-01%20(Custom)-1.png?height=120&name=Rose%20Rocket%20Logo%20(Alternate)-01%20(Custom)-1.png)
Your guide on how to set-up and and start receiving payments on your Rose Rocket invoices
Table of Contents:
- What is Rose Rocket Payments?
- Why should I use Rose Rocket Payments?
- What are the processing fees and times?
- How to set up Rose Rocket Payments
- How to send an invoice with/without Rose Rocket Payments
- How to pass on processing fees to your customer
- How your customers pay on their invoice
- Additional resources
What is Rose Rocket Payments?
Rose Rocket Payments is a convenient and secure payments solution that allows your customers to pay directly from their Rose Rocket invoice.
Rose Rocket Payments embeds a "Pay Now" button onto your invoices to allow your customer to pay via credit card or bank transfers. All payments are deposited directly to your bank account.
Why Should I Use Rose Rocket Payments?
- Deliver a professional billing experience: now your customers can securely receive, review and pay their invoices, all in one place
- Conveniently built-in your TMS: accept bank transfers and credit card payments without adding another step to your accounts receivable process
- Reconcile your invoices automatically: following payment, your invoices will be automatically marked as paid across Rose Rocket and any integrated accounting software
What Are The Processing Fees and Times?
Processing fees and payment transfer time varies based on payment method:
| Bank Transfer | Credit Card | |
| Time to receive payments | 5-7 business days | 2-3 business days |
| Processing fees | 0.5%, capped at $10 | 2.9% + $0.30 |
How To Set Up Rose Rocket Payments
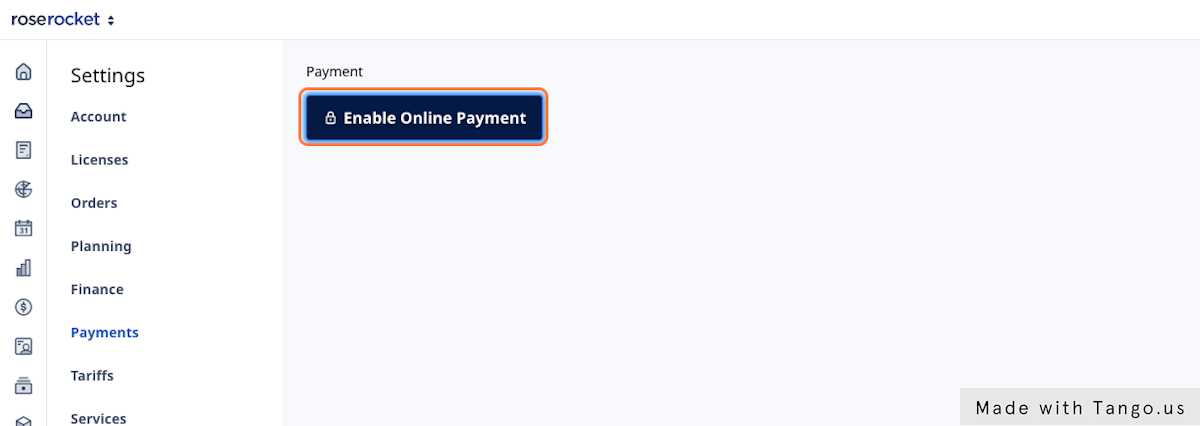
1. Click on Settings menu item
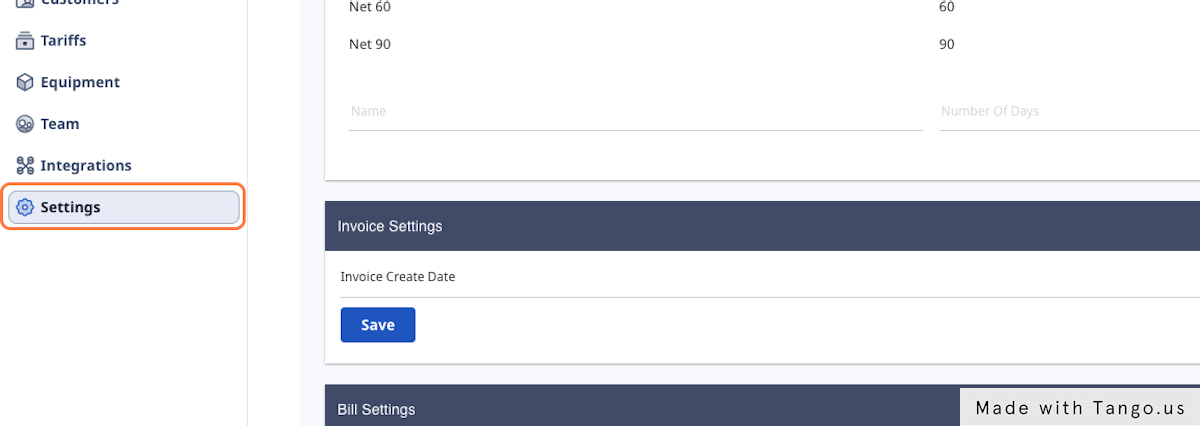
2. Click on Payments
3. Click on Enable Online Payment
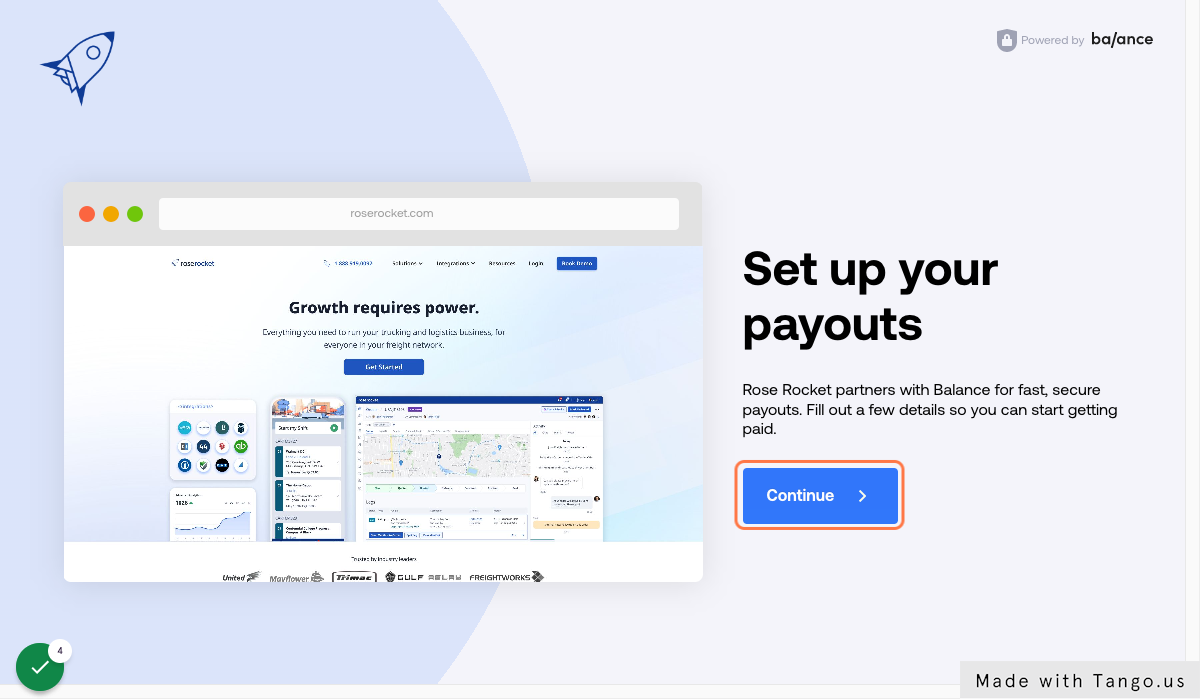
4. Click on Continue
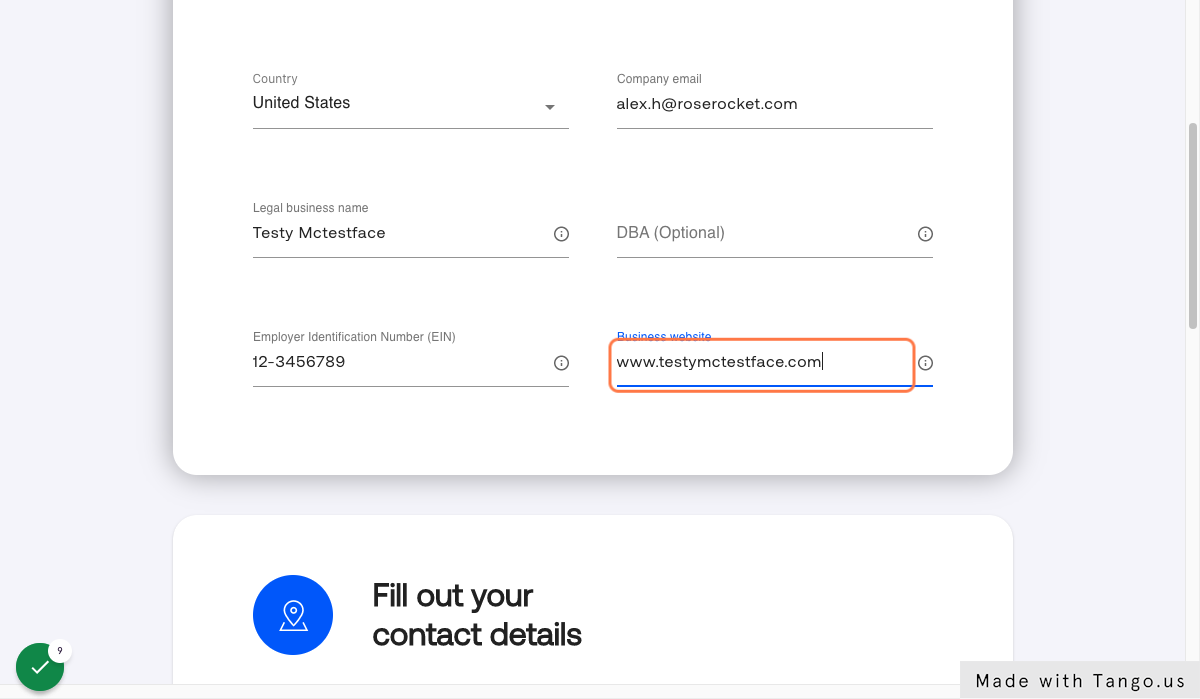
5. Fill out your company information
You must fill out your Employee Identification Number (EIN).
If you operate under a name different from your registered business name, be sure to fill out DBA as well.
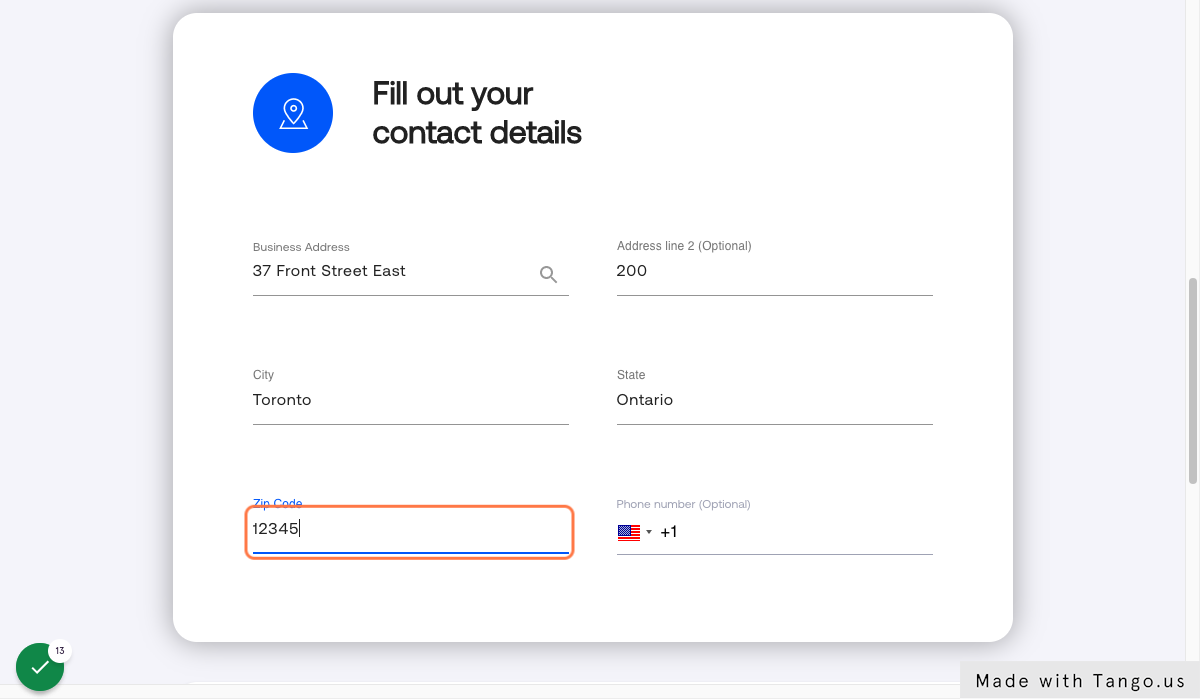
6. Fill out your company contact details
Note: Rose Rocket Payments is only available for businesses registered in the United States at the moment
7. Input your company's banking information
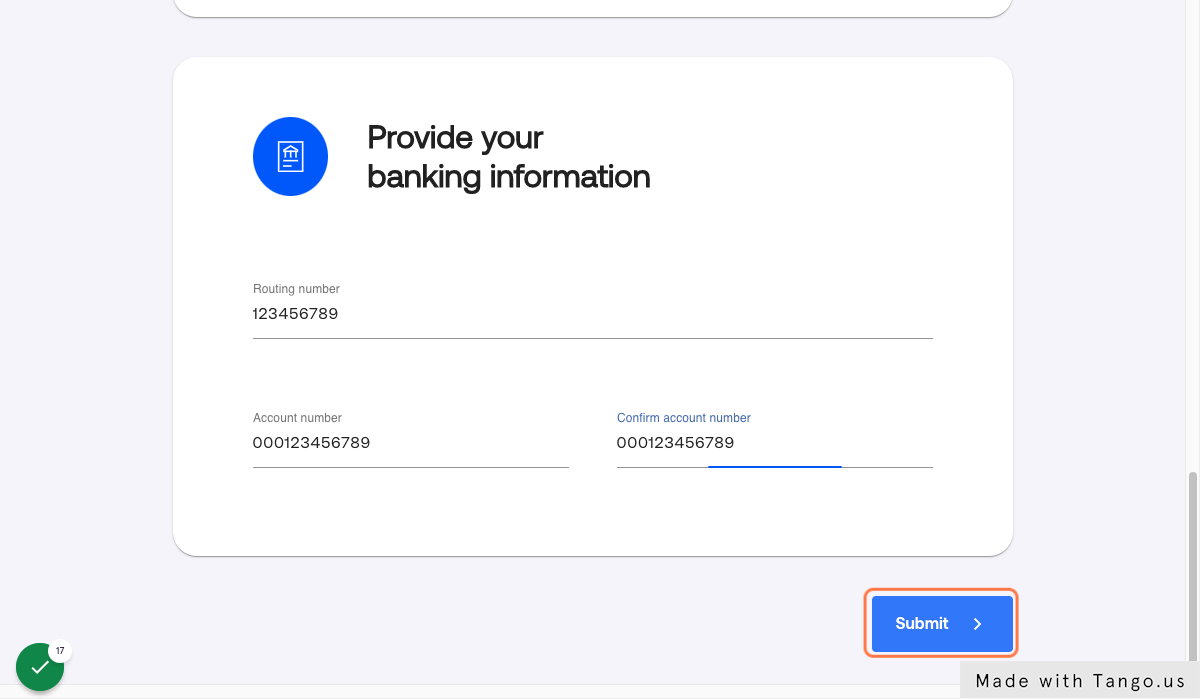
8. That's it! You're now ready to begin receiving payments.
Sending An Invoice With/Without Payments
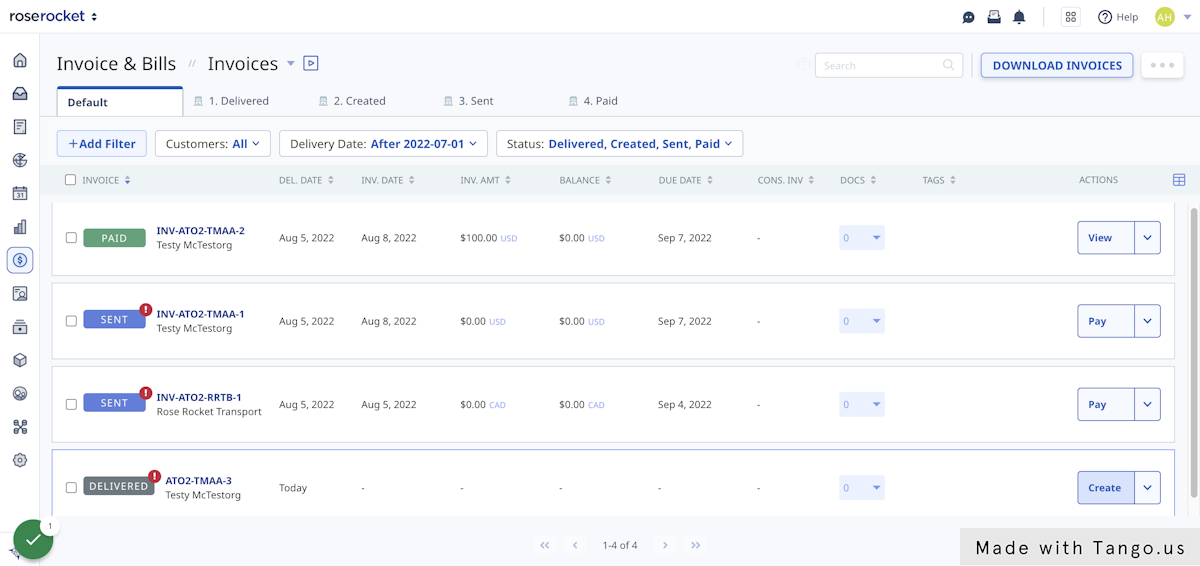
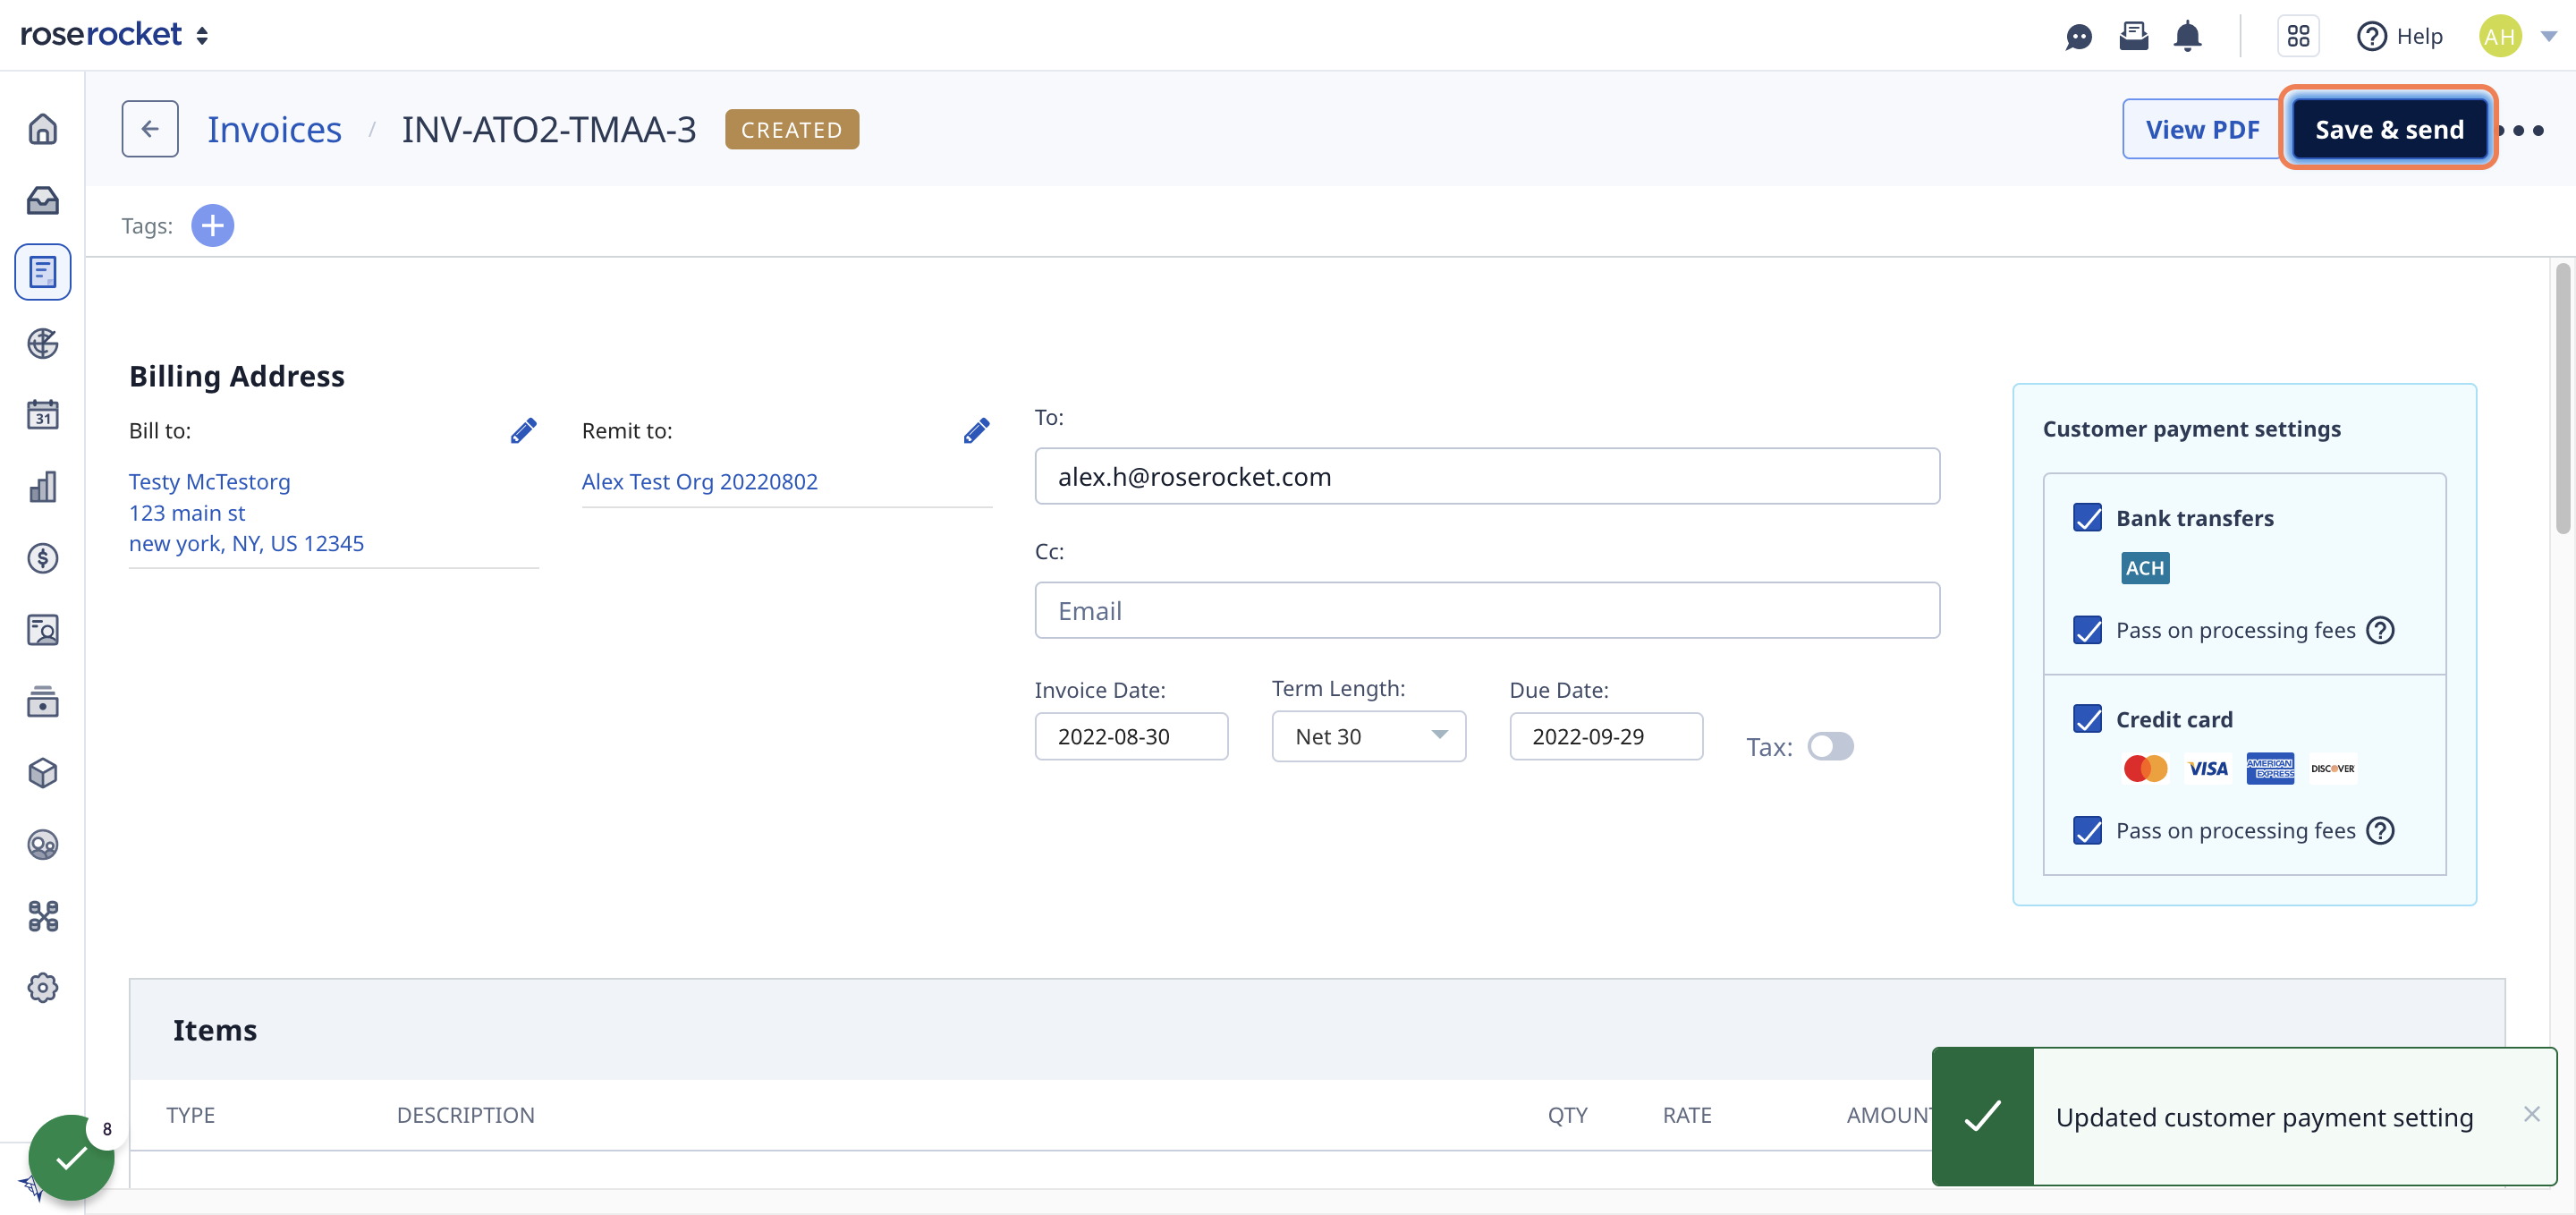
1. In the Invoices module, create a new invoice, or open an unpaid invoice
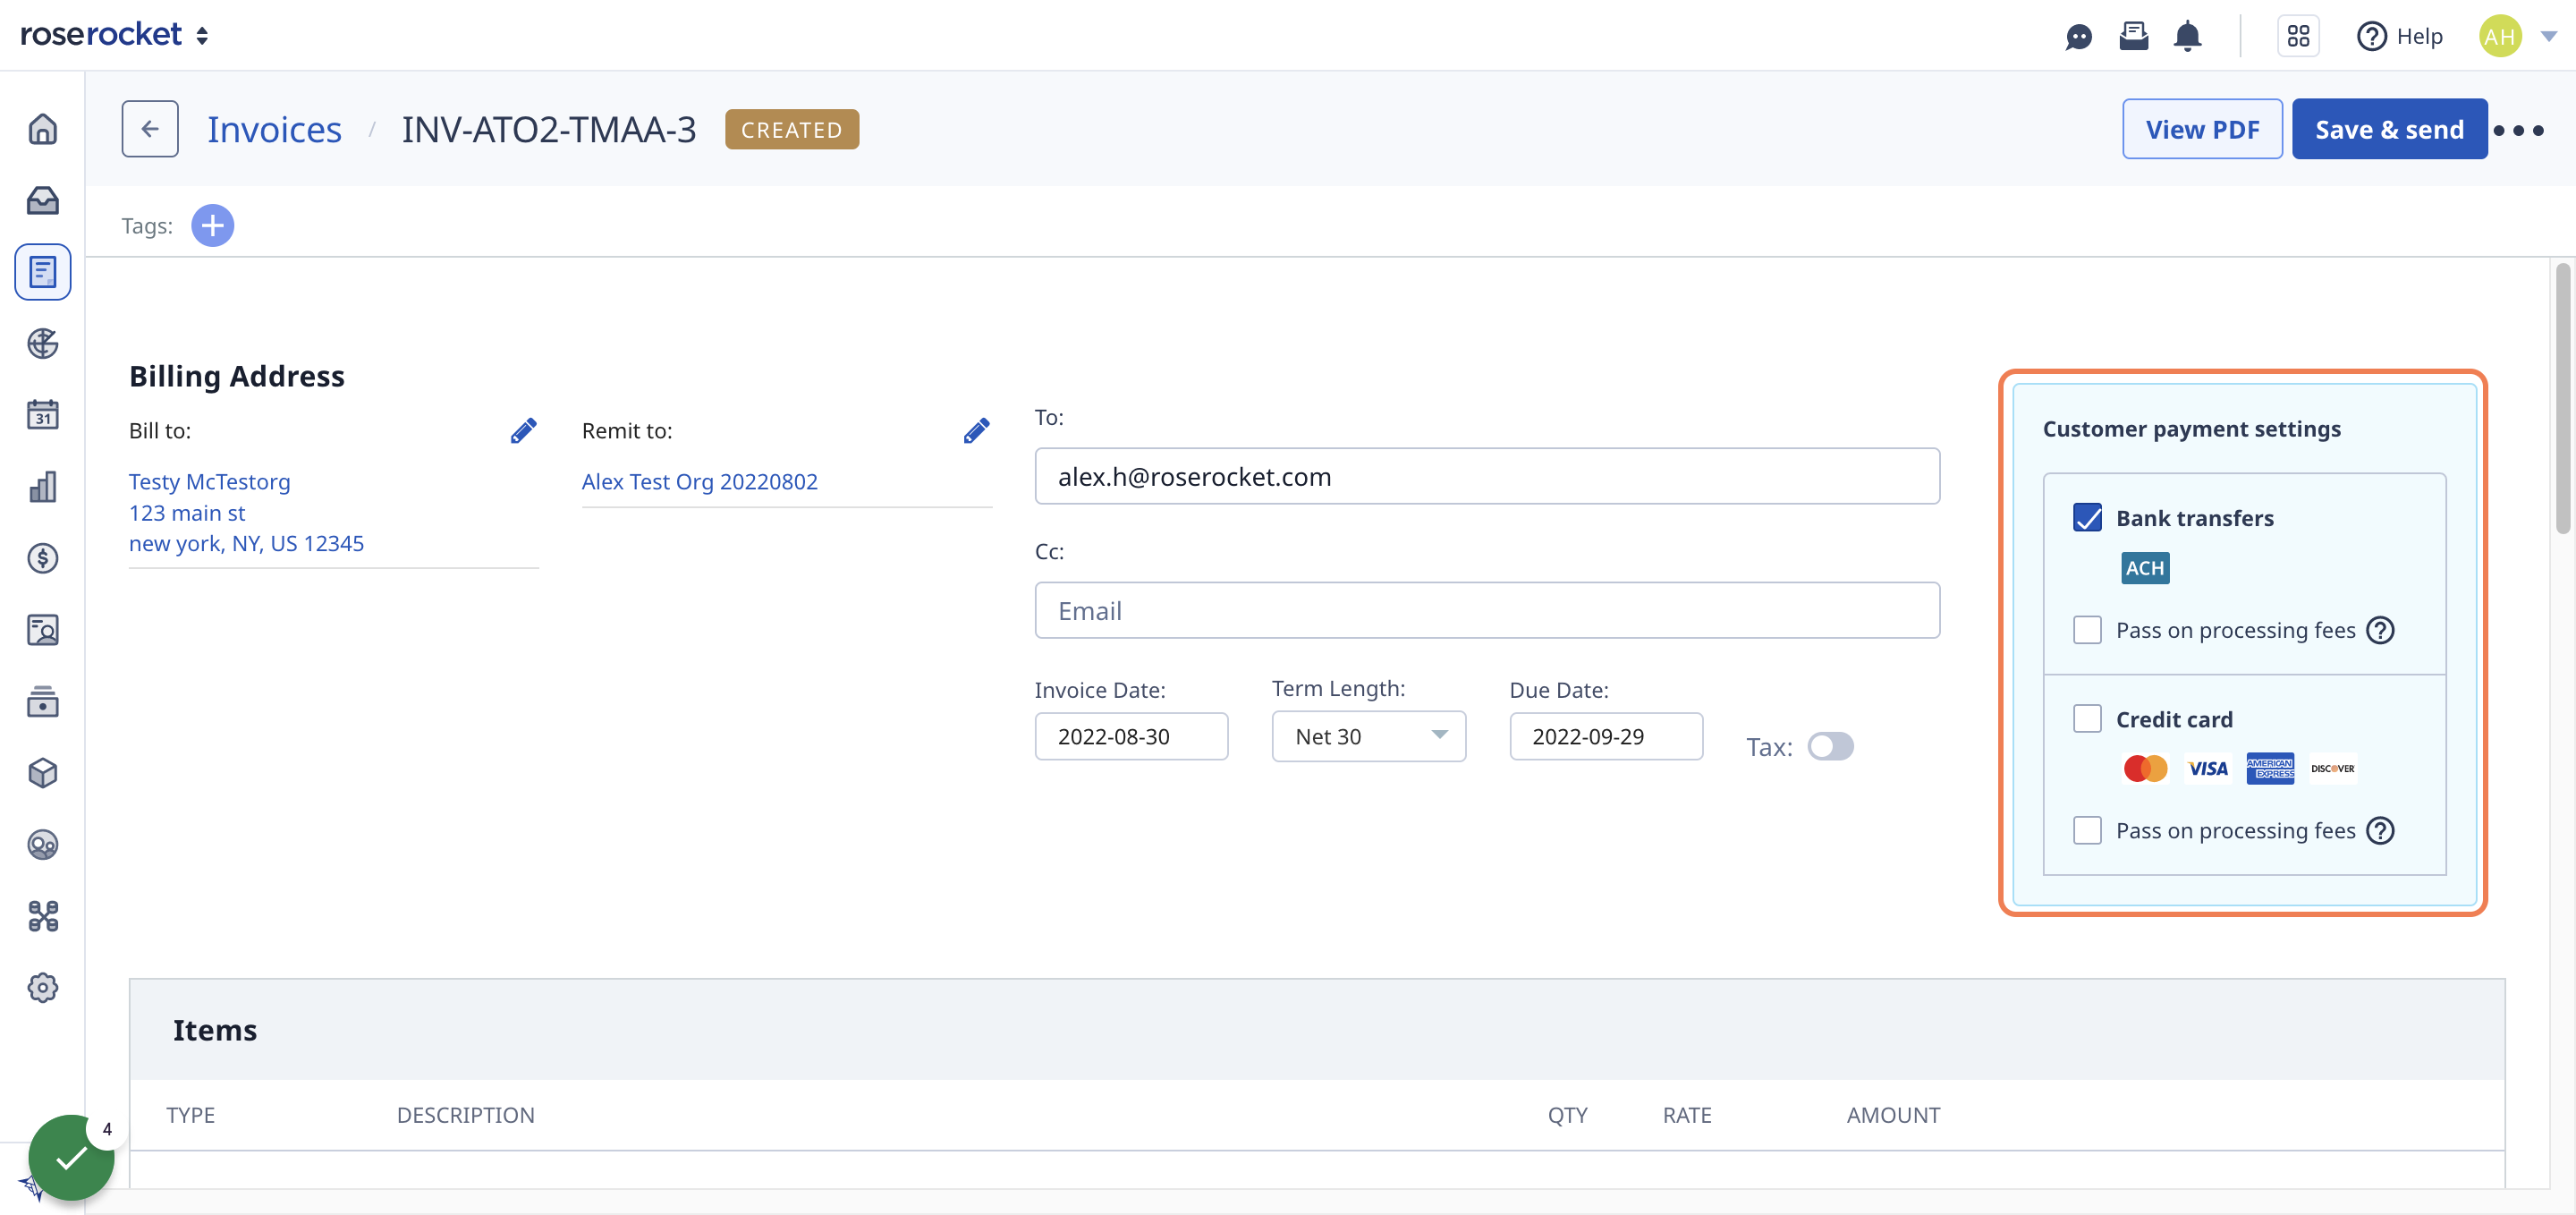
2. Under "Customer payment settings" select which payment methods you wish to offer
Choose the method of payment you would like to make available to the given customer: Bank transfer, credit card, or both.
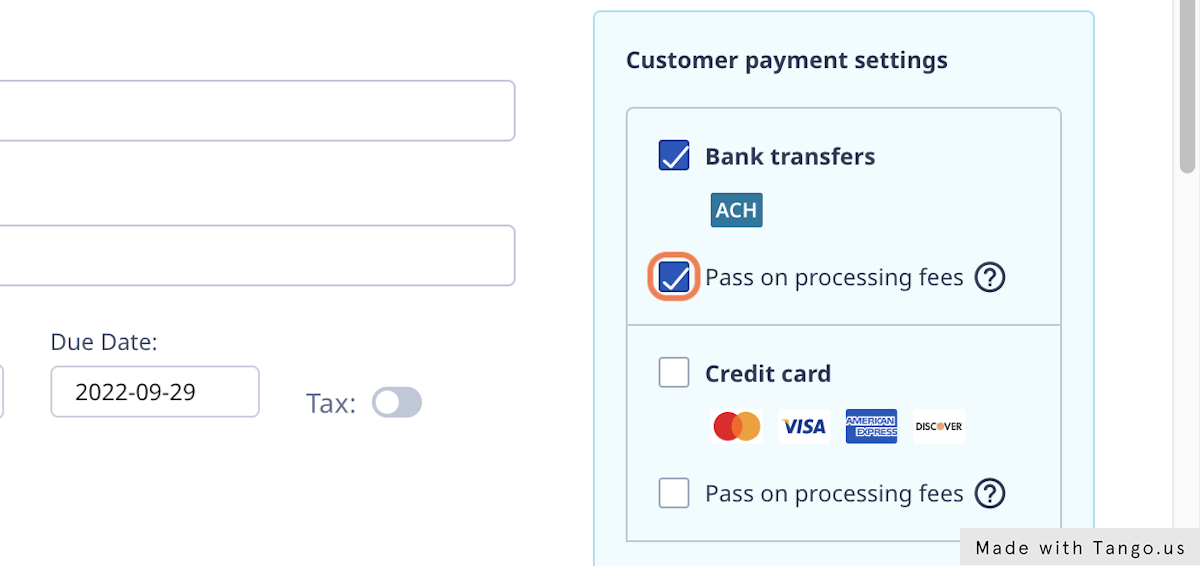
You can also choose to pass on processing fees to your customer.
The payment methods you choose to offer will be applied to all future invoices with this customer as their default settings.
.
4. Click on "Save & send"
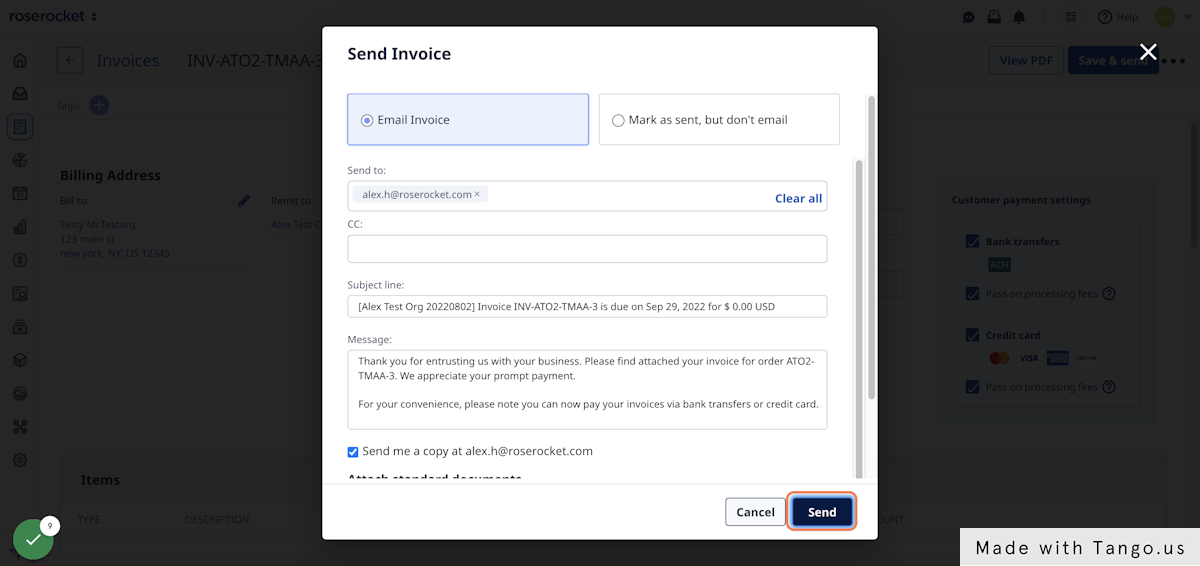
5. Finalize your invoice email, and click "Send"
Review your subject line, message, and choose what documents you wish to attach with the invoice
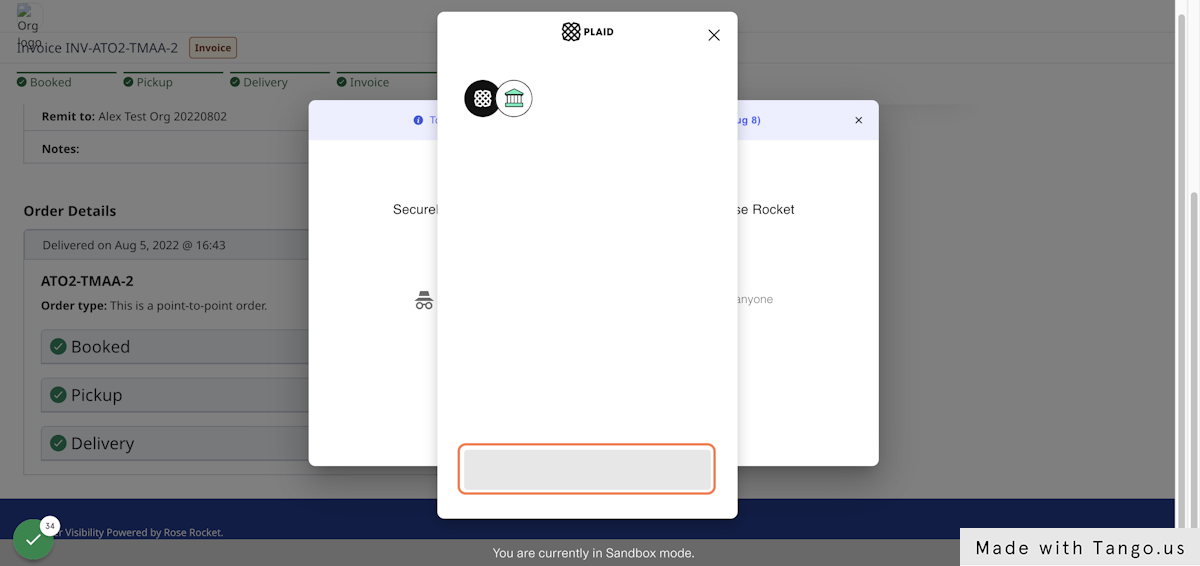
How To Pay An Invoice As A Customer
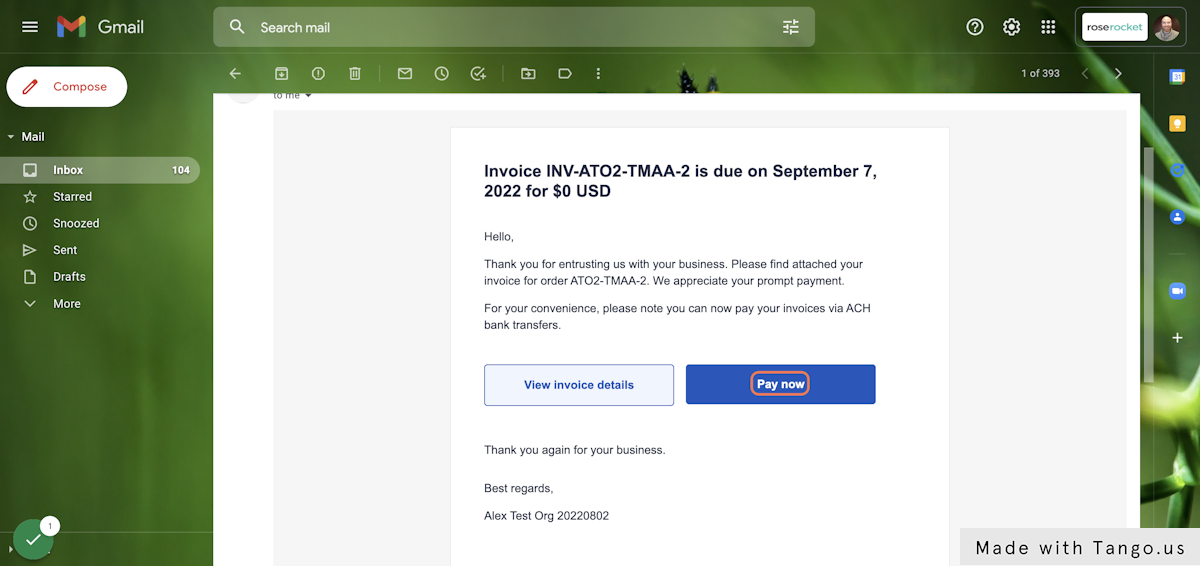
1. In your invoice email, click on the "Pay now" button
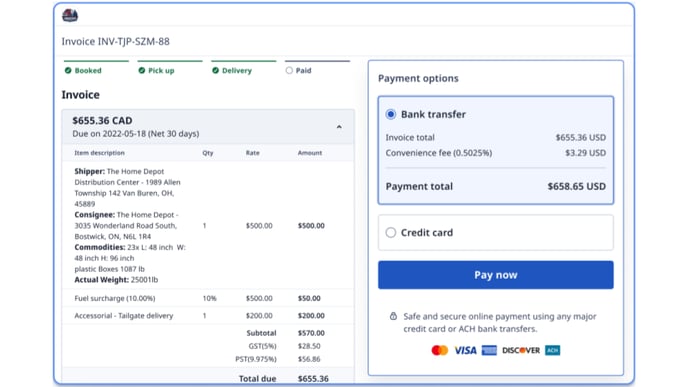
This will take you to your shareable e-invoice page
2. On the right side of your shareable invoice page select a payment method and click "Pay now"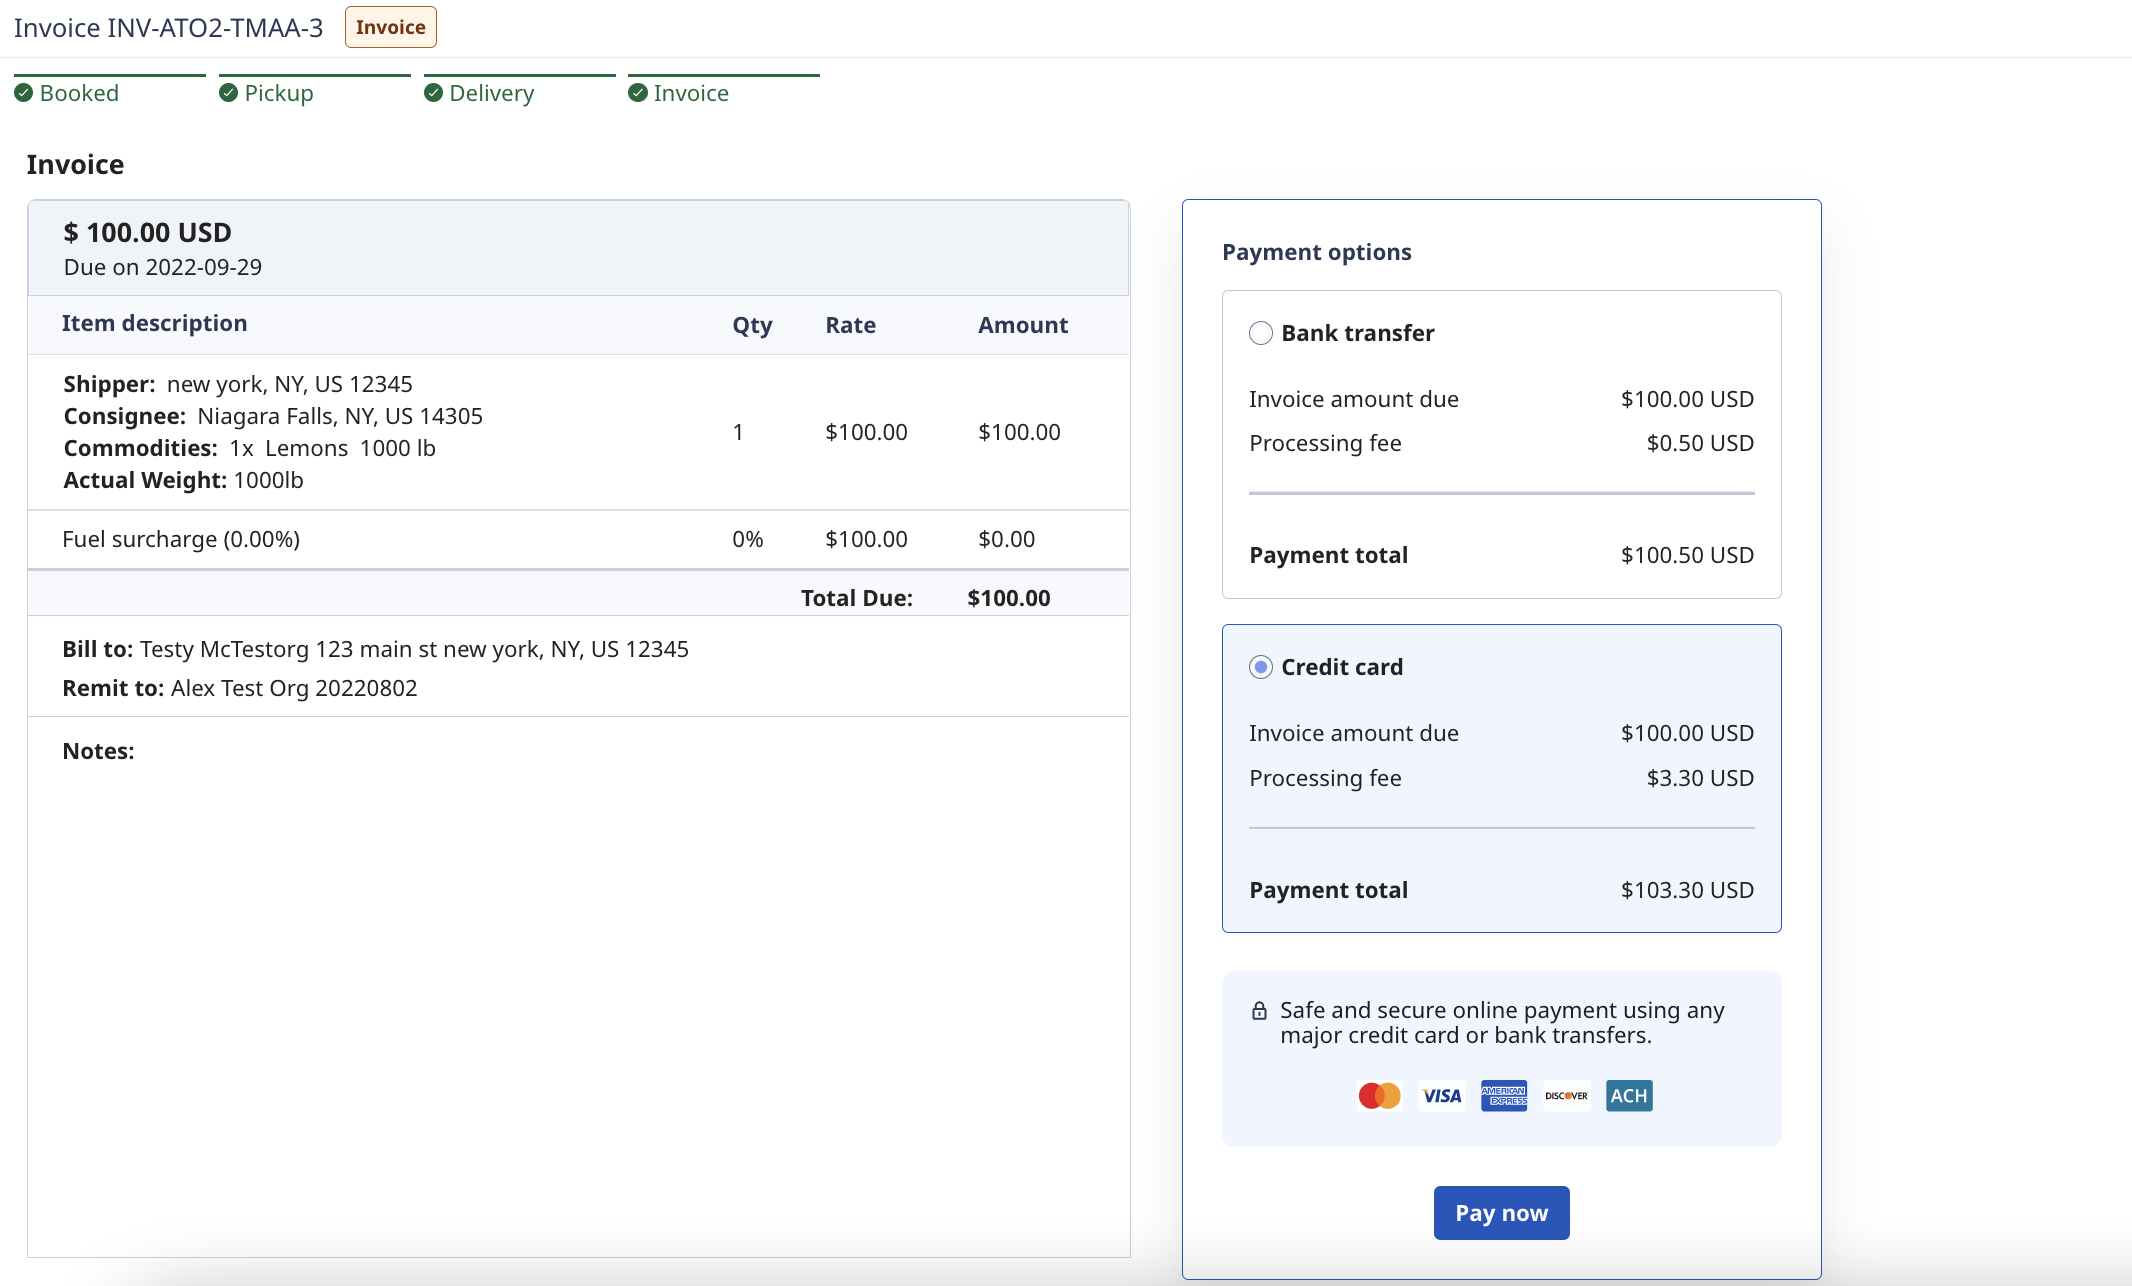
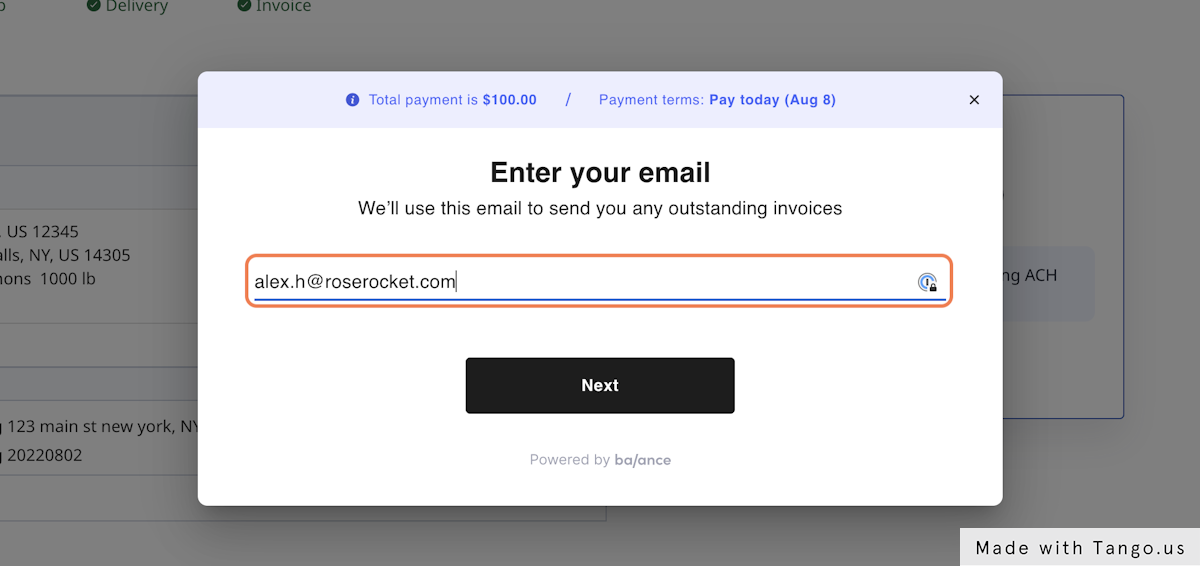
3. Enter in your email
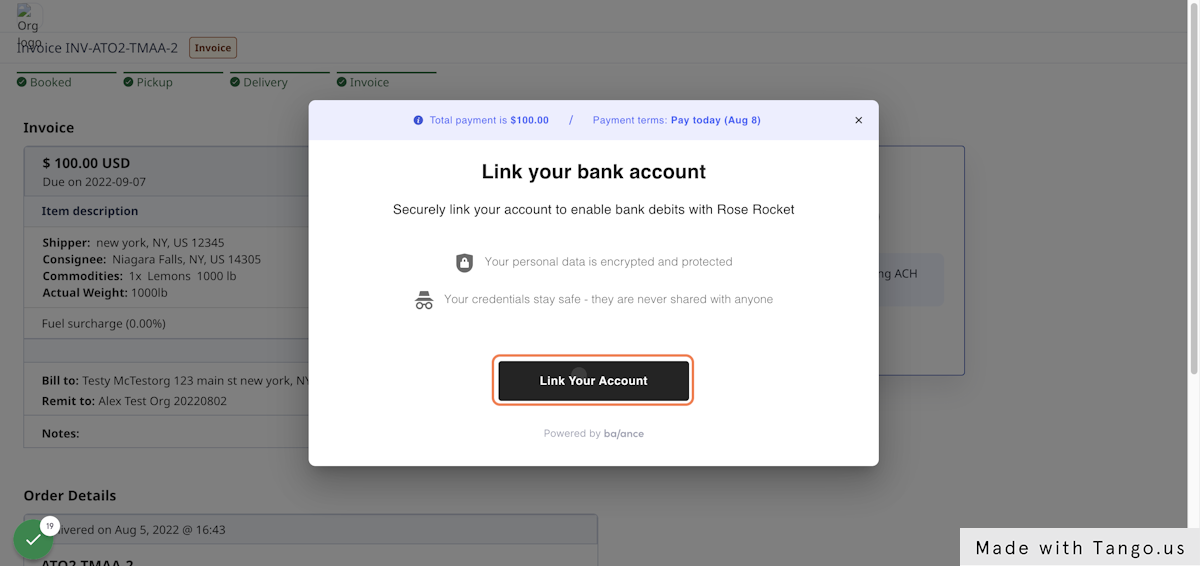
4. Click on "Link Your Account"
5. Select your bank from the list
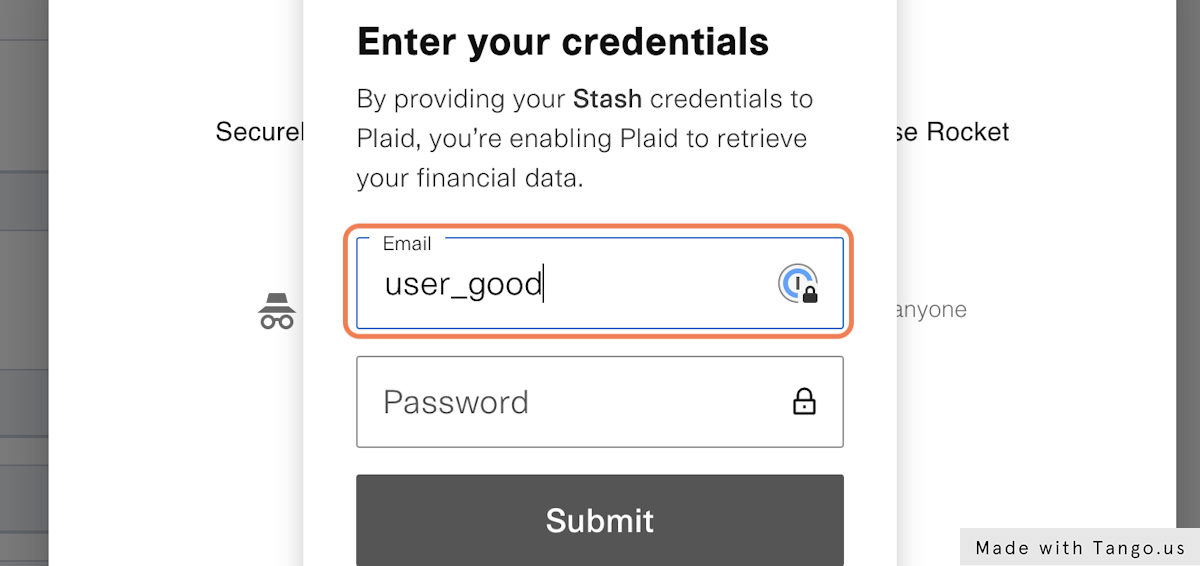
6. Enter in the email and password you use to login to your bank account
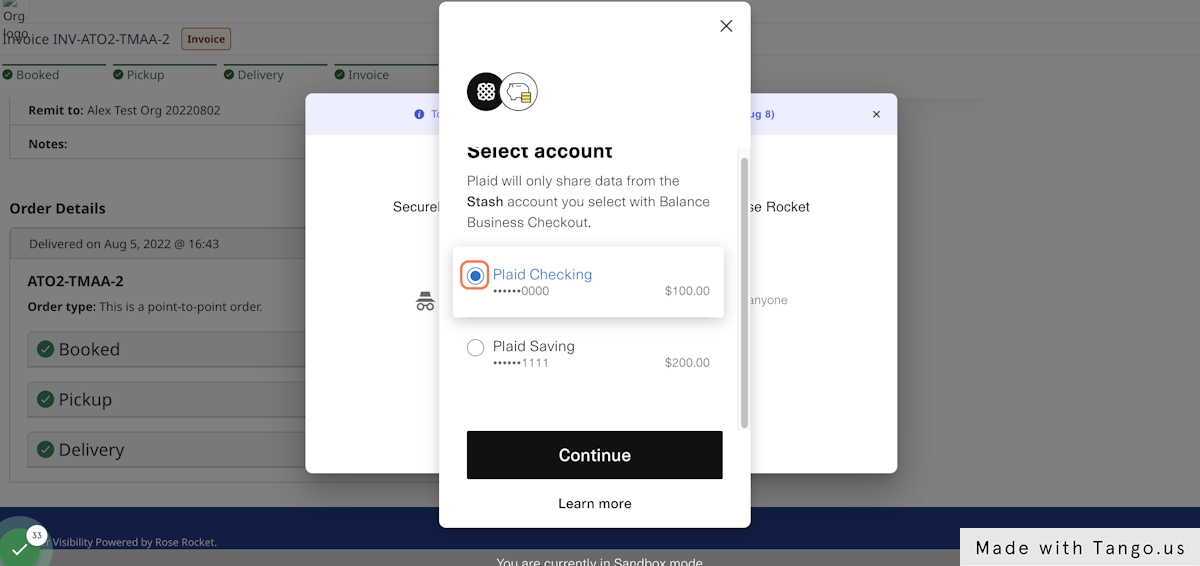
7. Select the account you wish to pay from
8. Click on Allow
9. Click on "Confirm Payment"
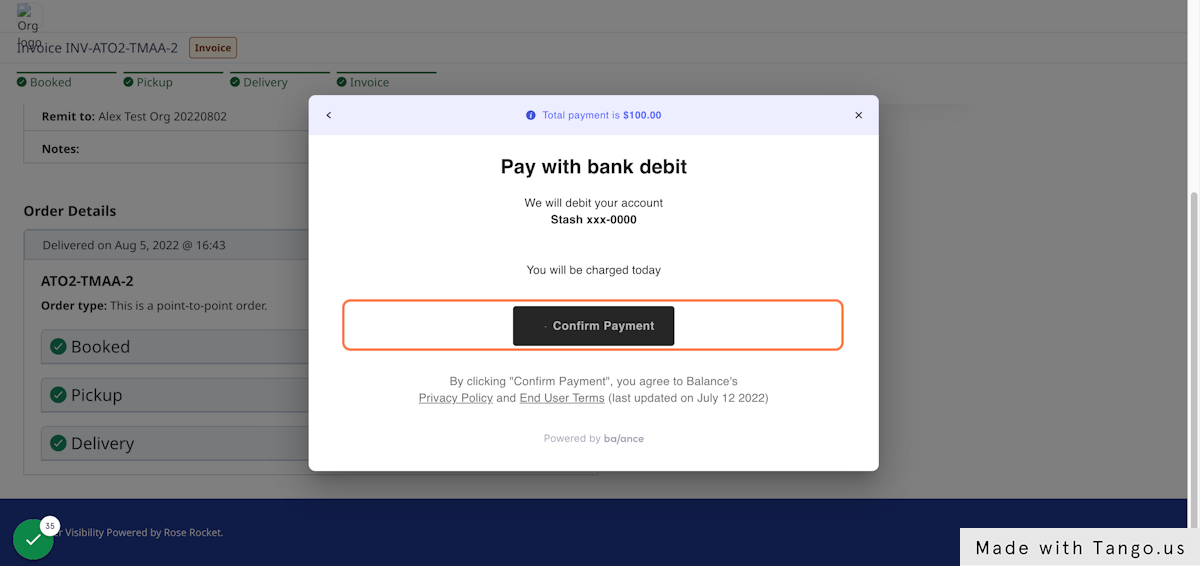
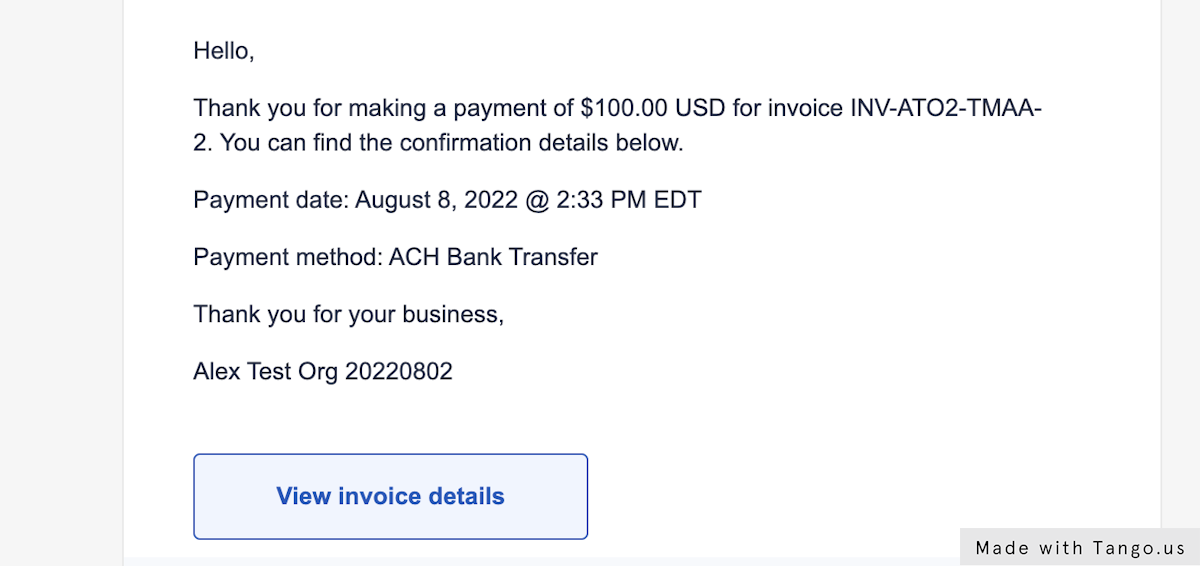
10. You will receive an email confirmation of your payment