Instead of a simple rate per mile that changes with weight, Tariffs allow you to create tariff ranges for: mile per weight range, cube weight (CWT), or pallets.
These pre-populated rates can automatically rate orders and generate quotes for applicable orders.
Here's how it works.
Table of Contents:
- Step 1: Create A Zone
- Step 2: Set Up Tariff
- Step 3: Add Tariffs To A Customer Profile
- Step 4: Fetch Tariff To An Order (Tariffs In Action)
Step 1: Create a Zone
Zones are the geographical areas that will be considered the same distance when calculating the length of a trip. Zones can be made up of a specific lane you run by adding an origin and destination, or a group of cities to capture a broader region.
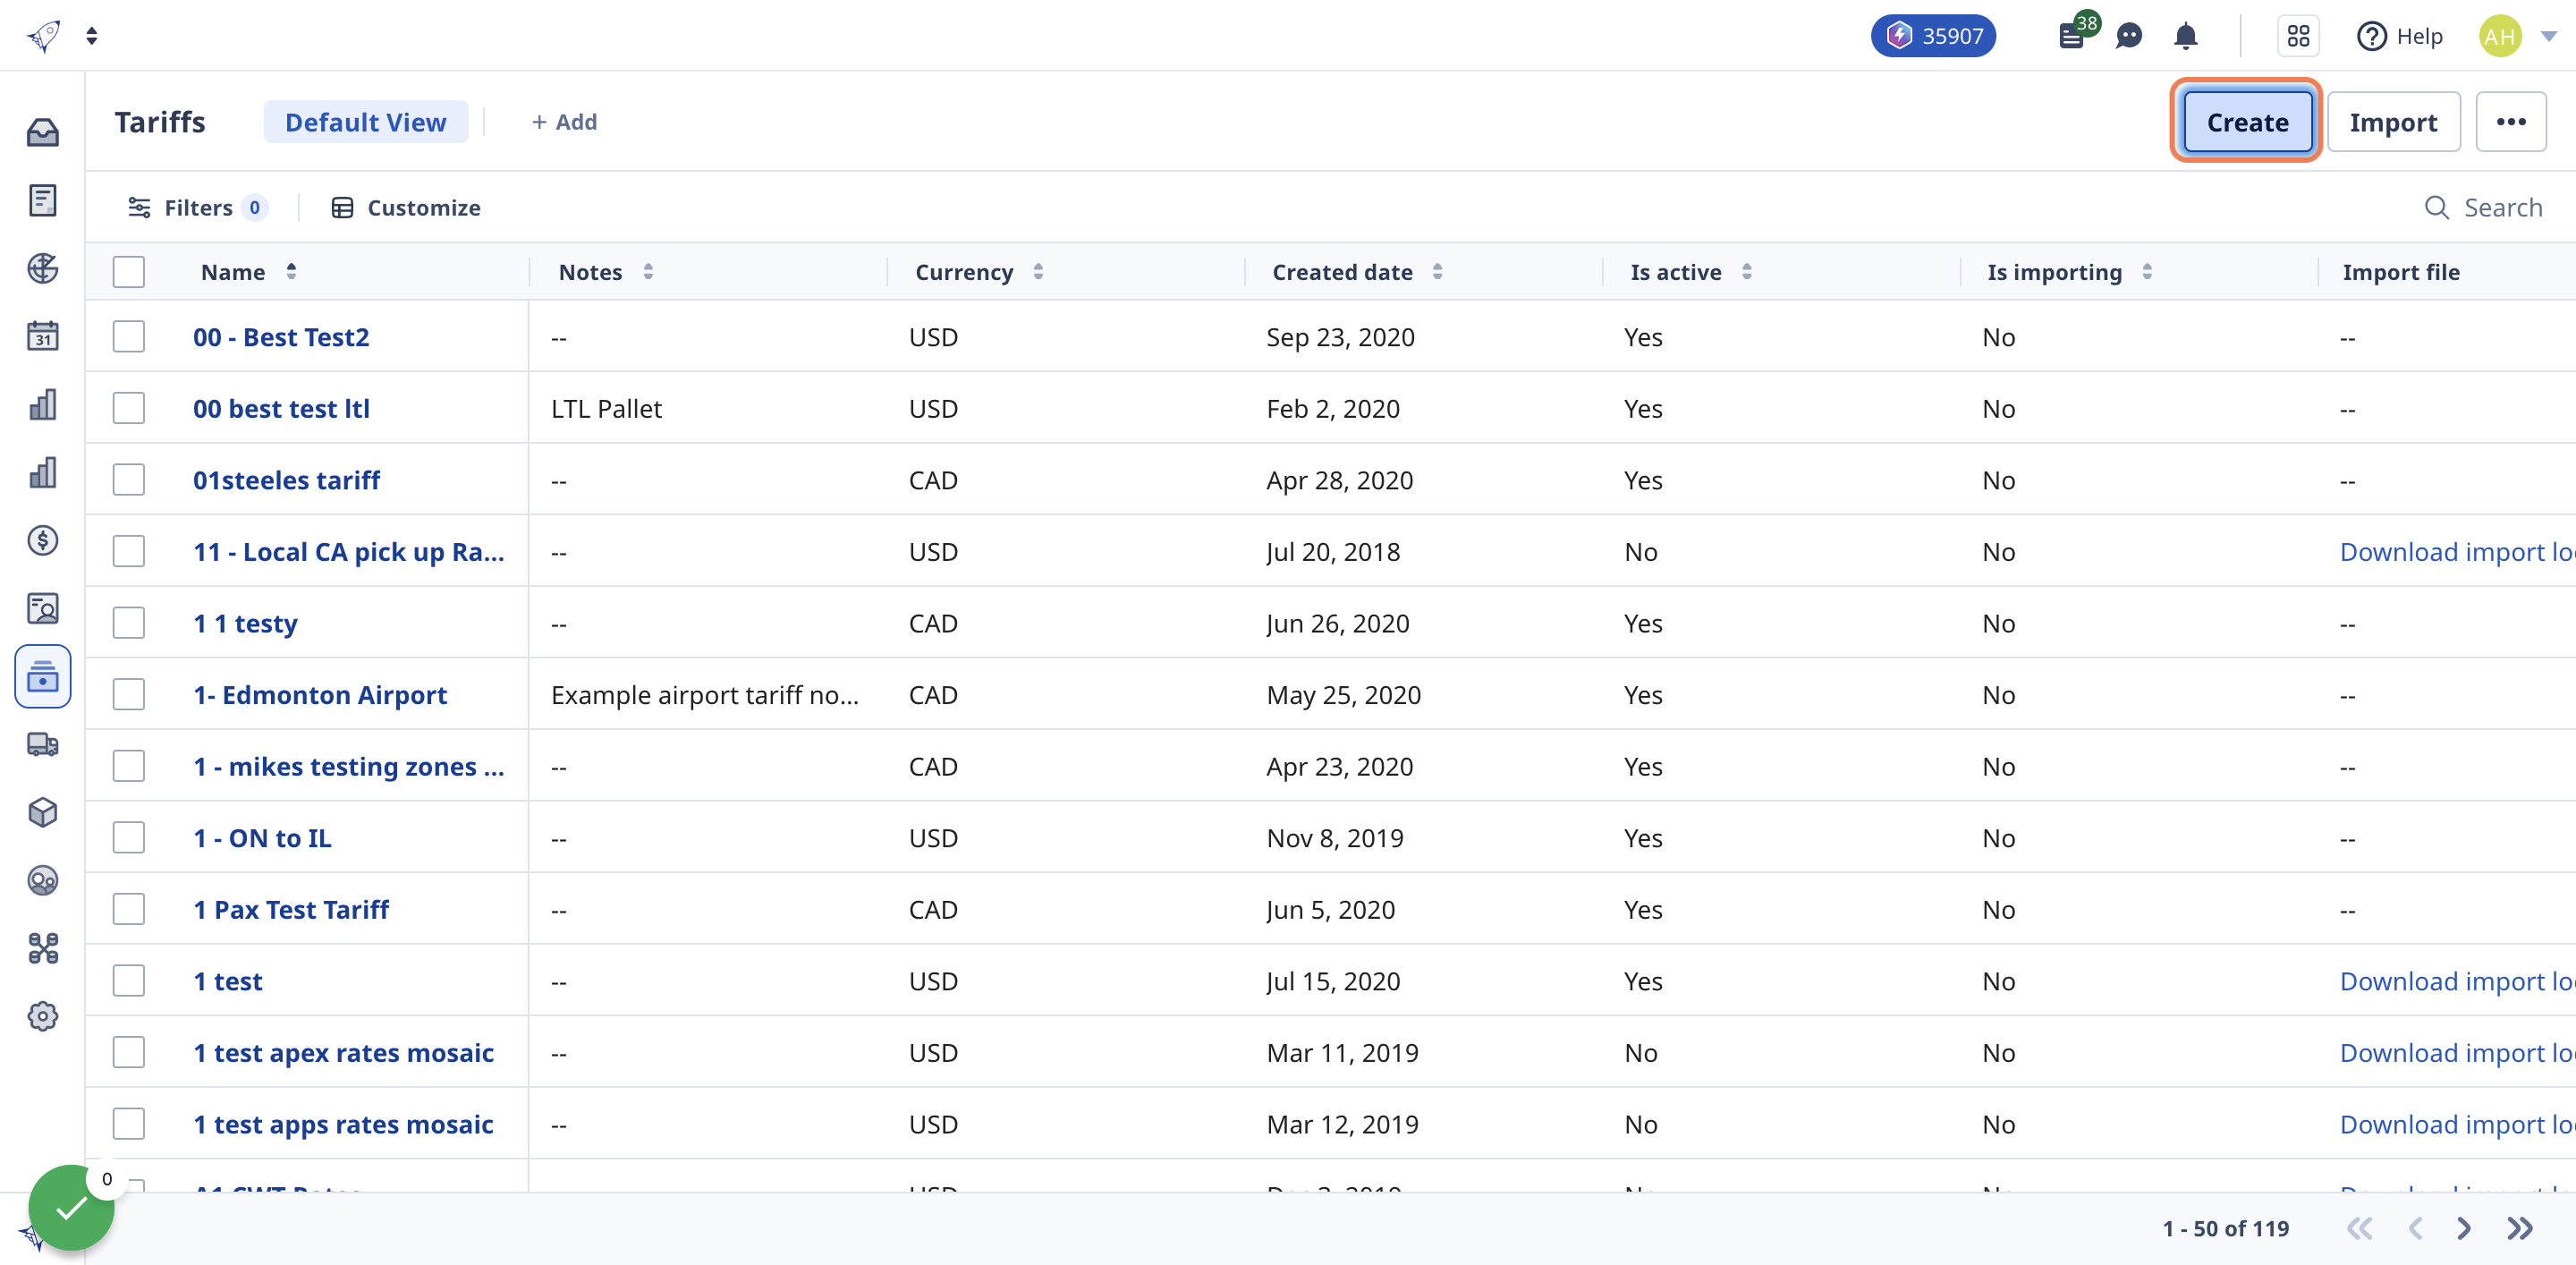
1. Click on Tariffs from the side navigation menu
If you do not see Tariffs as a menu option, reach out to your Account Manager to learn how to get it added
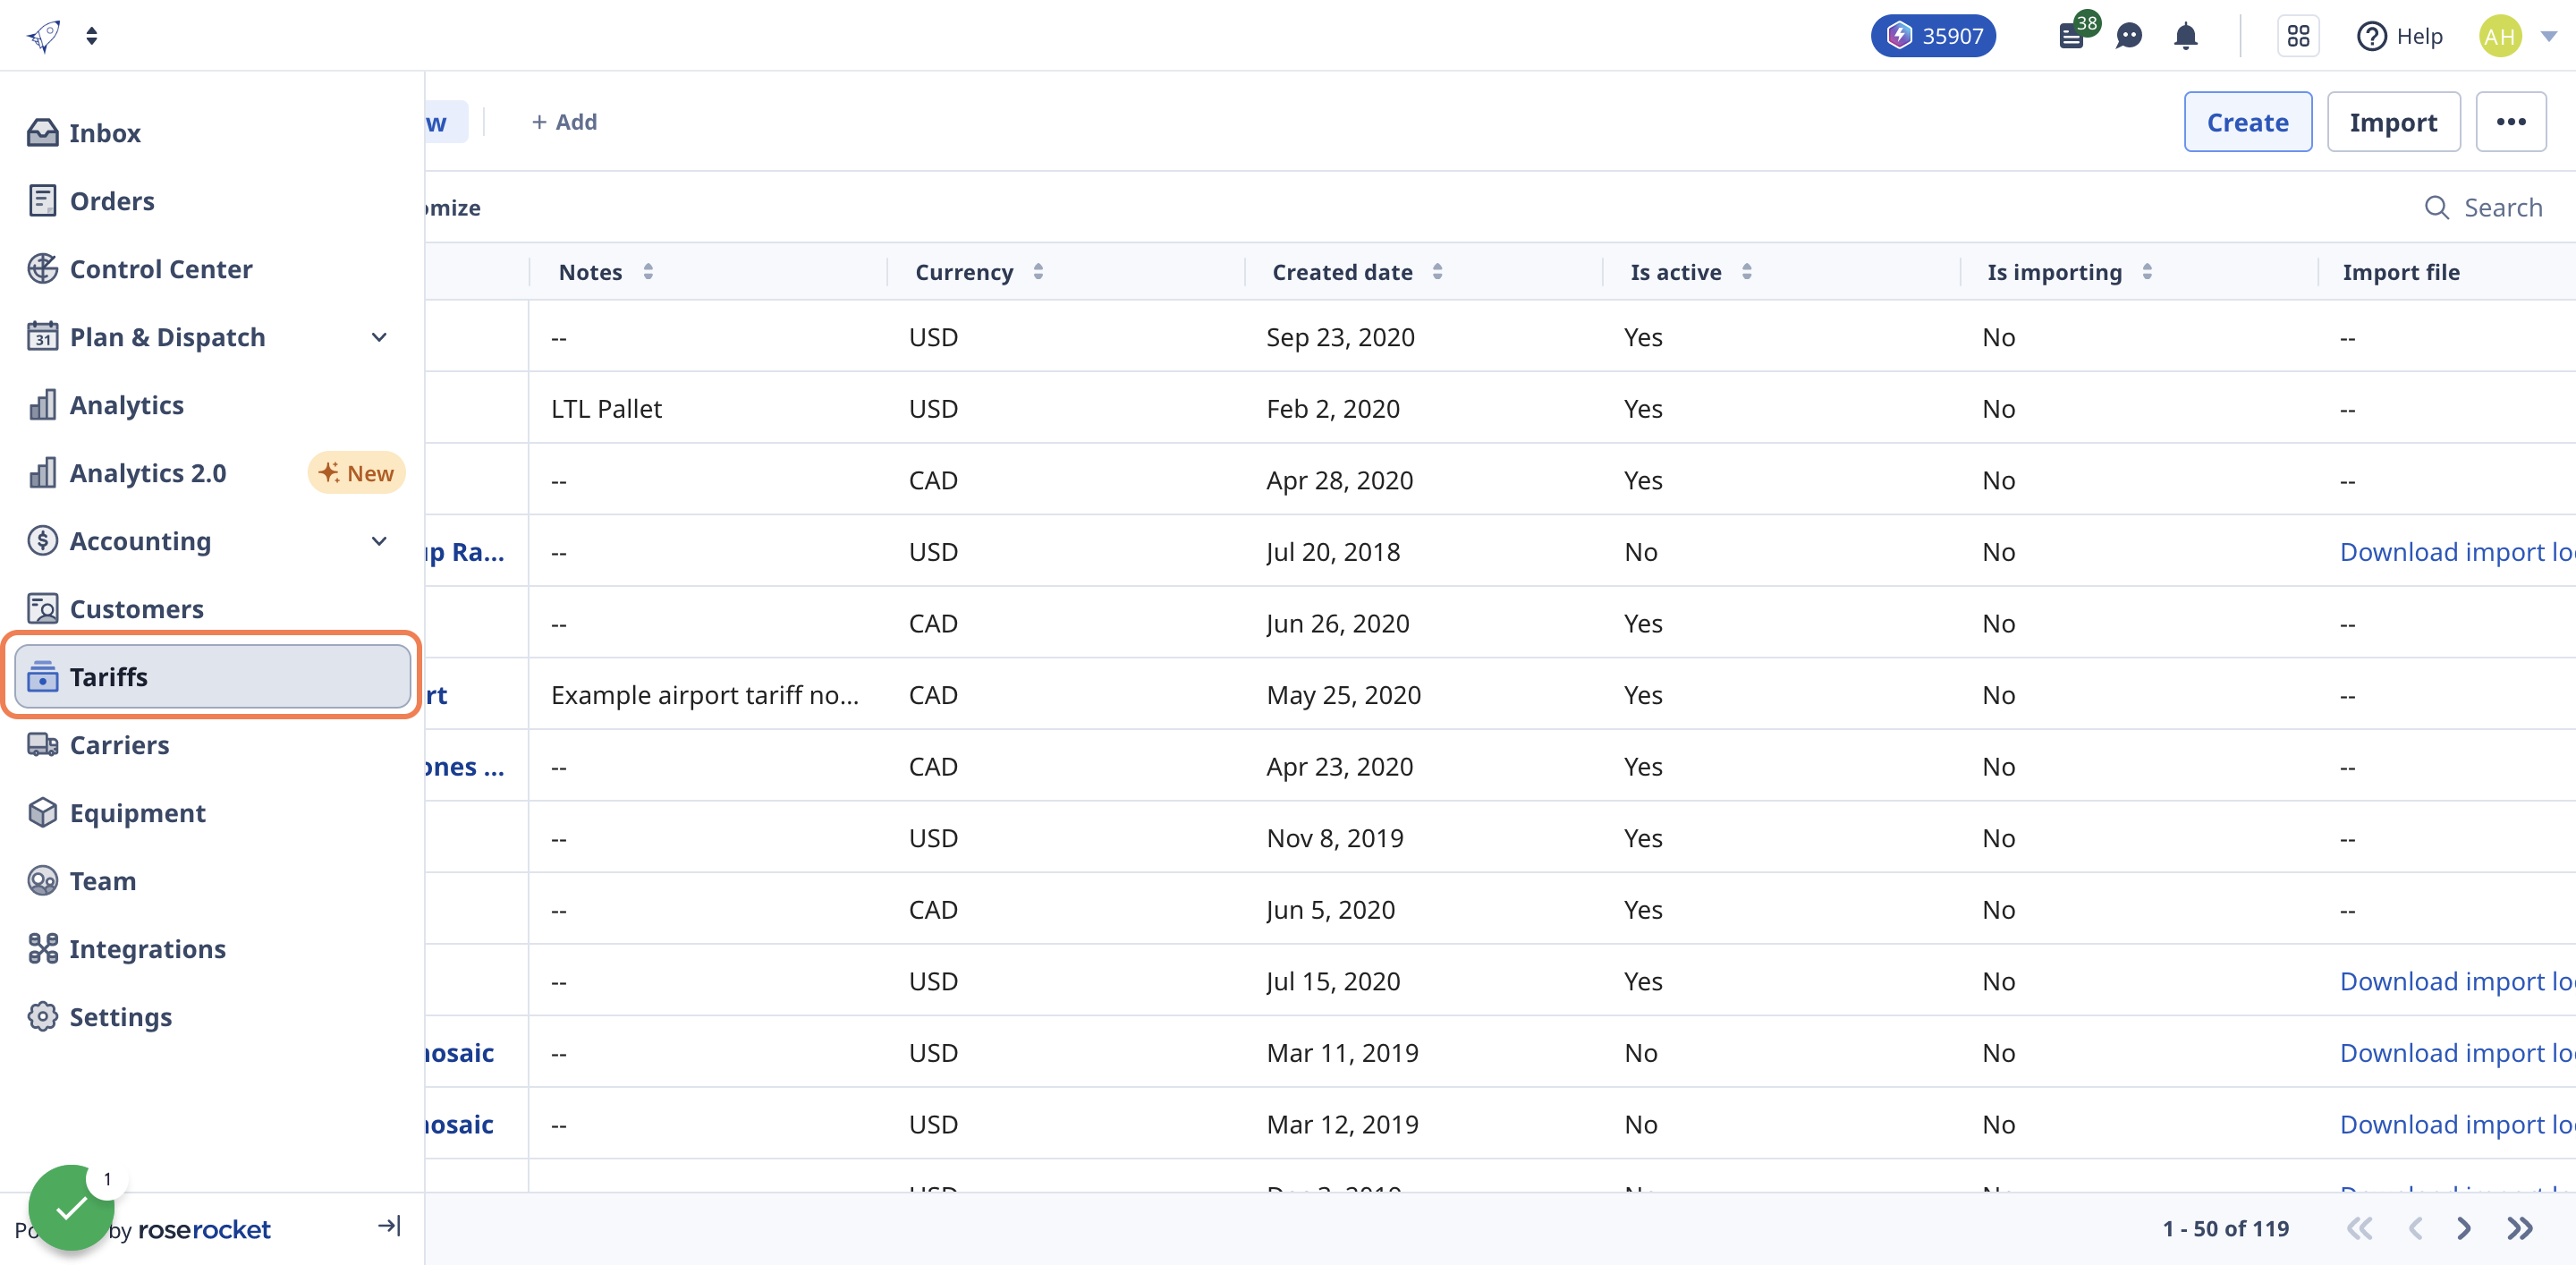
2. Click on the "...", then select "View zones"
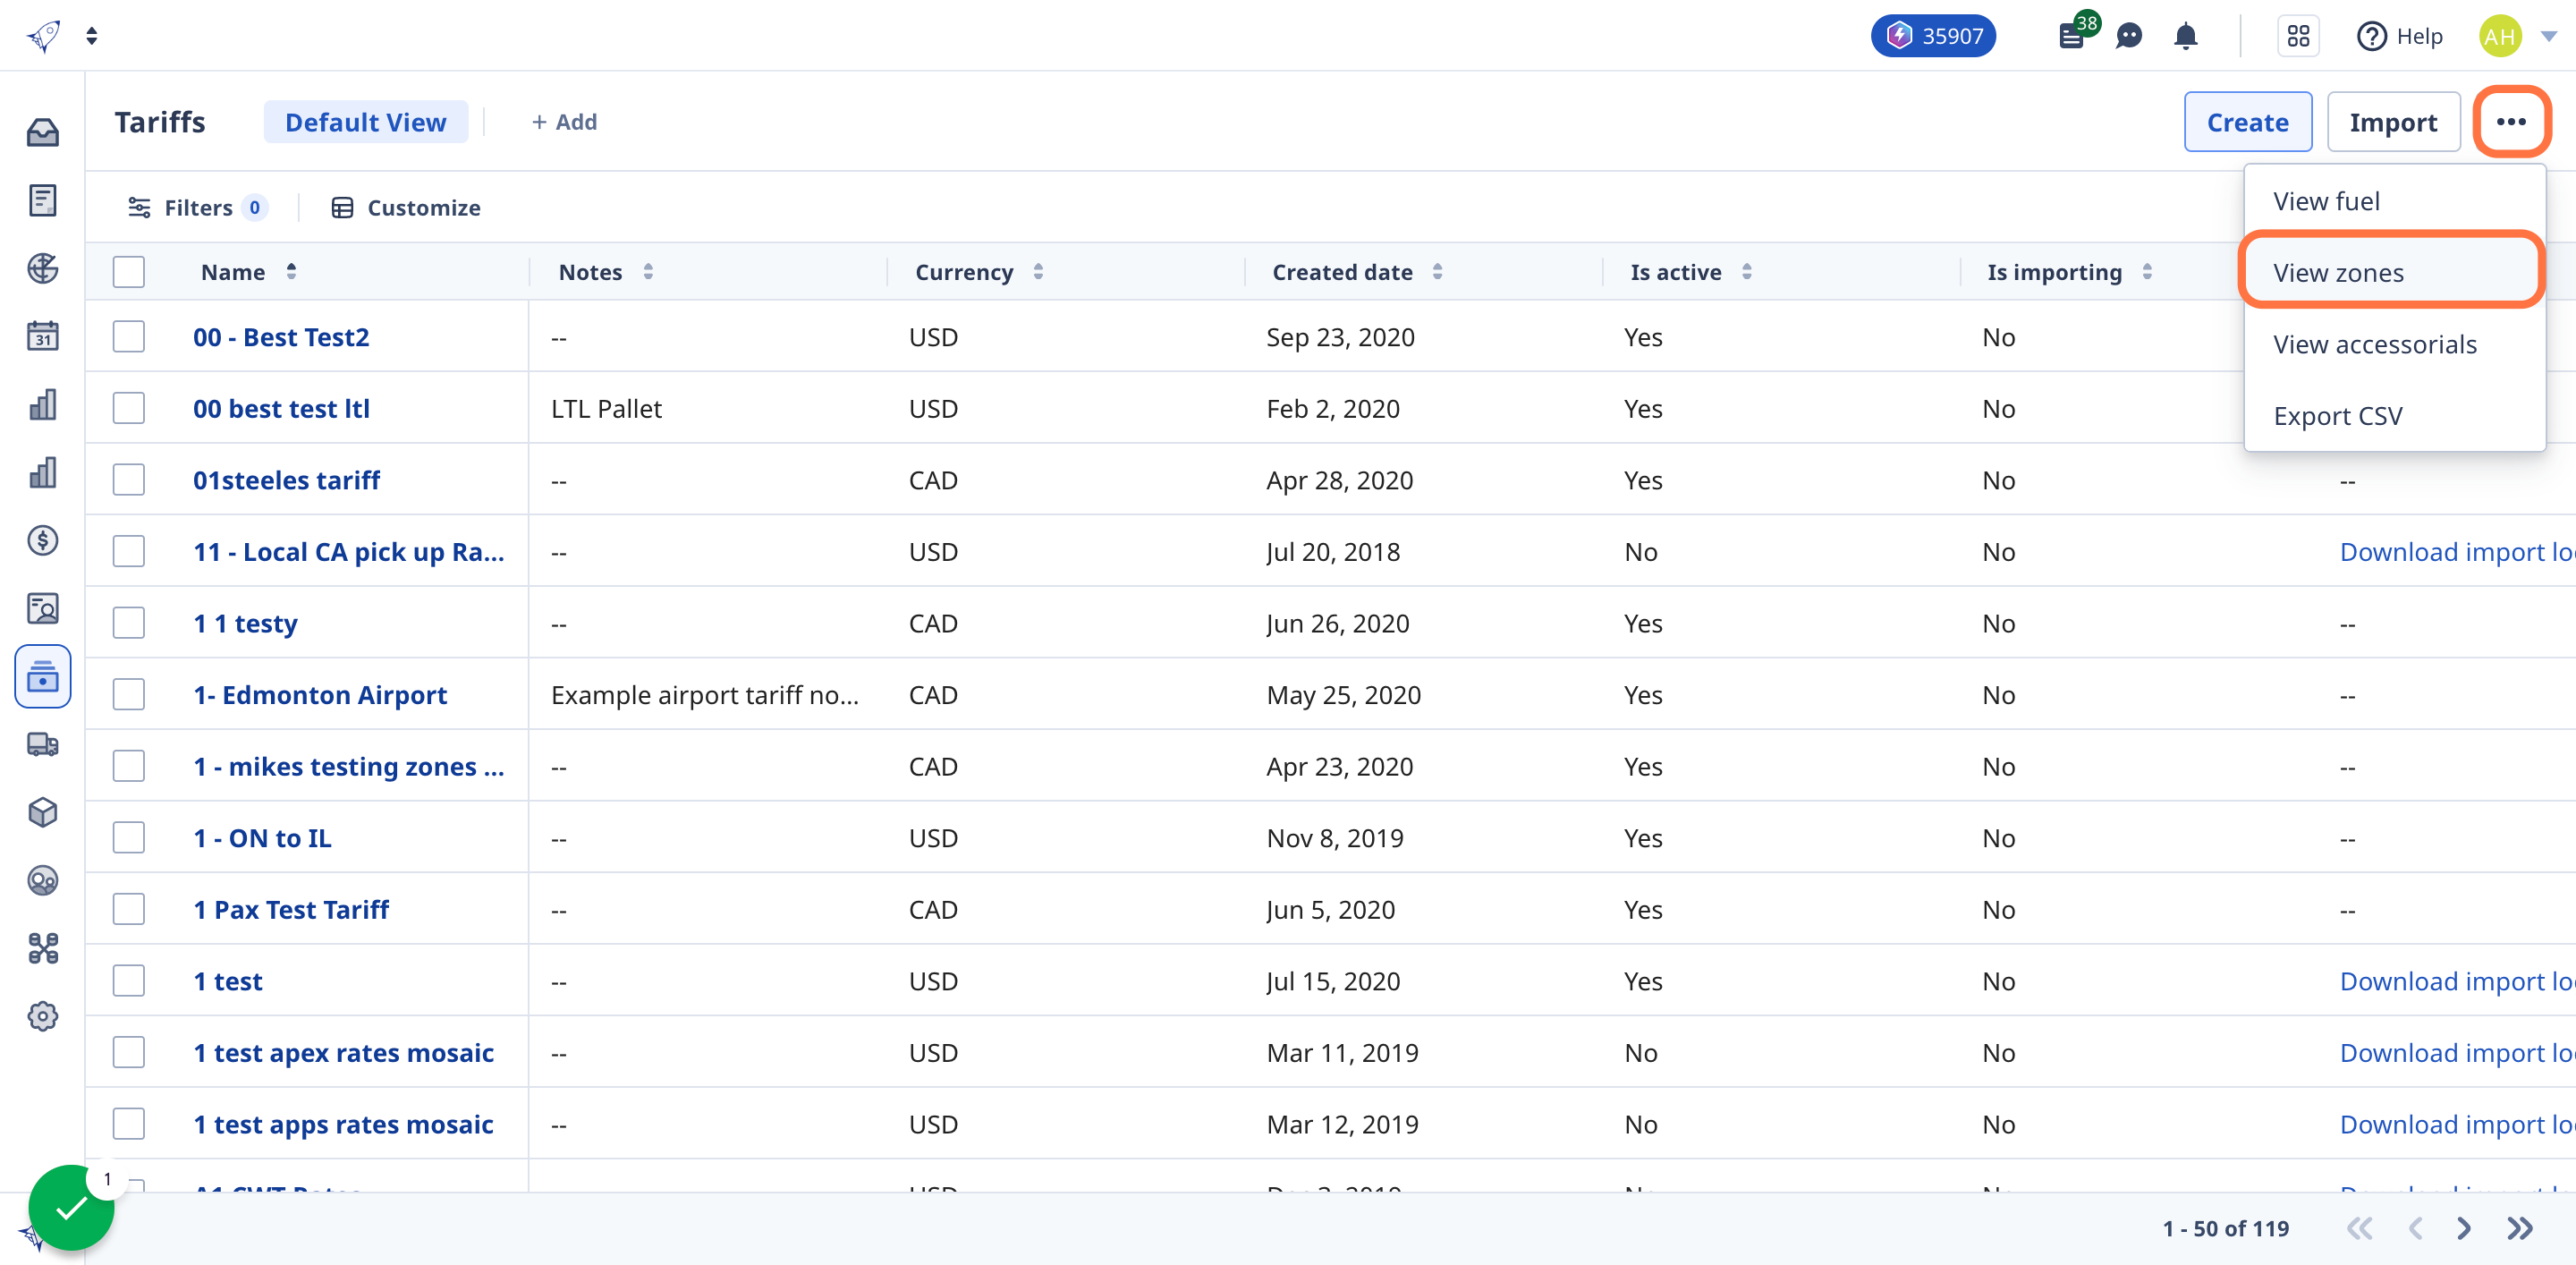
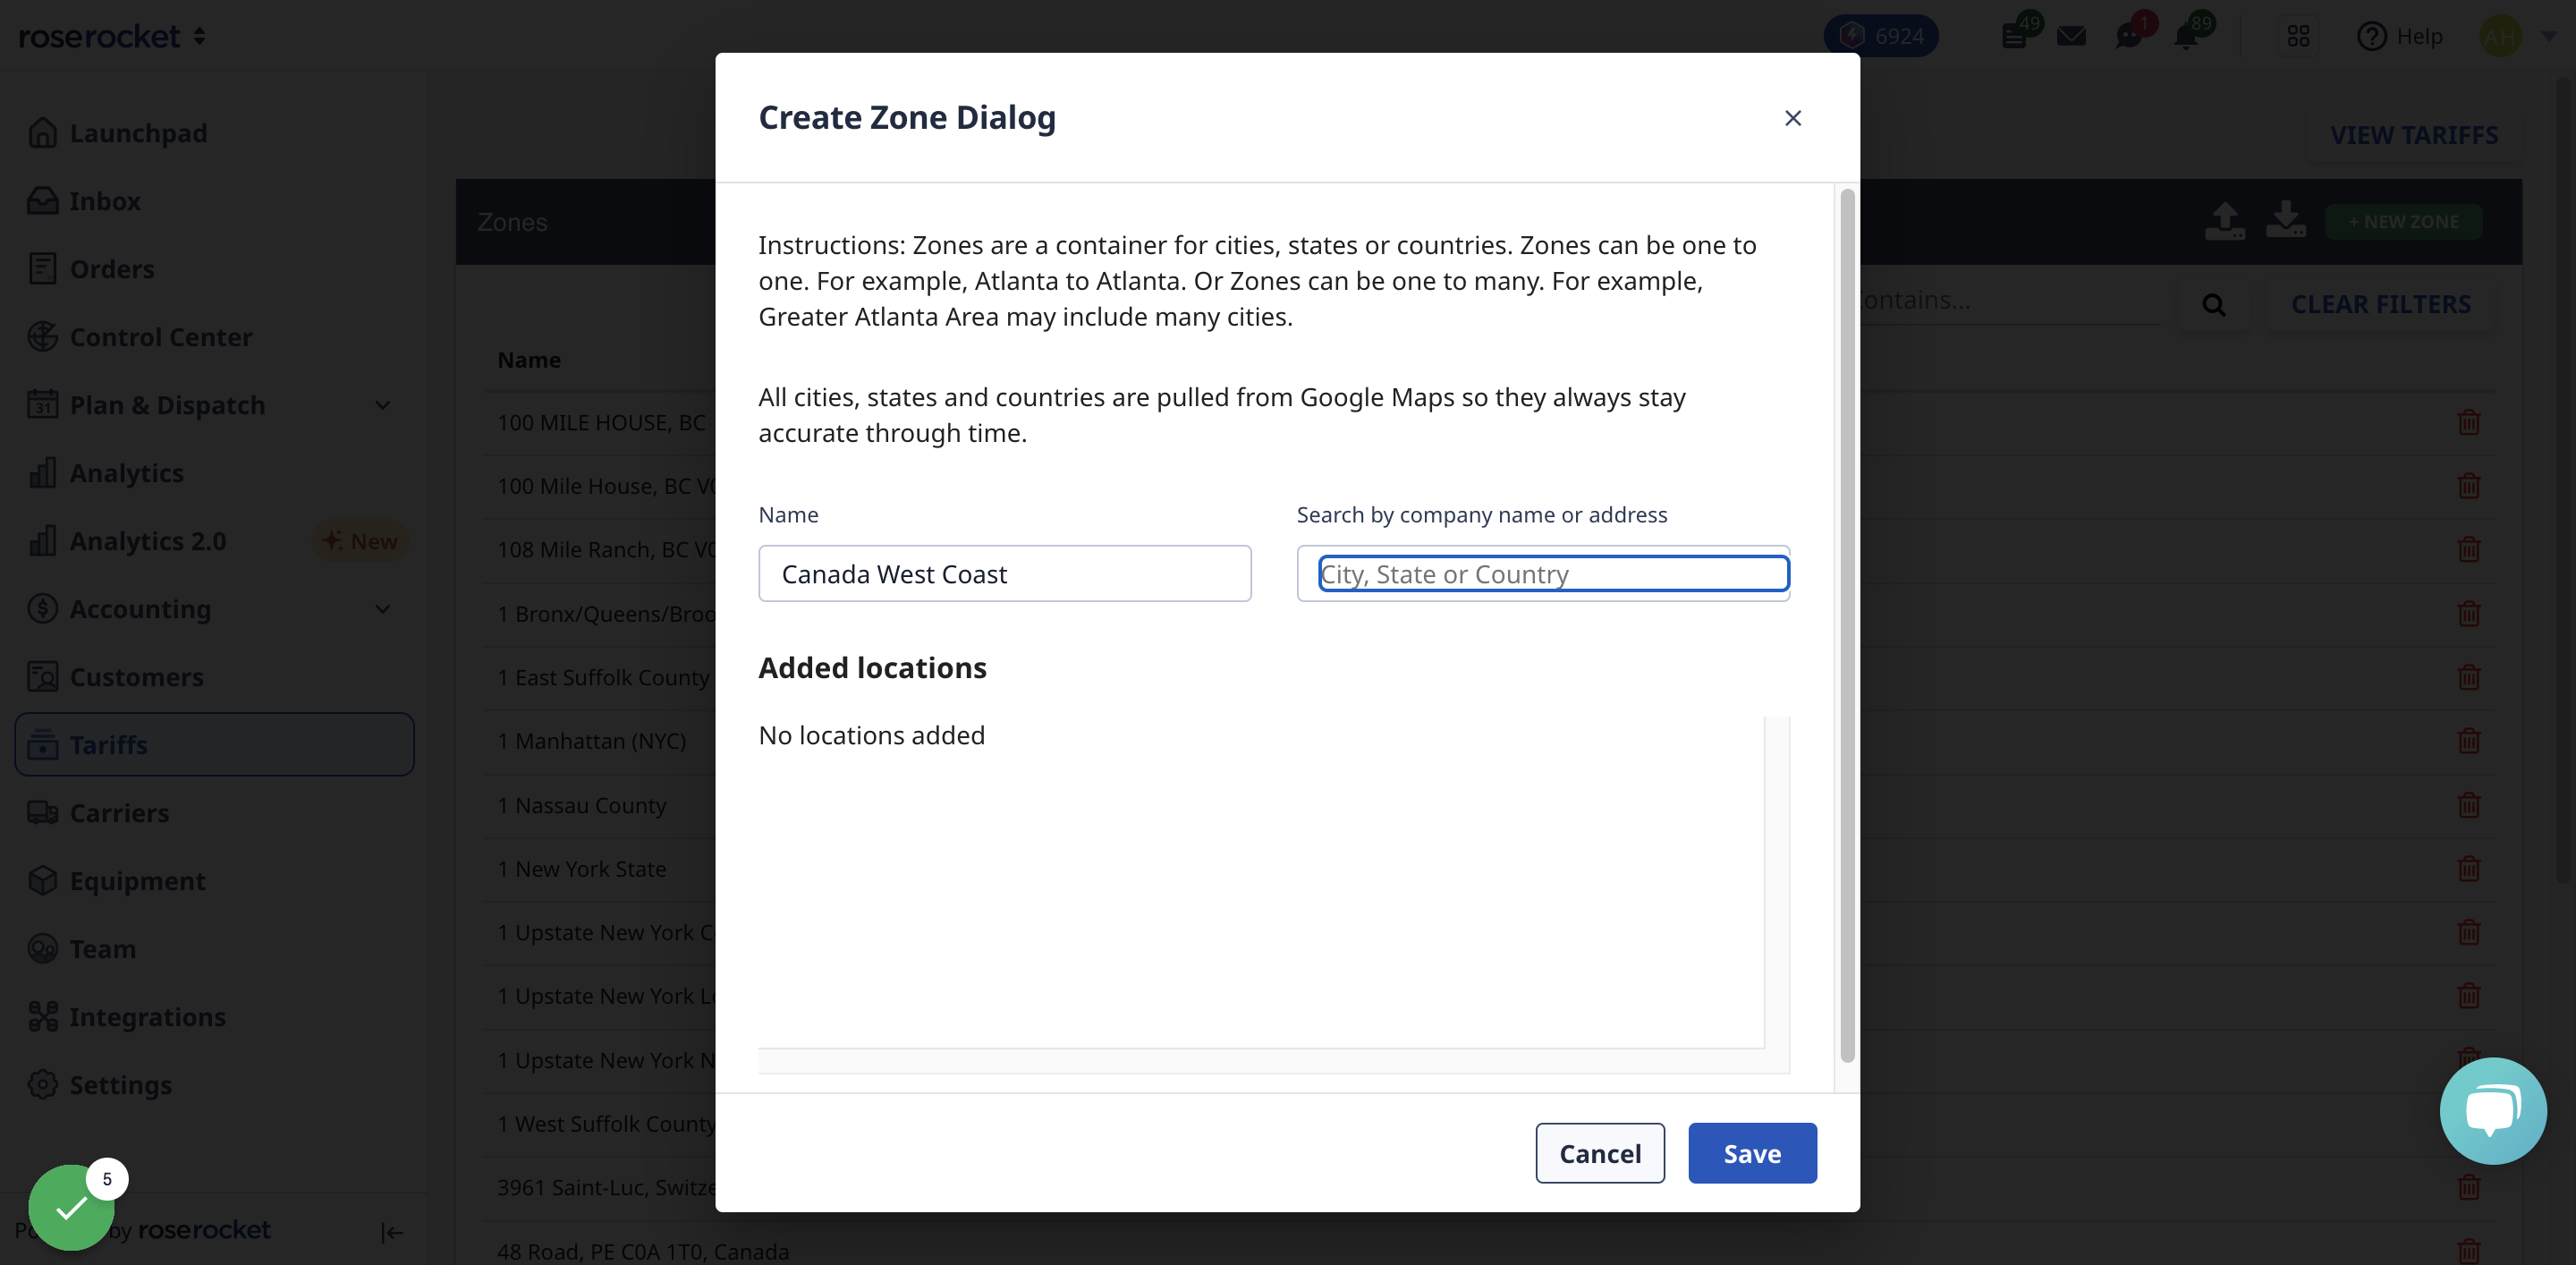
3. Click on NEW ZONE
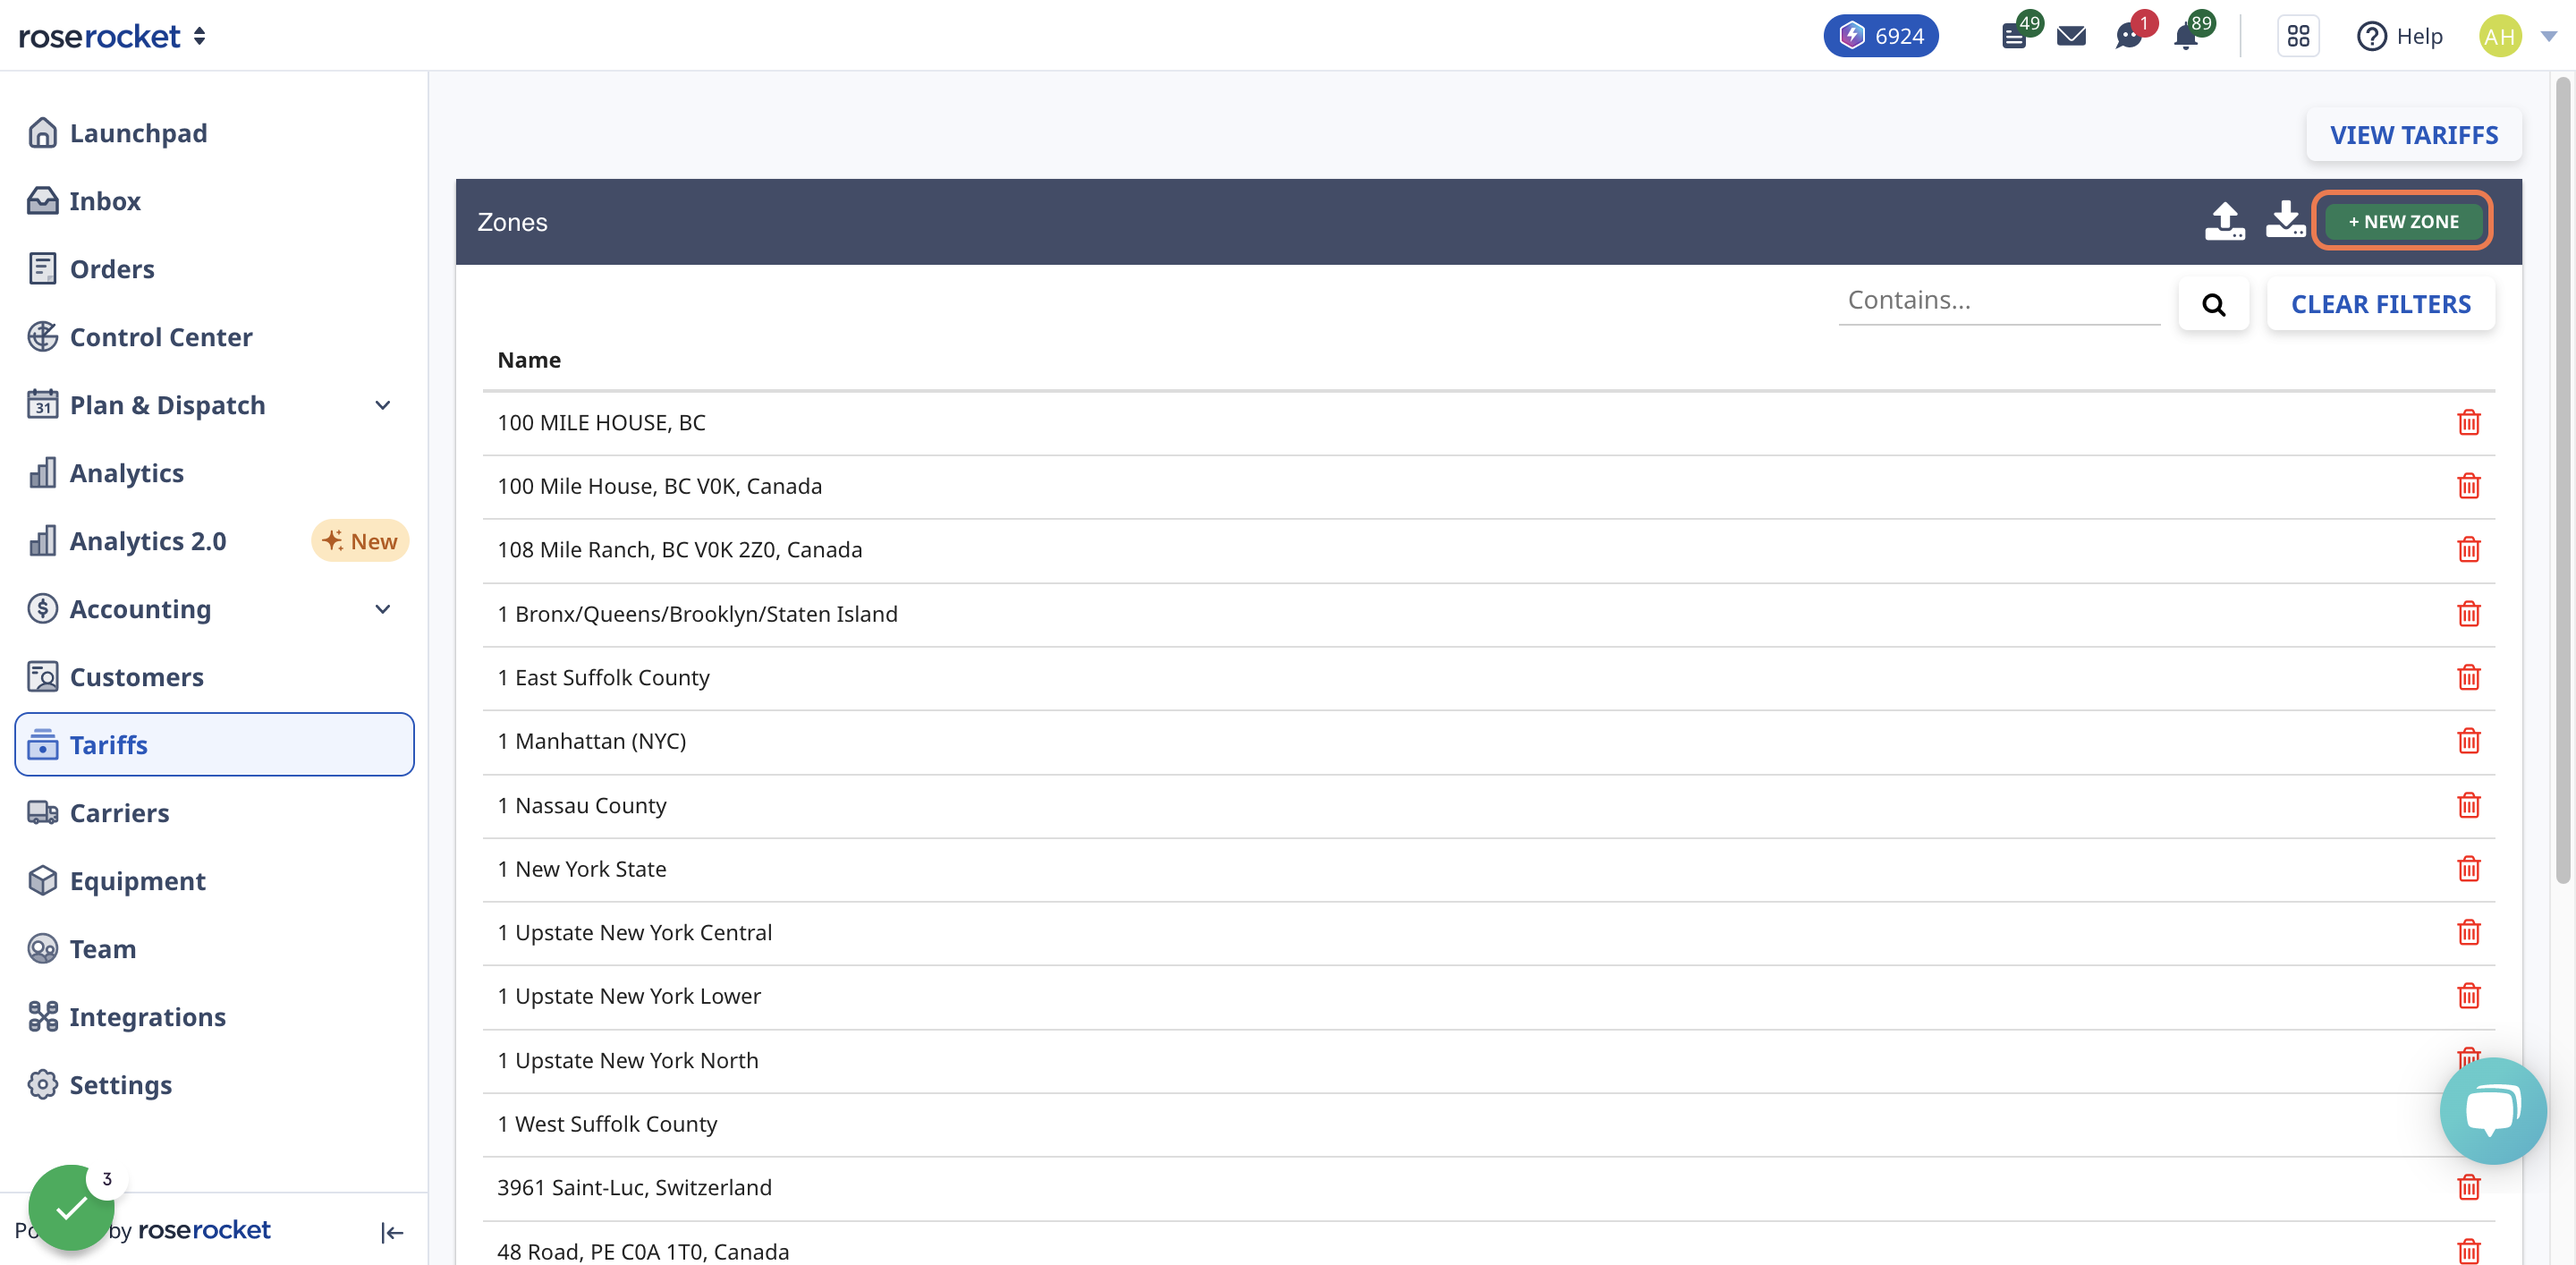
4. In the Create Zone Dialog window, enter a name for your new zone, and begin adding locations to be included. They can be: cities, states, provinces, or countries
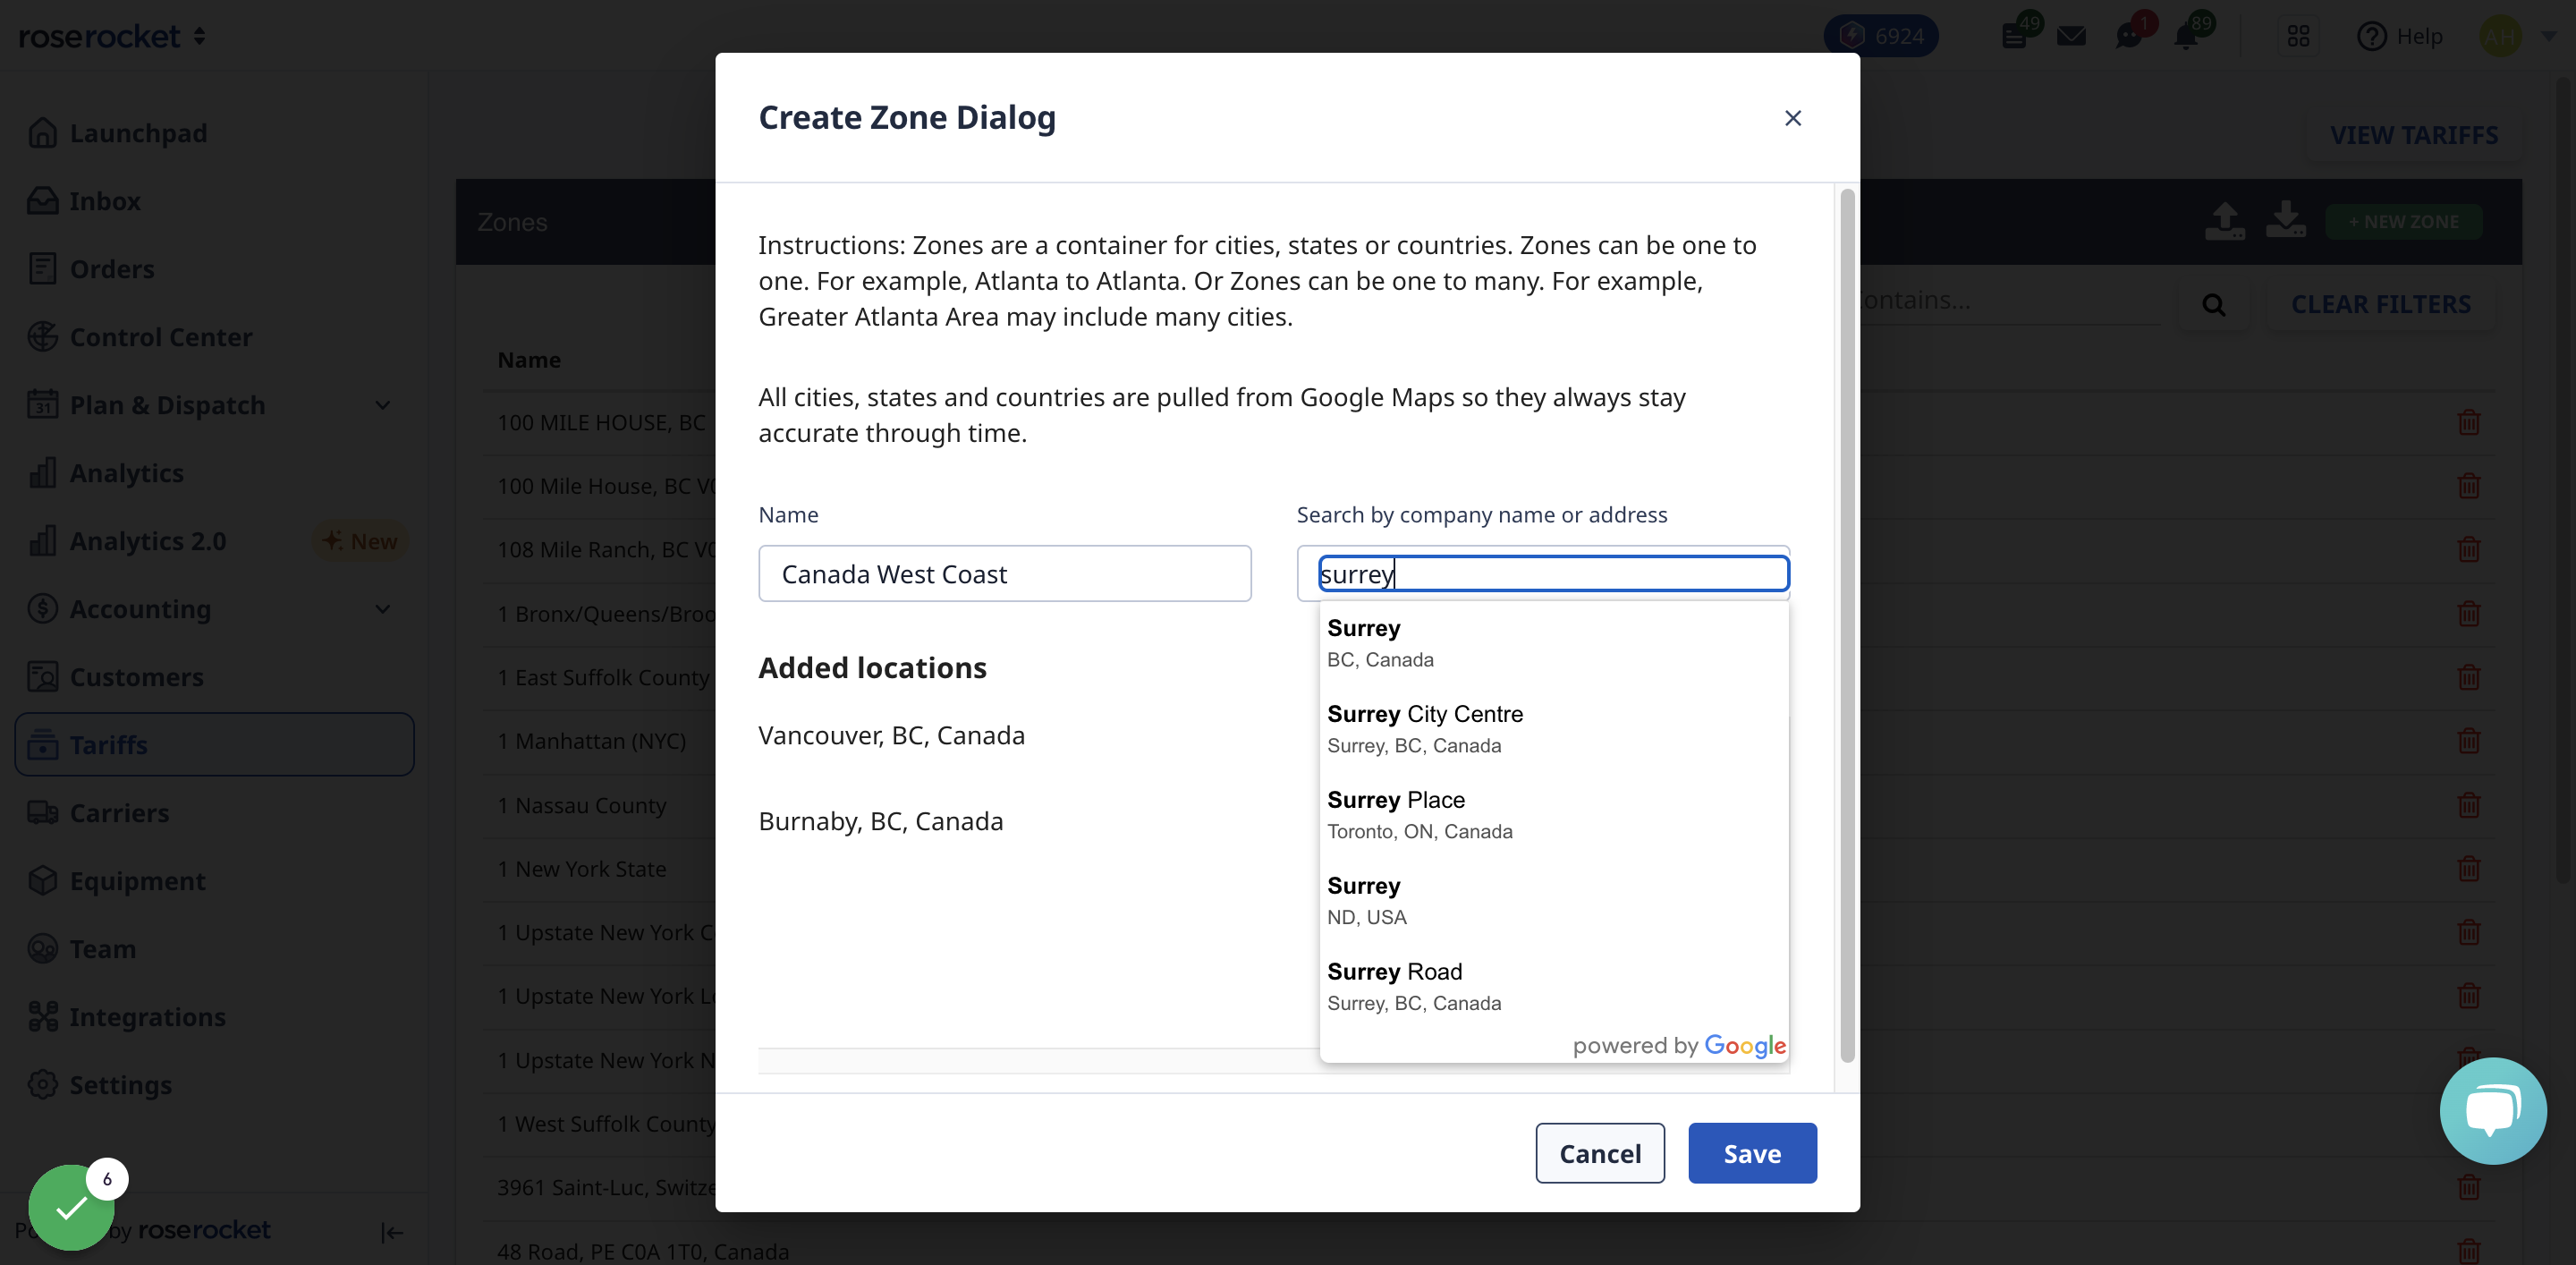
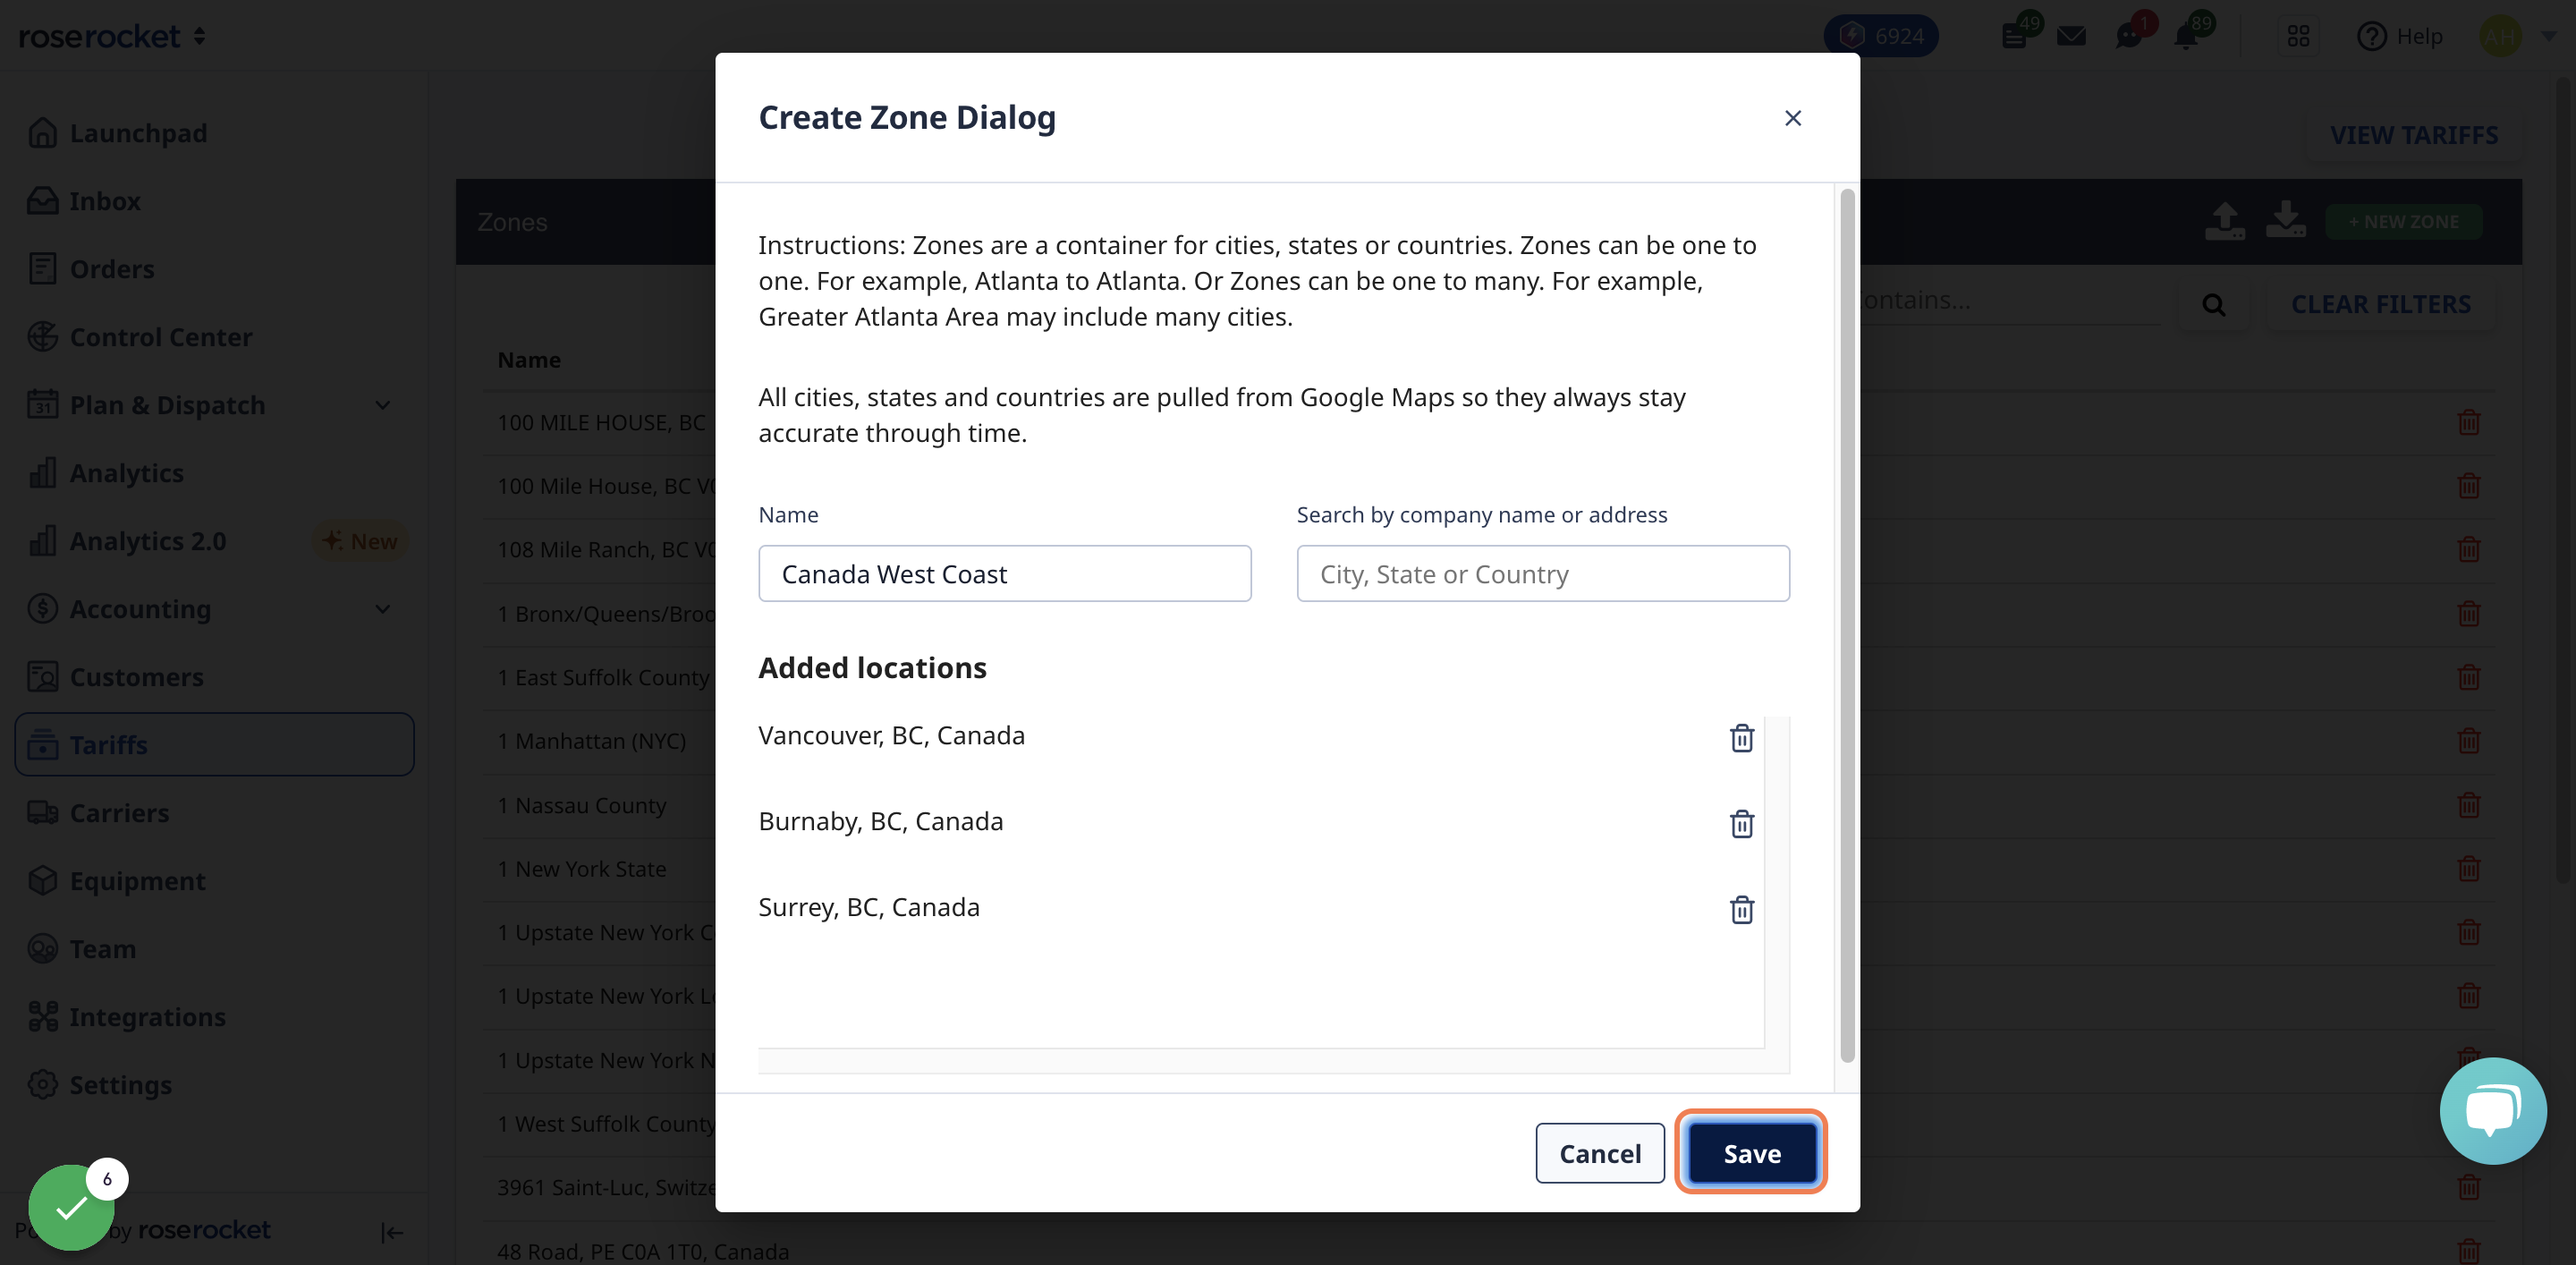
5. For example, let's make a new zone called "Canada West Coast", and add Vancouver, Surrey, and Burnaby.
When you create an order in the future, any pick-up or delivery locations included in this zone will automatically generate rates according to the tariffs you'll be setting.
6. Once you're done, click "Save"
Step 2: Set up Tariff
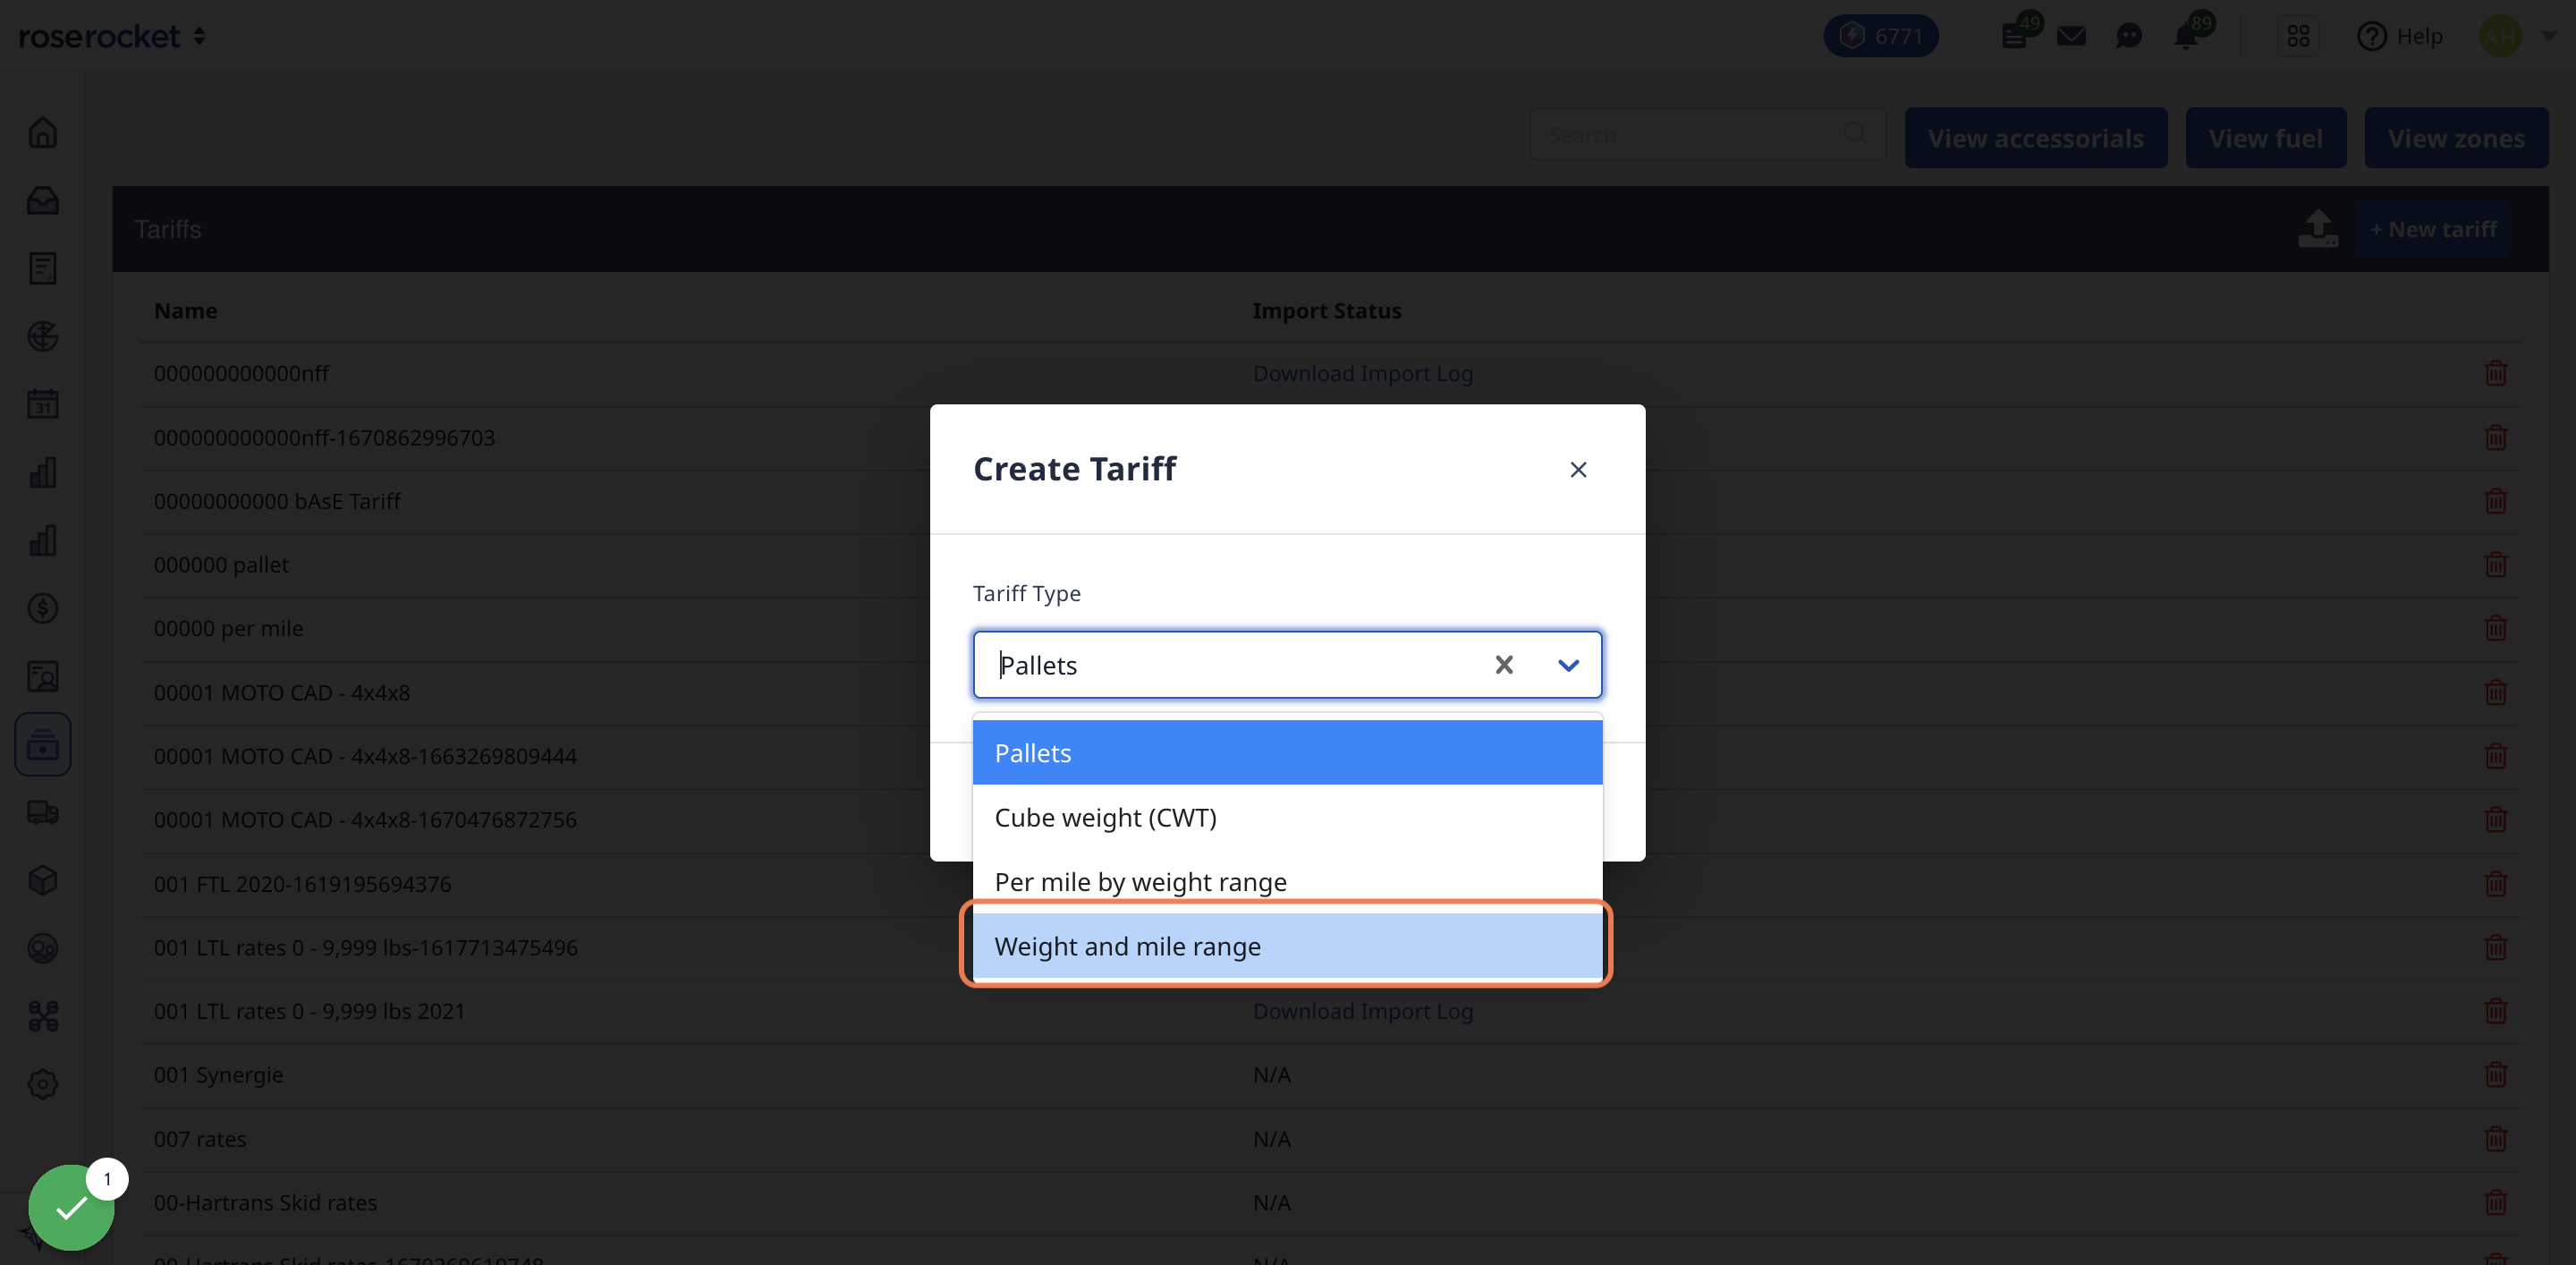
Tariff rates can be set up in four ways:
- Pallets
- Cube Weight (CWT)
- Per Mile and Weight Range
- Per Weight and Mile Rate
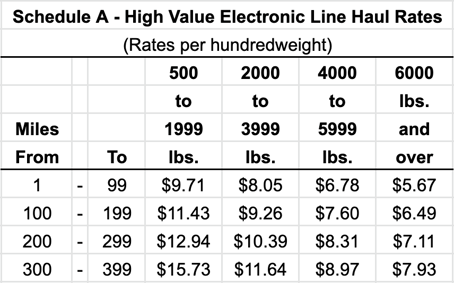
For this example, let's use an imaginary schedule that has pre-calculated rates for loads in Per Mile and Weight ranges:
1. In the Tariffs module, click on "Create"
2. Select "Weight and mile range", and click "Create"
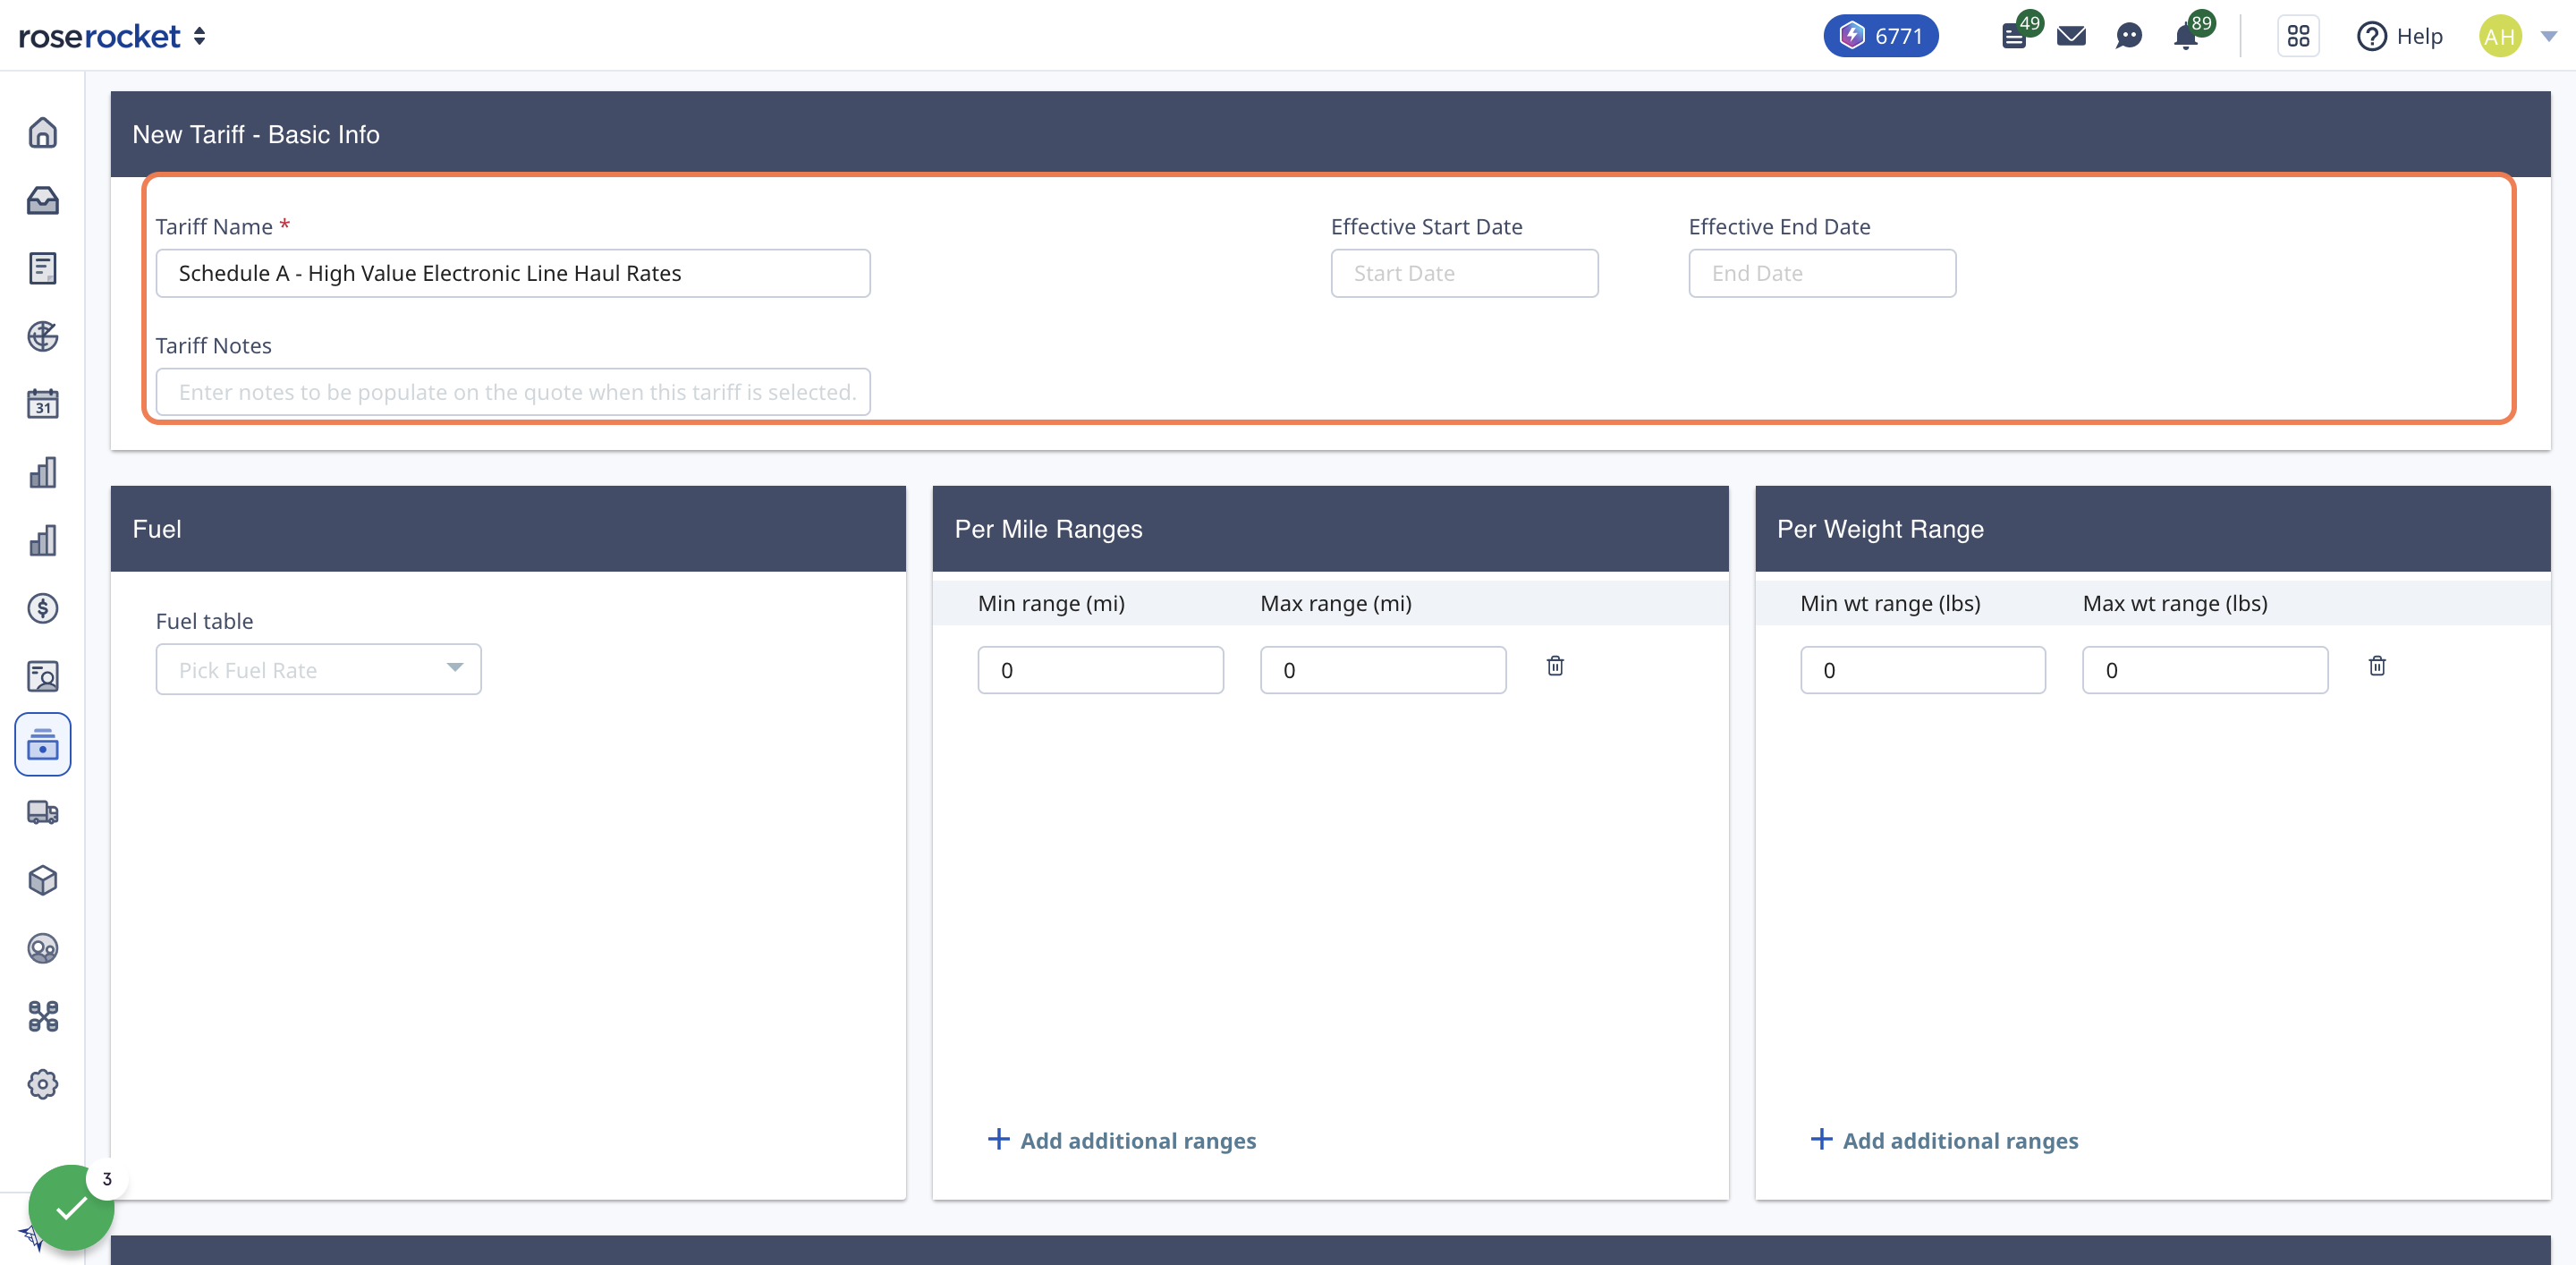
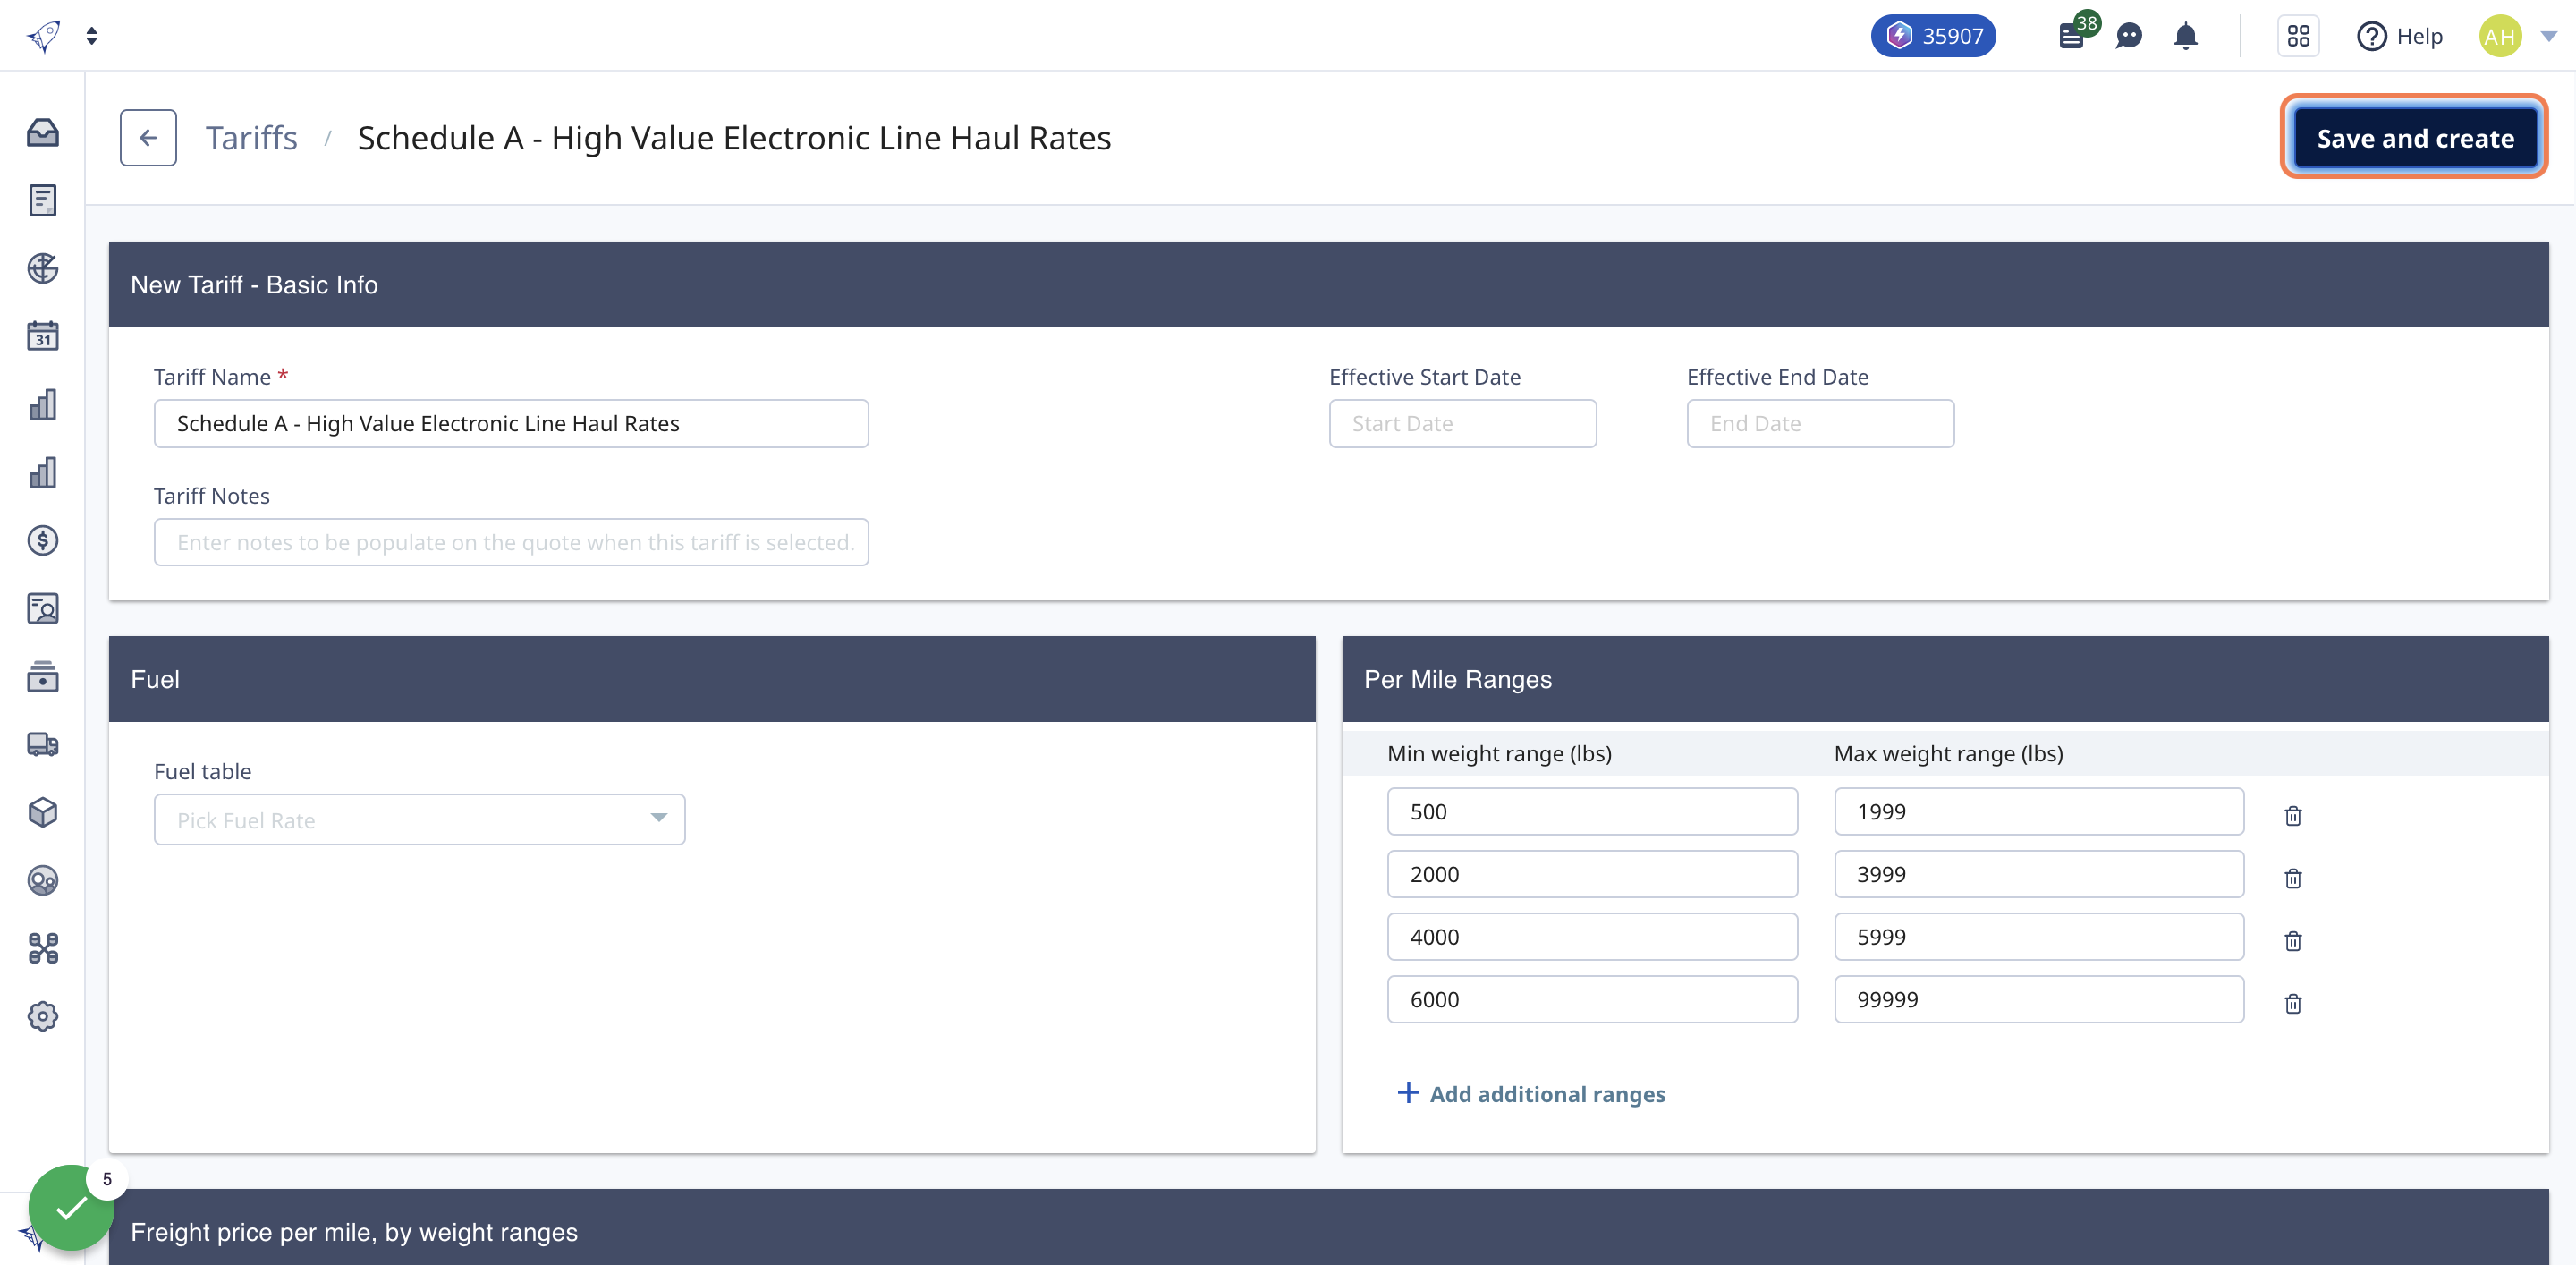
3. Name your Tariff
You also have the option to add "Tariff Notes" that will populate on the quote when this tariff is selected, as well as a Start/End date if you want these rates to only available for a limited time period
4. Enter in mile and weight ranges, as seen in the above table
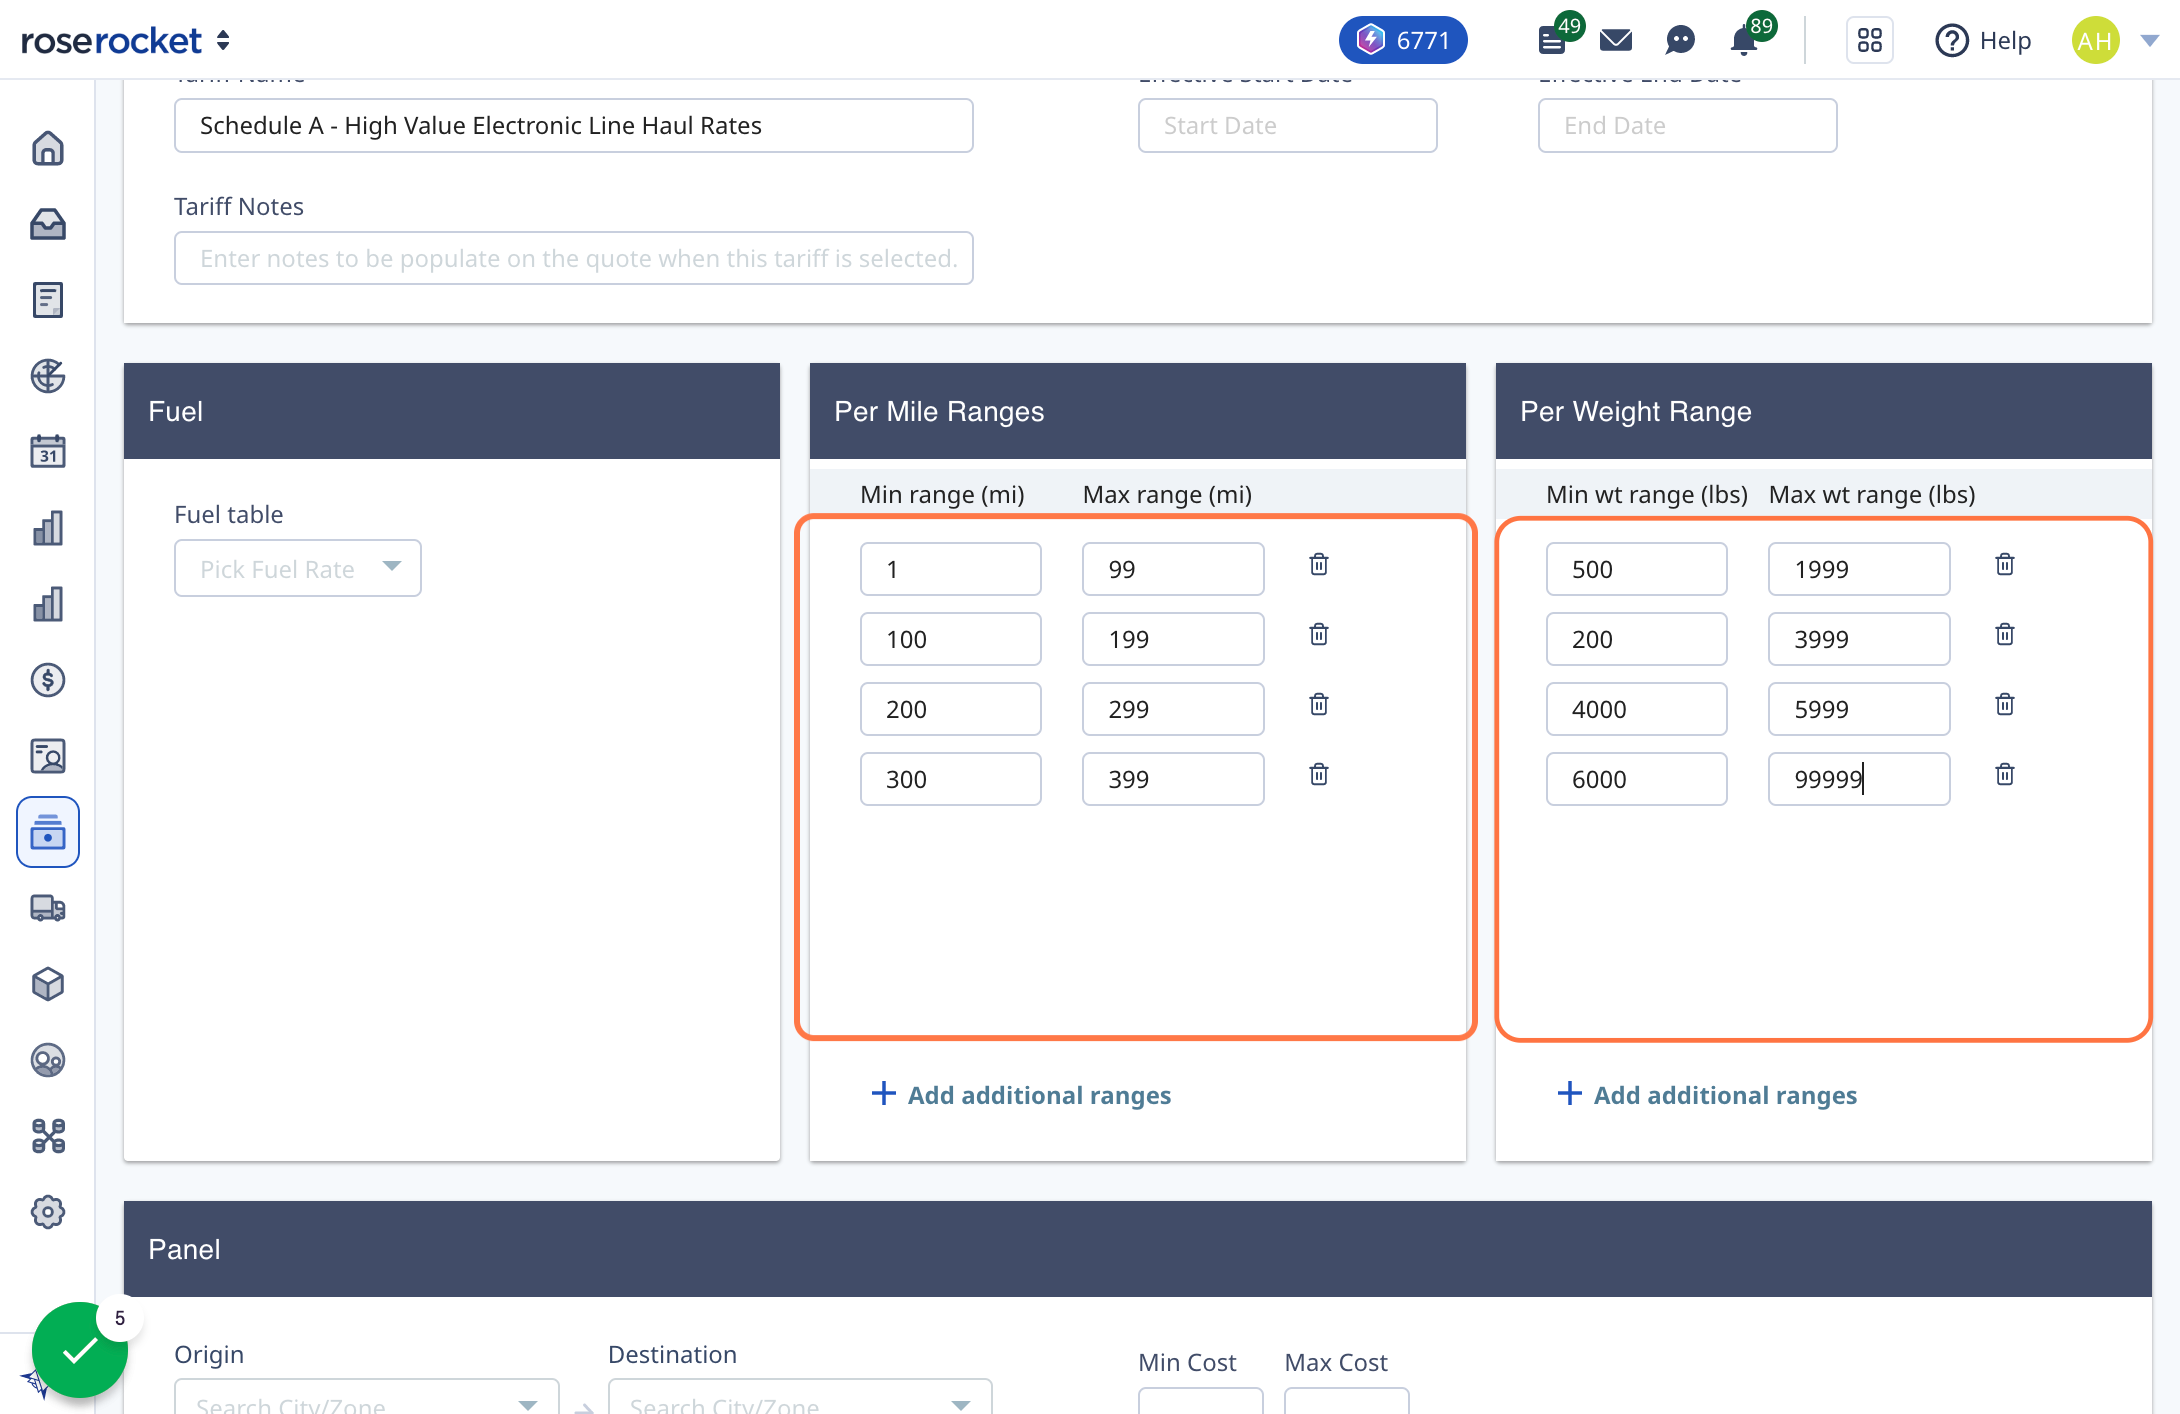
5. Set price per weight ranges for each mile range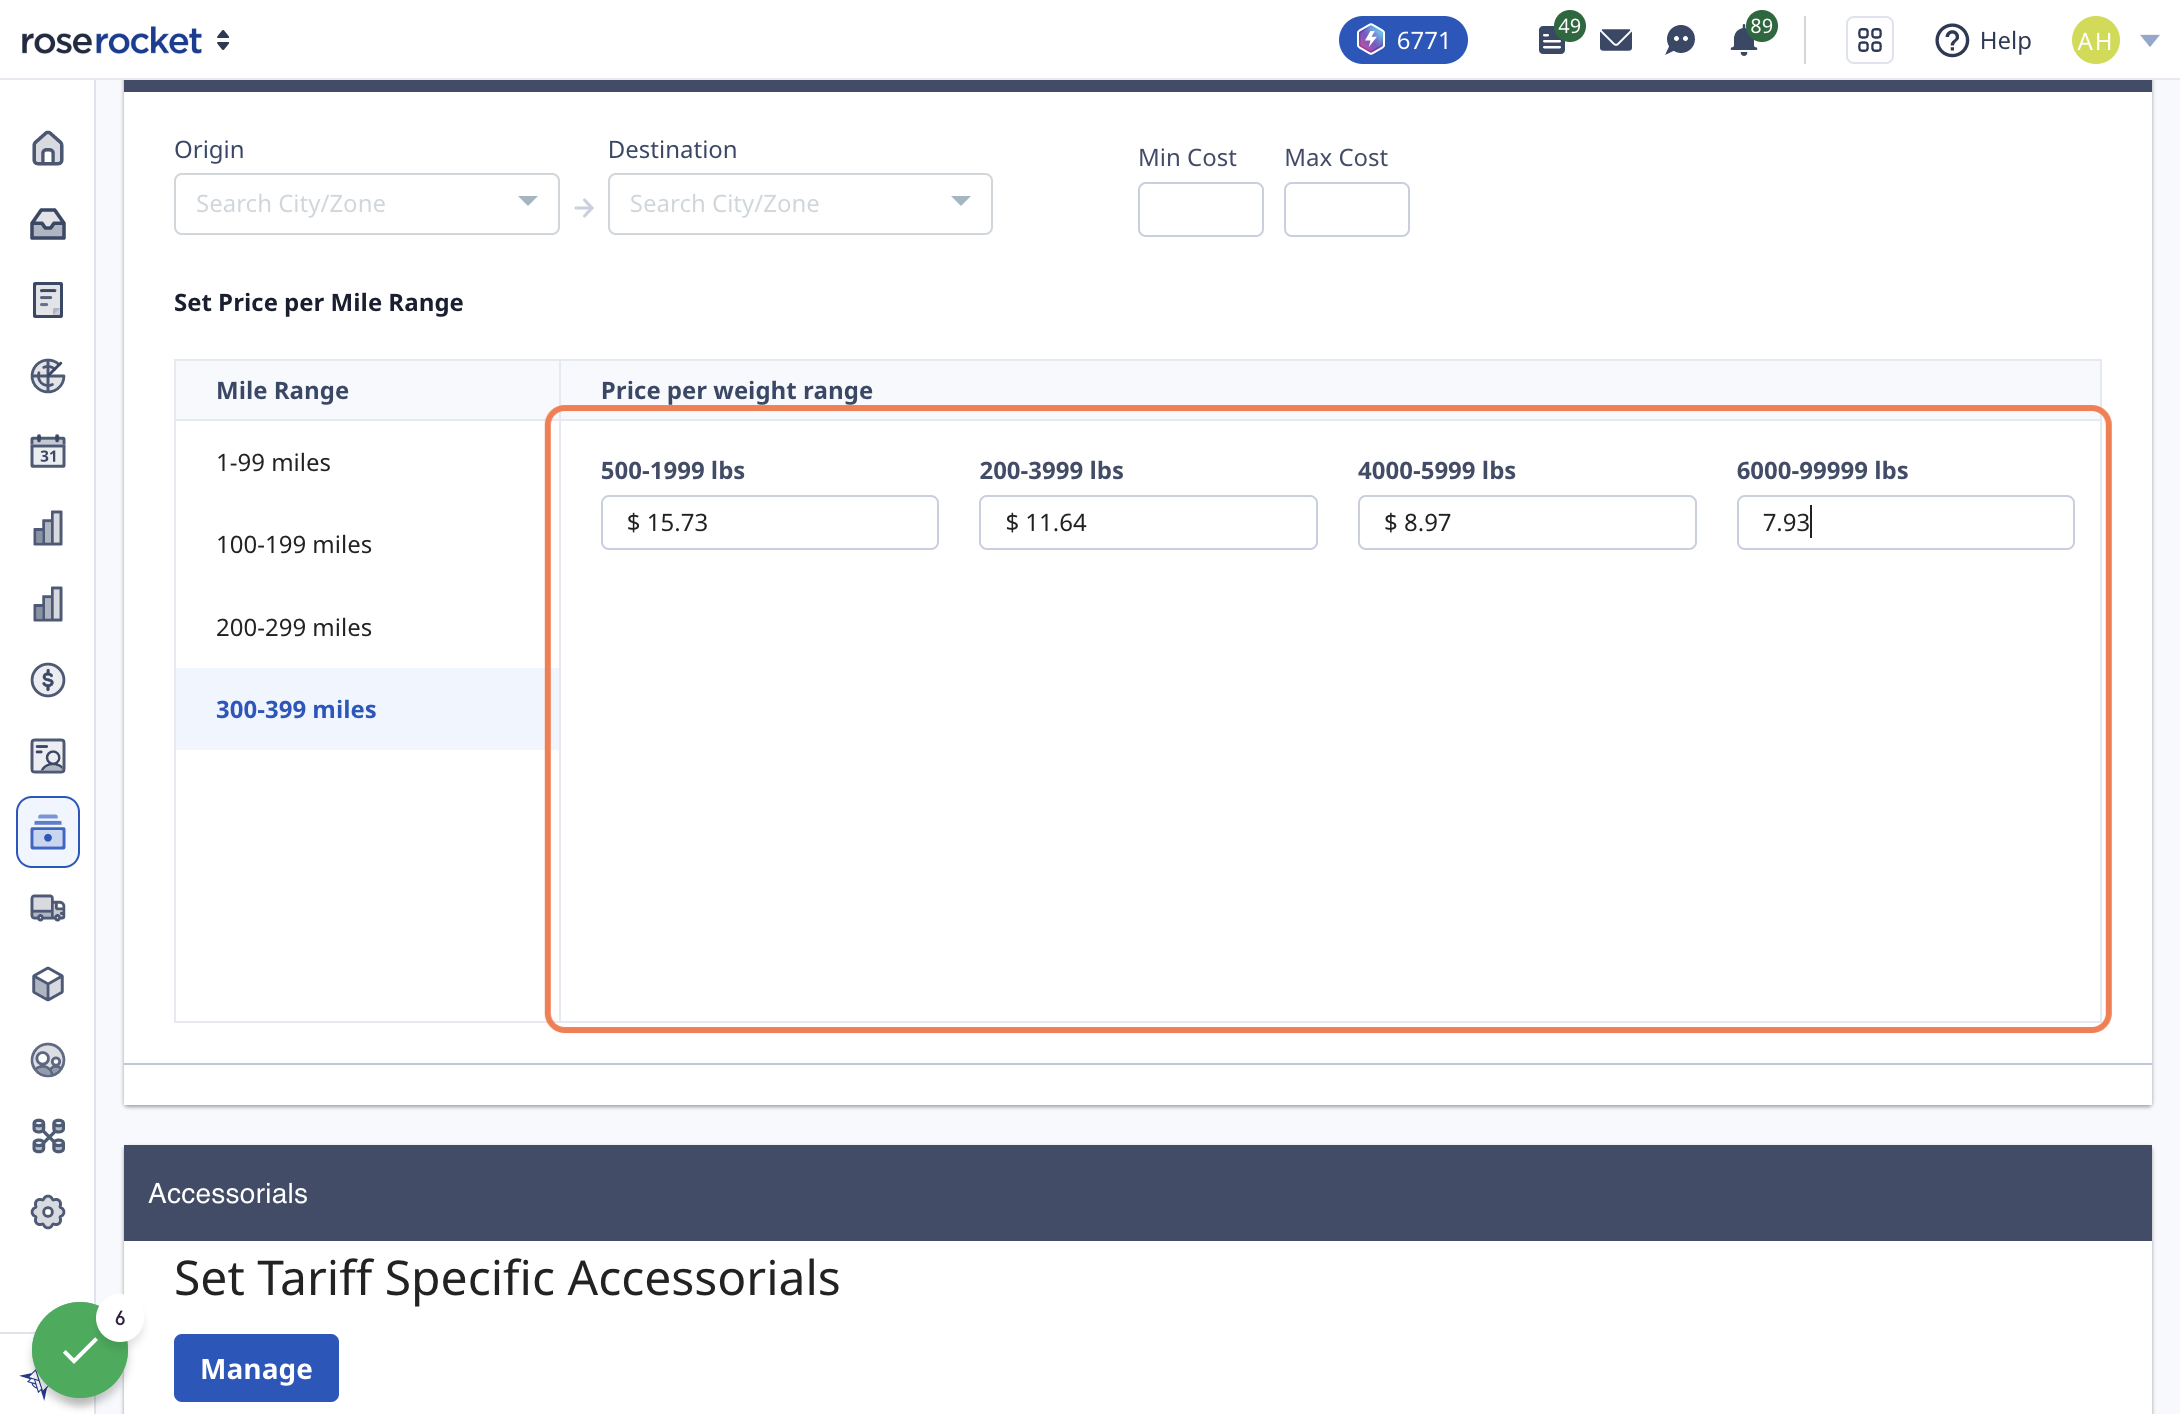
6. Enter in the Origin and Destination that this tariff should be applied to
Set the lane this tariff is to be applied to. Origin and Destination can be entered by city, or if you want to include a larger area, enter in a Zone.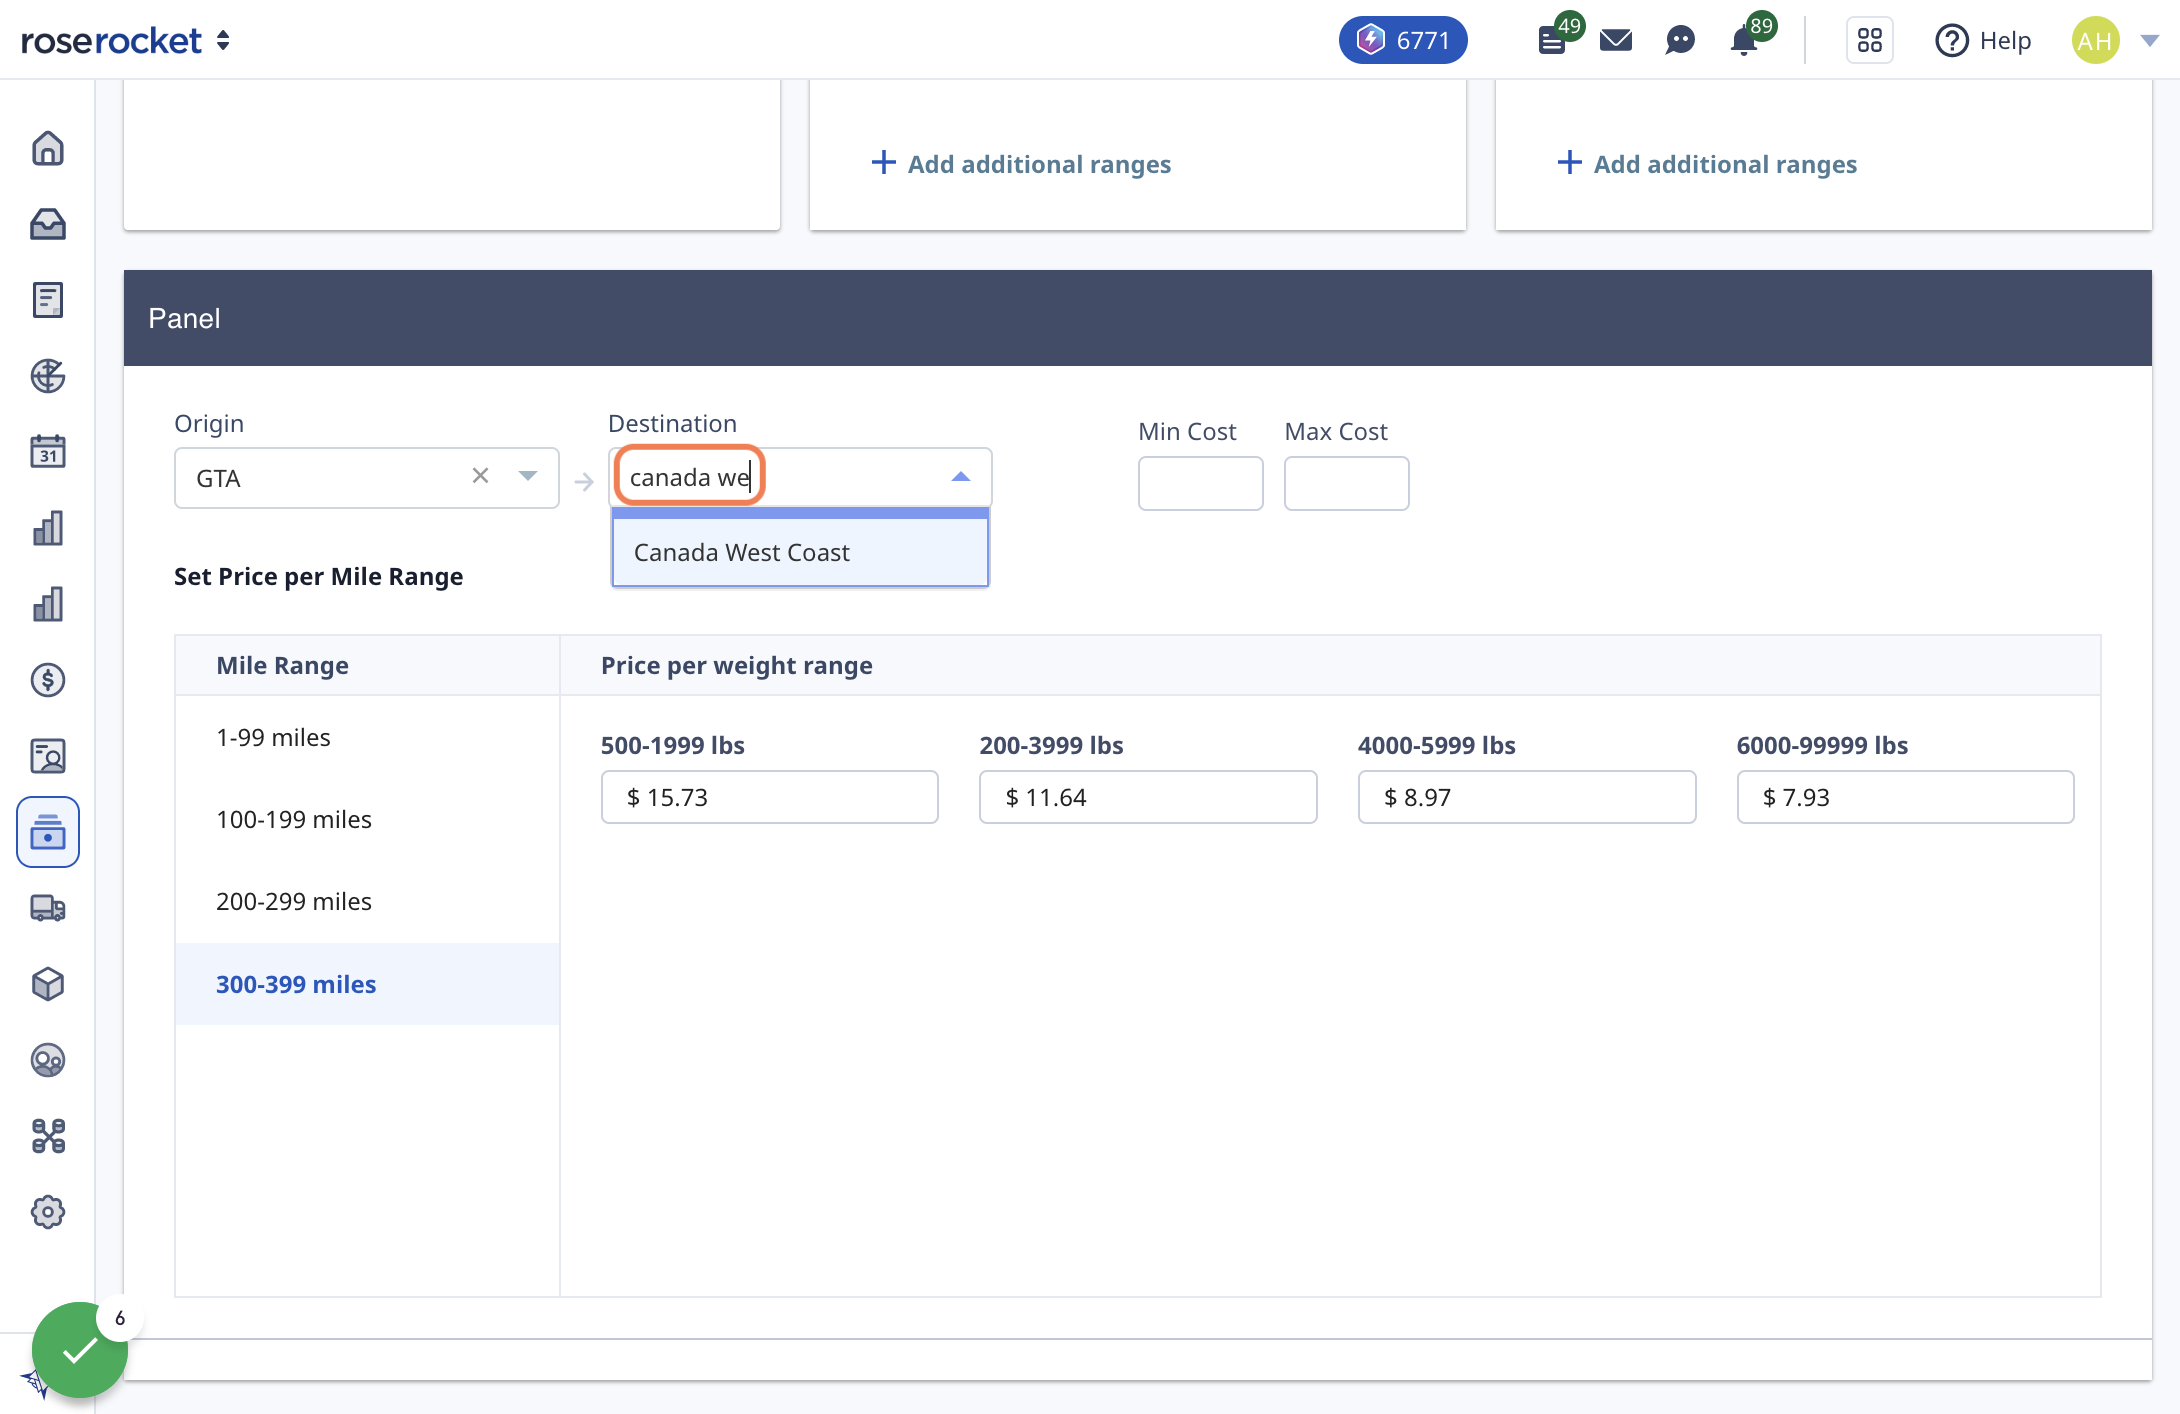
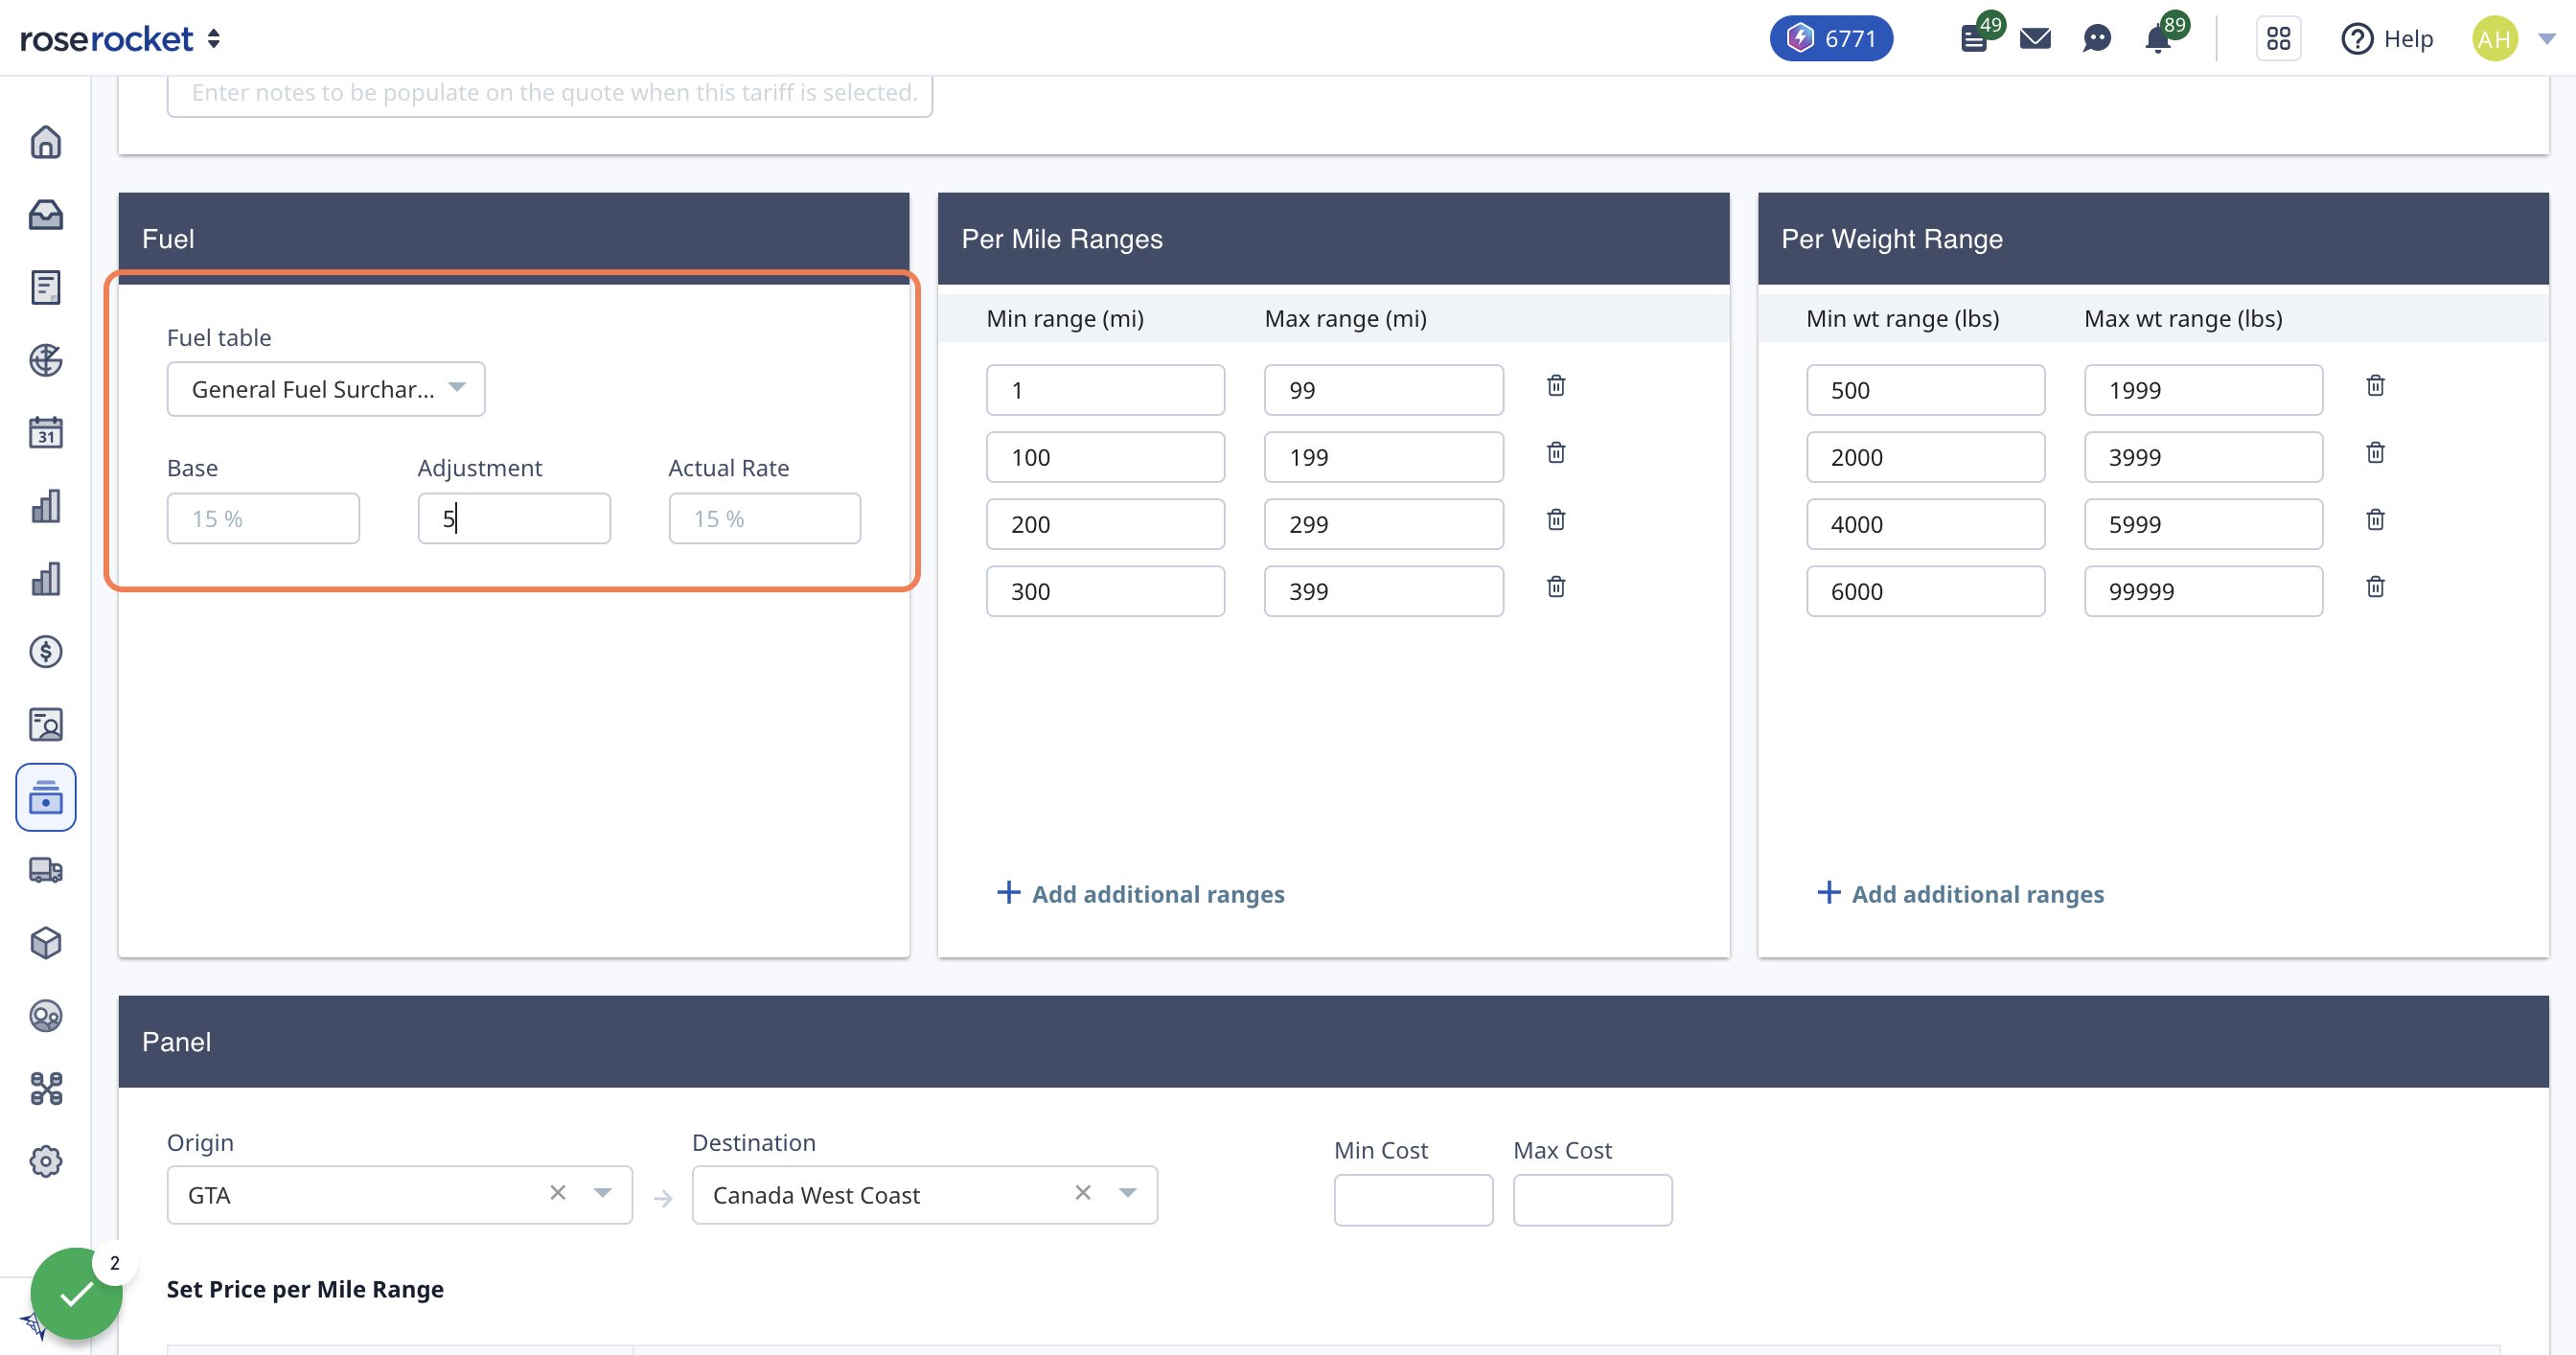
7a. OPTIONAL: Set Fuel Rates
You have the option to import a fuel table, which will automatically add a fuel surcharge to your tariffs. If you want to adjust the surcharge, simply add in the +/- % adjustment to the actual rate you want
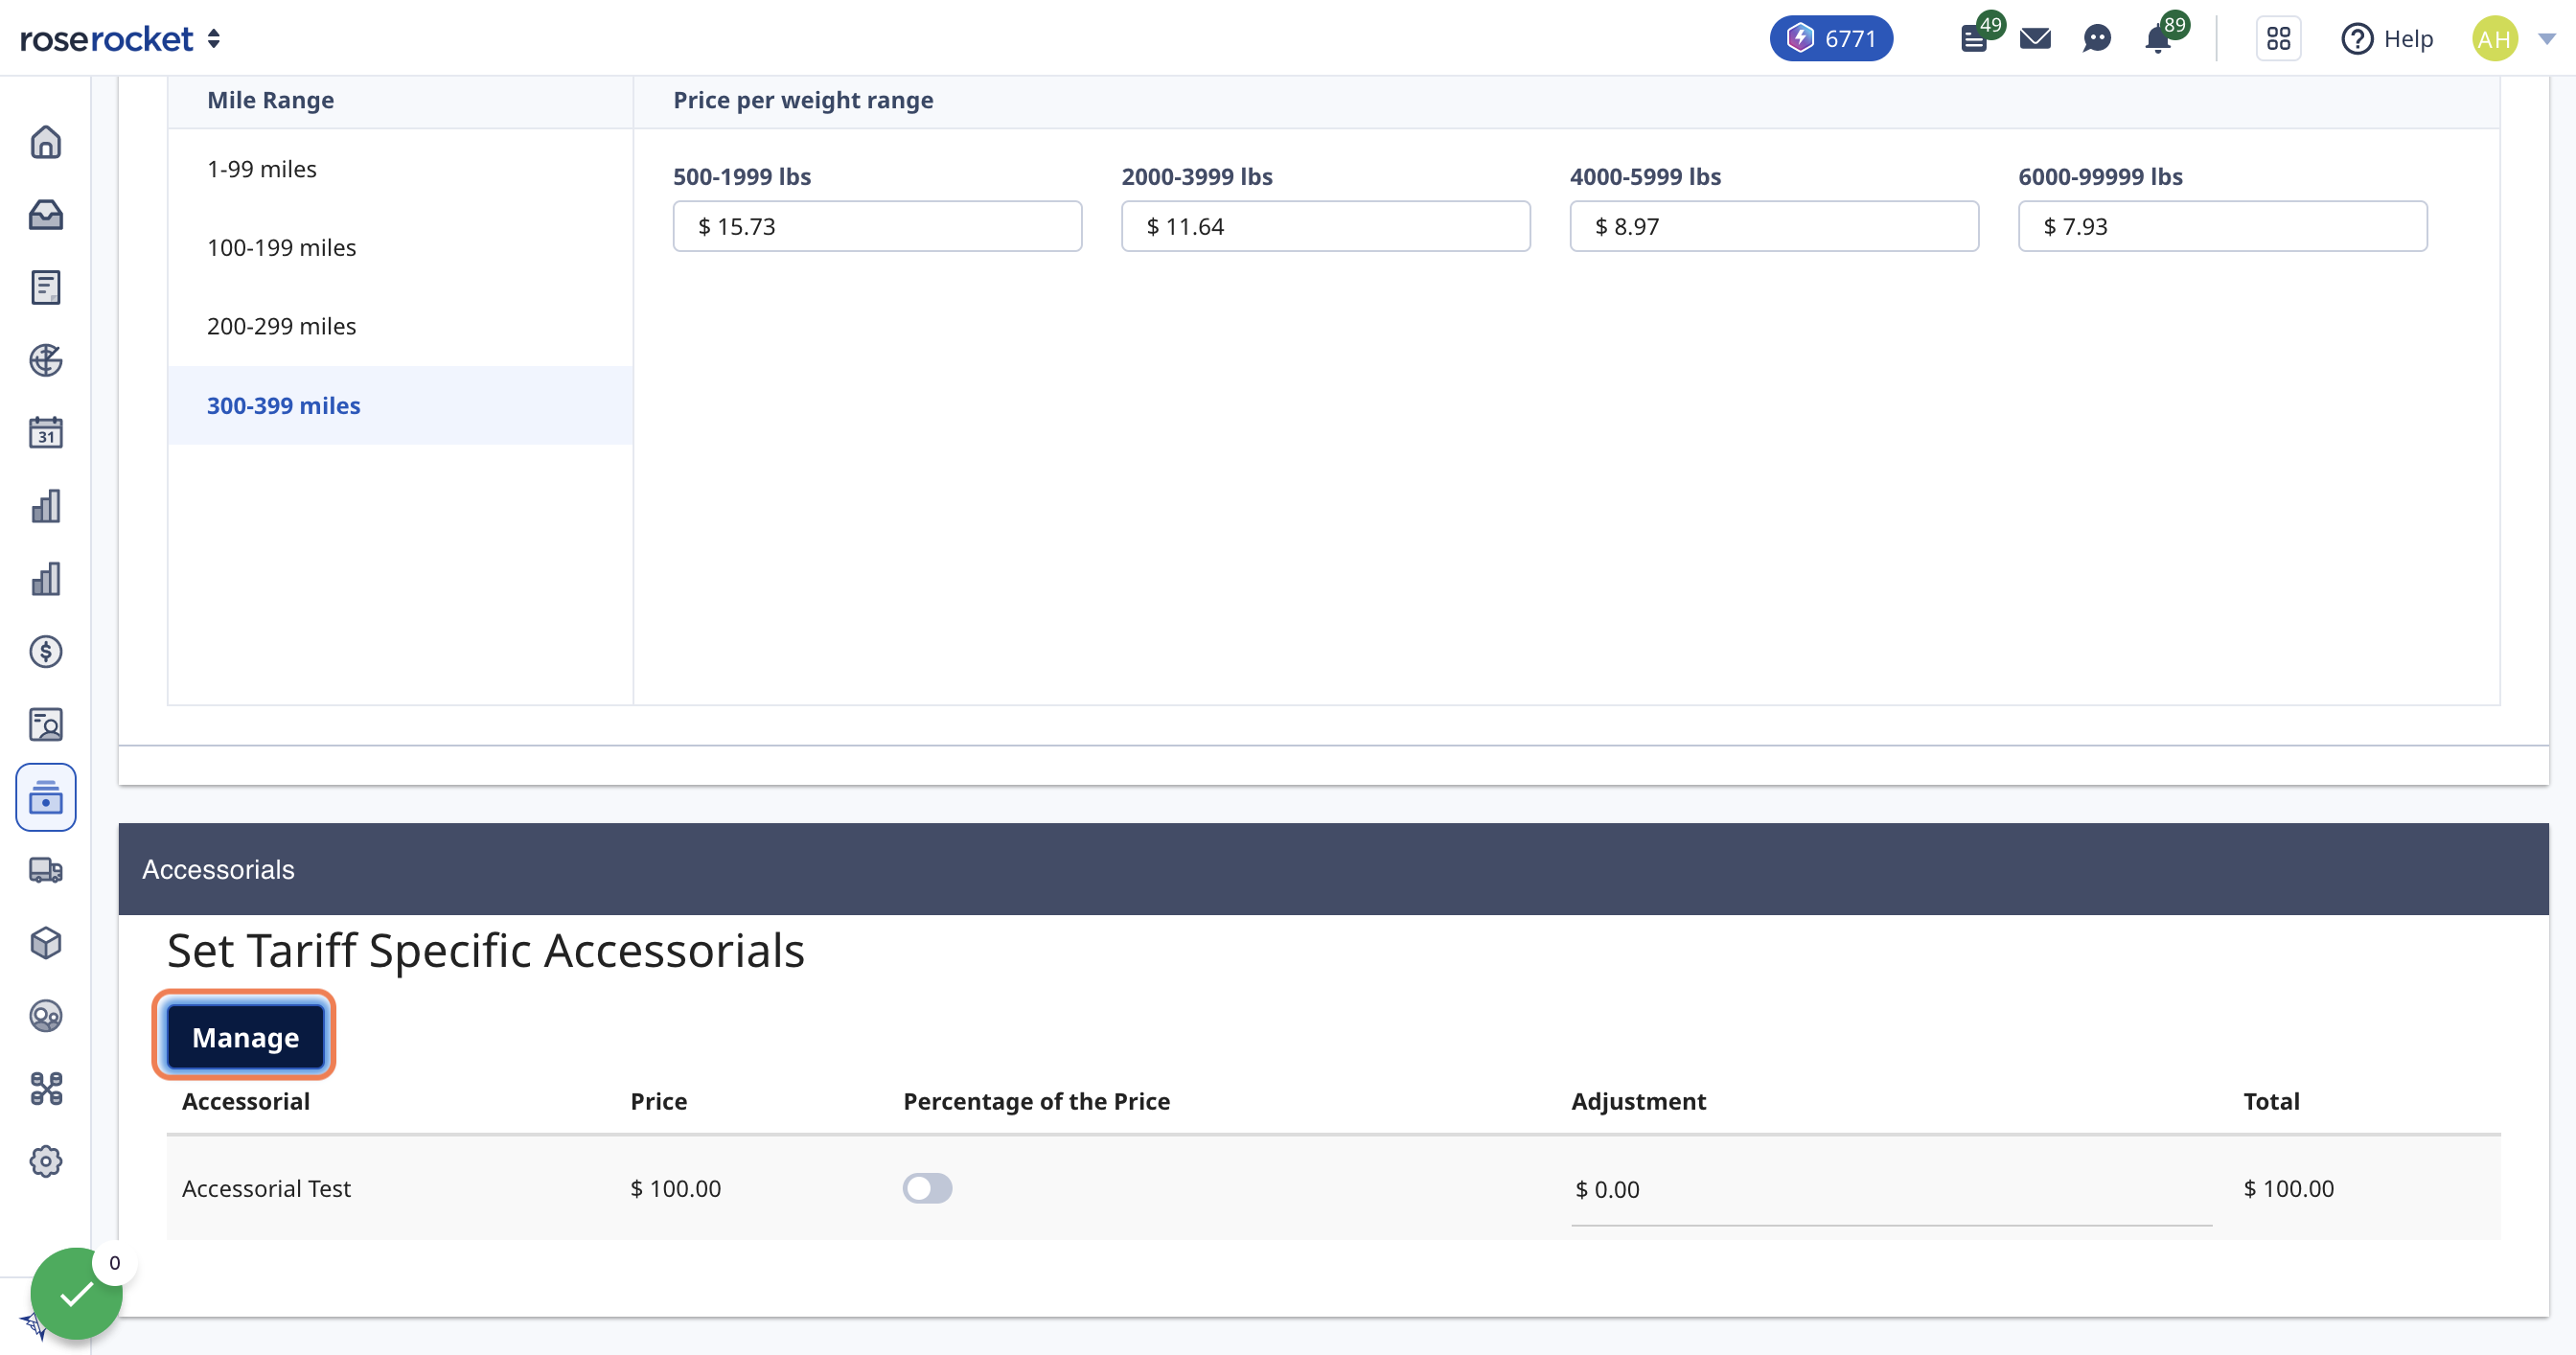
7b. OPTIONAL: Set adjusted accessorial rate
If there's an accessorial you want automatically added each time this tariff is used, add it here. Like fuel, you can also add an adjustment to the default rate set for that accessorial
8. Click "Save and create" to save your new tariff
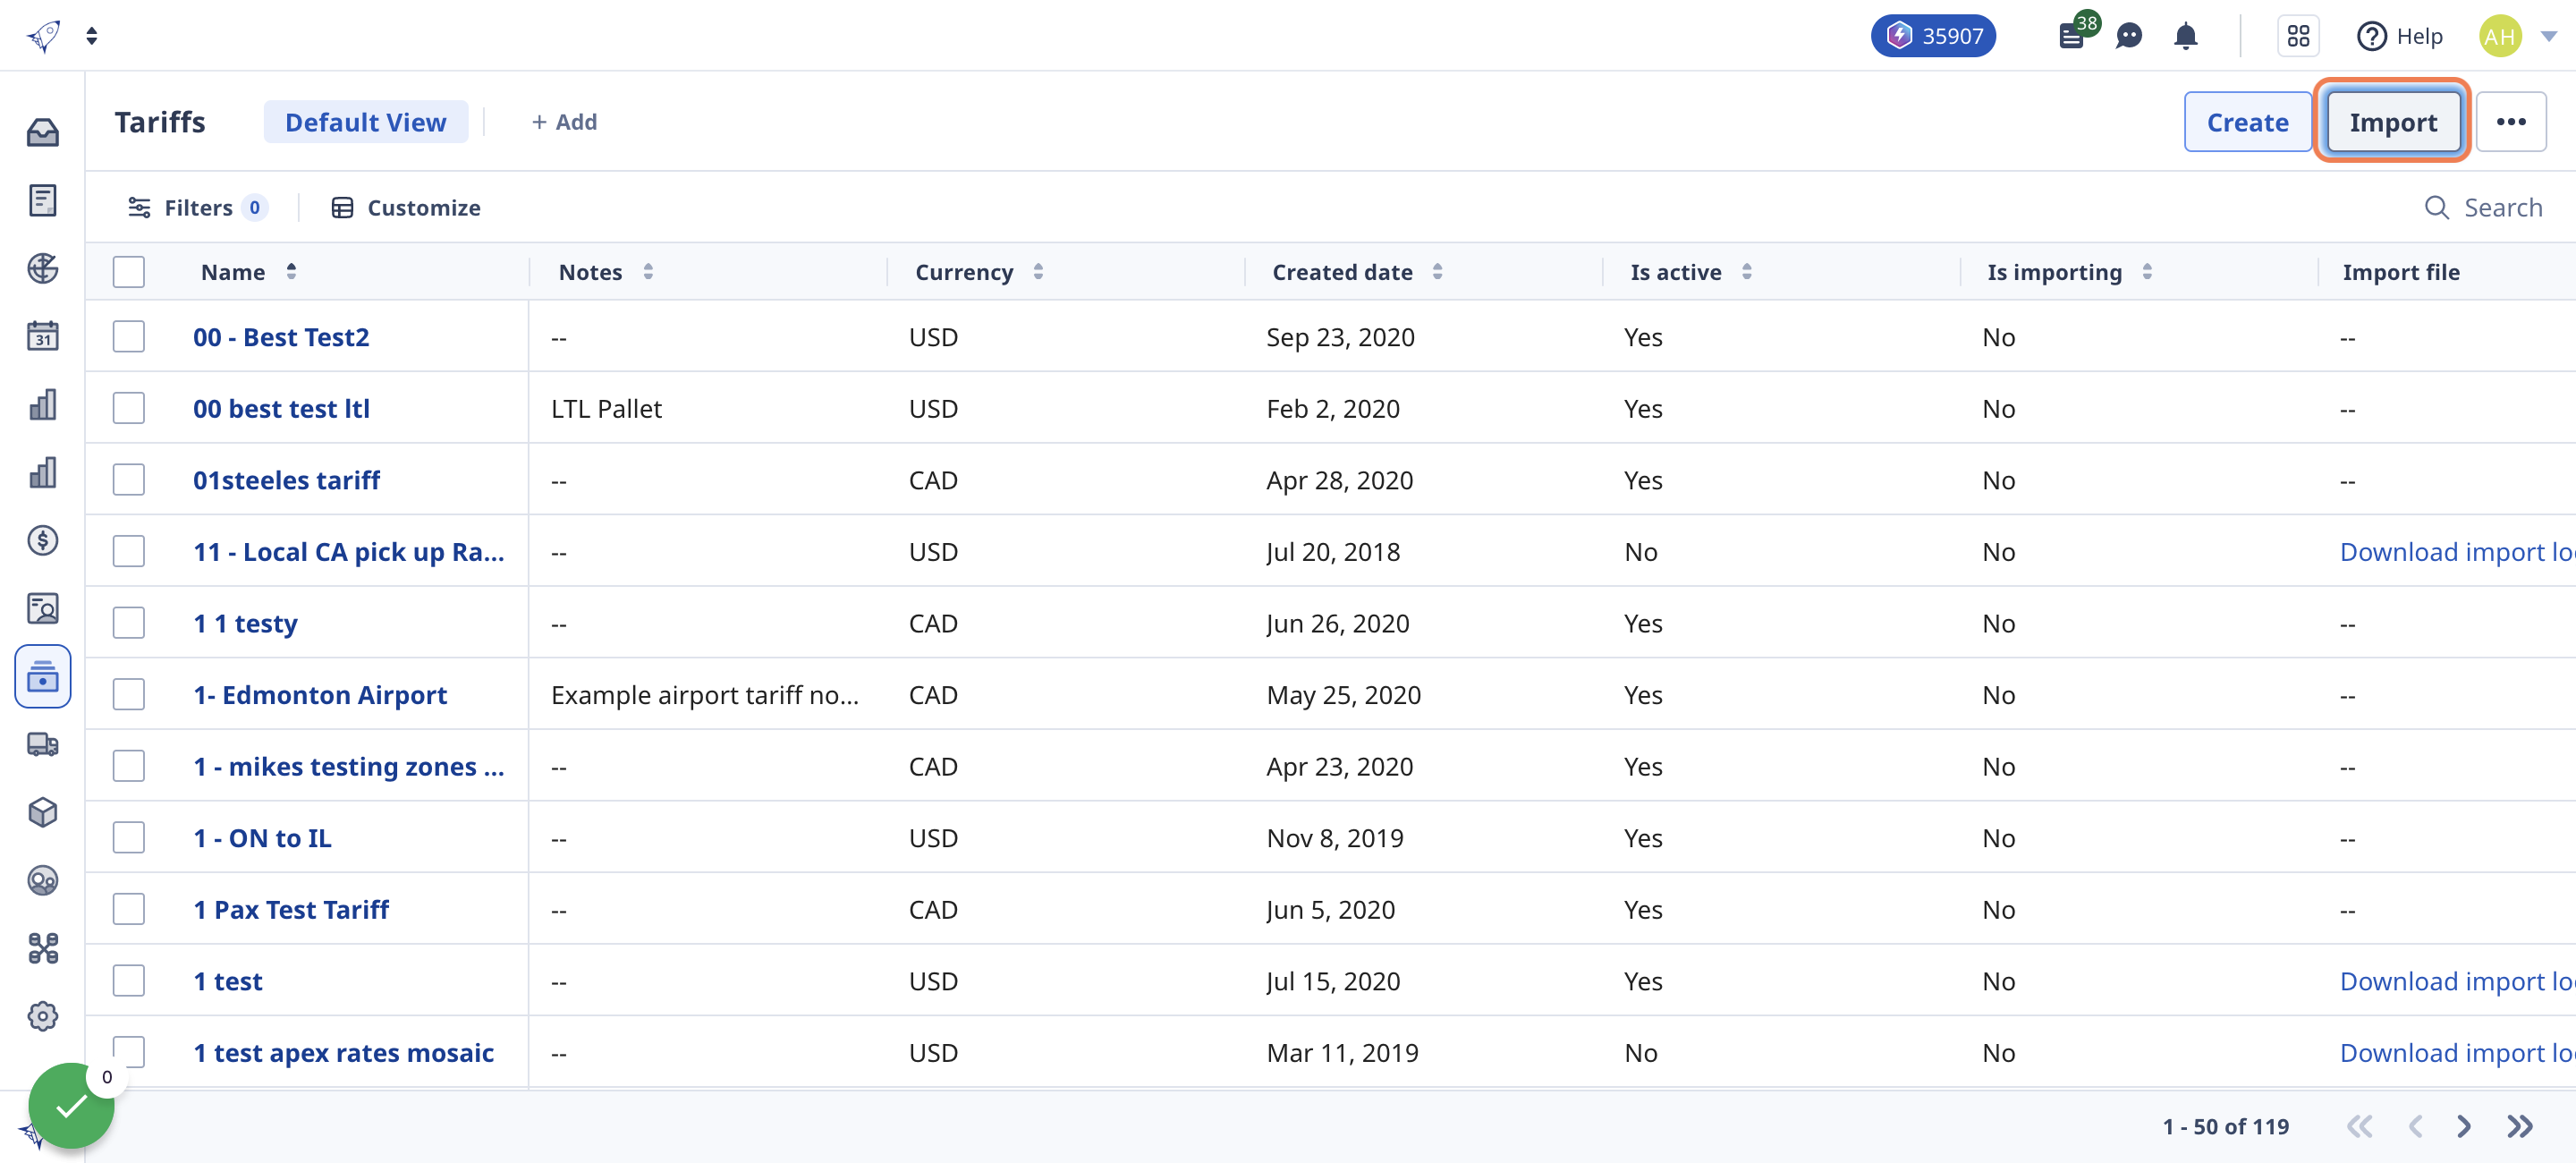
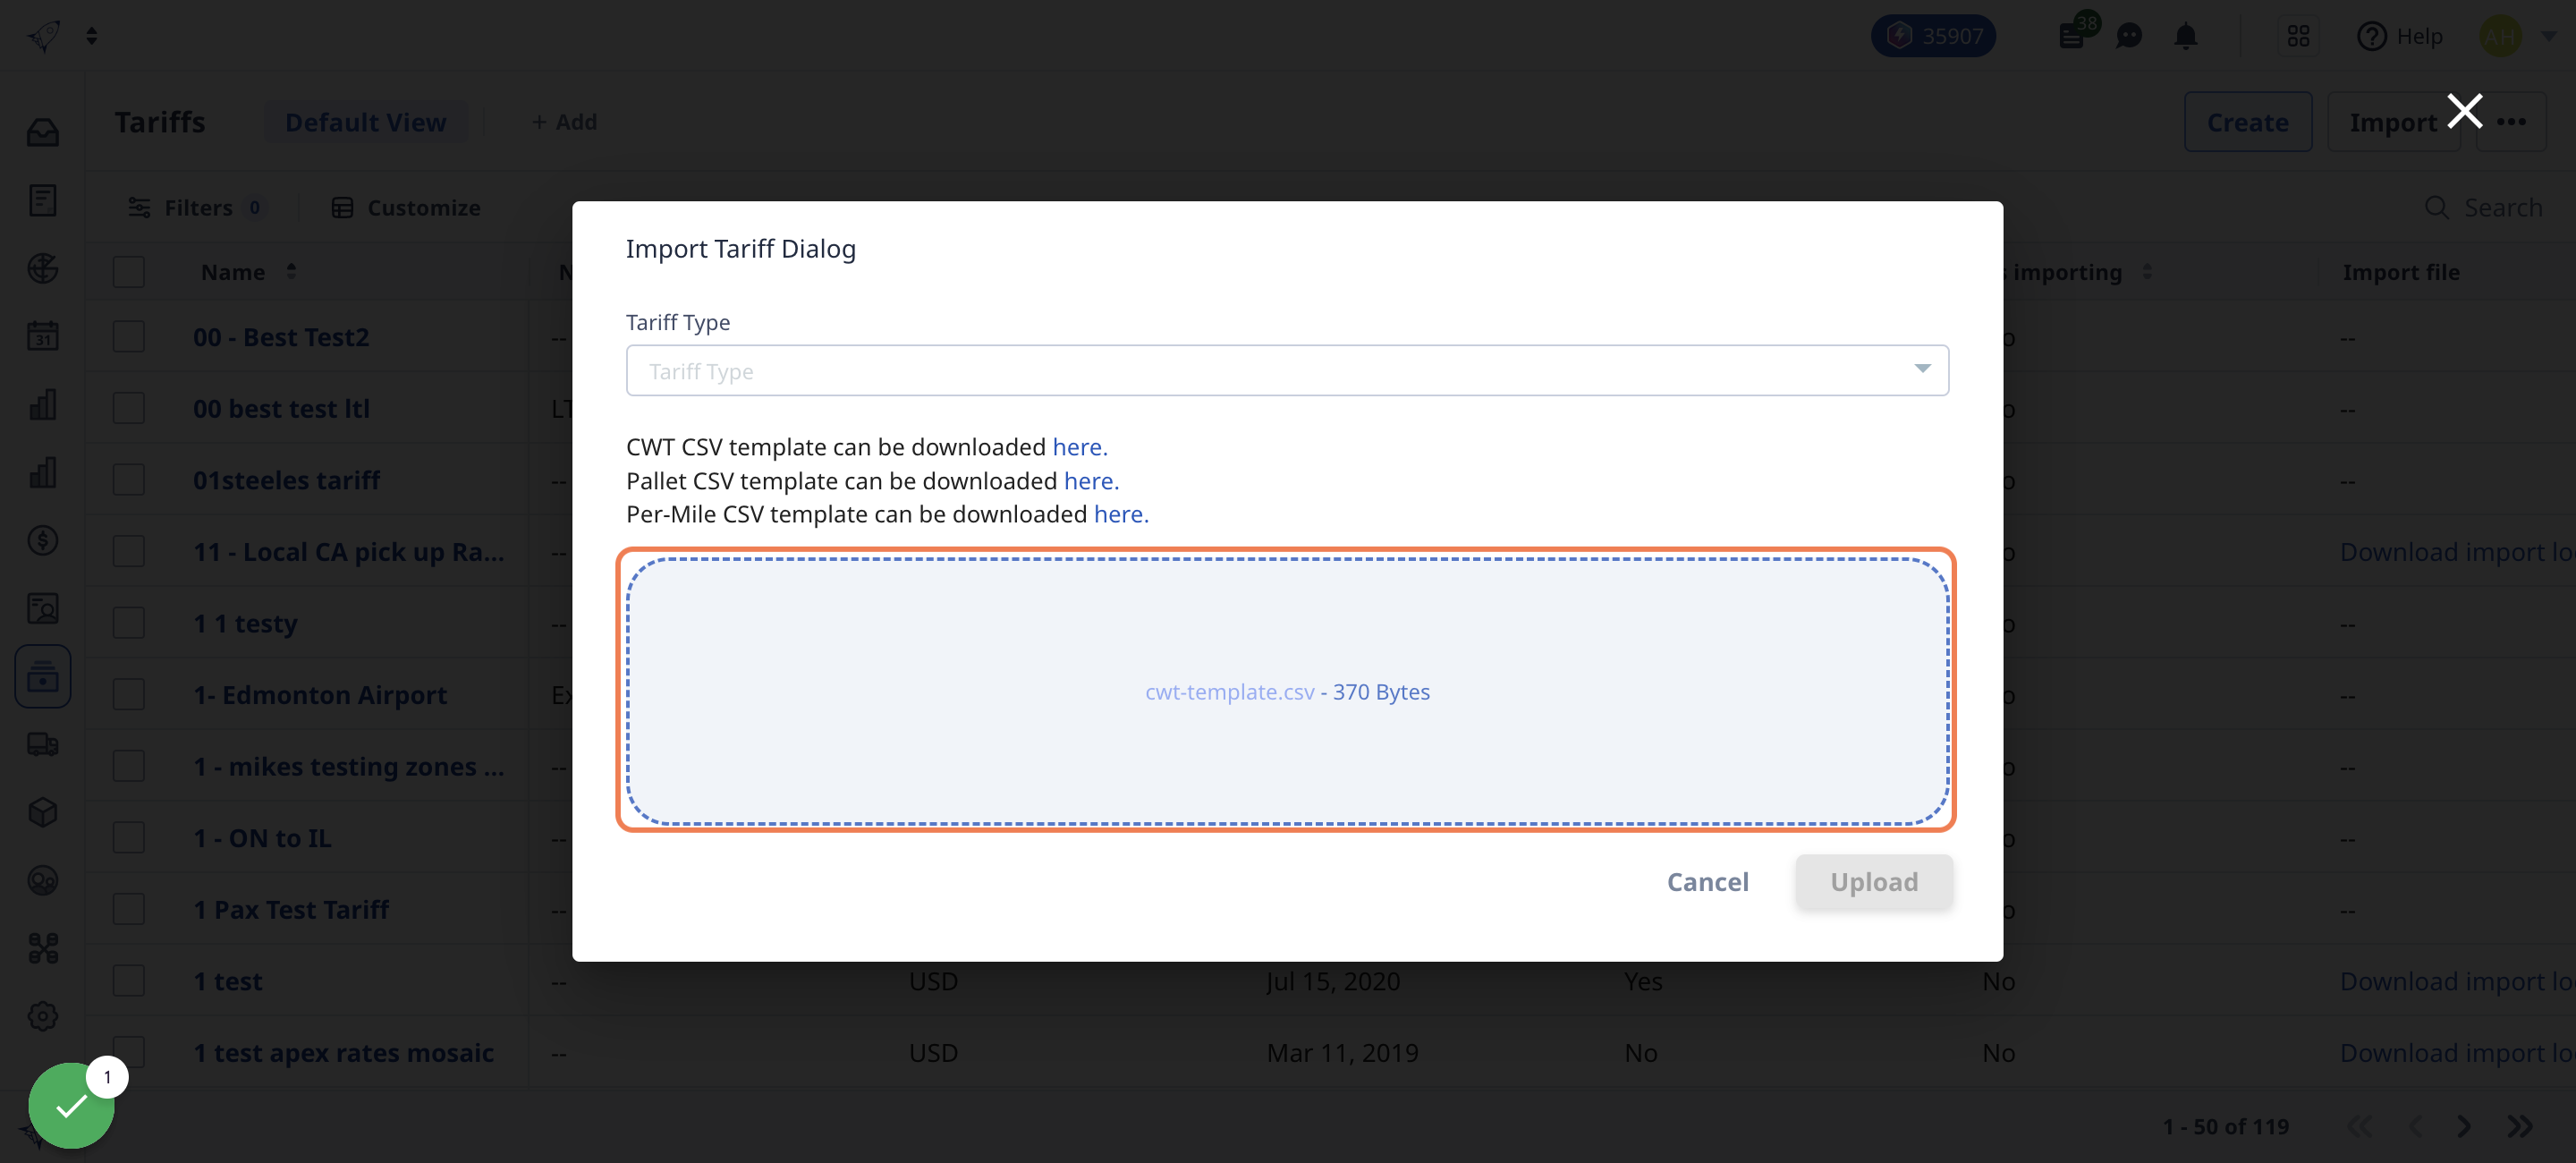
Import Tariffs
Already have your tariffs in a spreadsheet, and don't want to plug them all in manually? Look no further than the "Import Tariff" feature.
1. In the Tariffs module, click "Import"
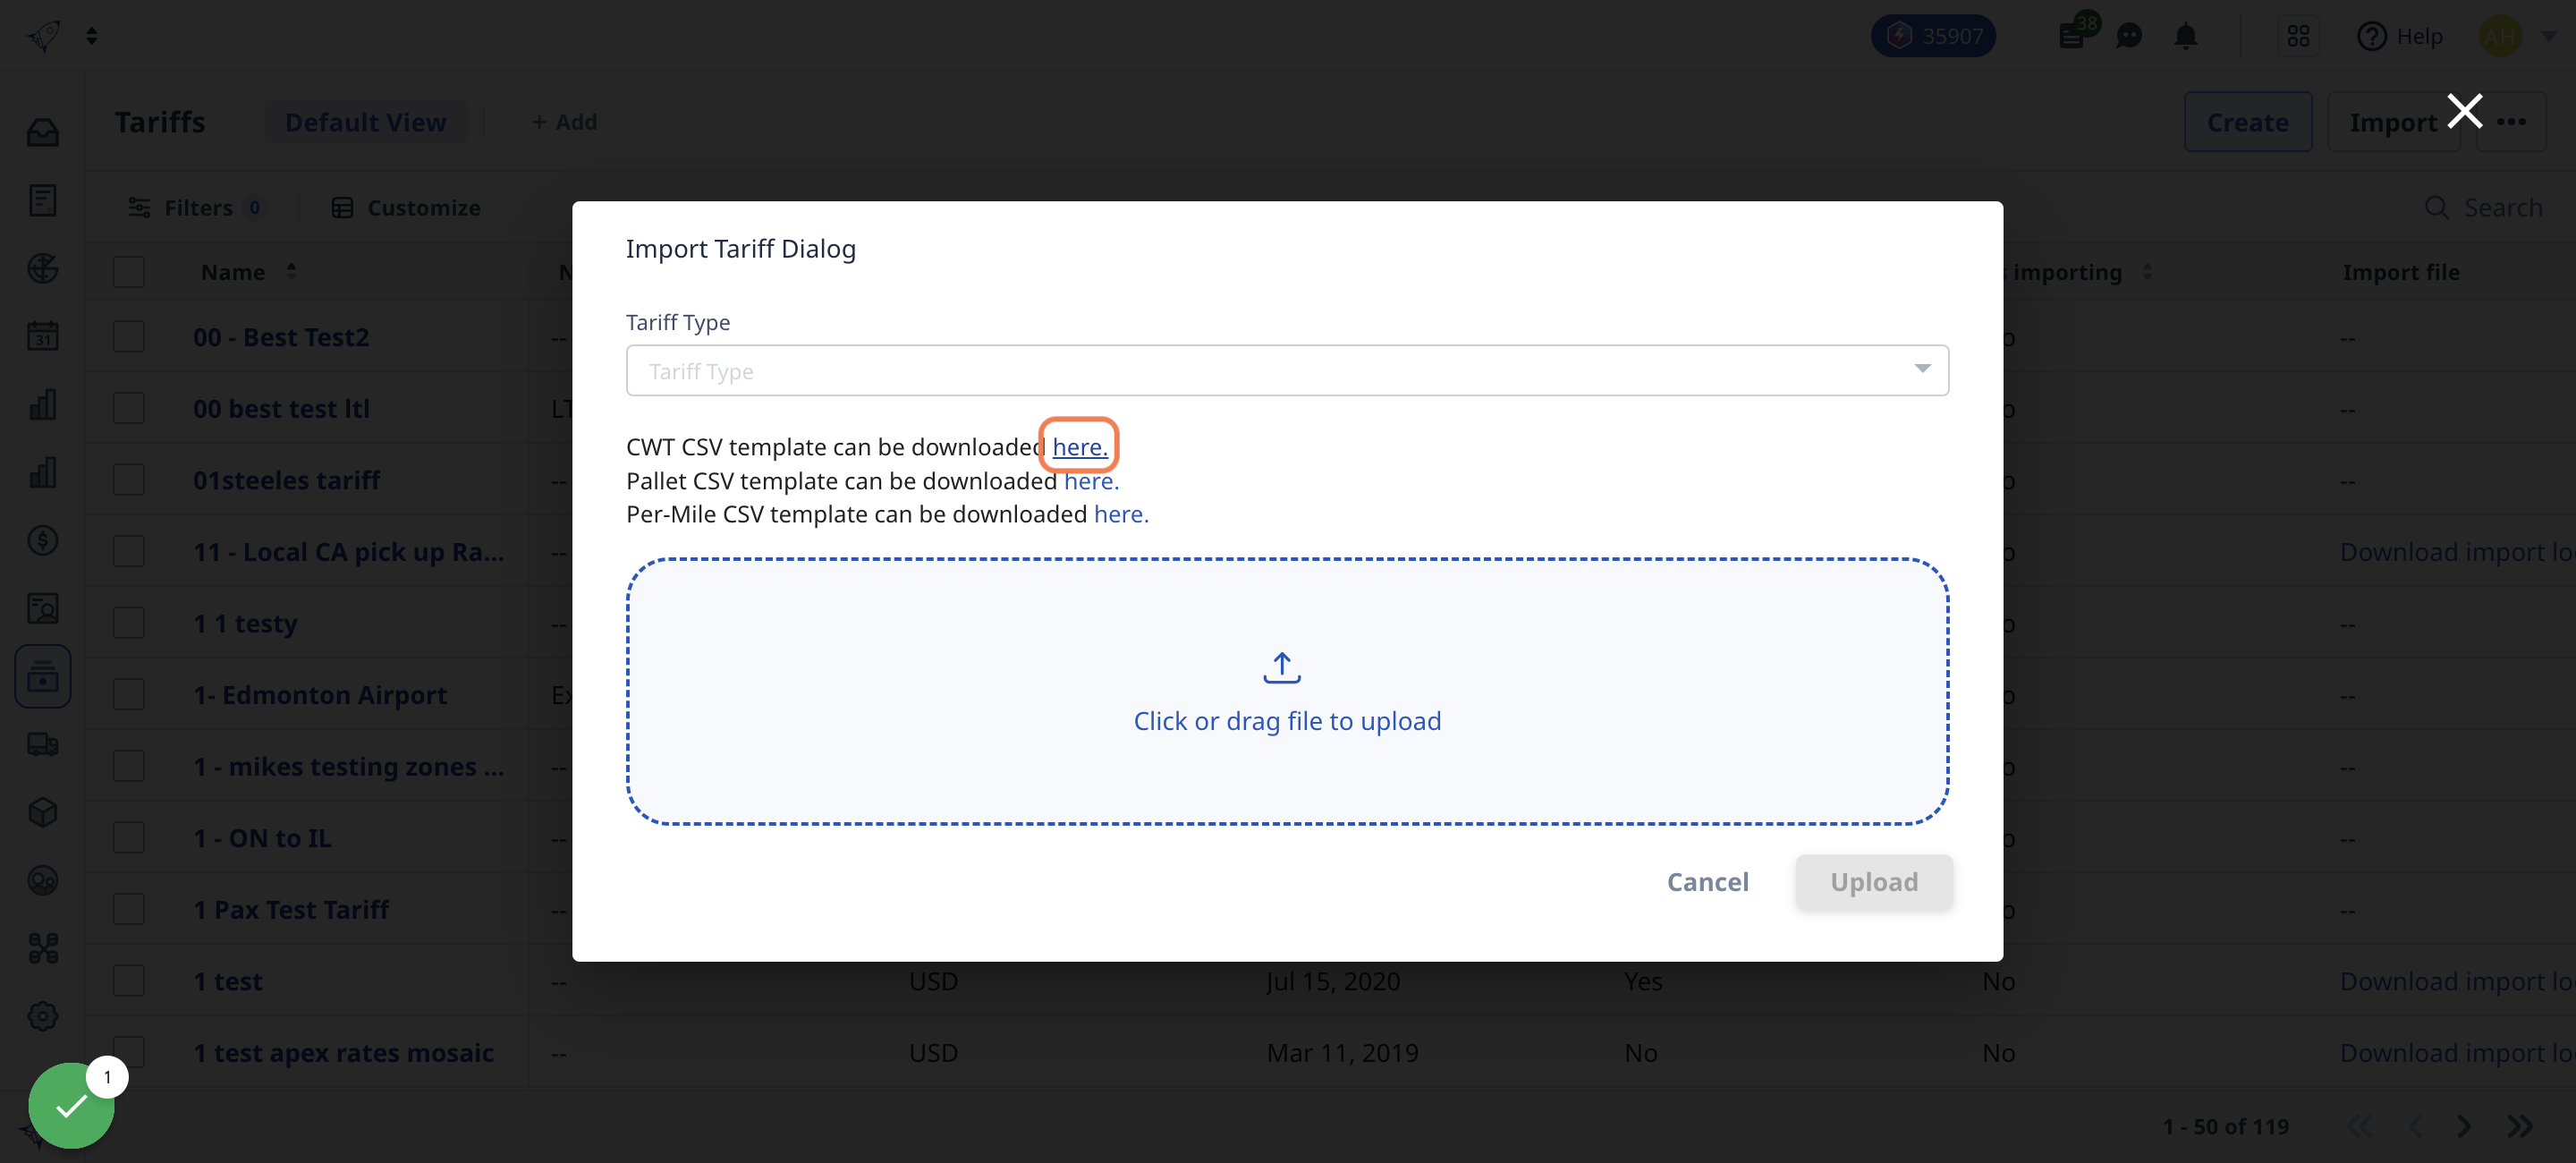
2. In order for Rose Rocket to recognize your spreadsheet data, it must be in the correct format. To download a template, click "here" next to the tariff type you wish to upload.
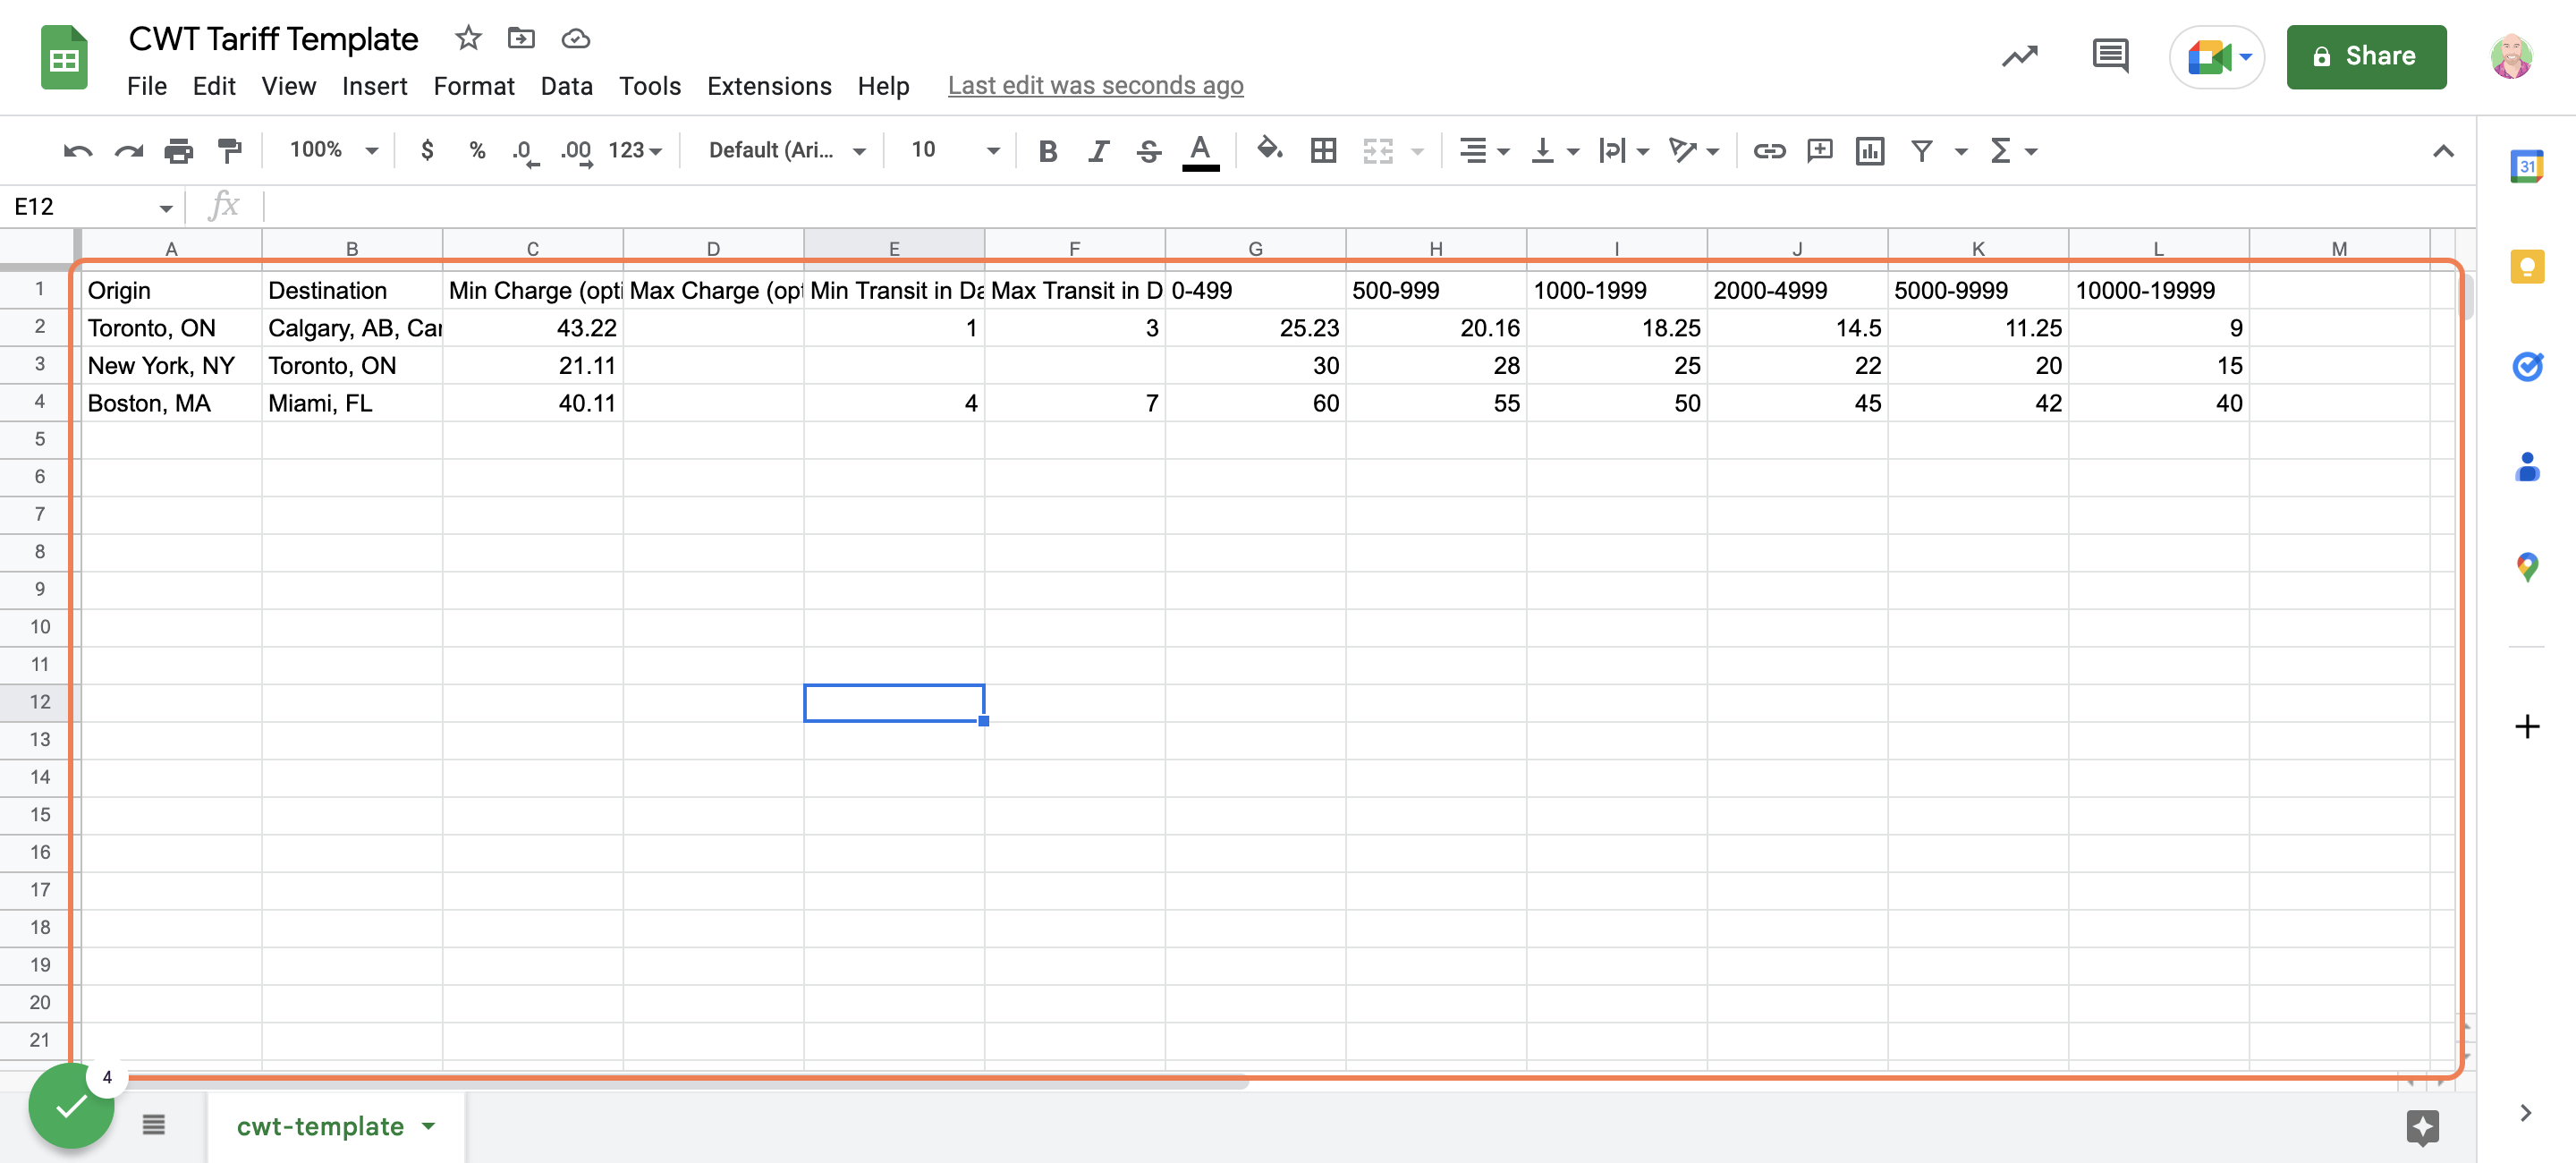
3. Open the .csv template in your spreadsheet software, and fill in the tariff data under the right fields
4. Once complete, save your sheet and upload it to Rose Rocket
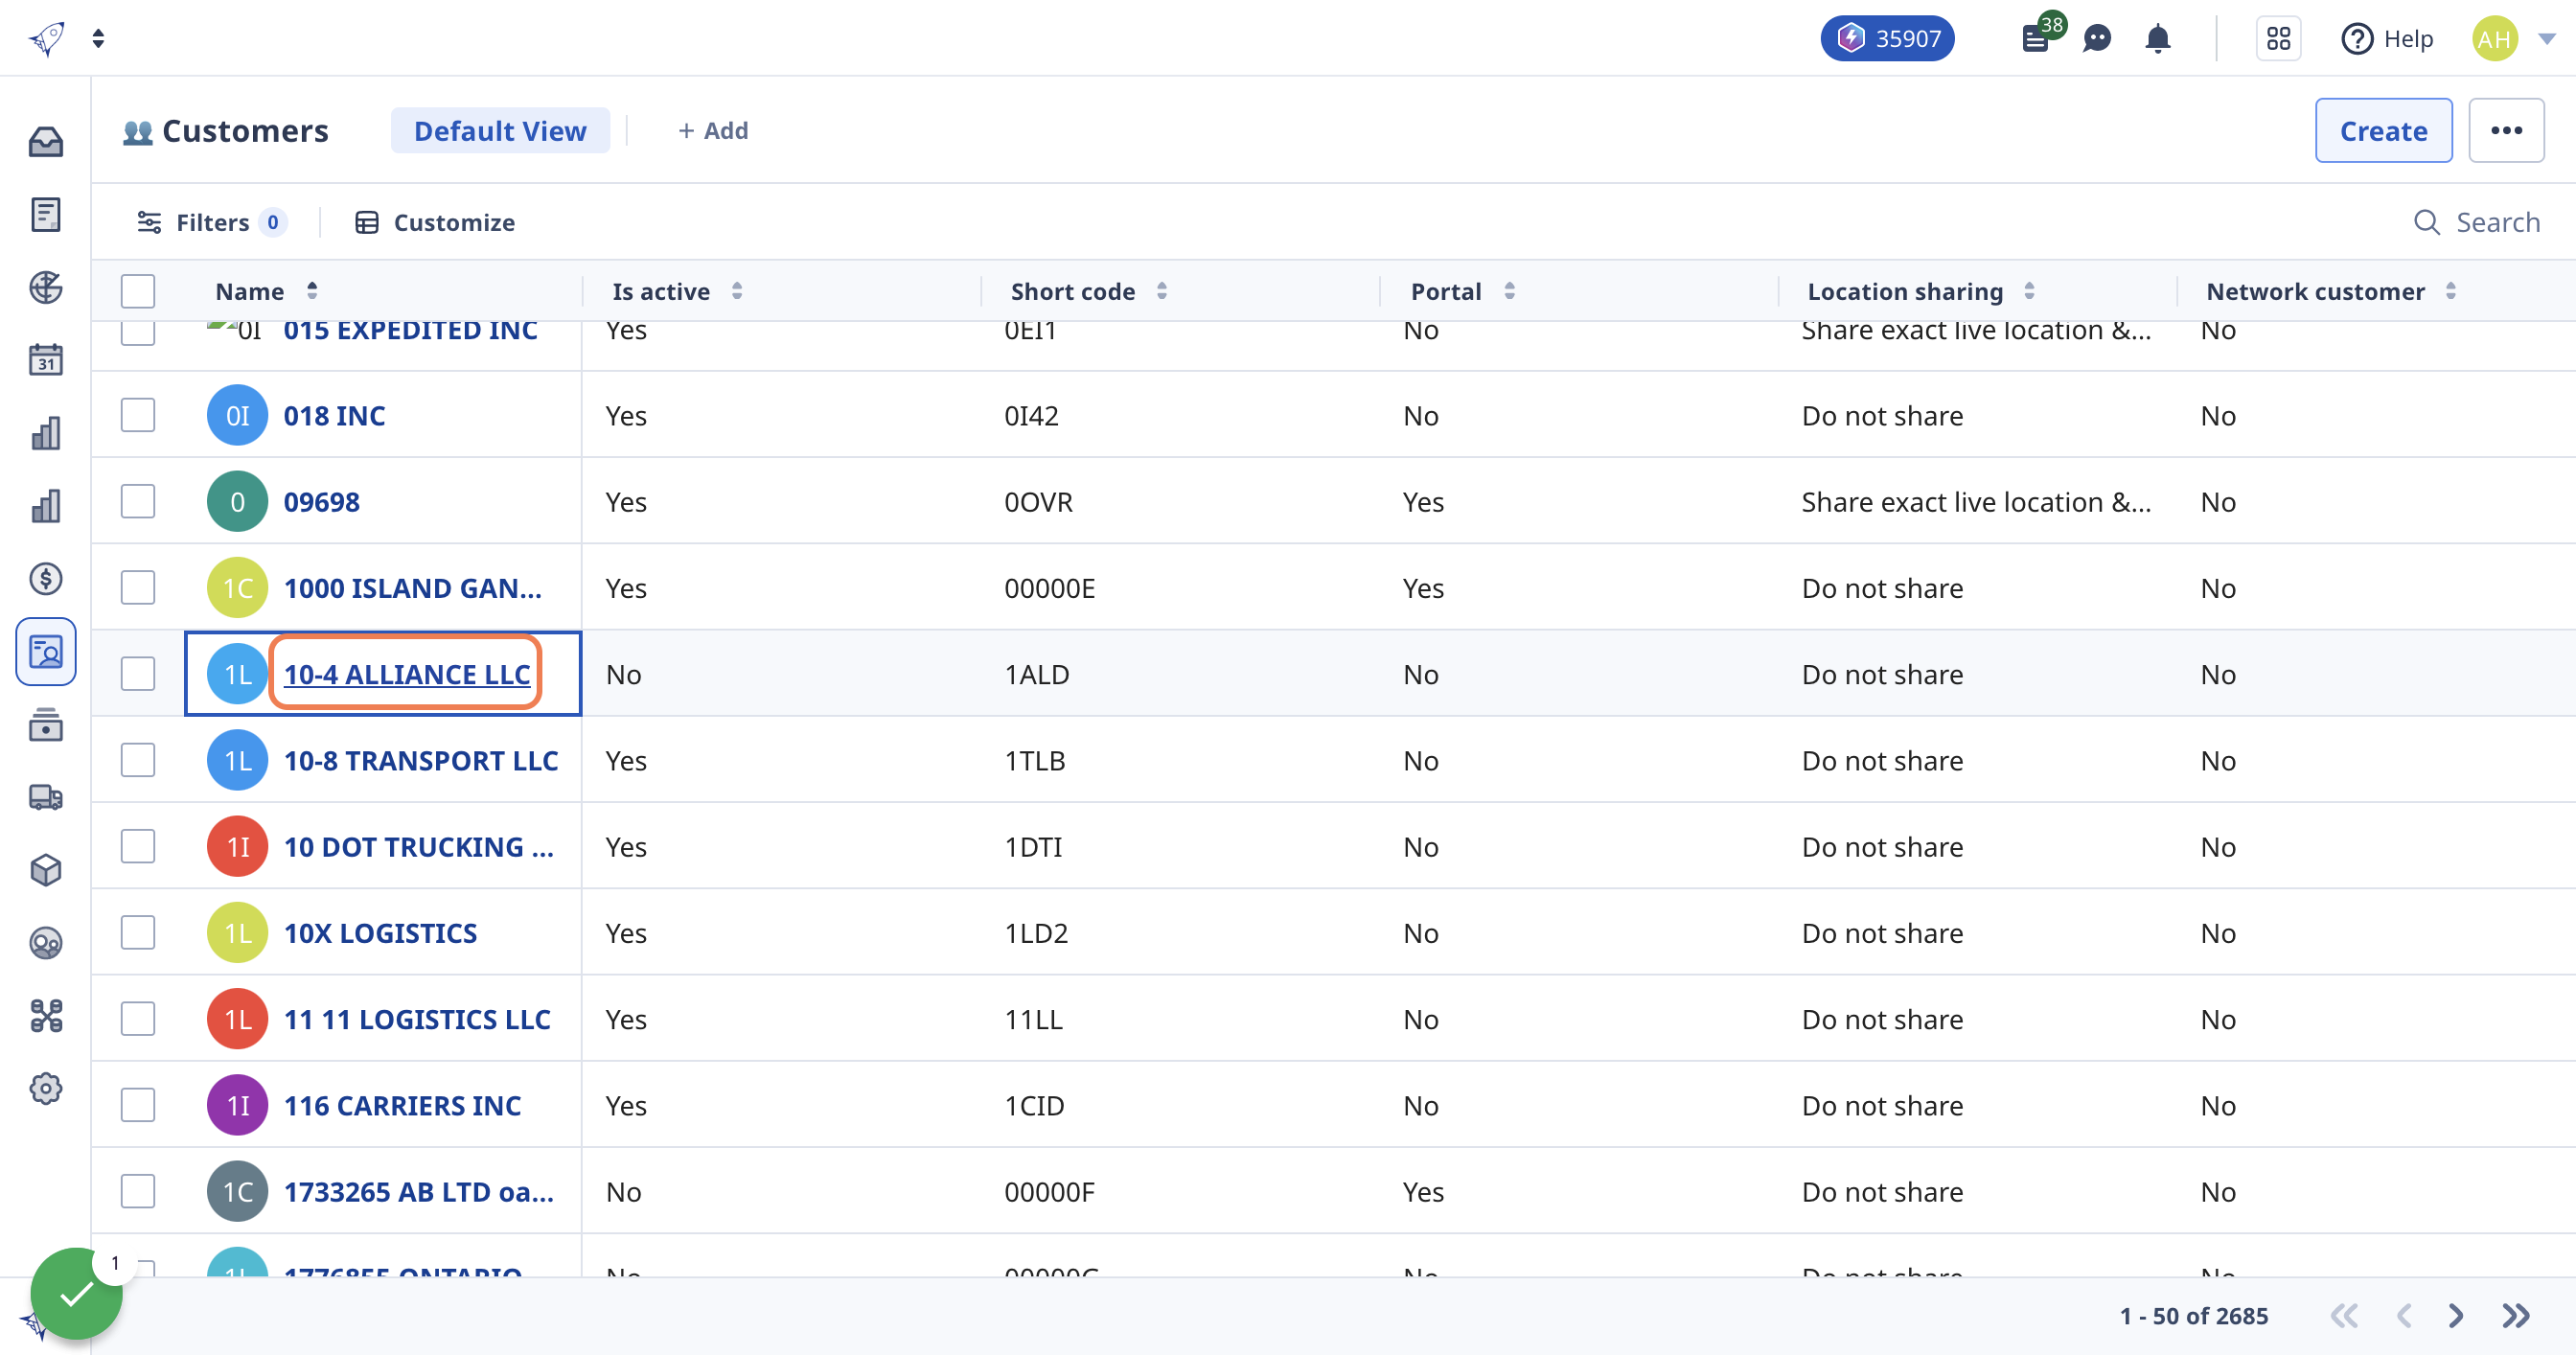
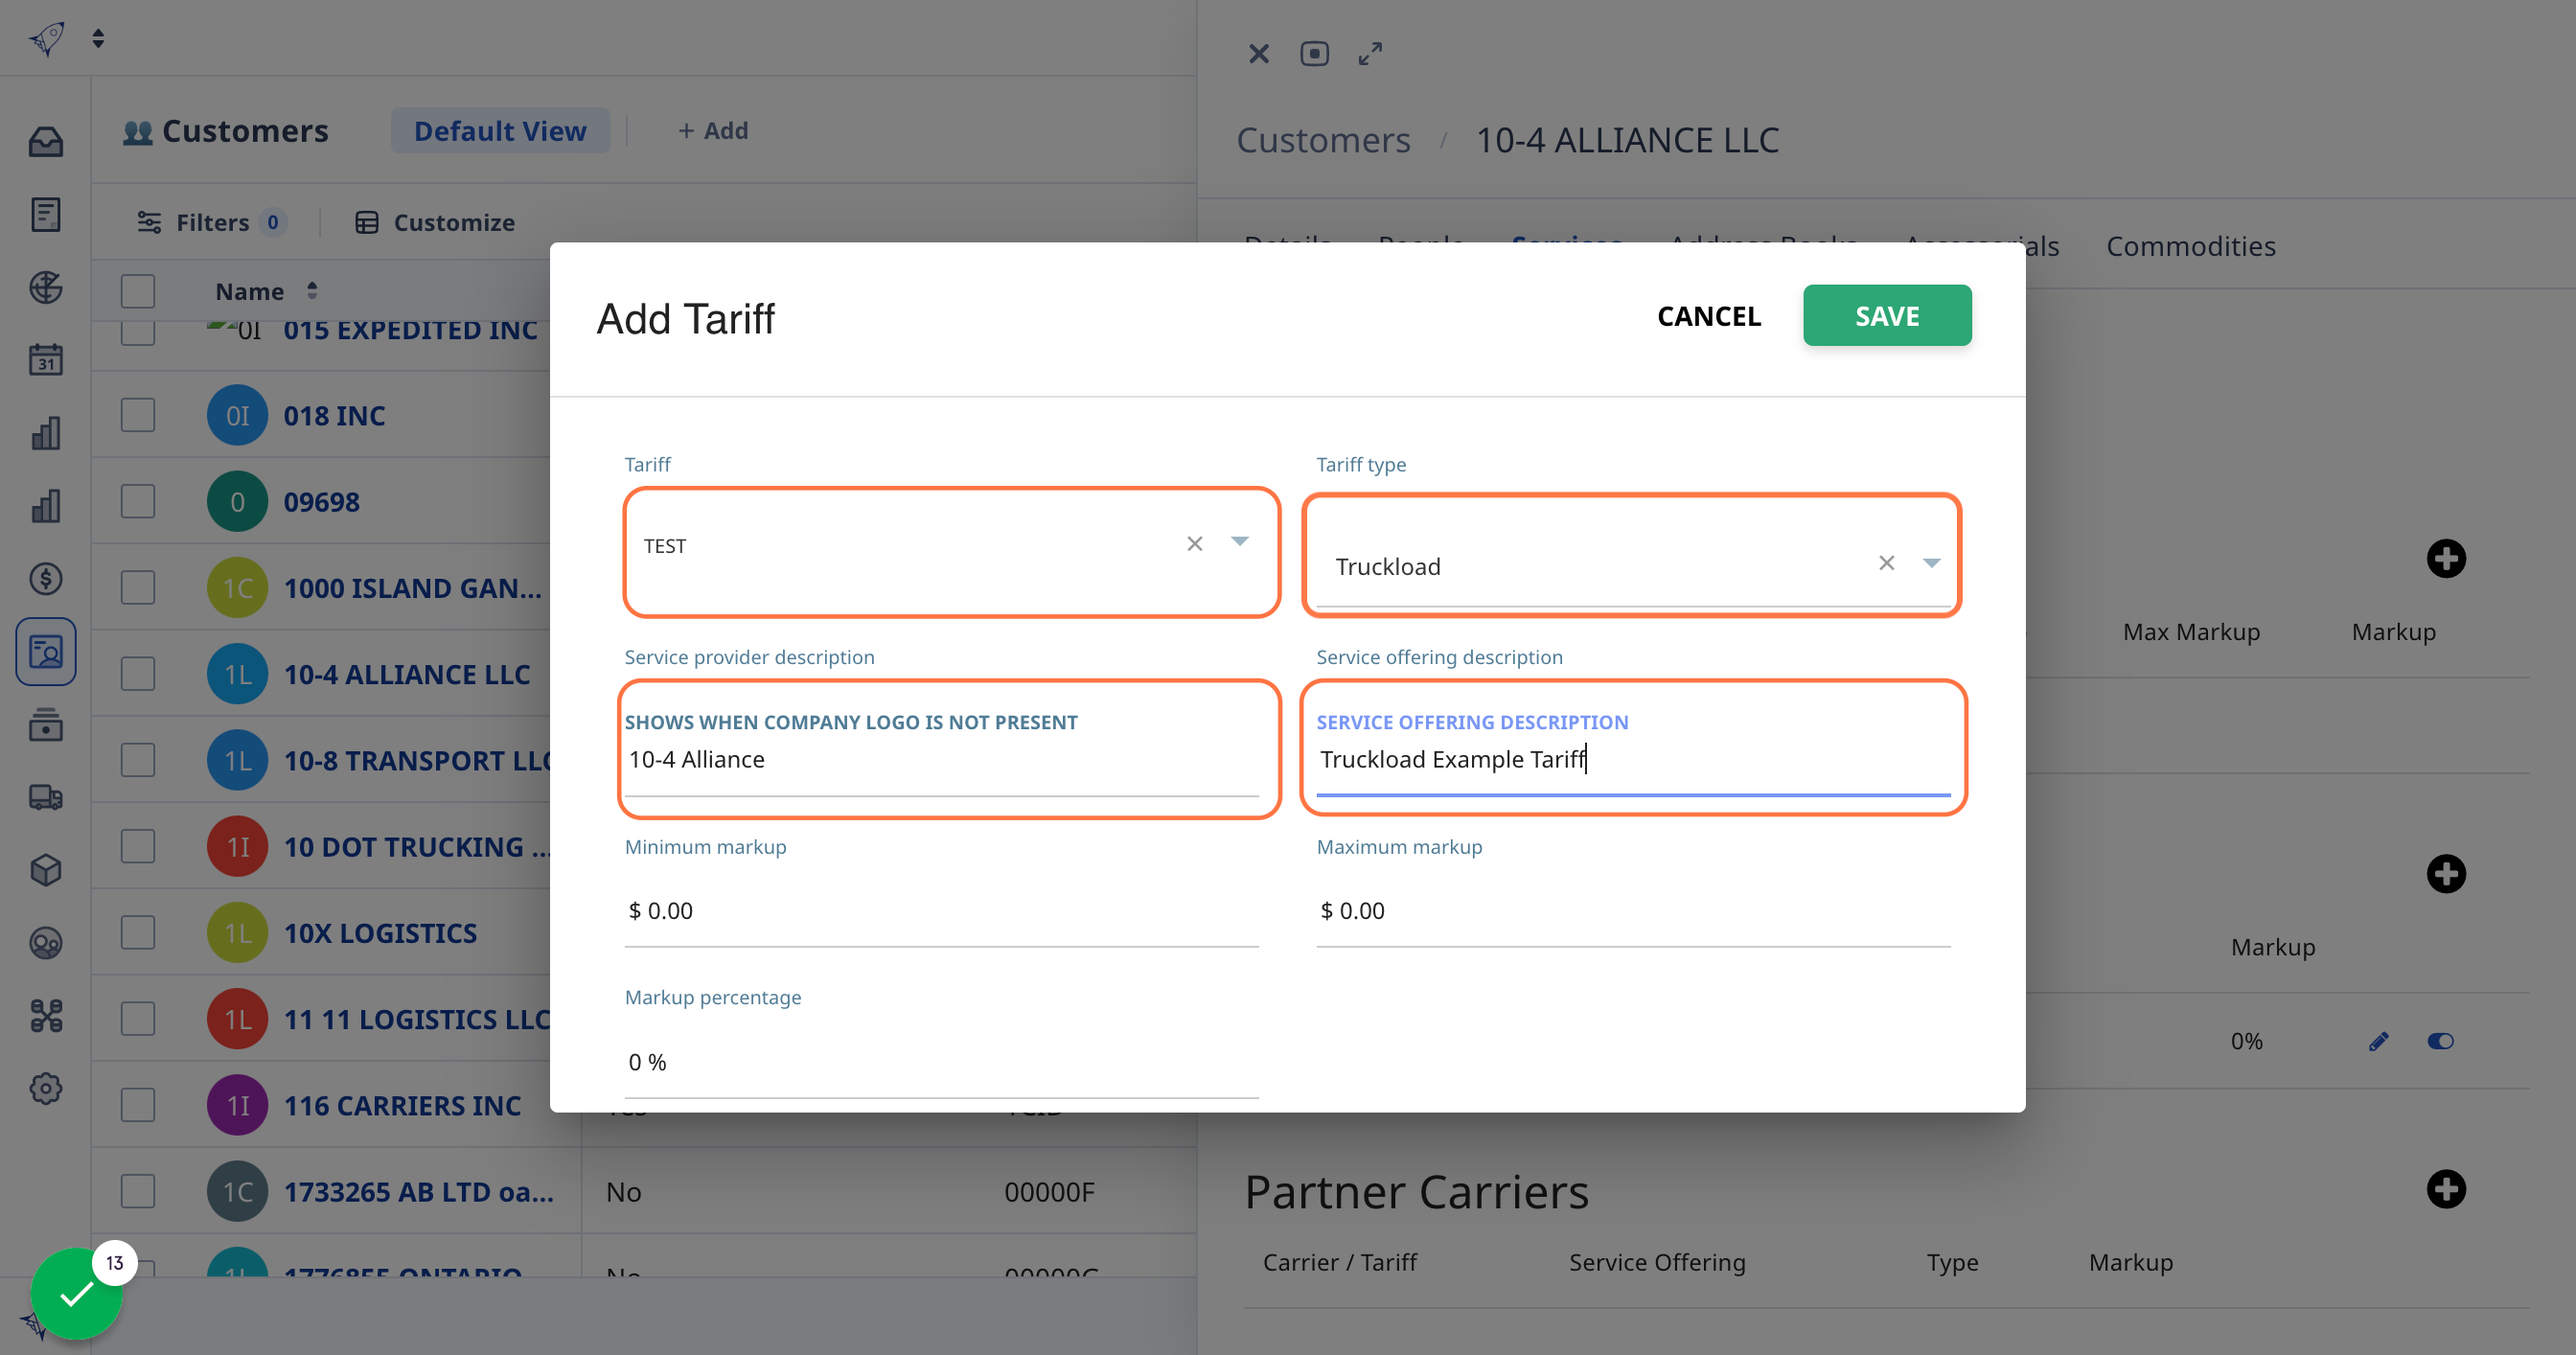
Step 3: Attach the tariff to customers
Once the tariff is built, it’s time to attach it to a customer profile. Tariffs can be added to one or more customers depending on if it's customer-specific or a general tariff. Similarly, customer profiles can have one or more tariffs attached to them.
1. Go to the Customers module

2. Click on the customer you want to apply a tariff to
3. On the customers profile page, click the "Services" tab
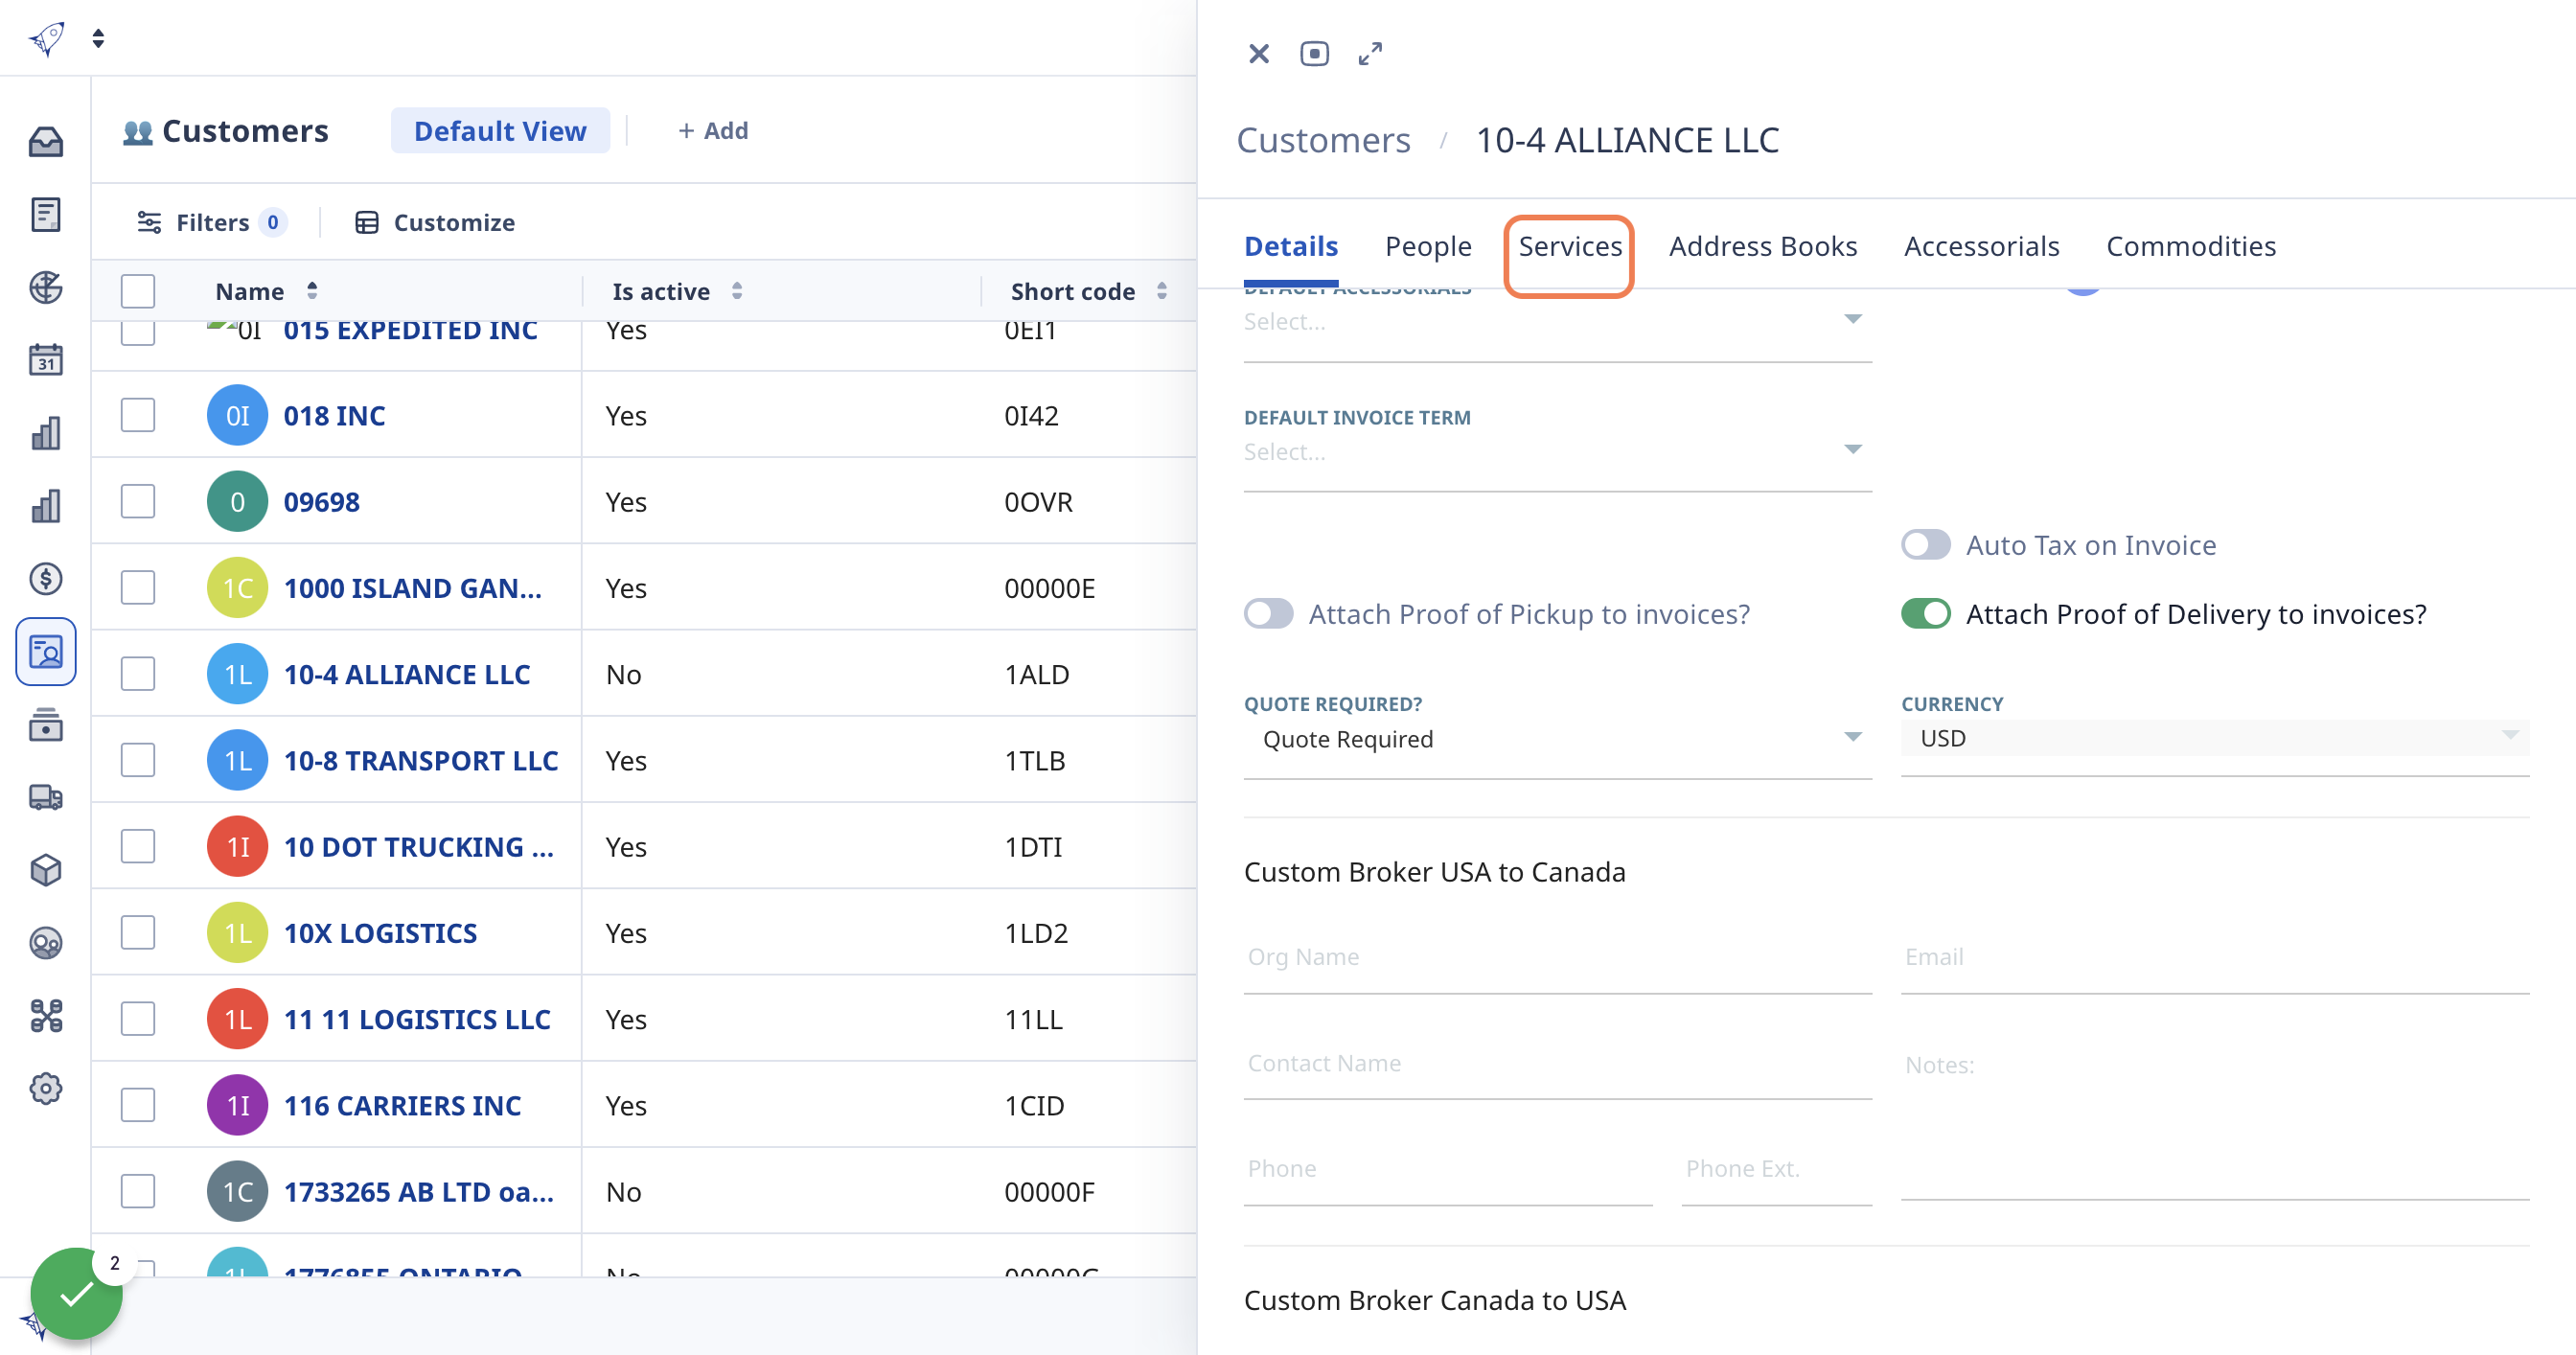
3. In the Customer Tariffs section, select the "+" to add tariff
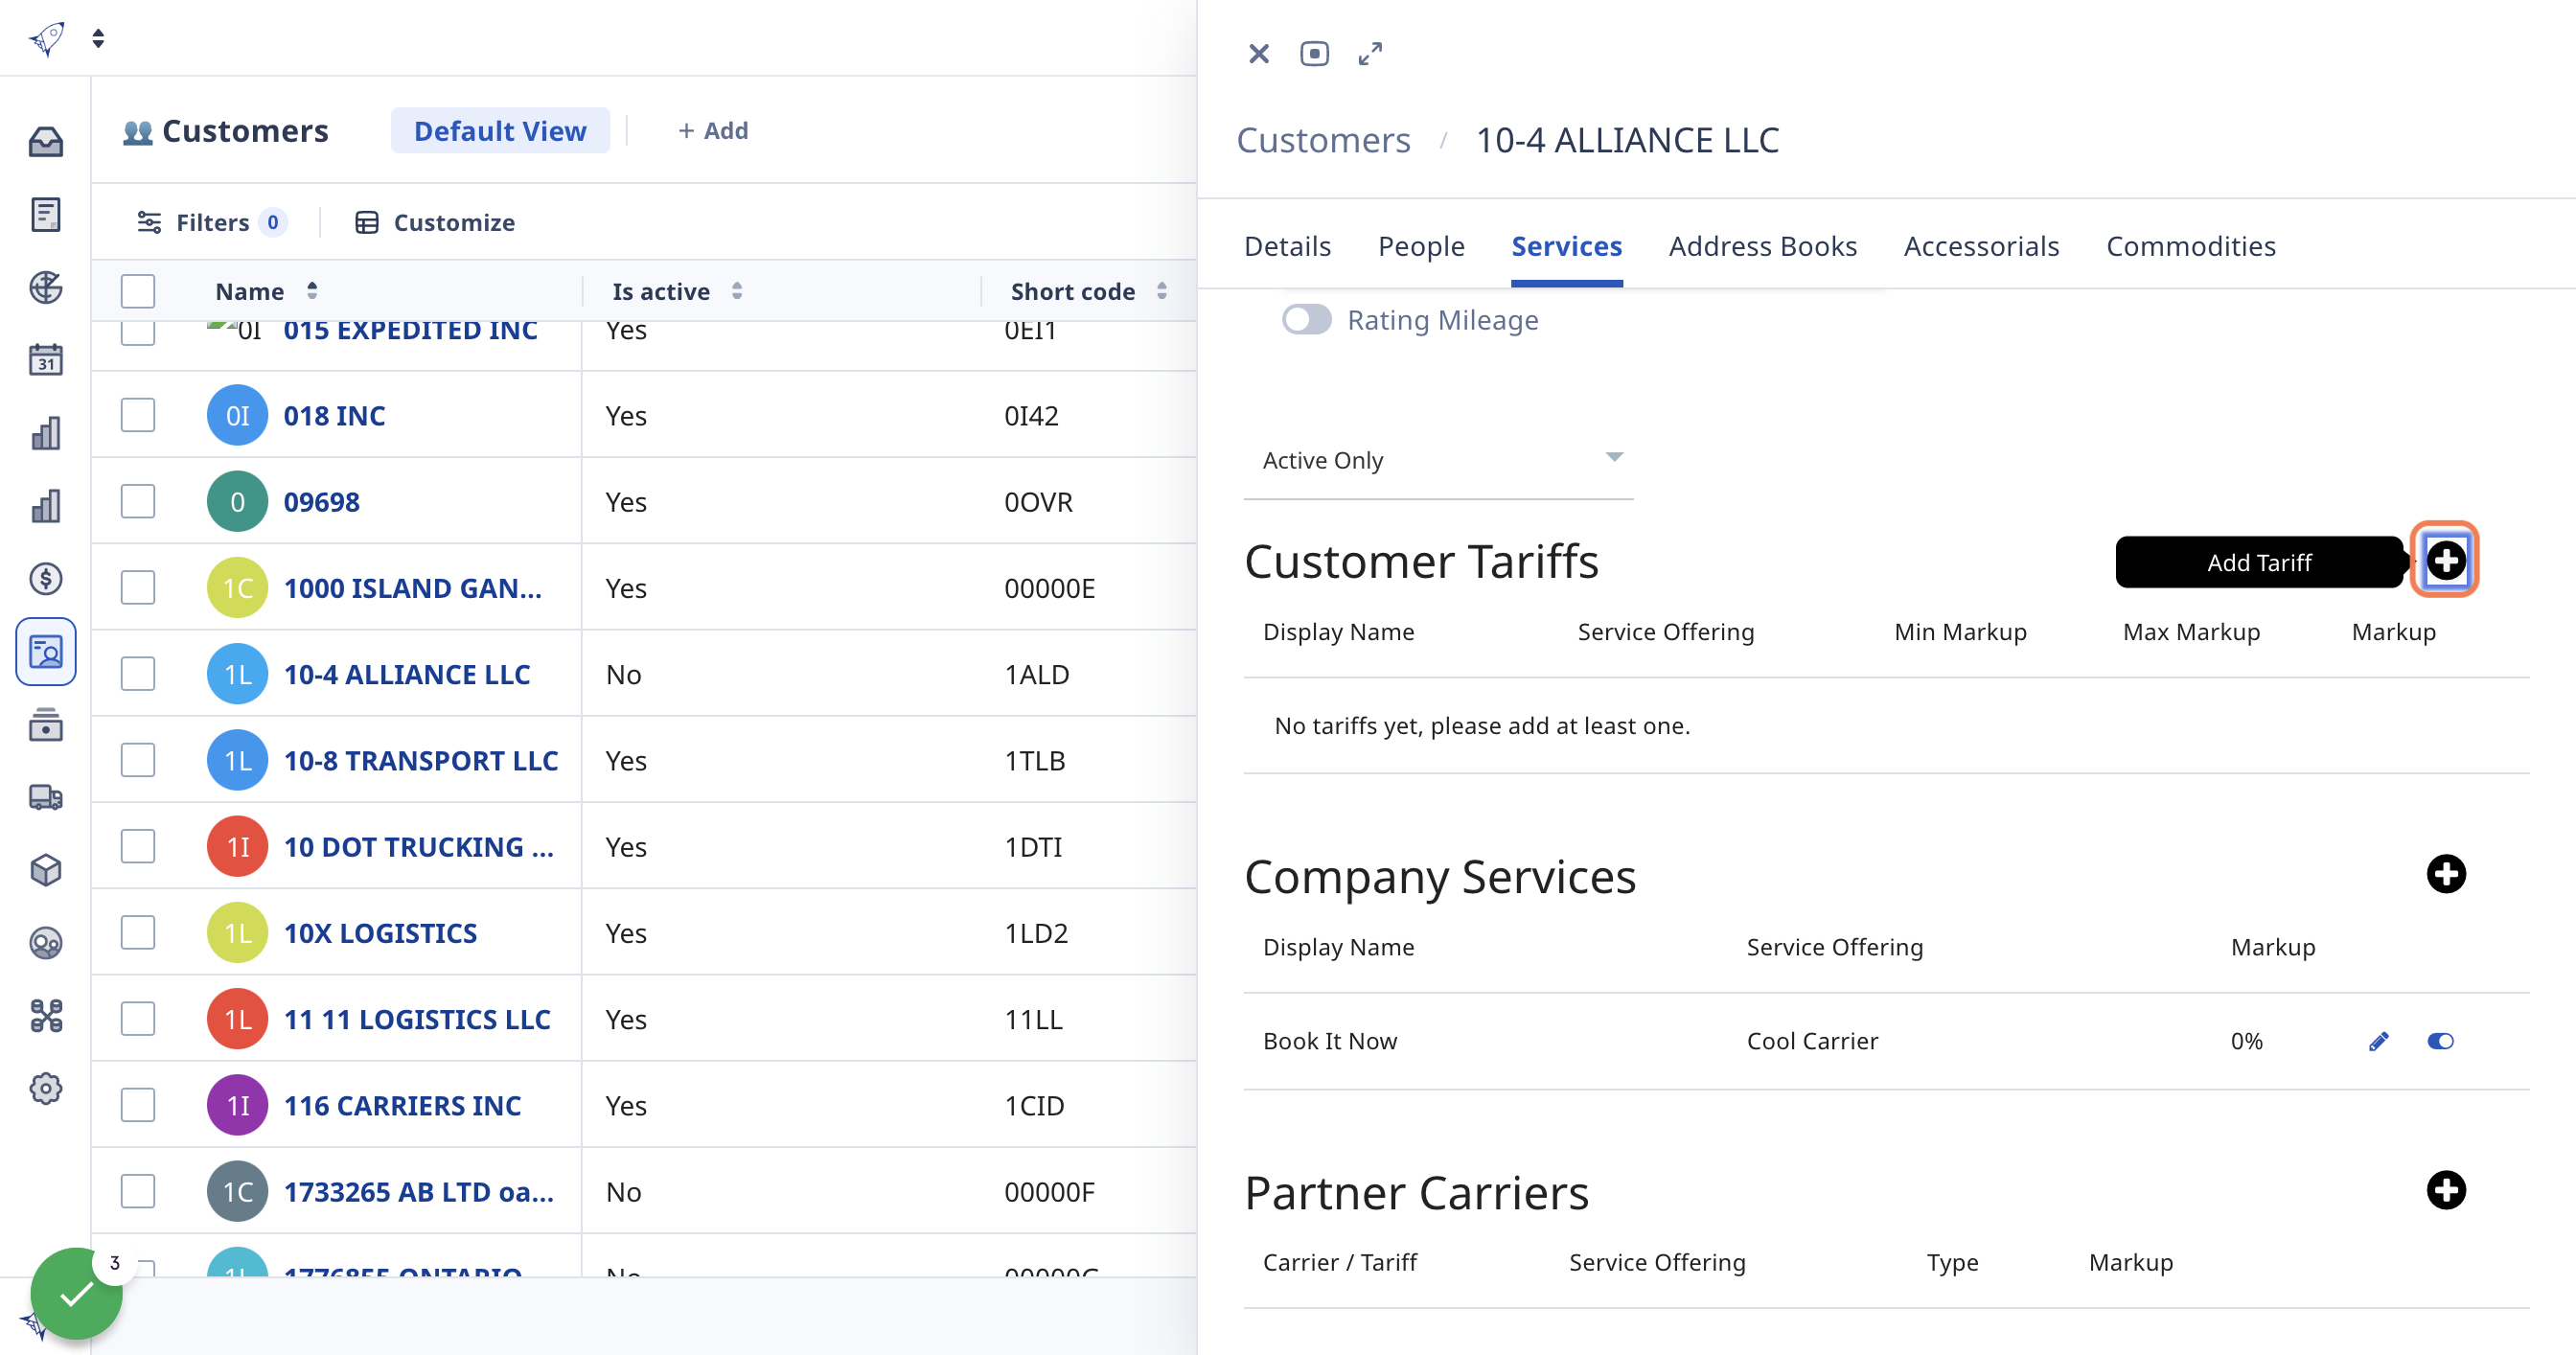
4. Find the tariff you want to add, and the service you want it to apply to. Once done, add a company name and description, and click "Save".
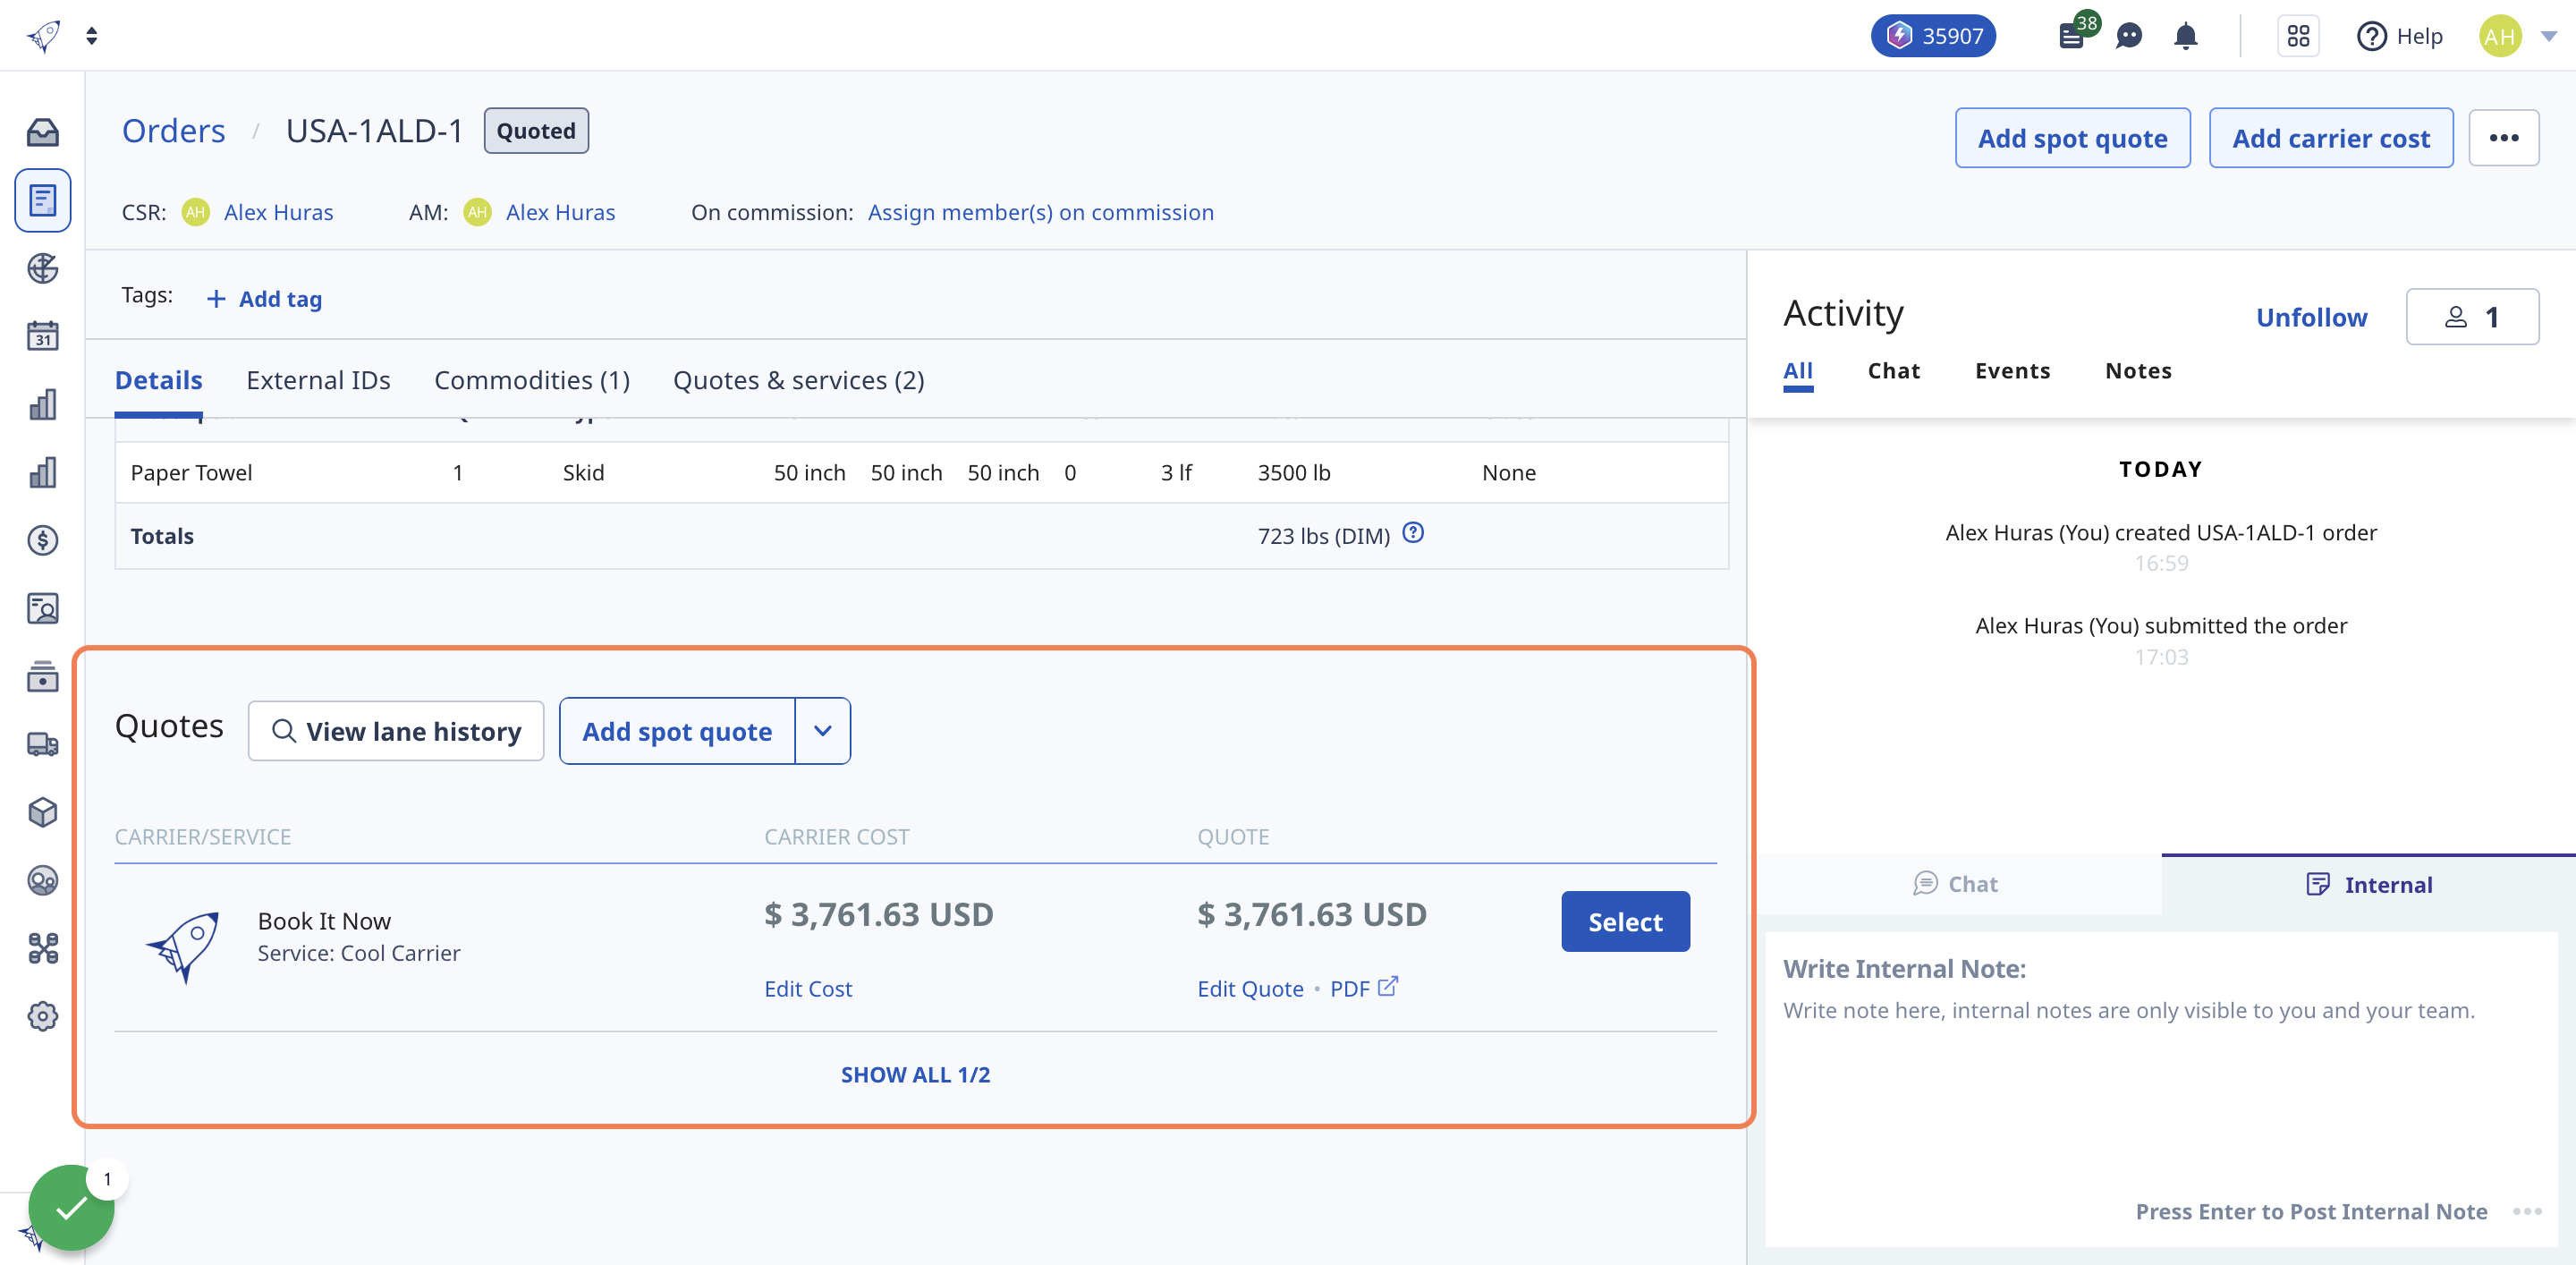
Step 4: Automatically fetch rates
Once you’ve created a zone, added the rate and attached it to your customer, your tariff is ready to use. When creating an order, the fetching rates will be pulled onto the order automatically. If you edit an order, you have the option to re-rate it.