Table of Contents
- What is a Customer Portal?
- Activating your Customer Portal
- Viewing your orders
- Share e-Tracking Page
- Creating a new order
- Request a Quick Quote
- Add/remove/edit team member access
- Updating your settings
What is a Customer Portal?
The Customer Portal is your one-stop shop to get view your ongoing and historical orders, request spot quotes, submit new orders, track and trace shipments, retrieve or upload documents, and even chat online with your partner broker or carrier.
Stop wasting time requesting shipment updates by phone or email. Every shipment’s status is available at a glance or you can have status changes emailed to you.
Activating your Customer Portal
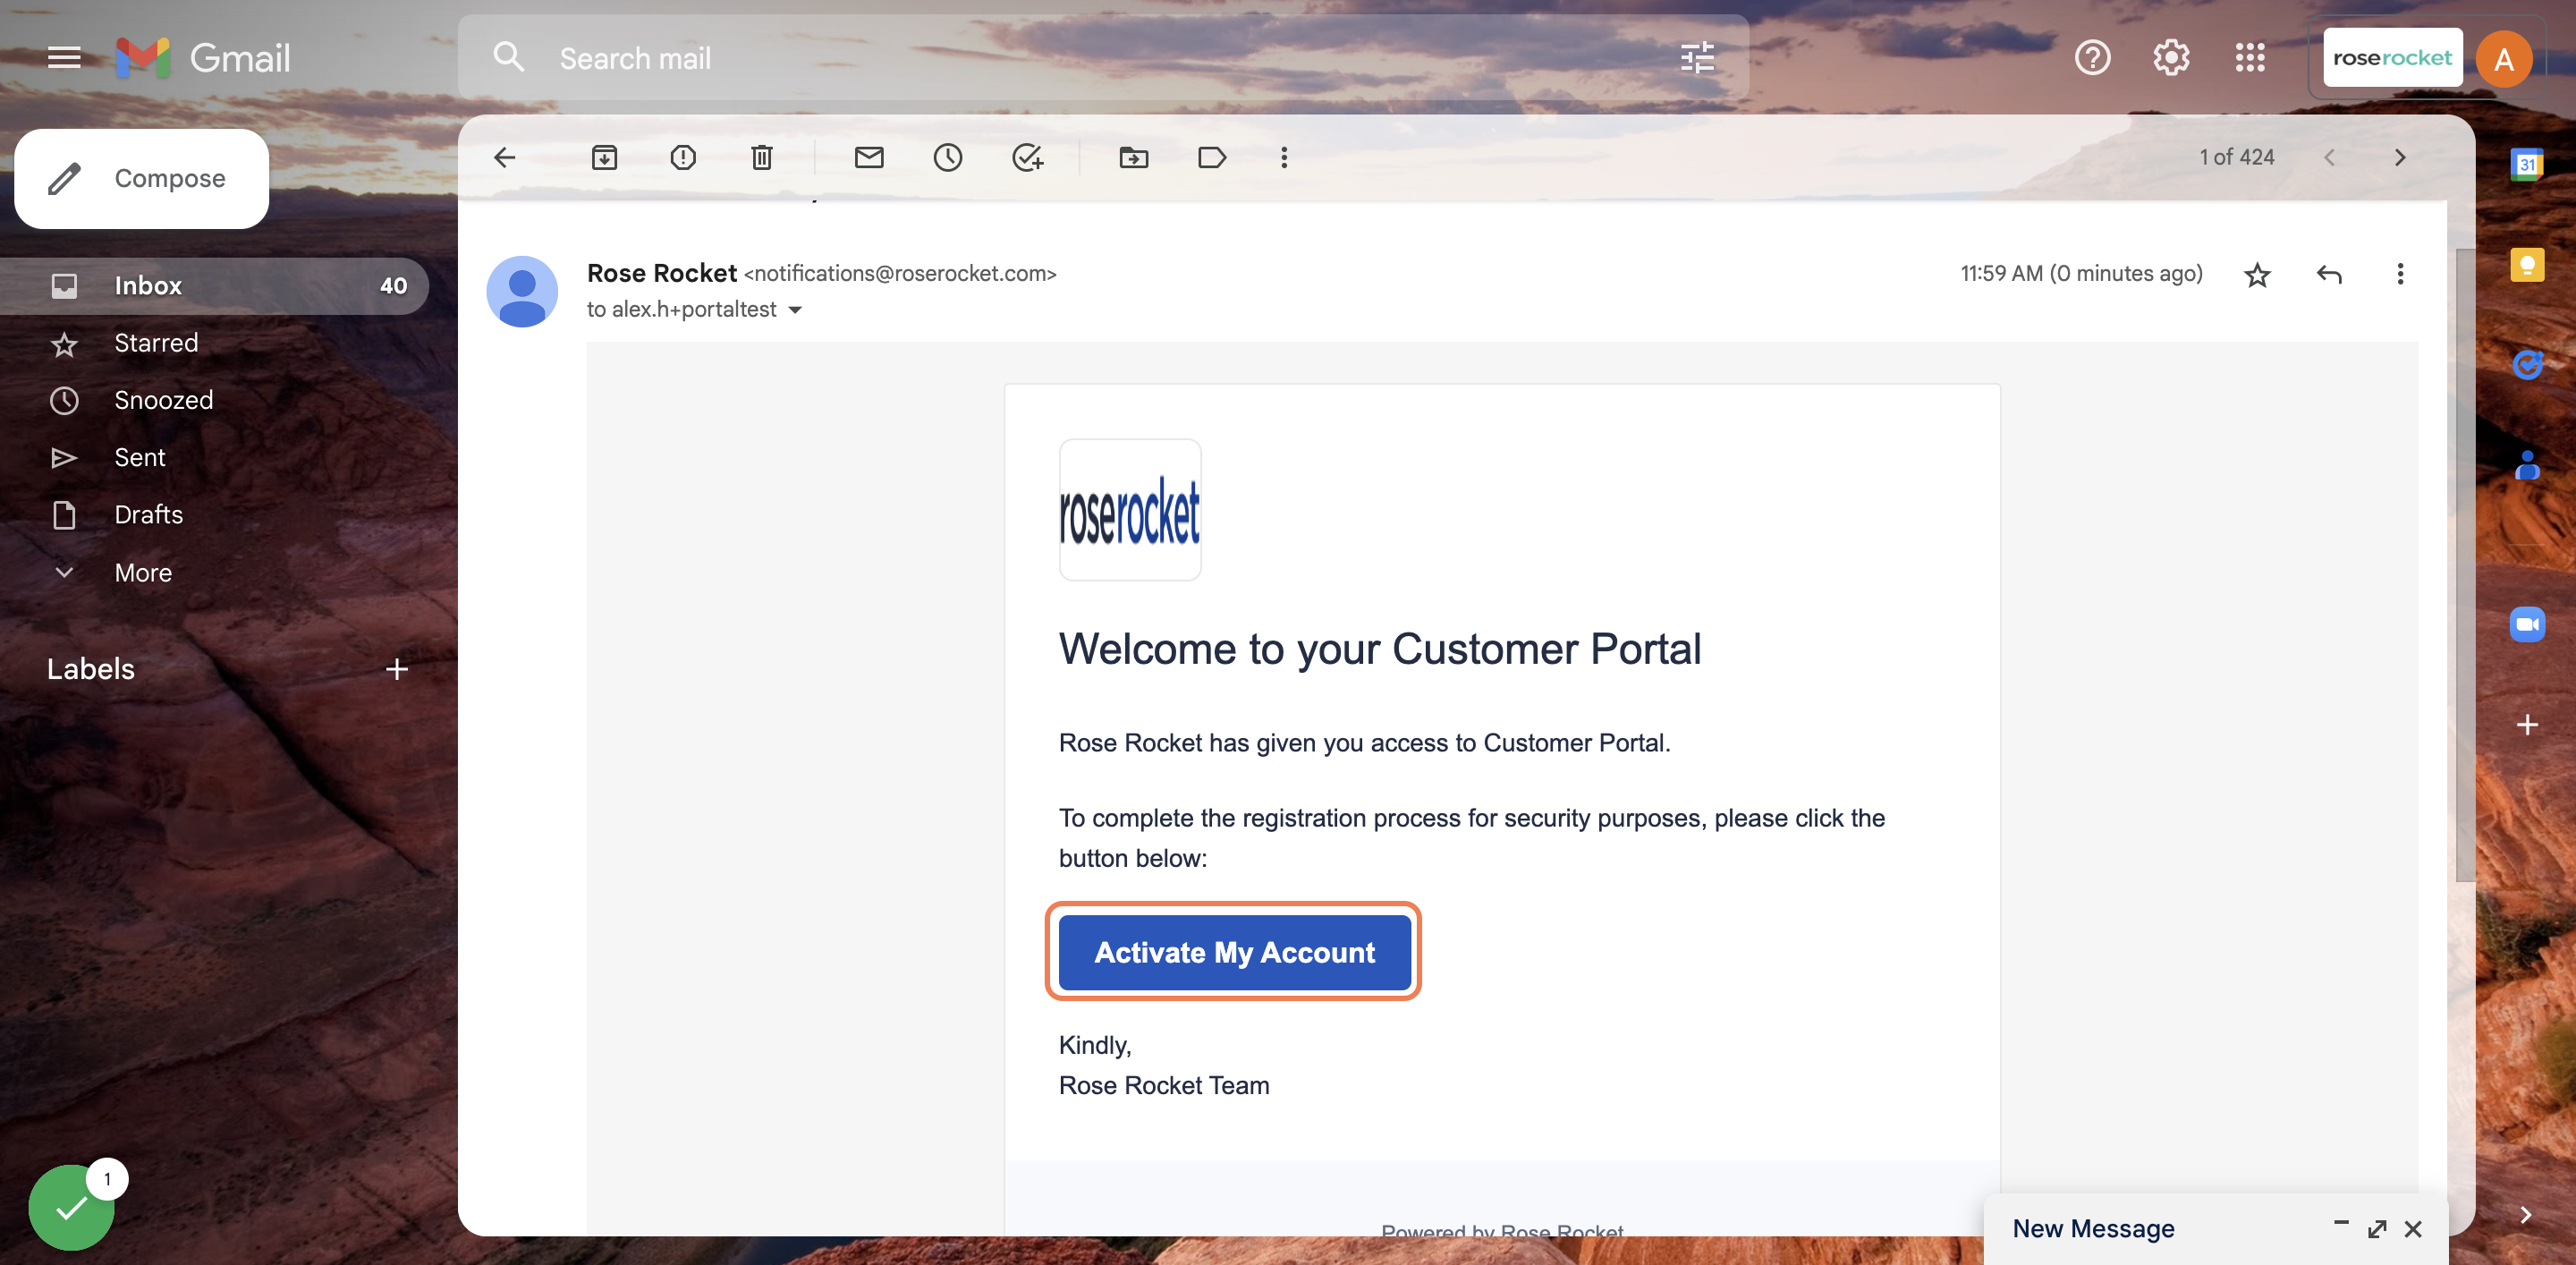
2. Enter your log-in information, and select "Activate"
You can create an account using Single Sign-On through Google or Microsoft, or create a new account manually

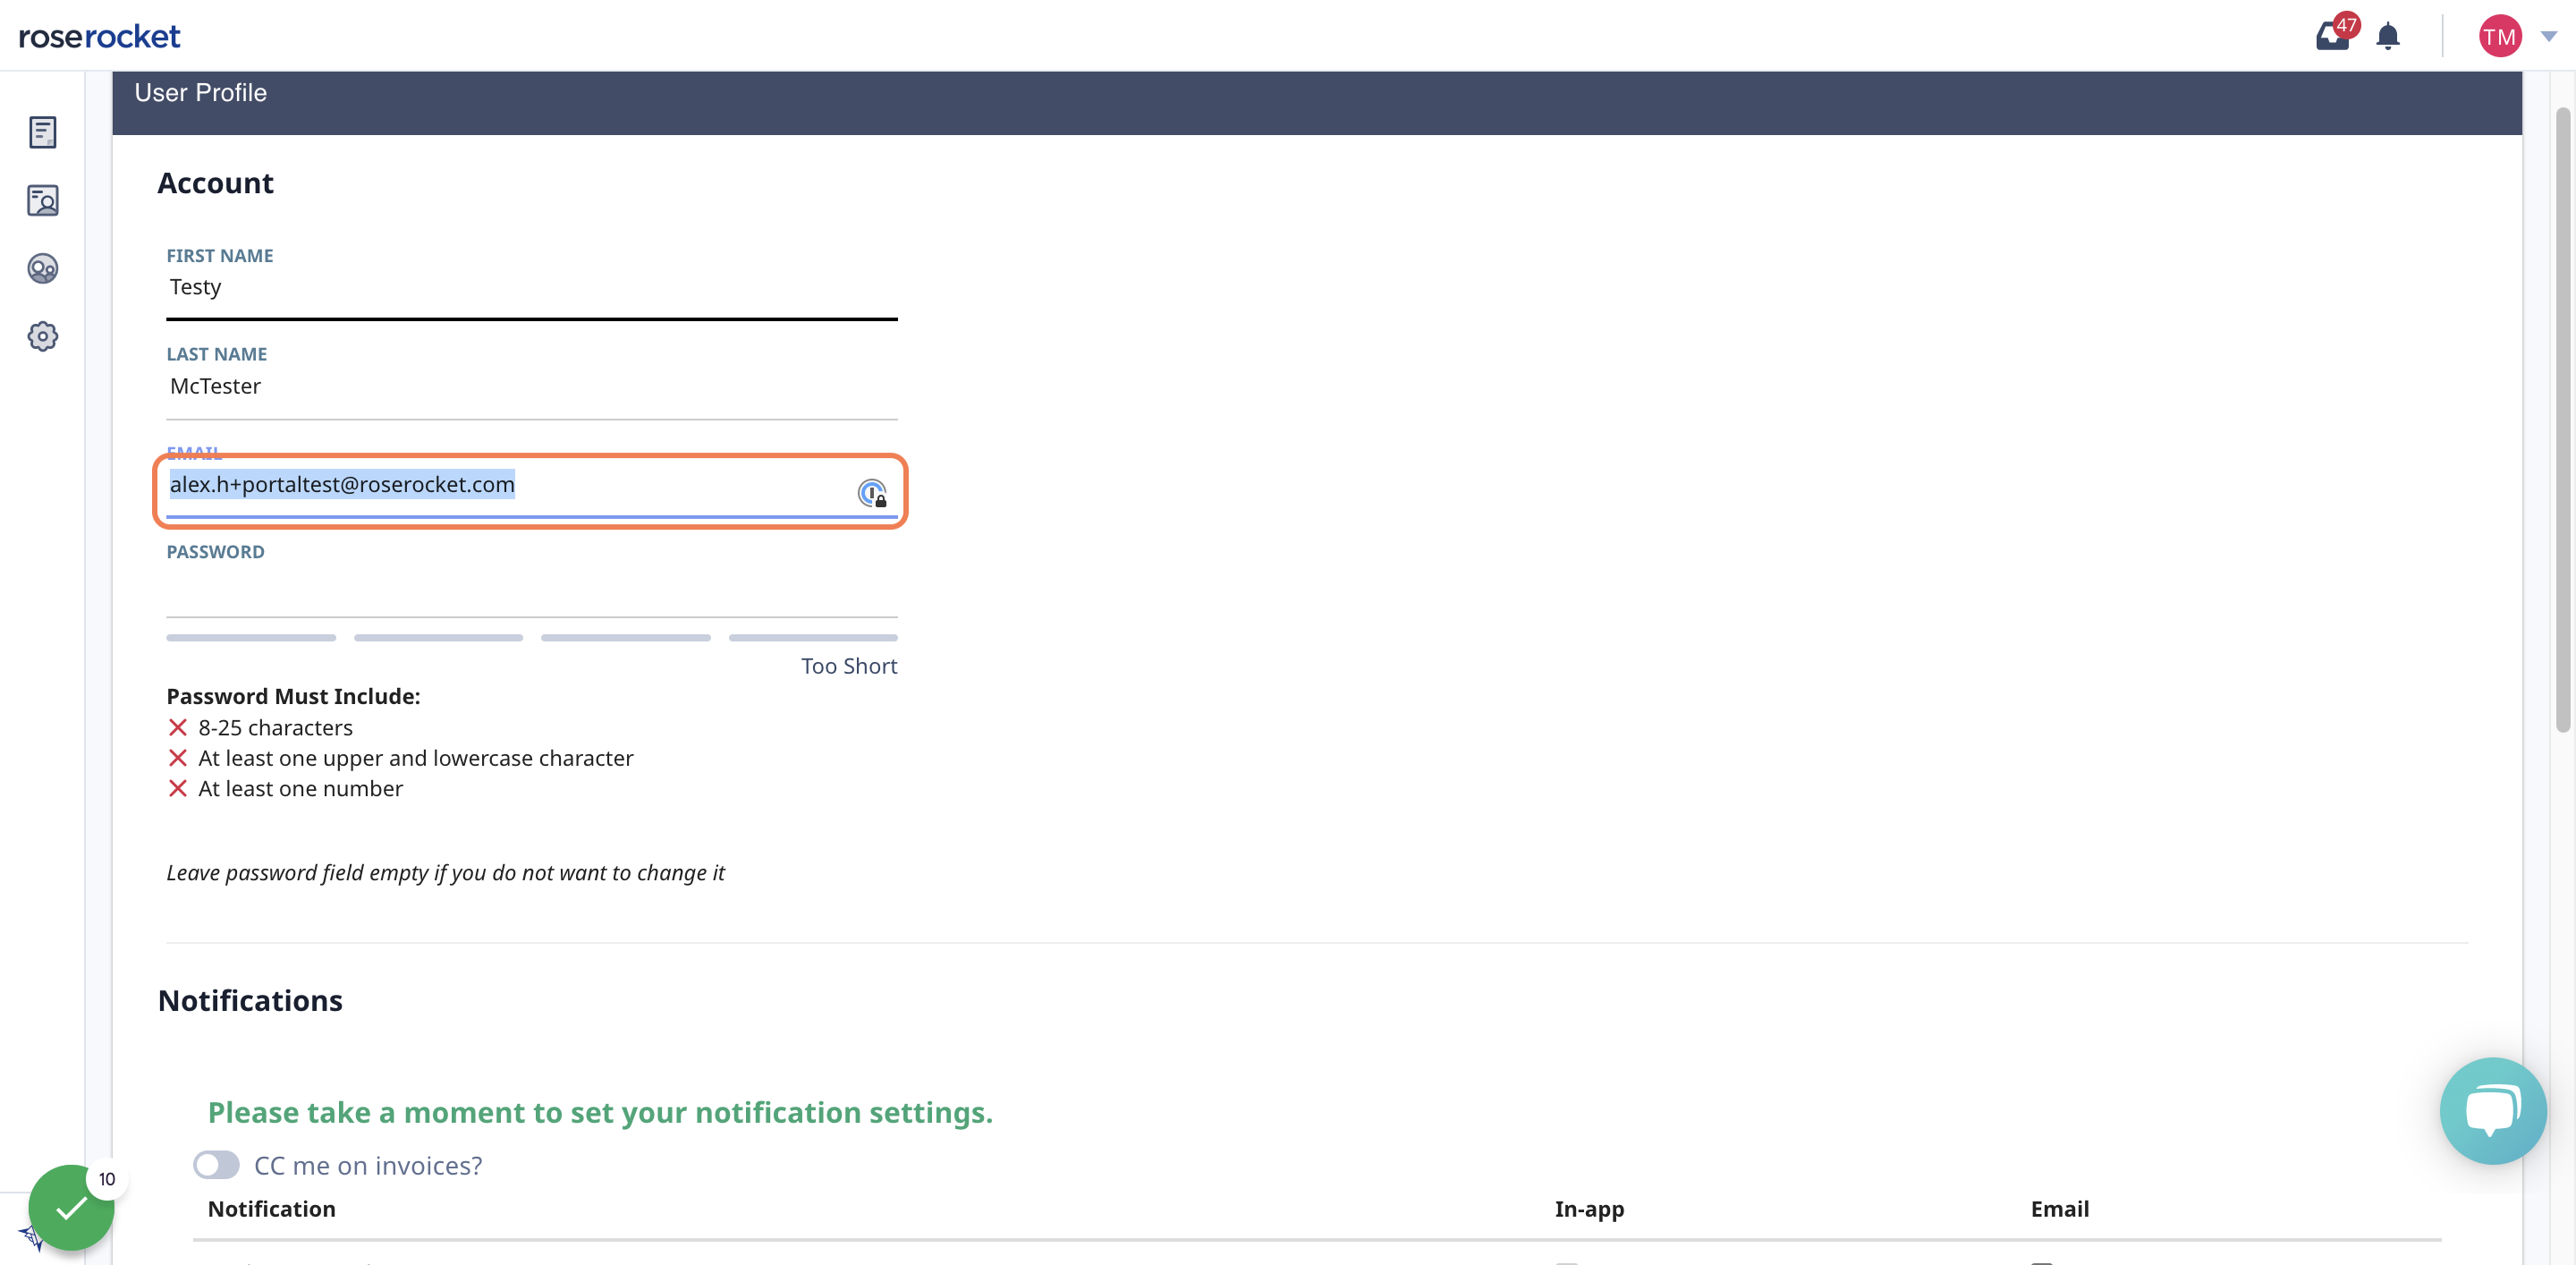
3. You will land on your User Profile page. Check that your account information is correct
If you want to update your name, email, or password, simply type them in here
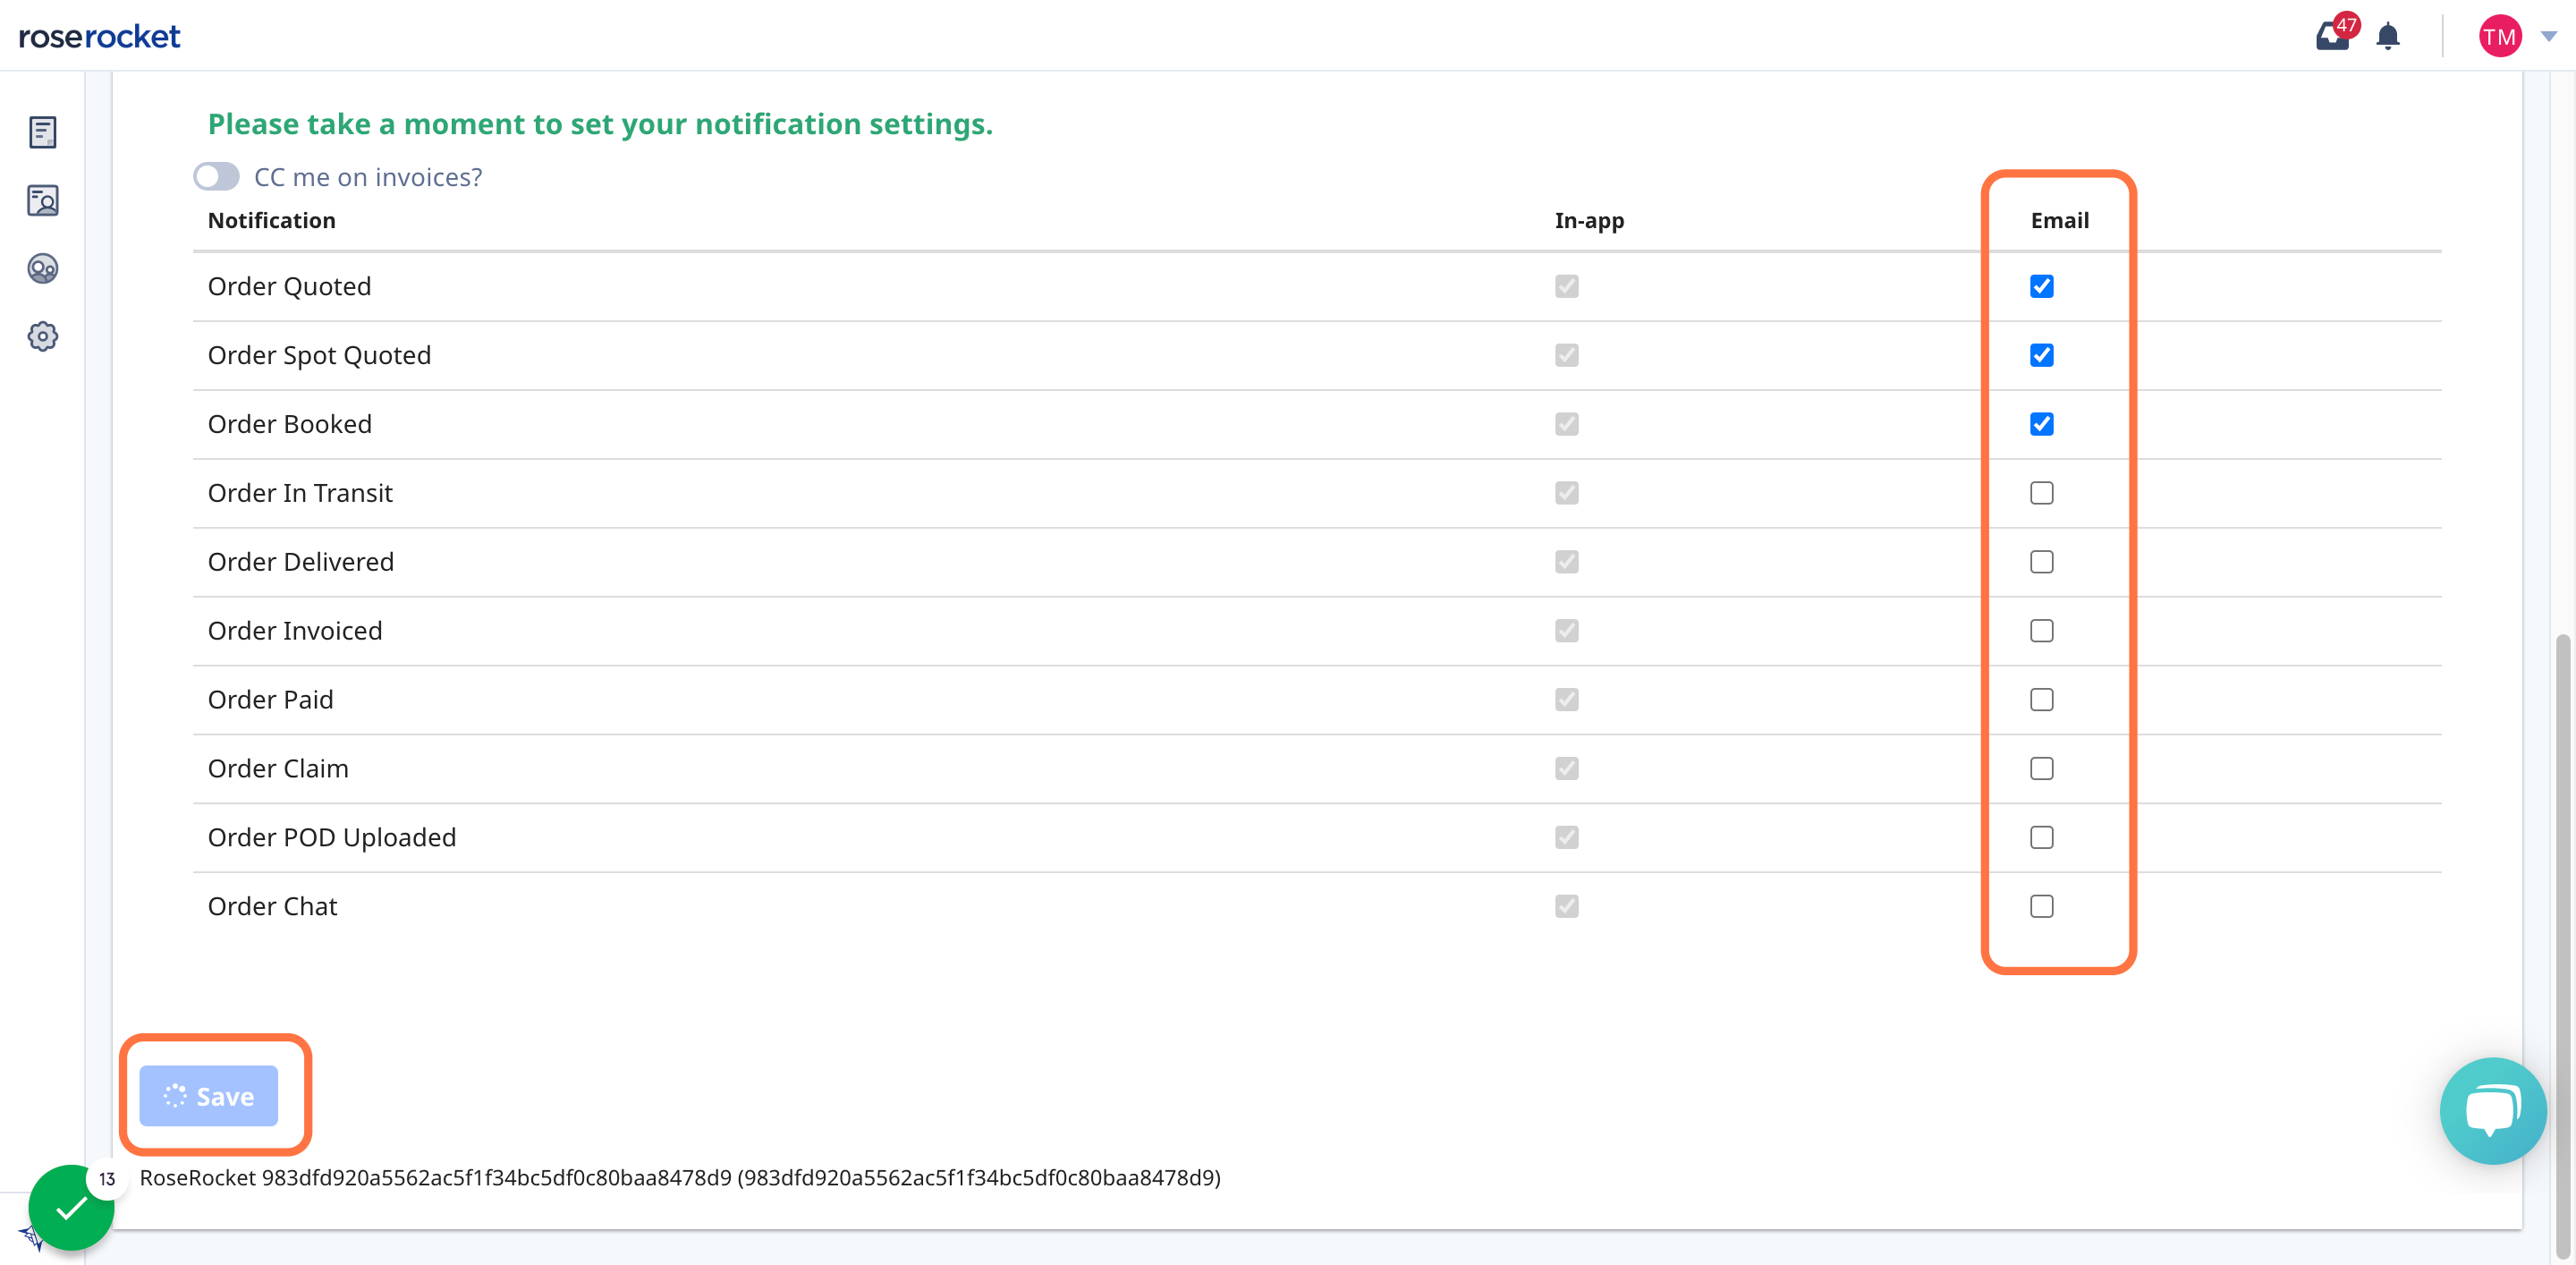
4. Set the email notifications you wish to receive, and click "Save" to save your profile details
5. ... and that's it! Your Customer Portal has now been activated.
Viewing your orders
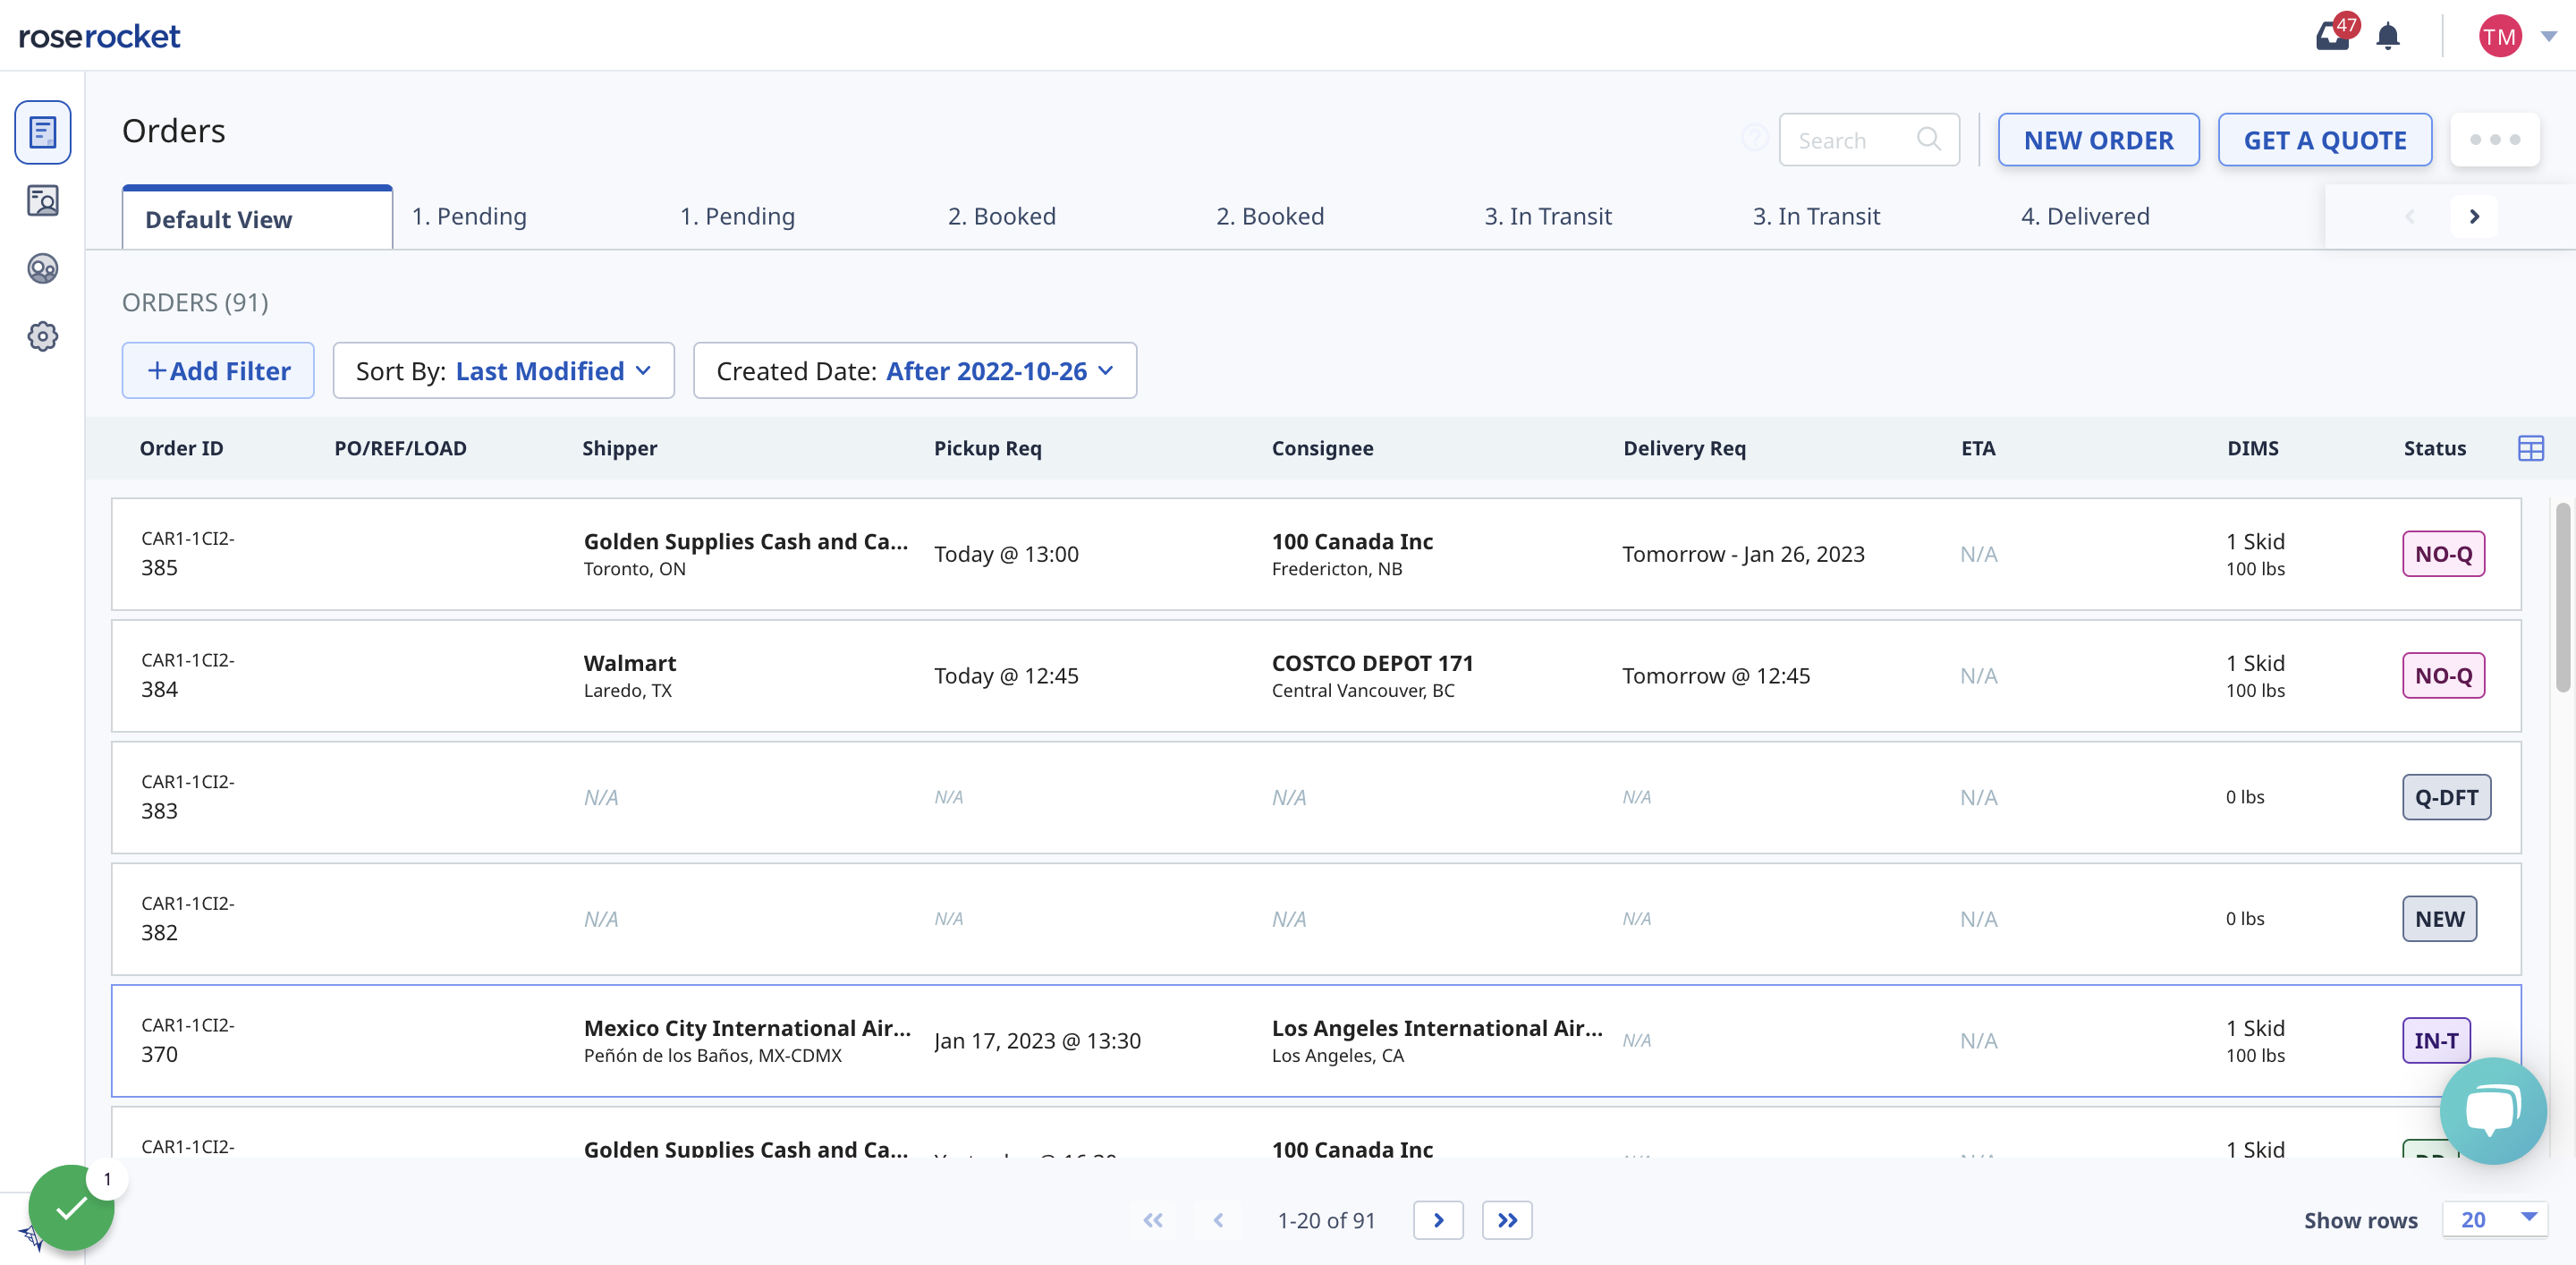
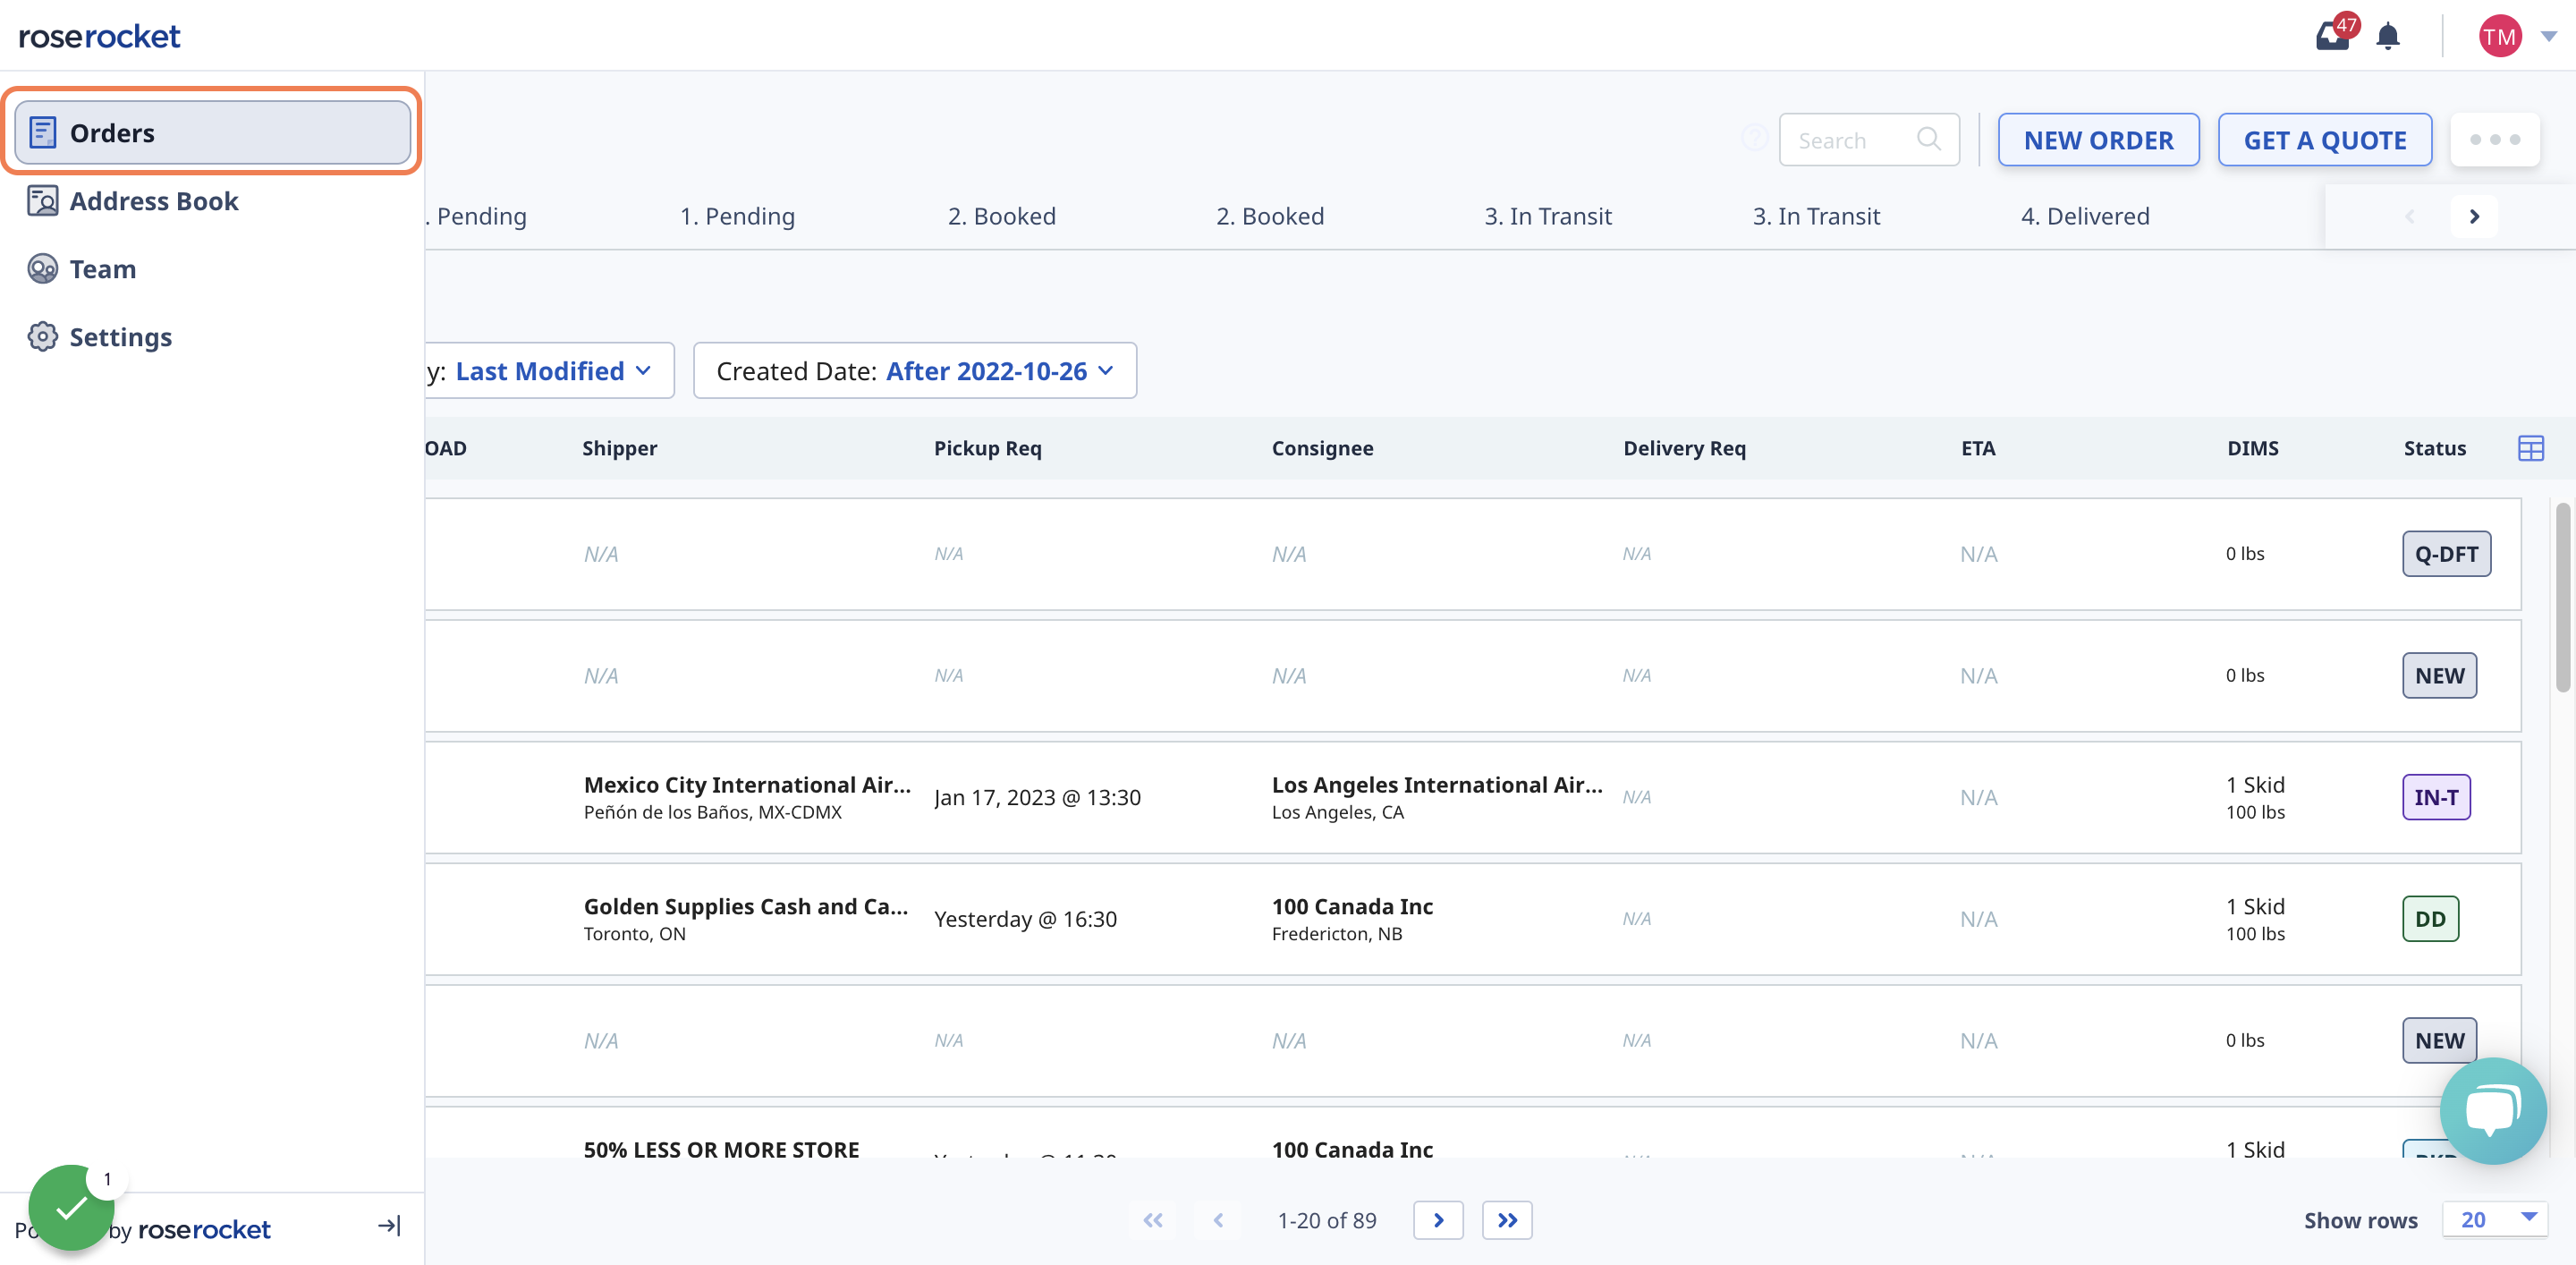
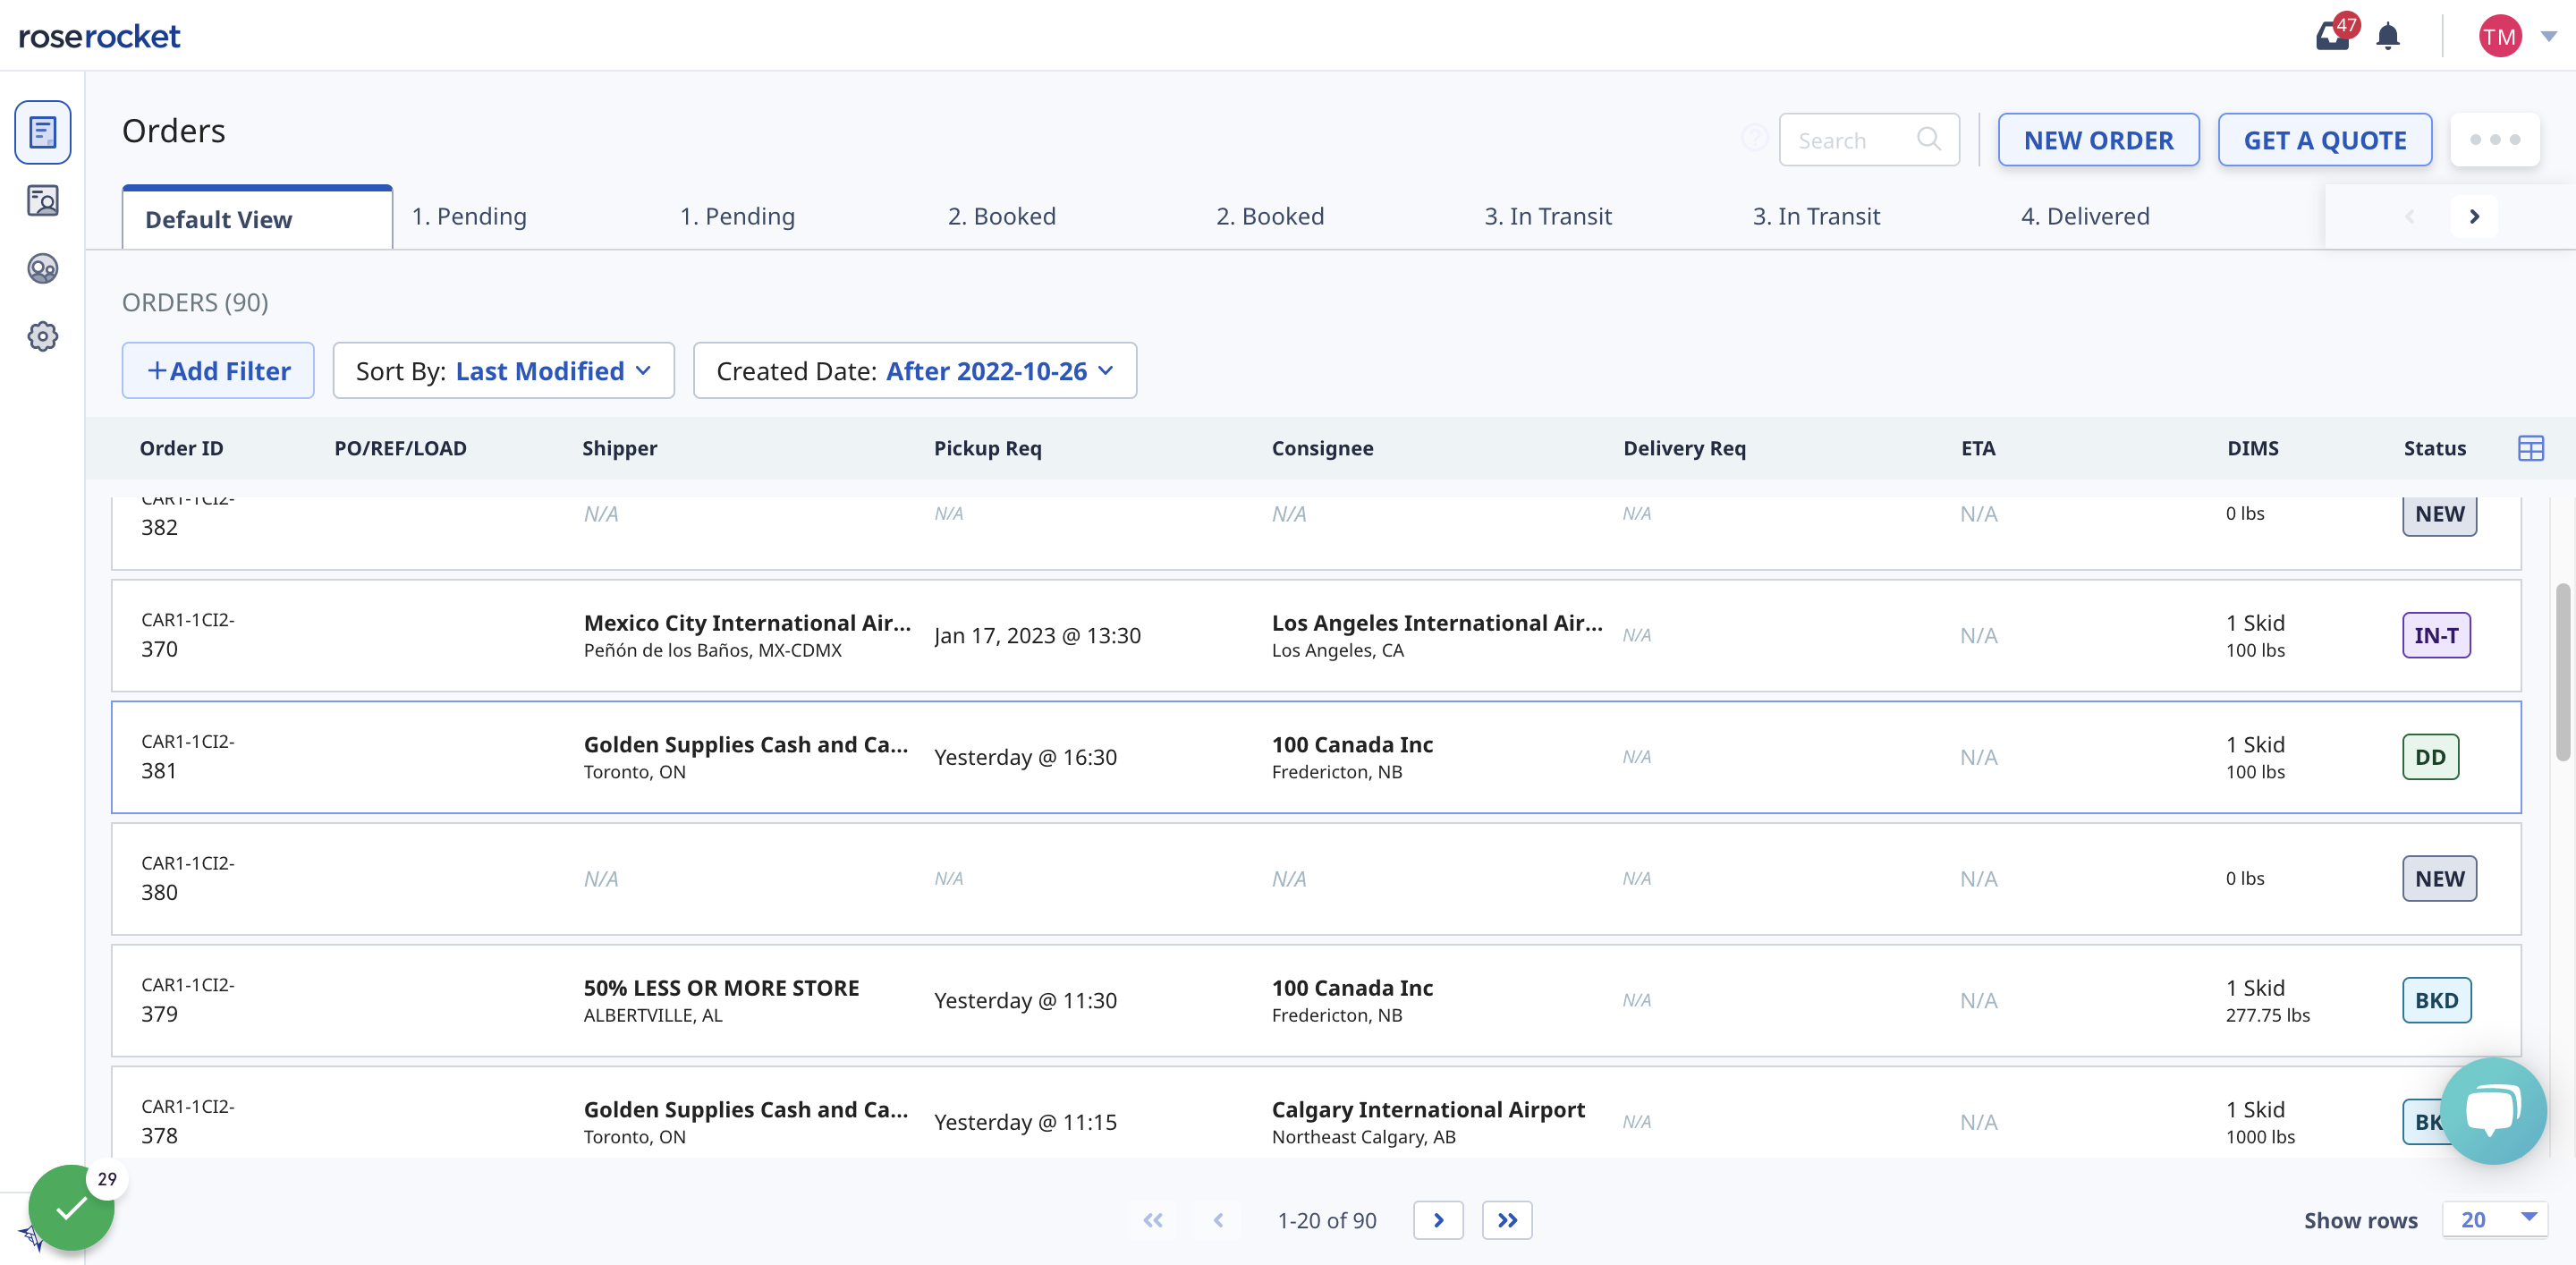
1. From the side navigation menu, click on Orders to visit the Orders page
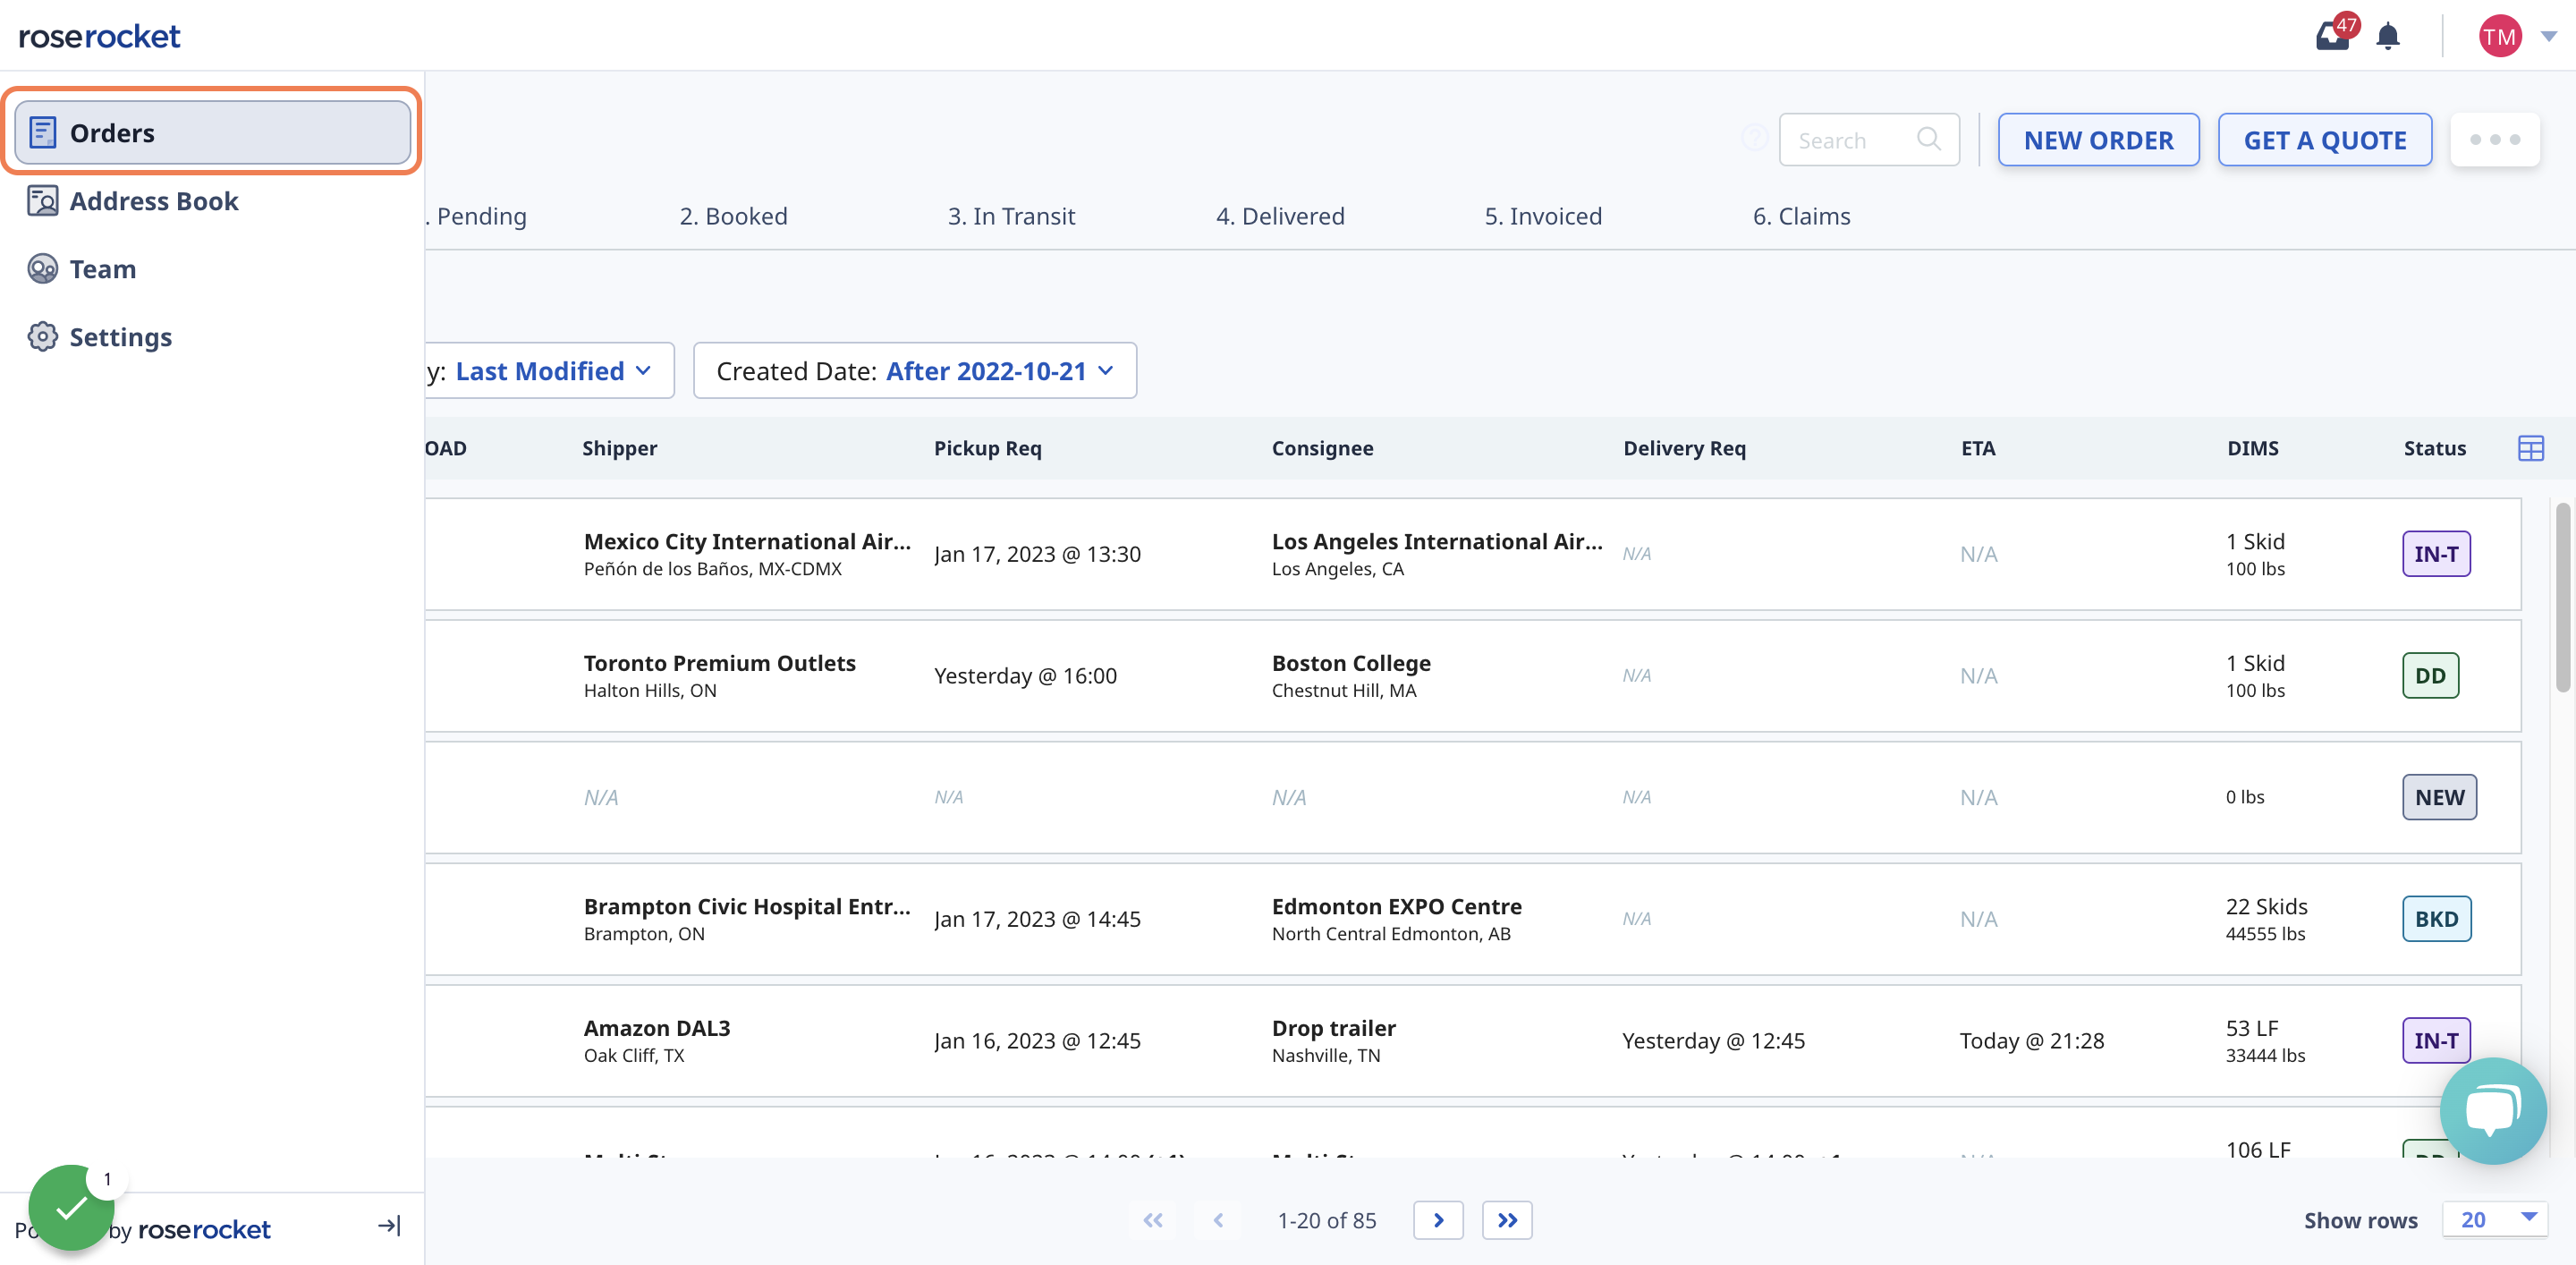
2. From the Orders page, you can view all your orders, historical and ongoing, with your partner
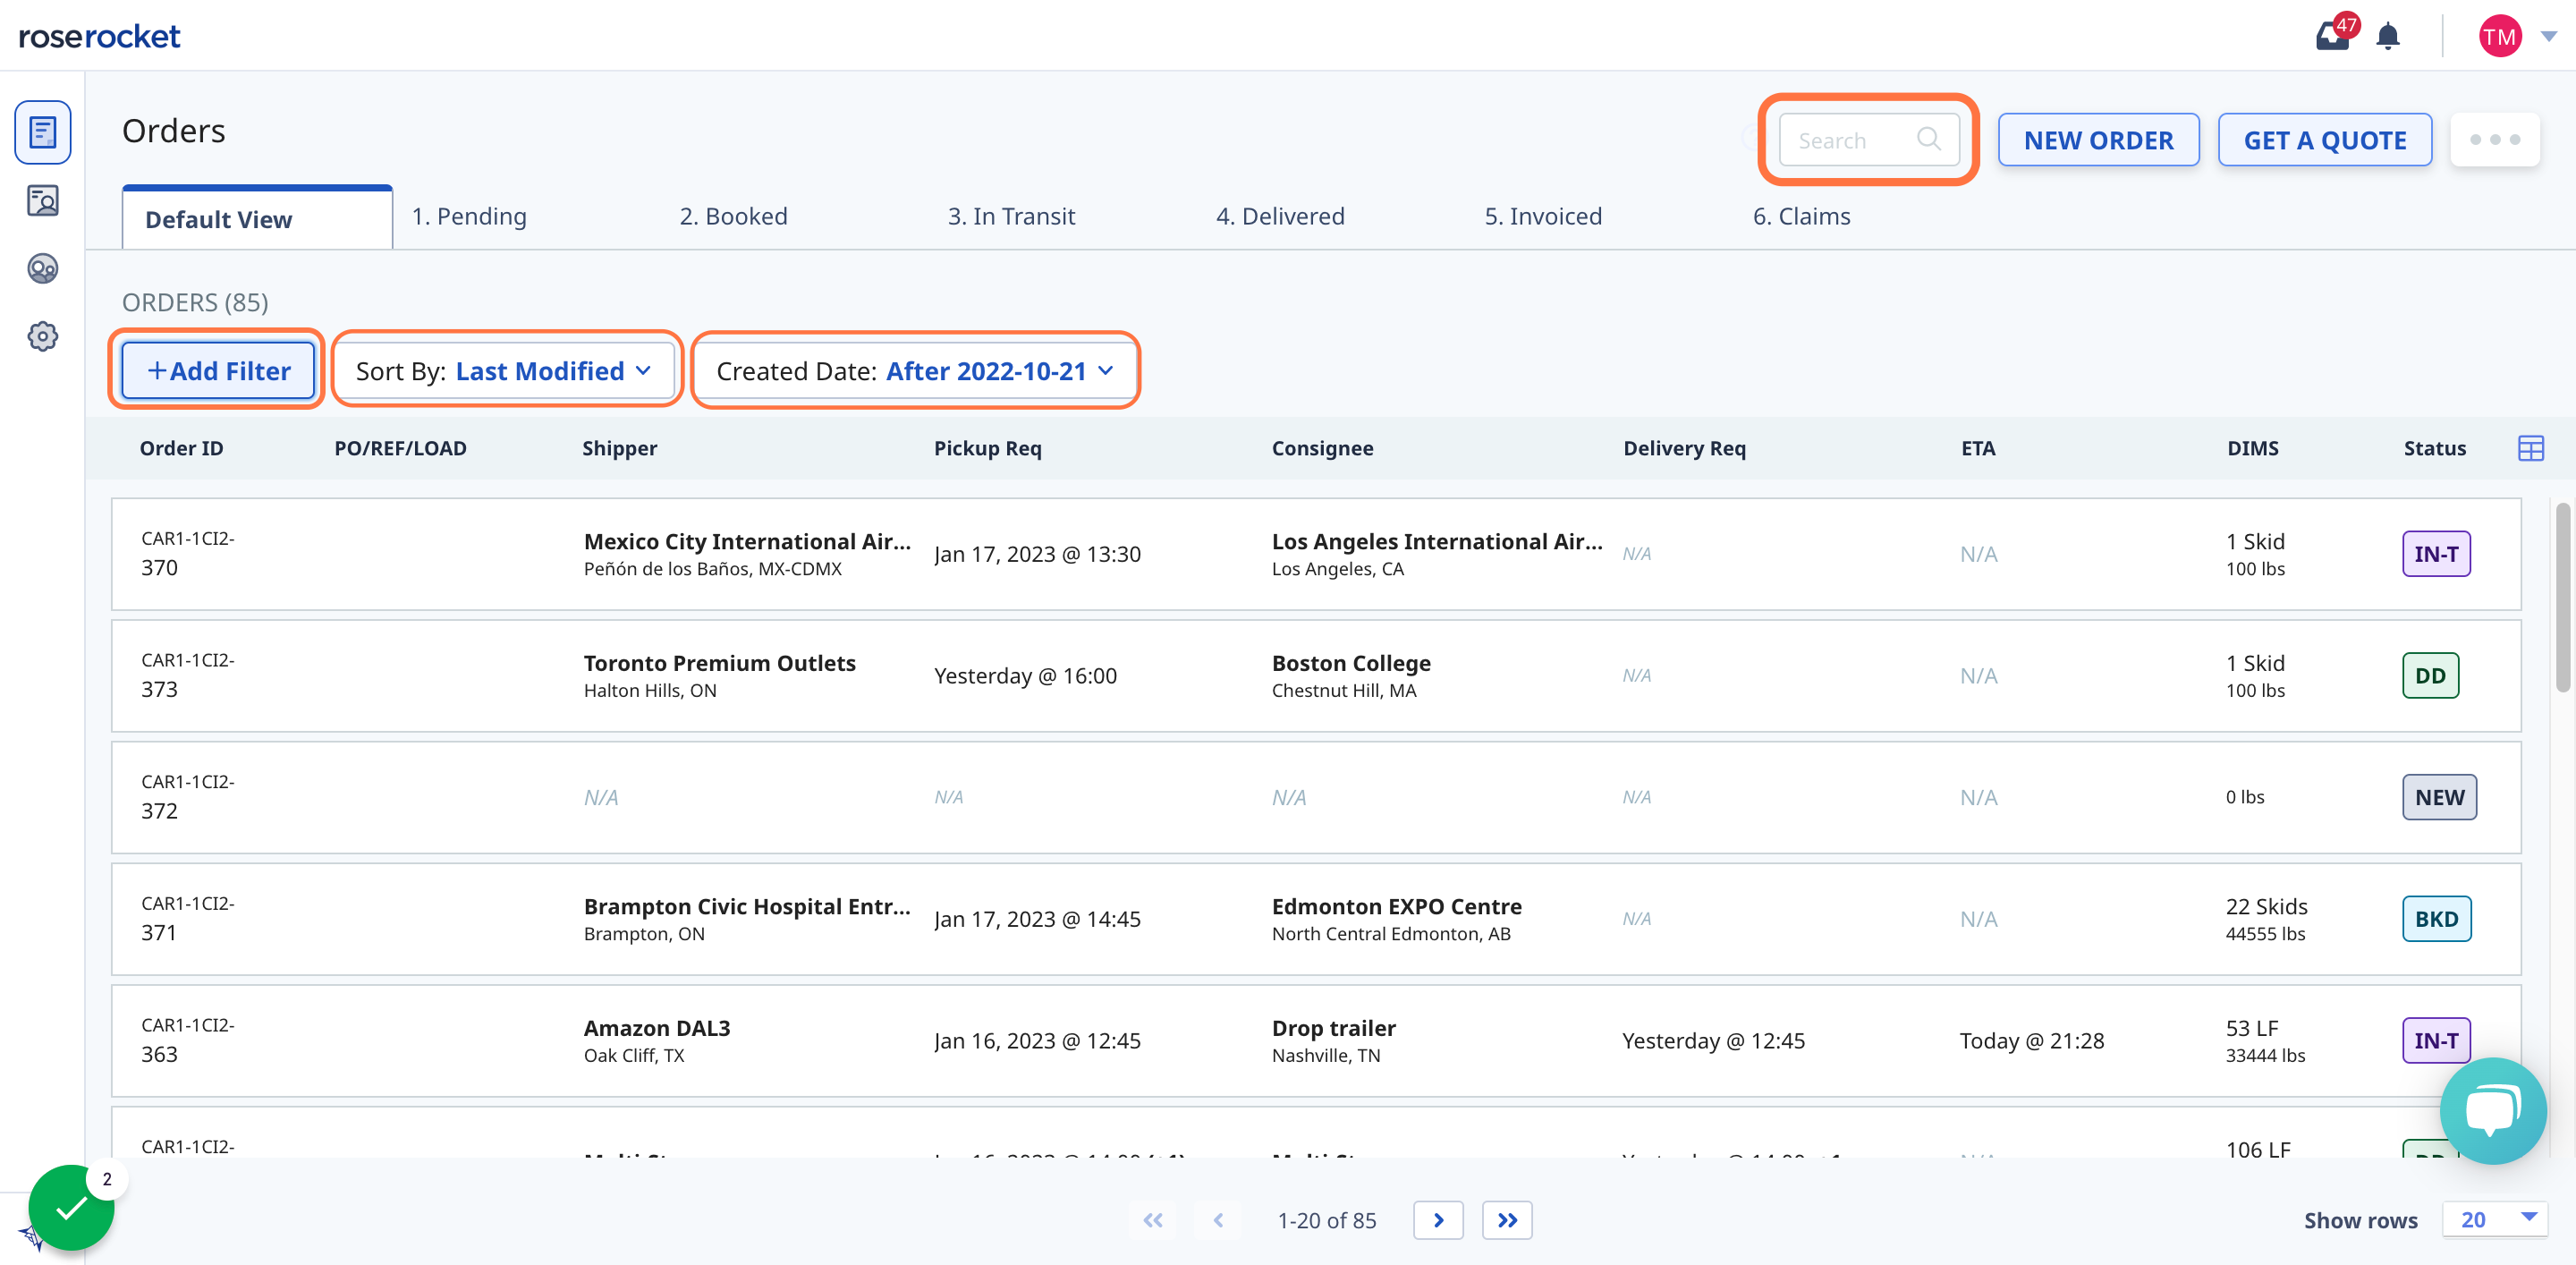
3. You can filter, sort, and search the orders list to find the orders you're interested in
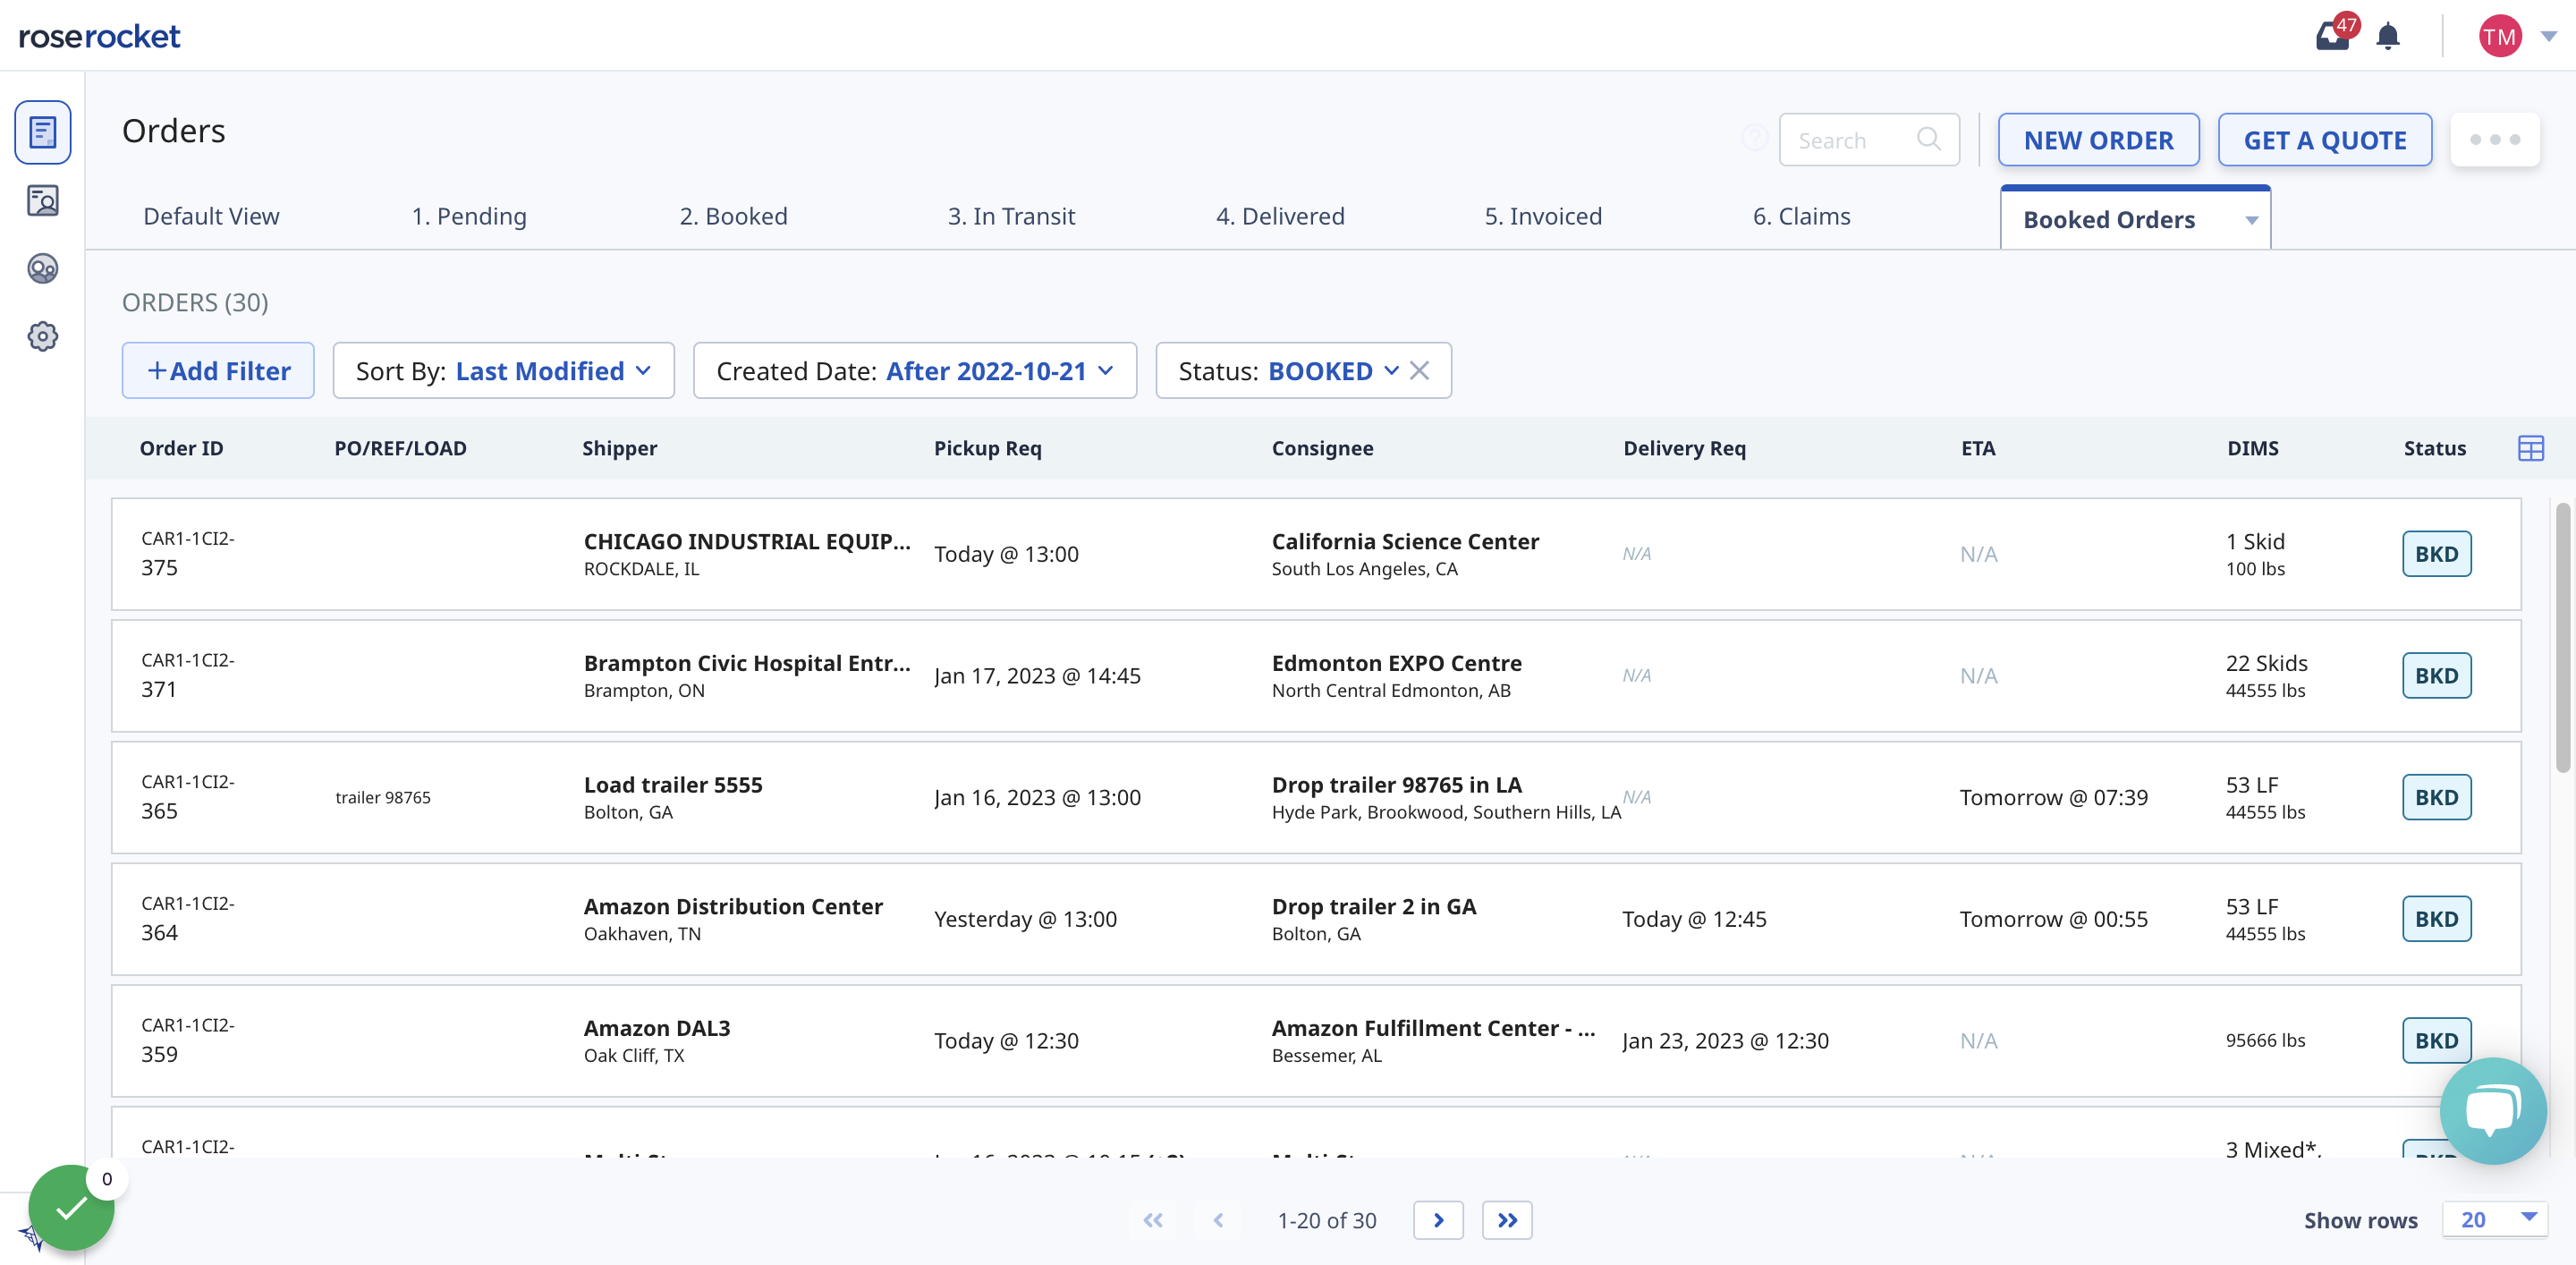
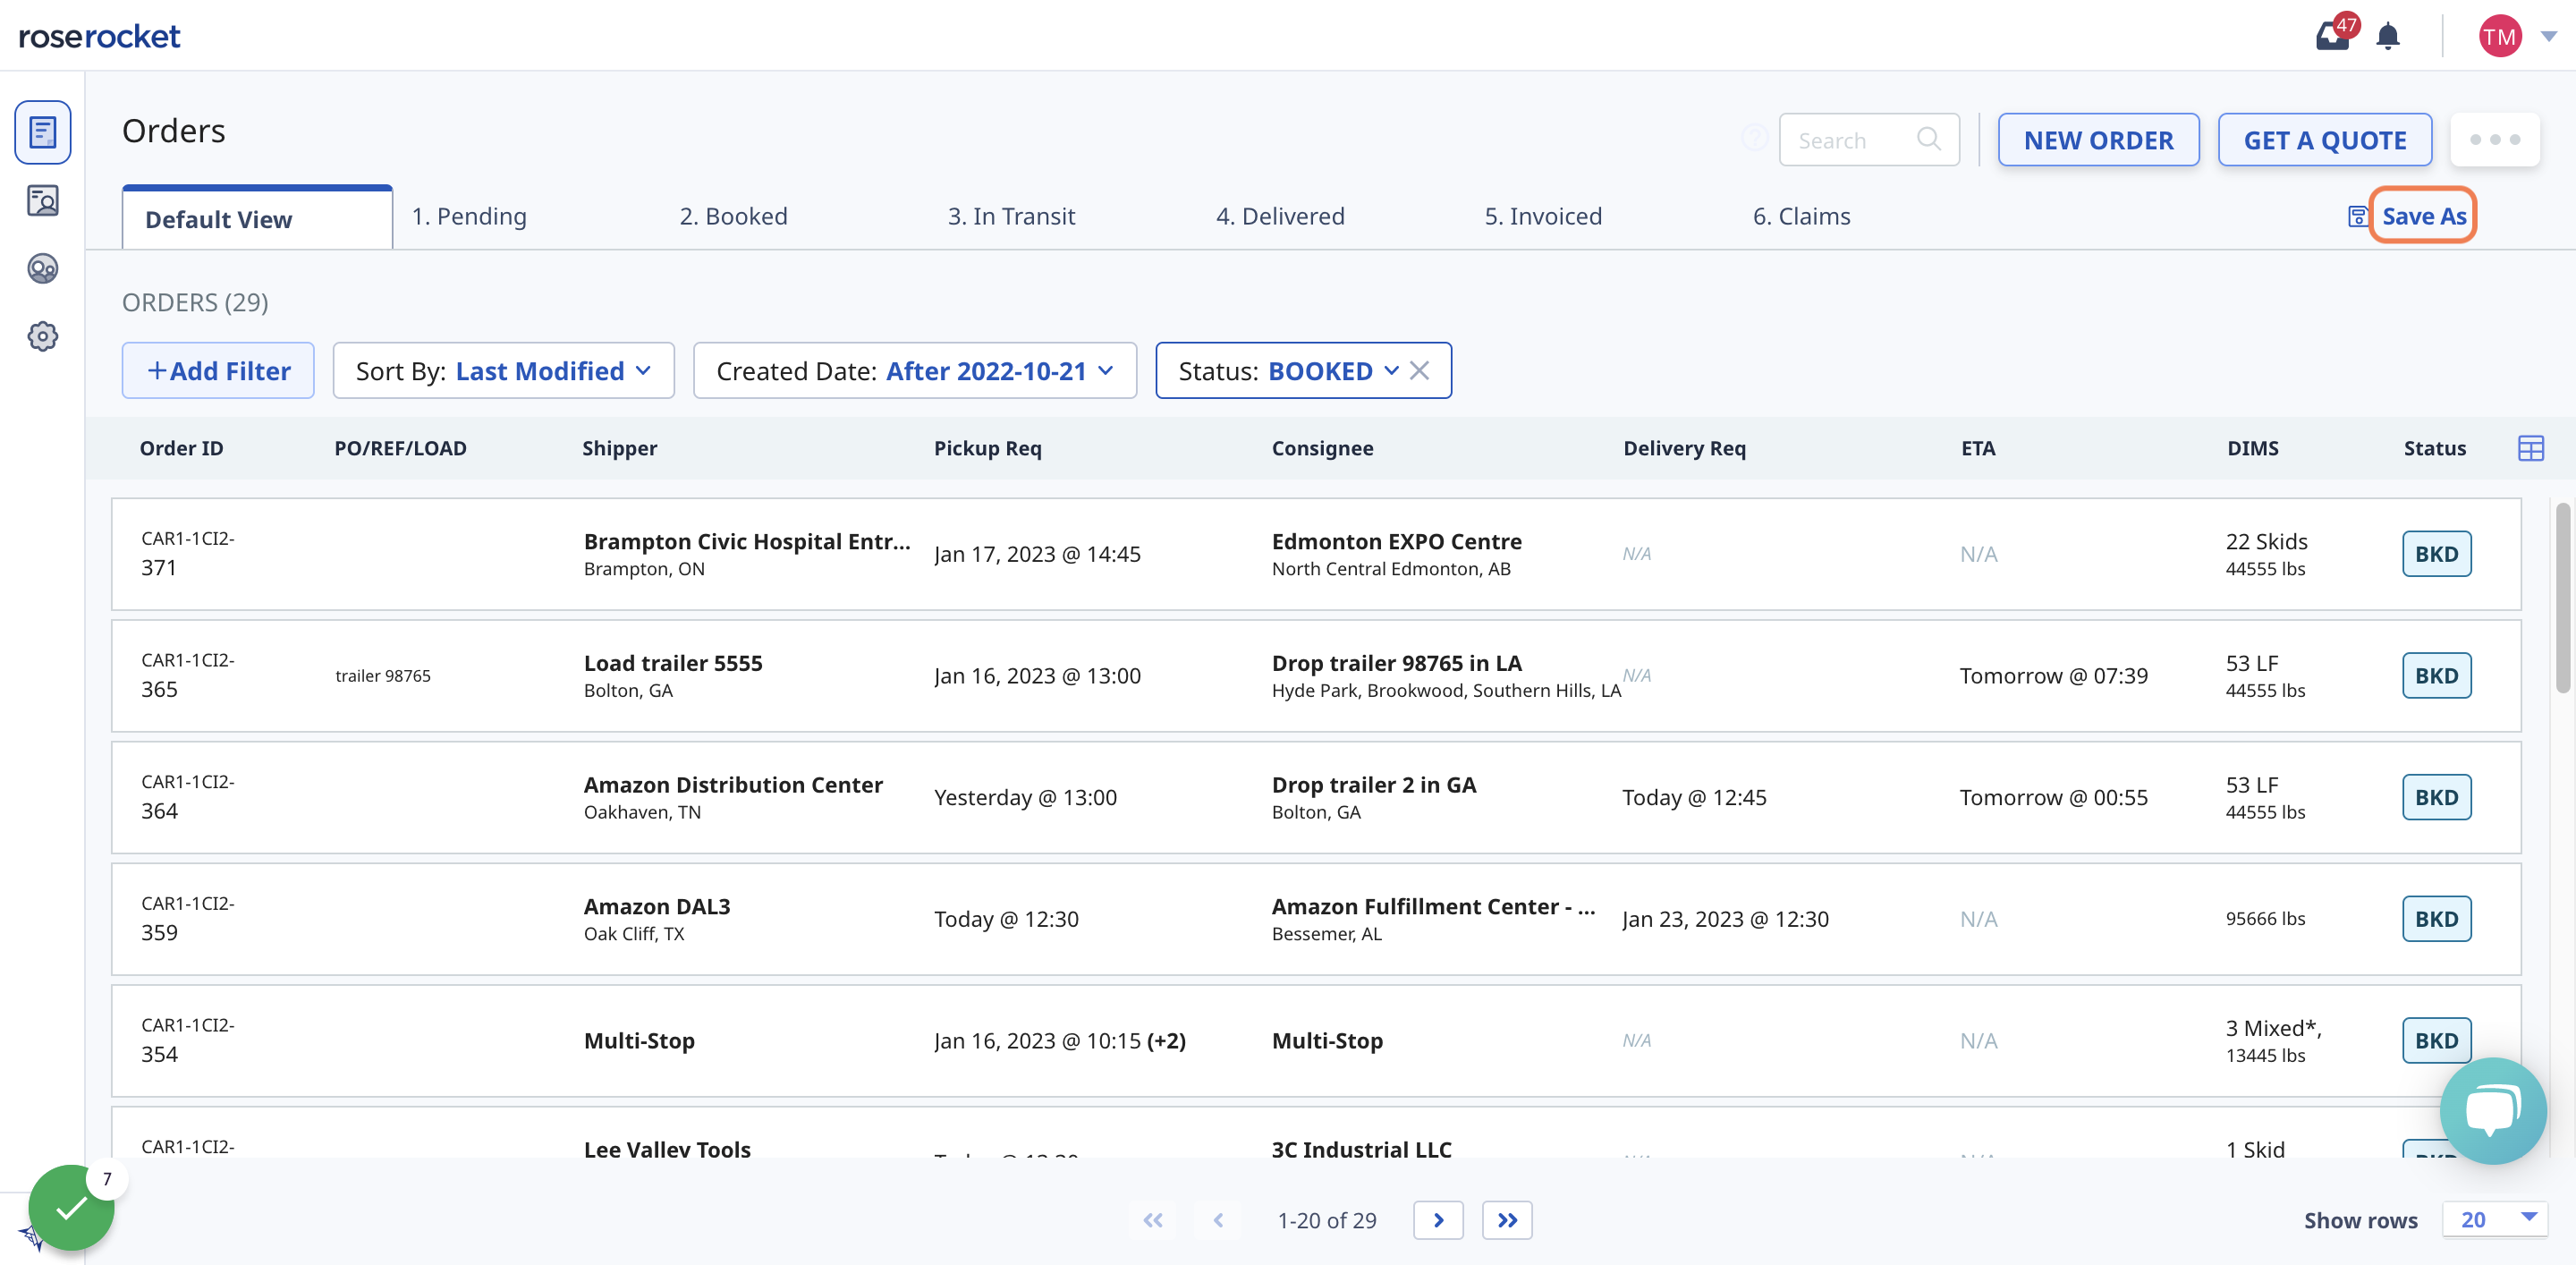
4. For example, let's say you want to only view orders that are in "Booked" status. Click on "+Add Filter" and select the "Status" filter
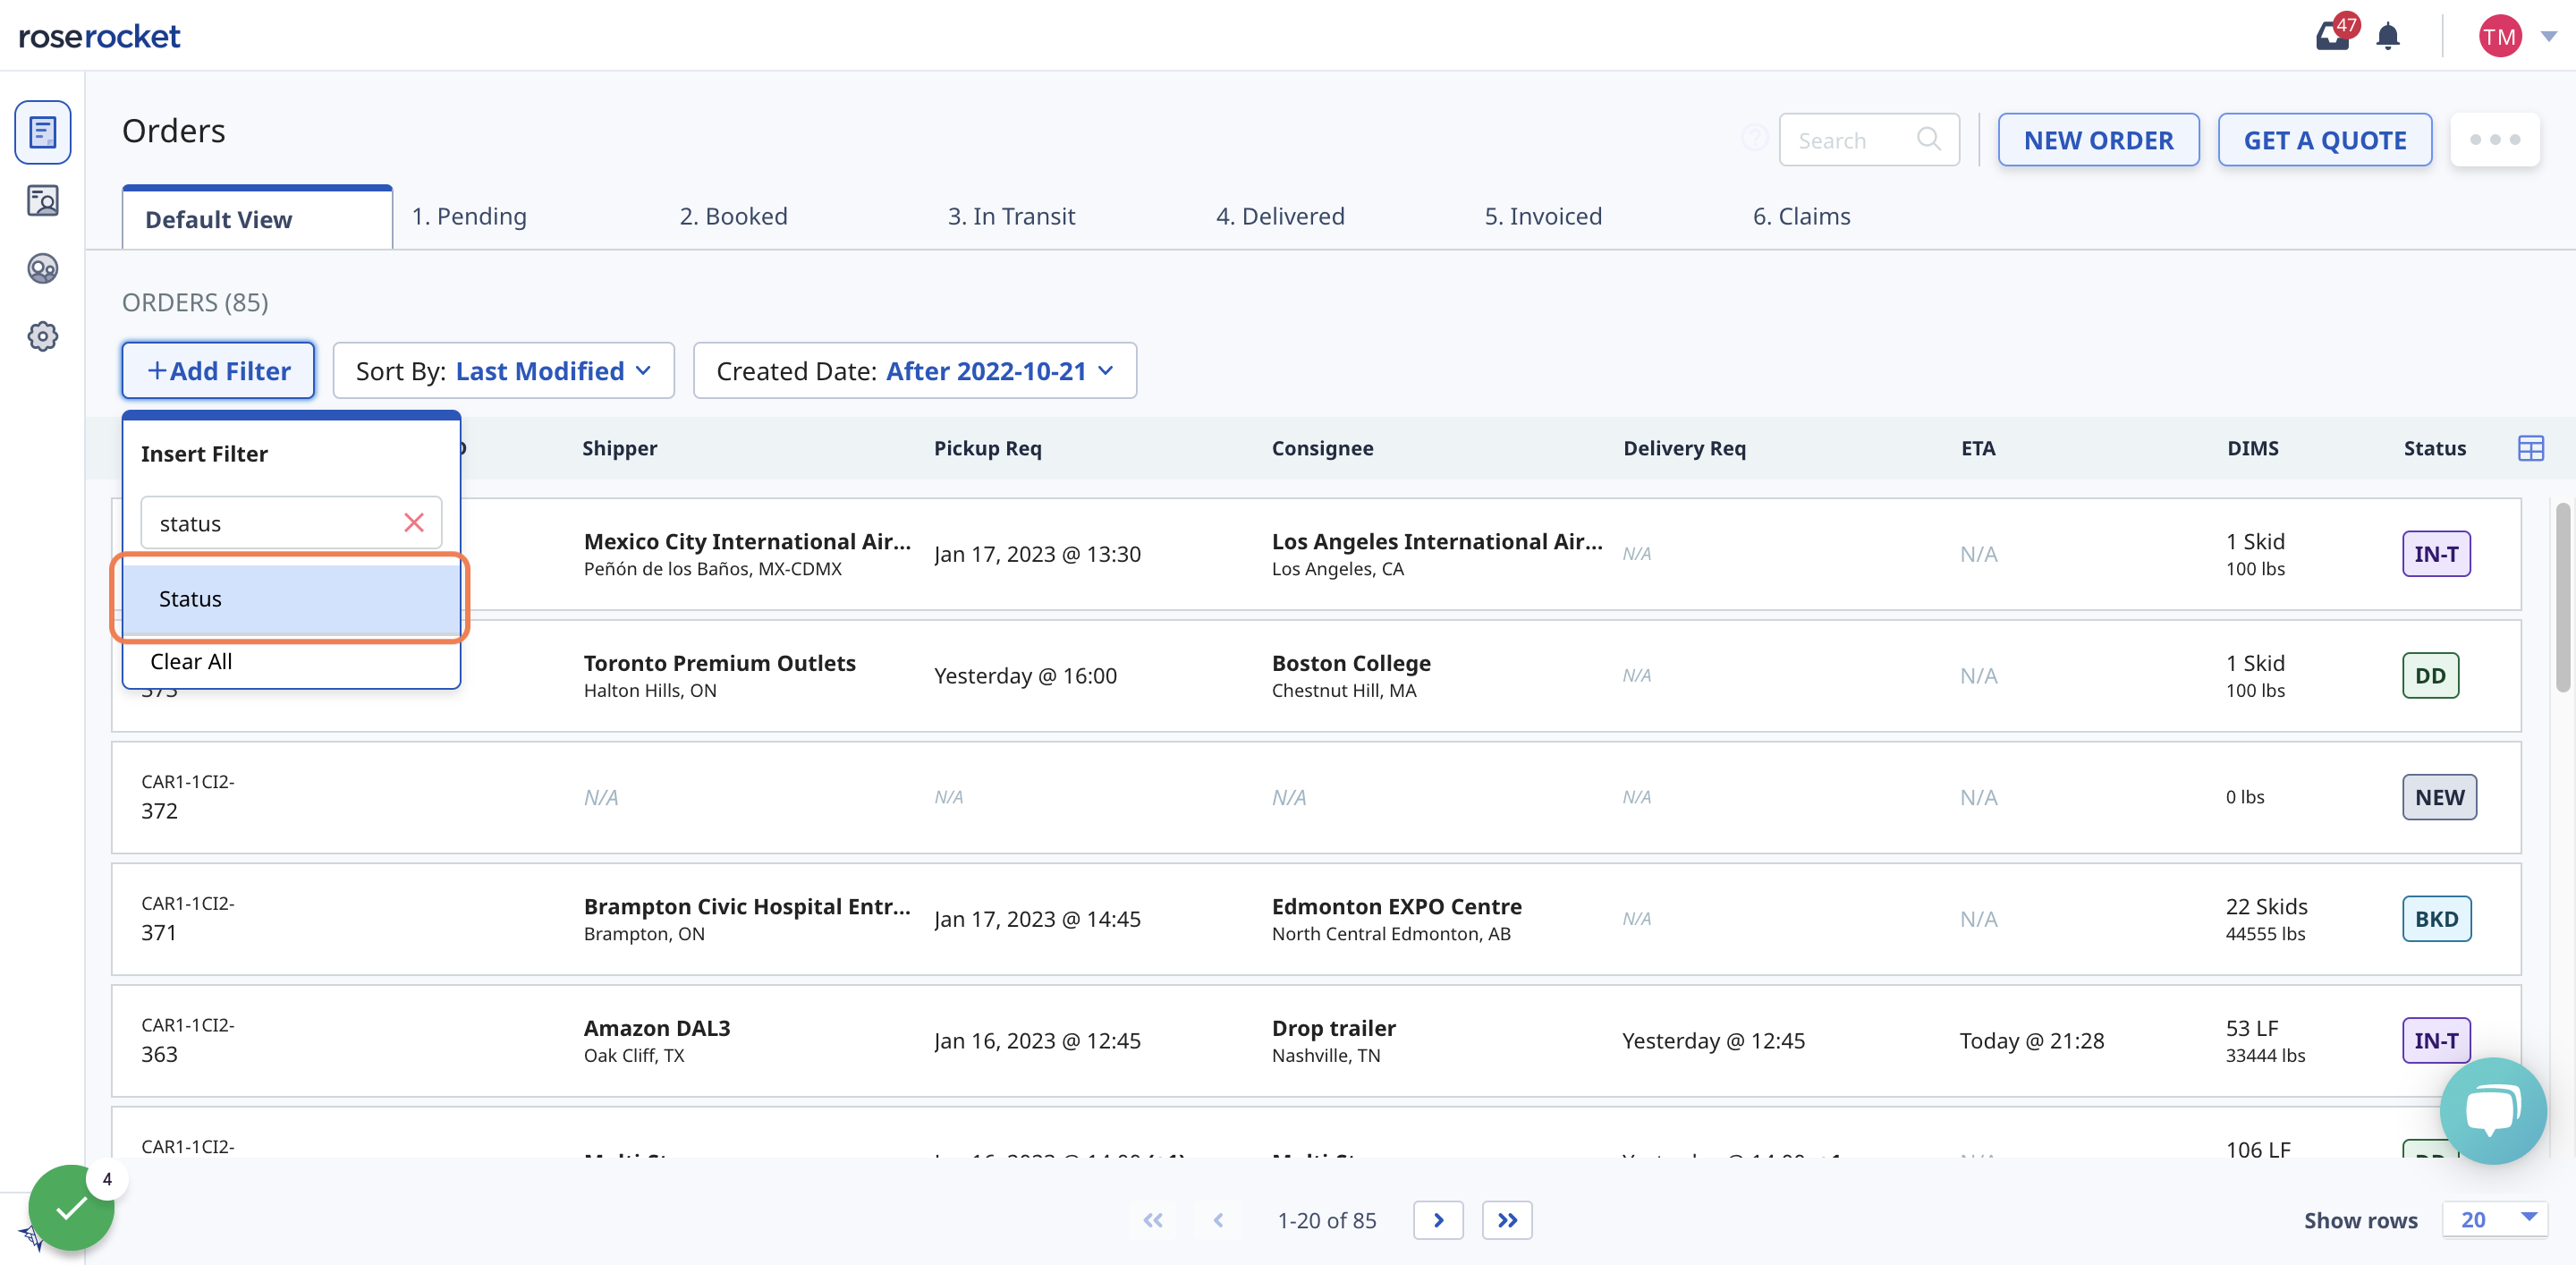
5. Under your newly created Status filter, select "Booked"
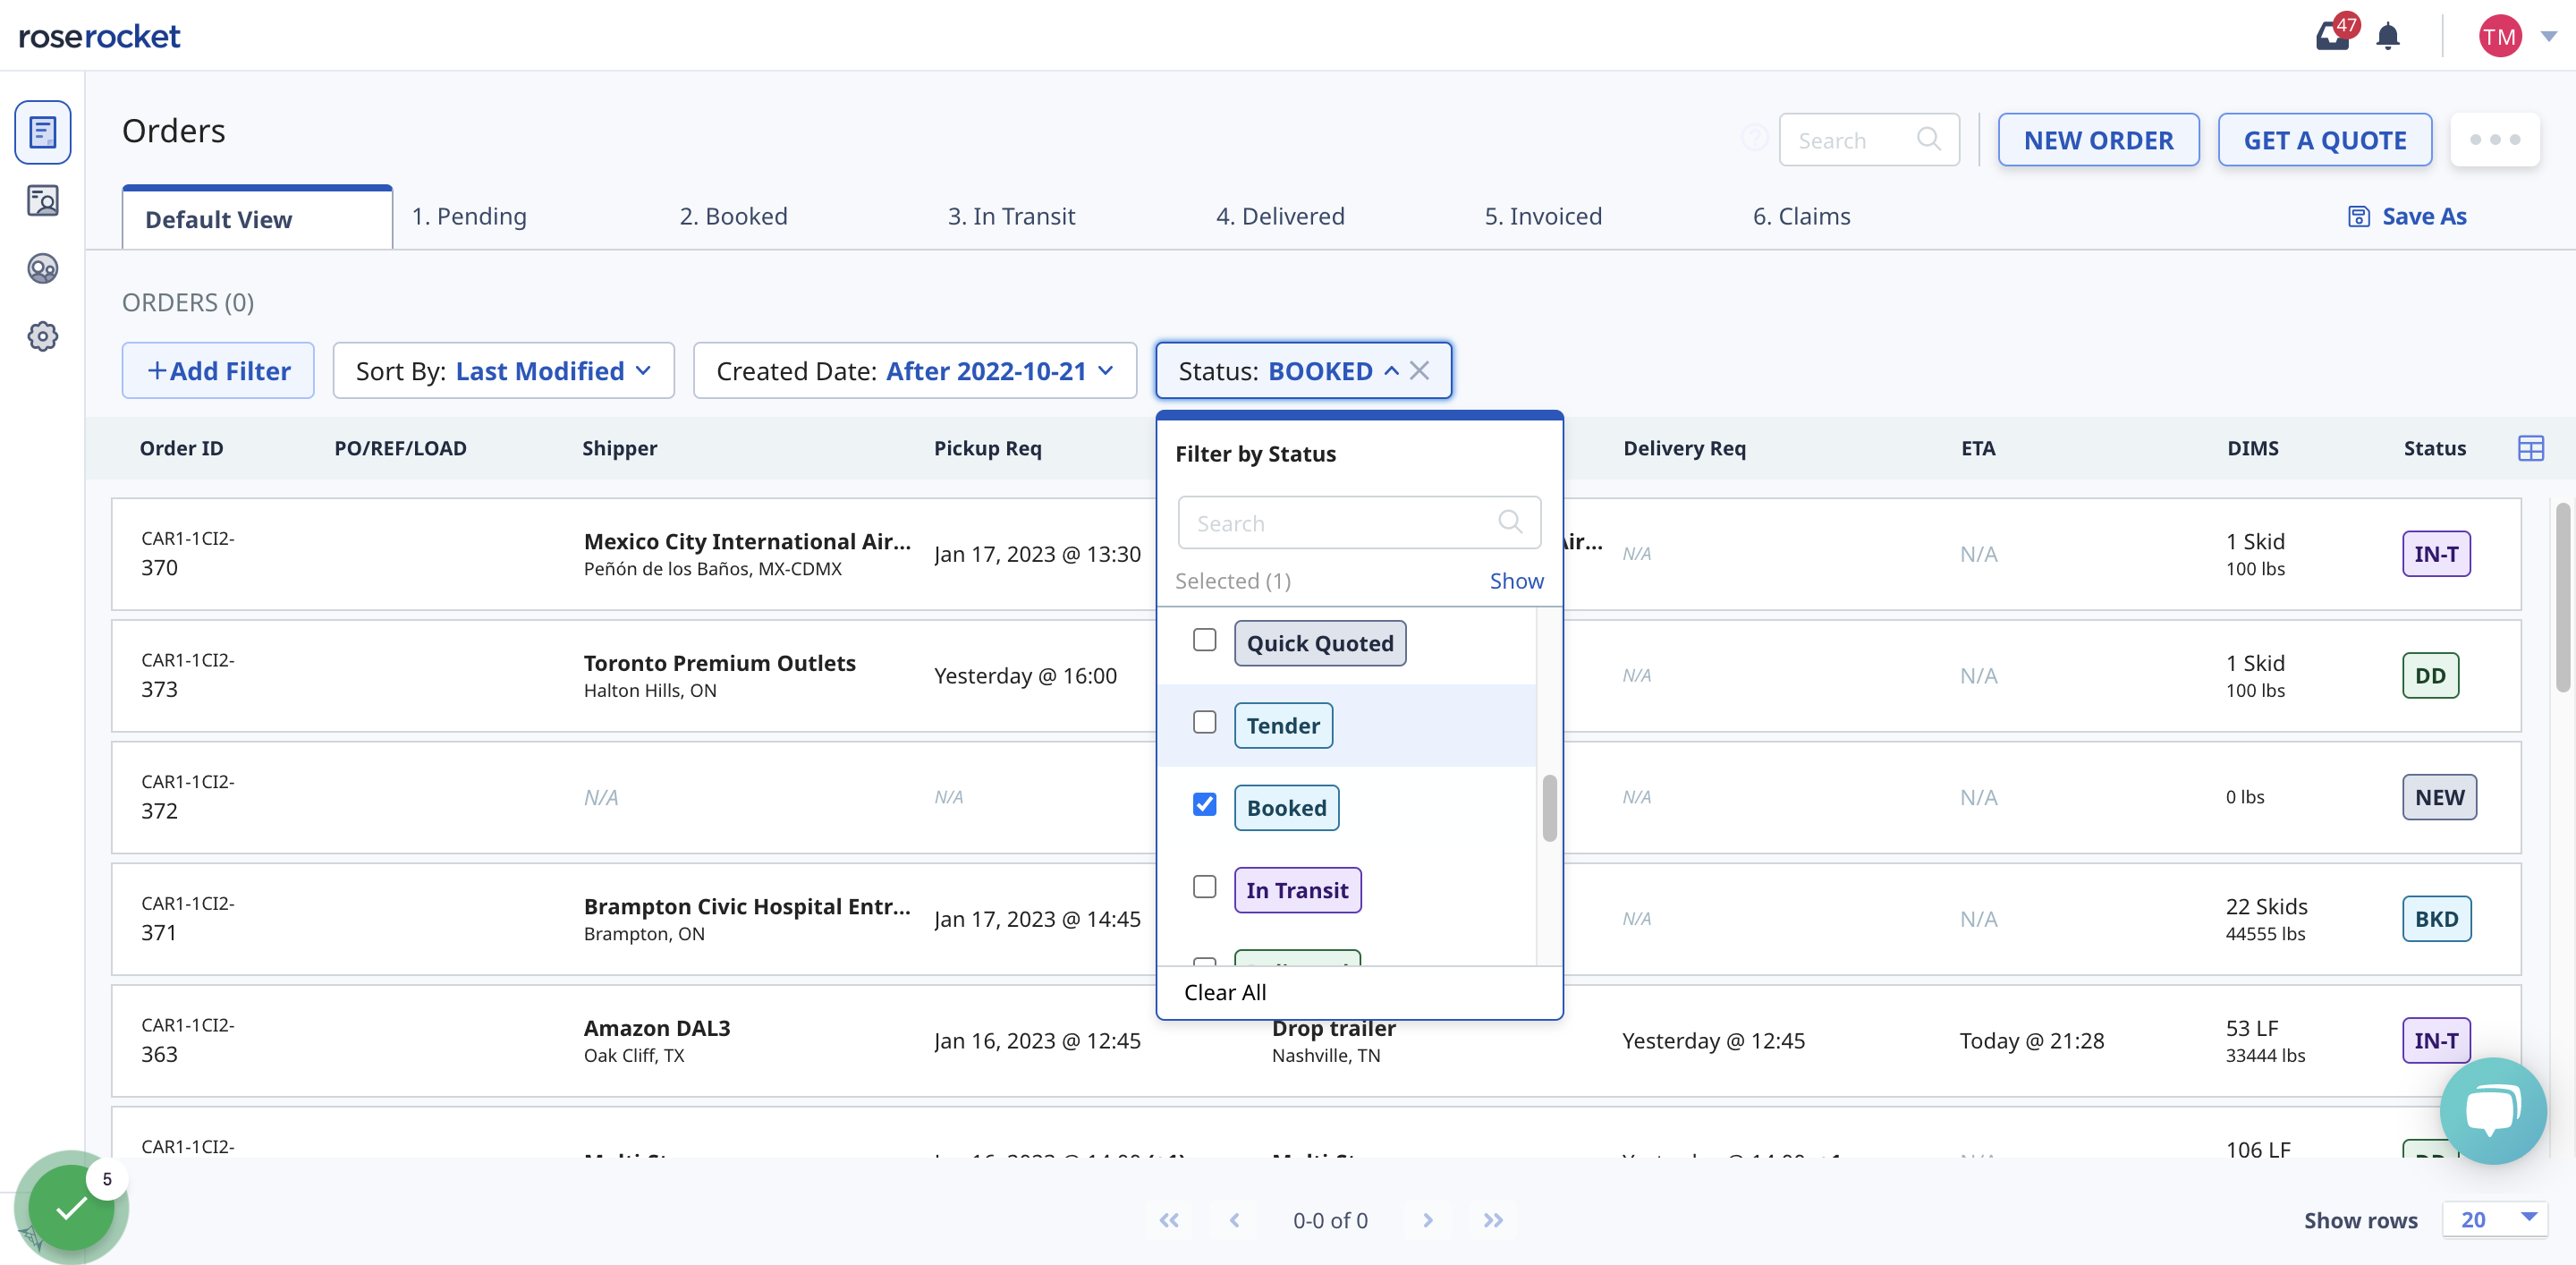
6. Now your list is filtered for orders with this status
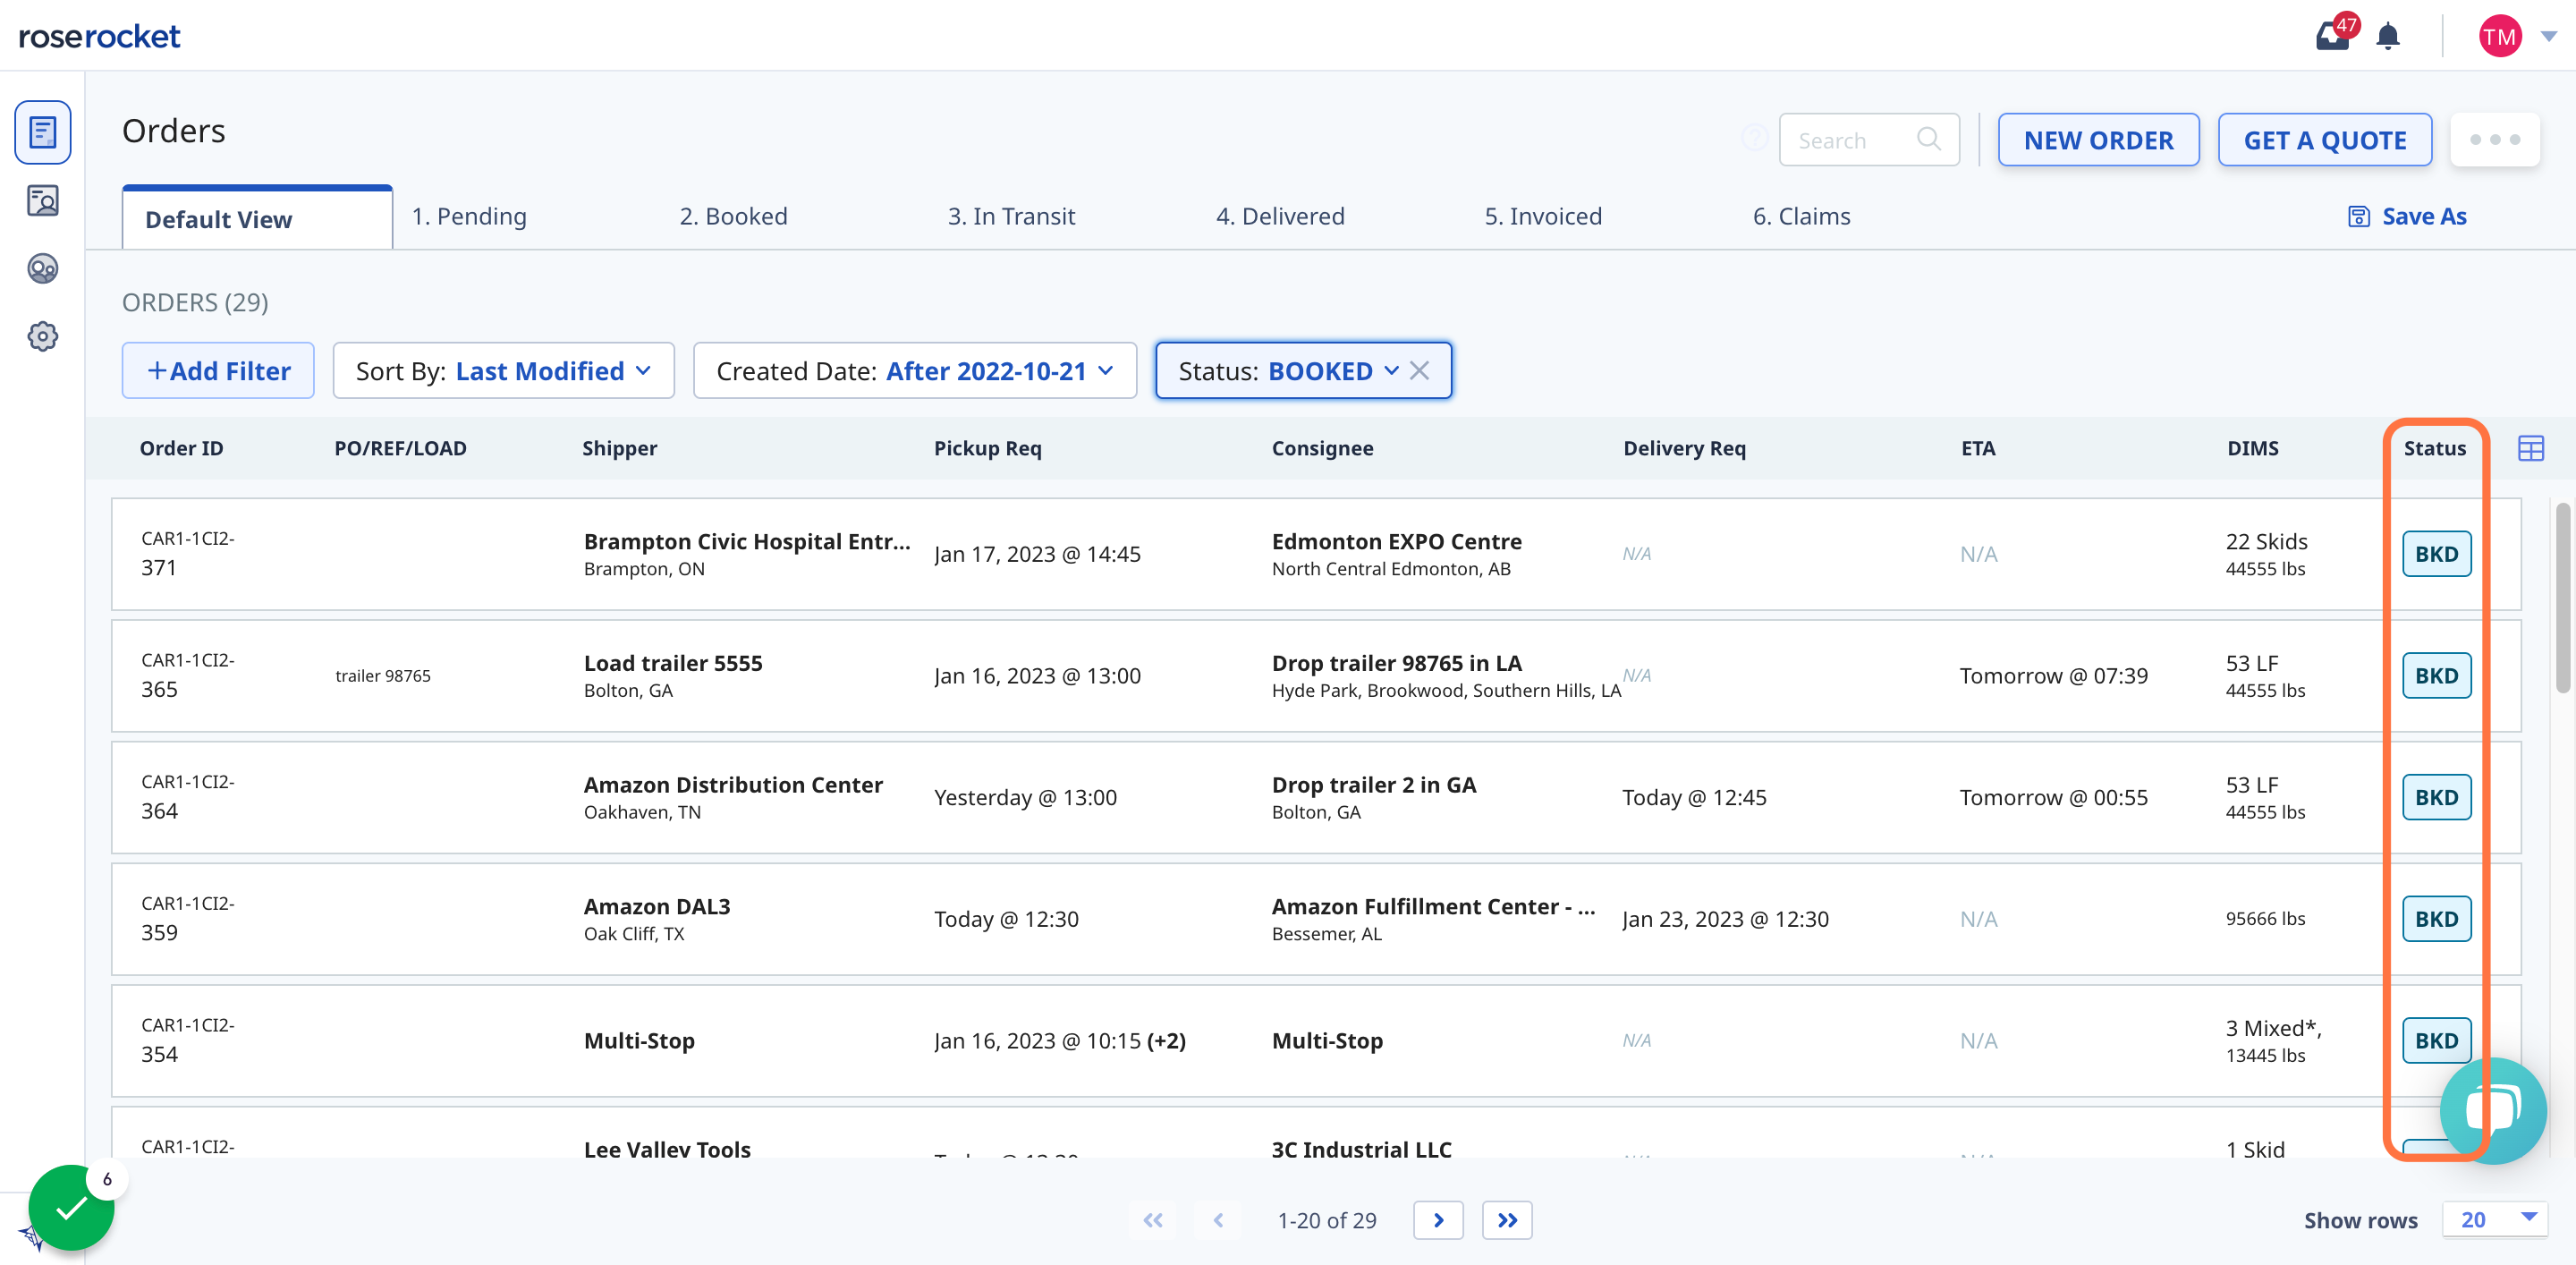
7. You can also add/remove columns from your Orders list by clicking the Columns icon
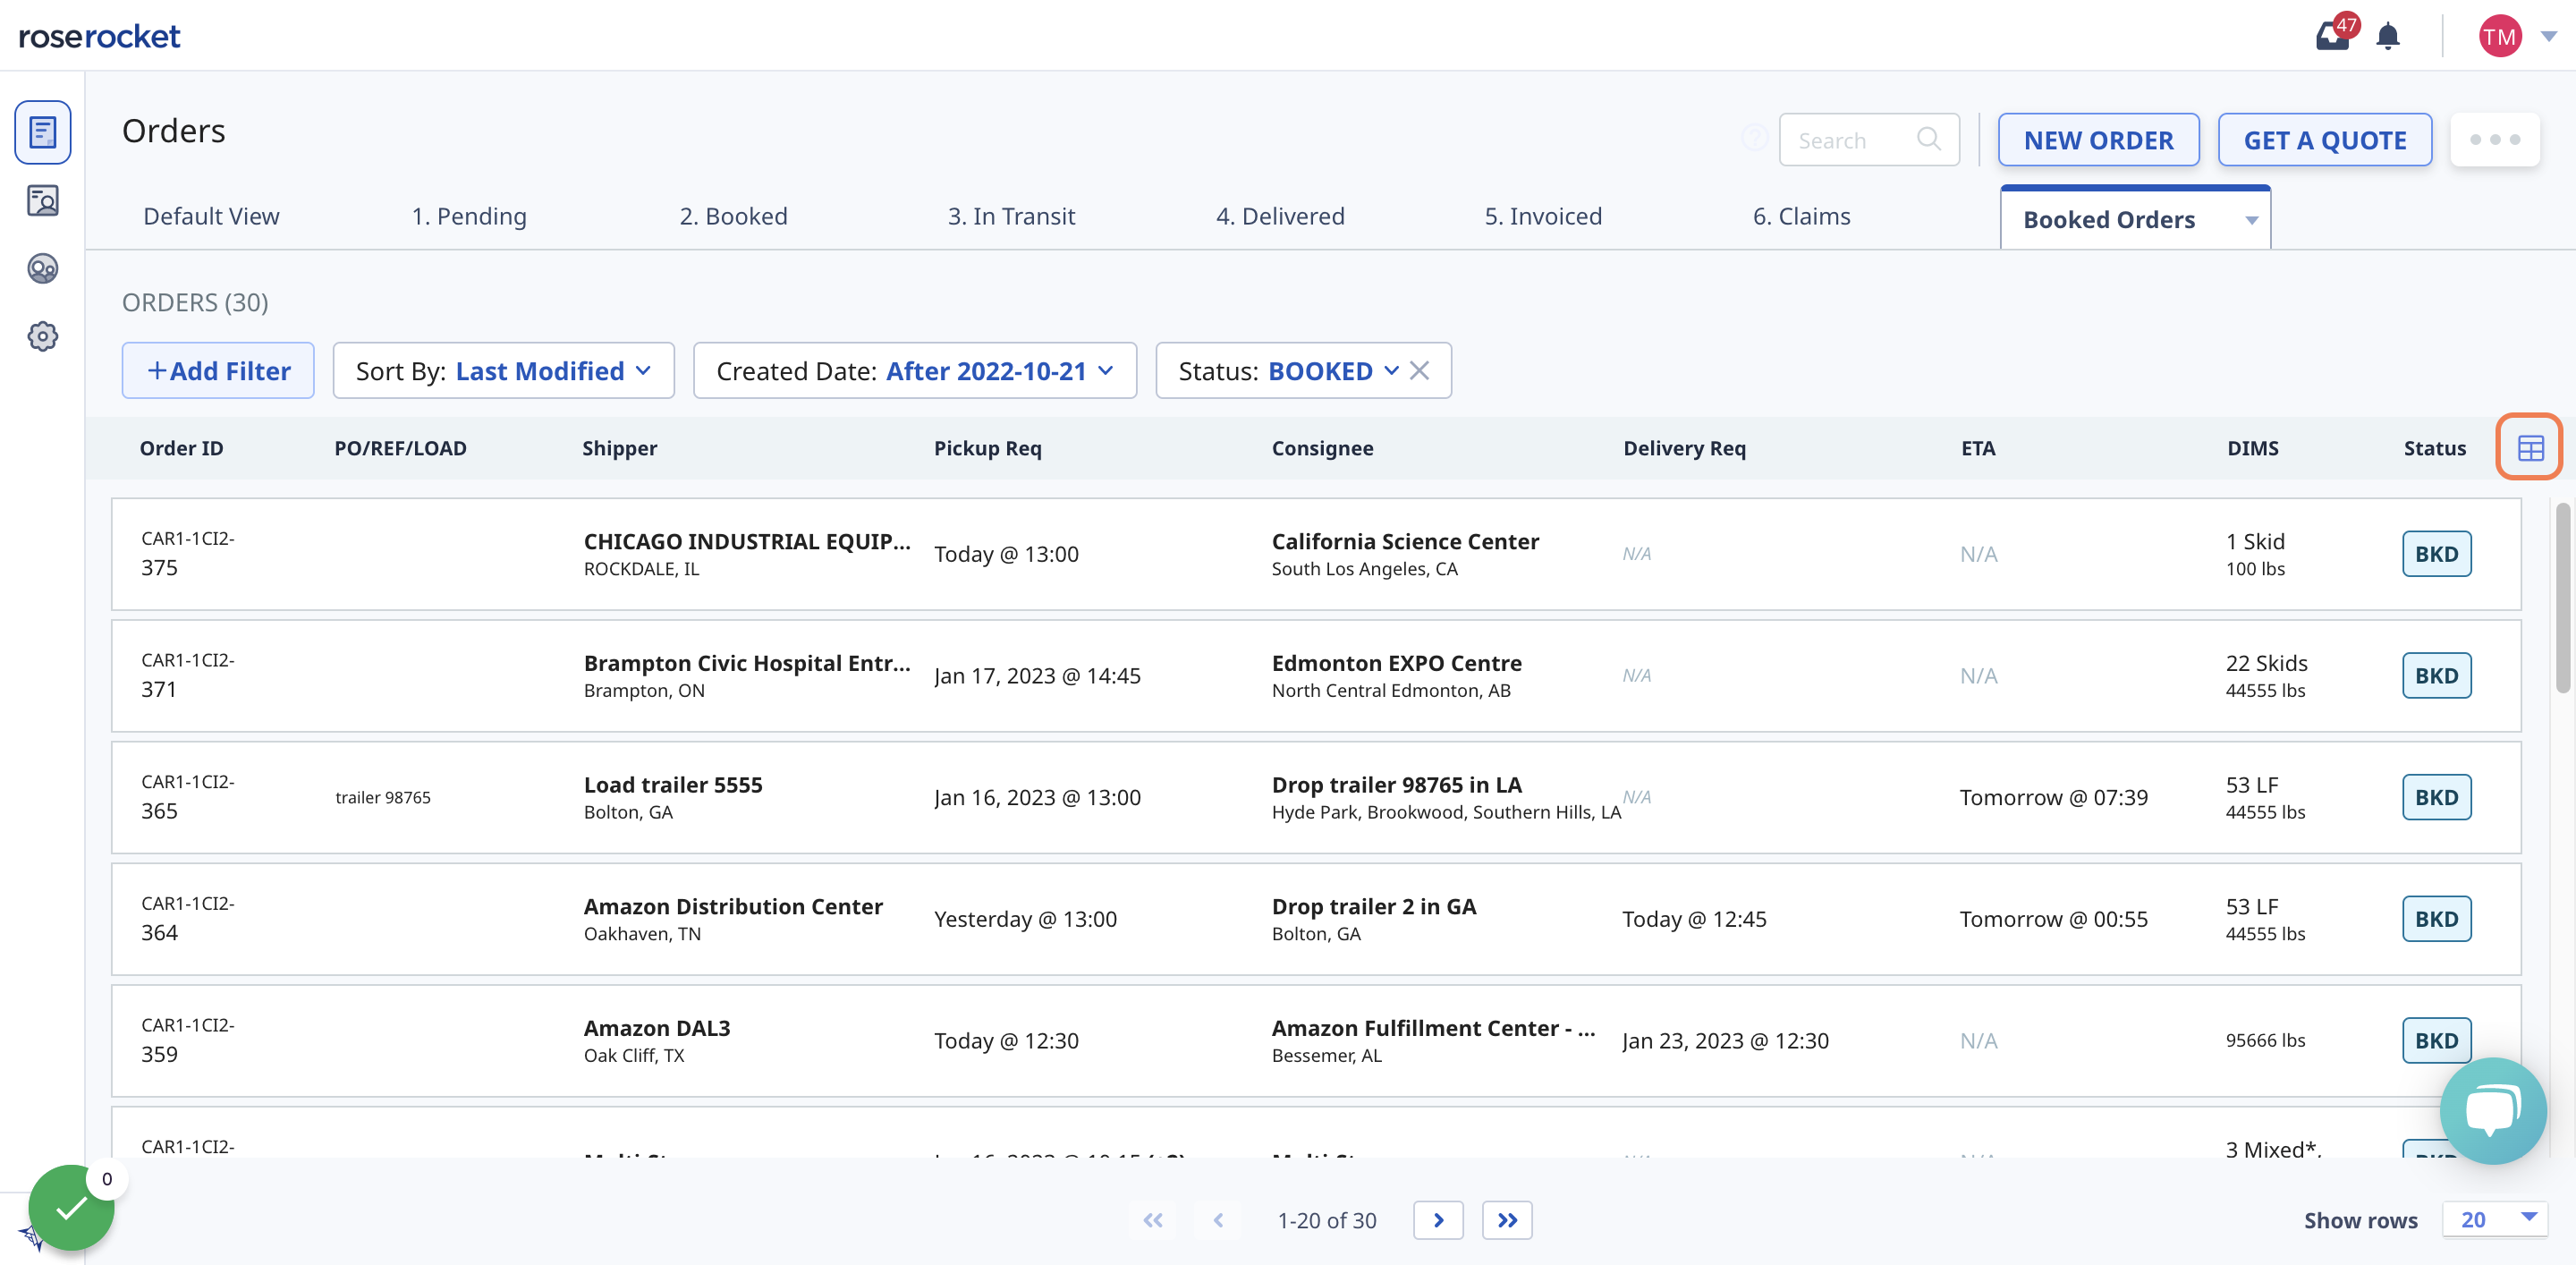
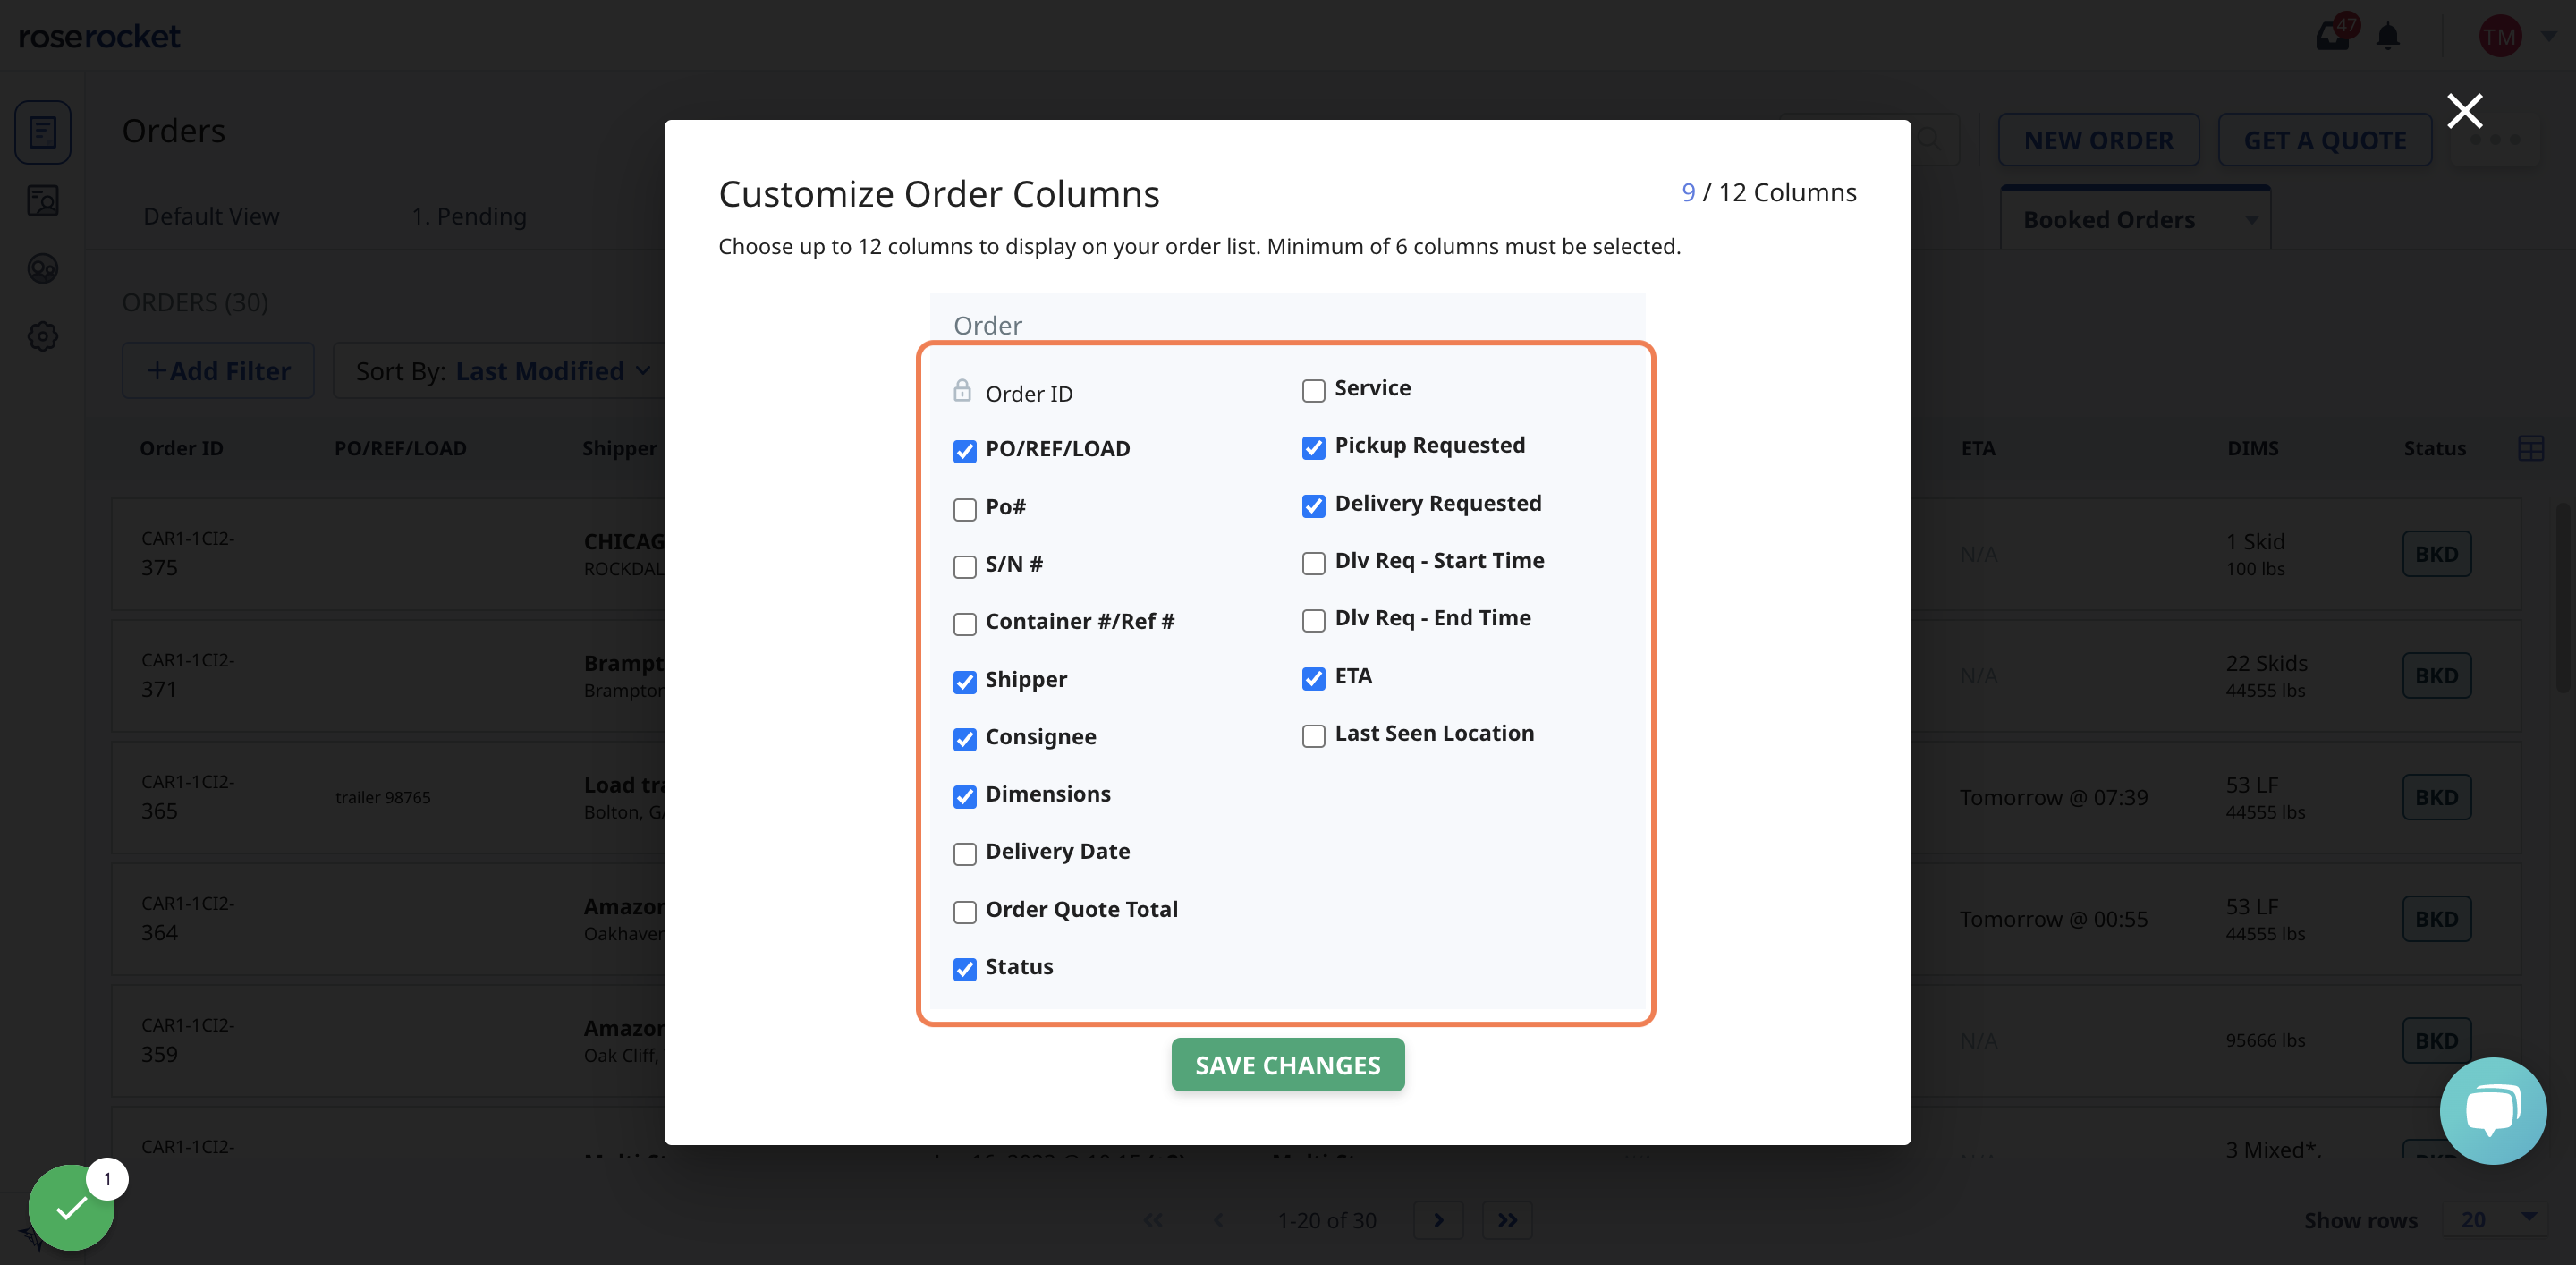
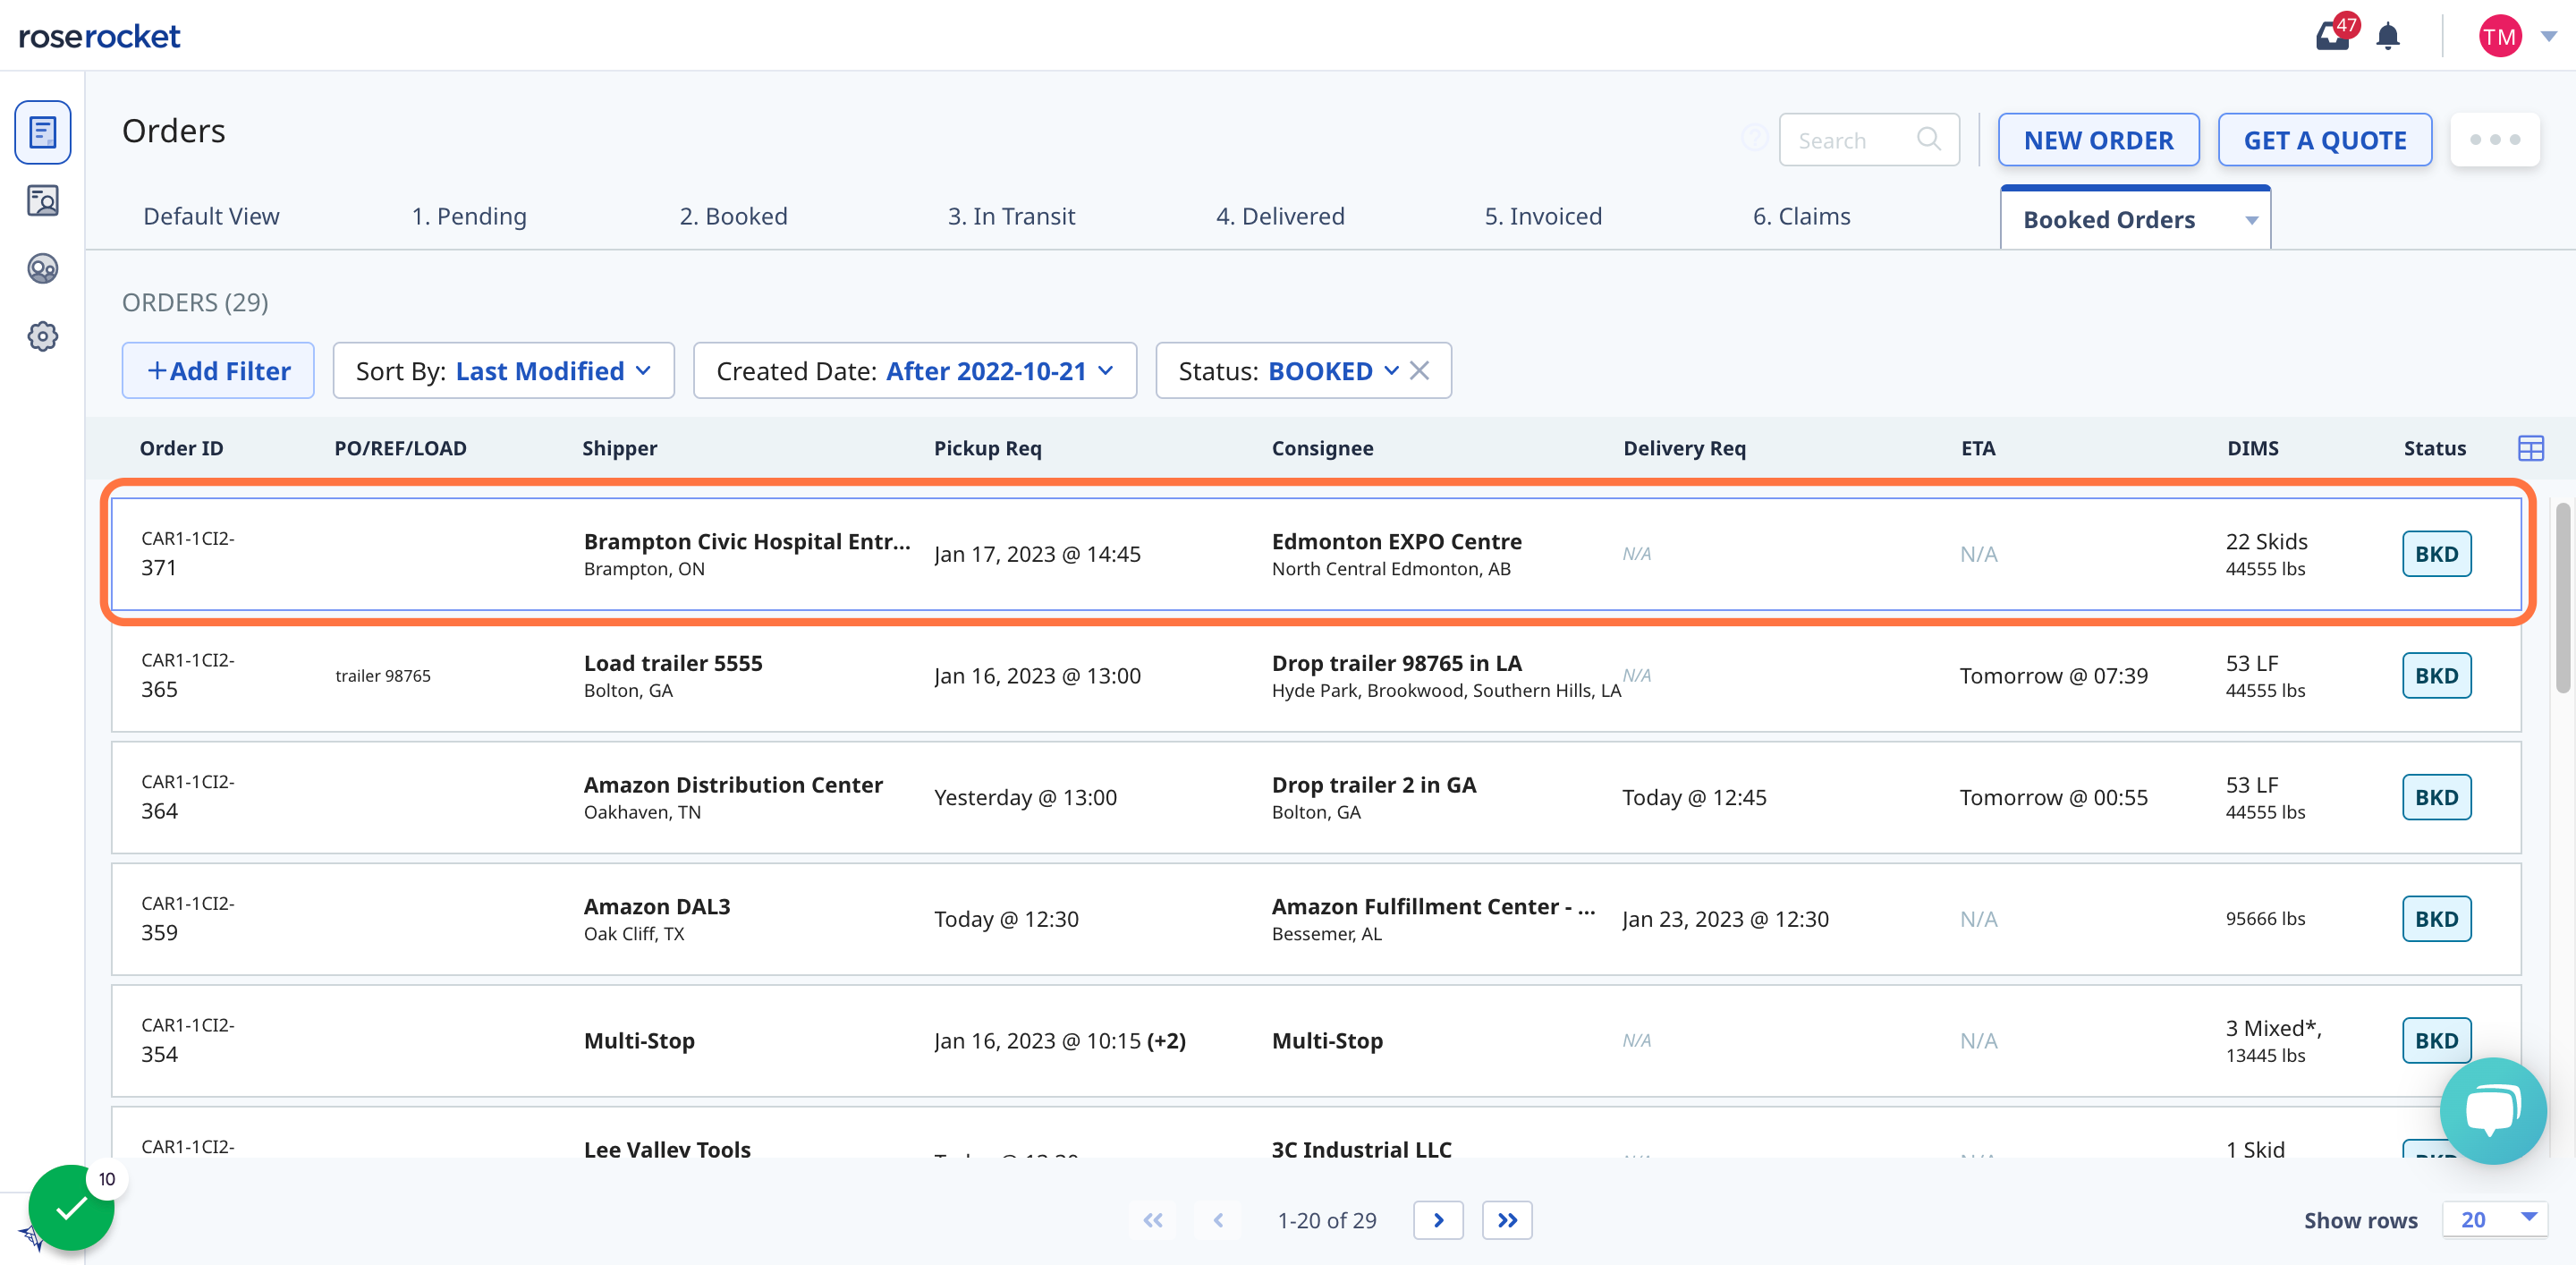
8. Choose up to 12 columns to display on your orders list, and click "Save Changes"
9. If you created a view that you plan to revisit often, you can click "Save As" to save it as a tab at the top of the page.
Otherwise, filters, sorting, and columns will be reset to default when you exit.
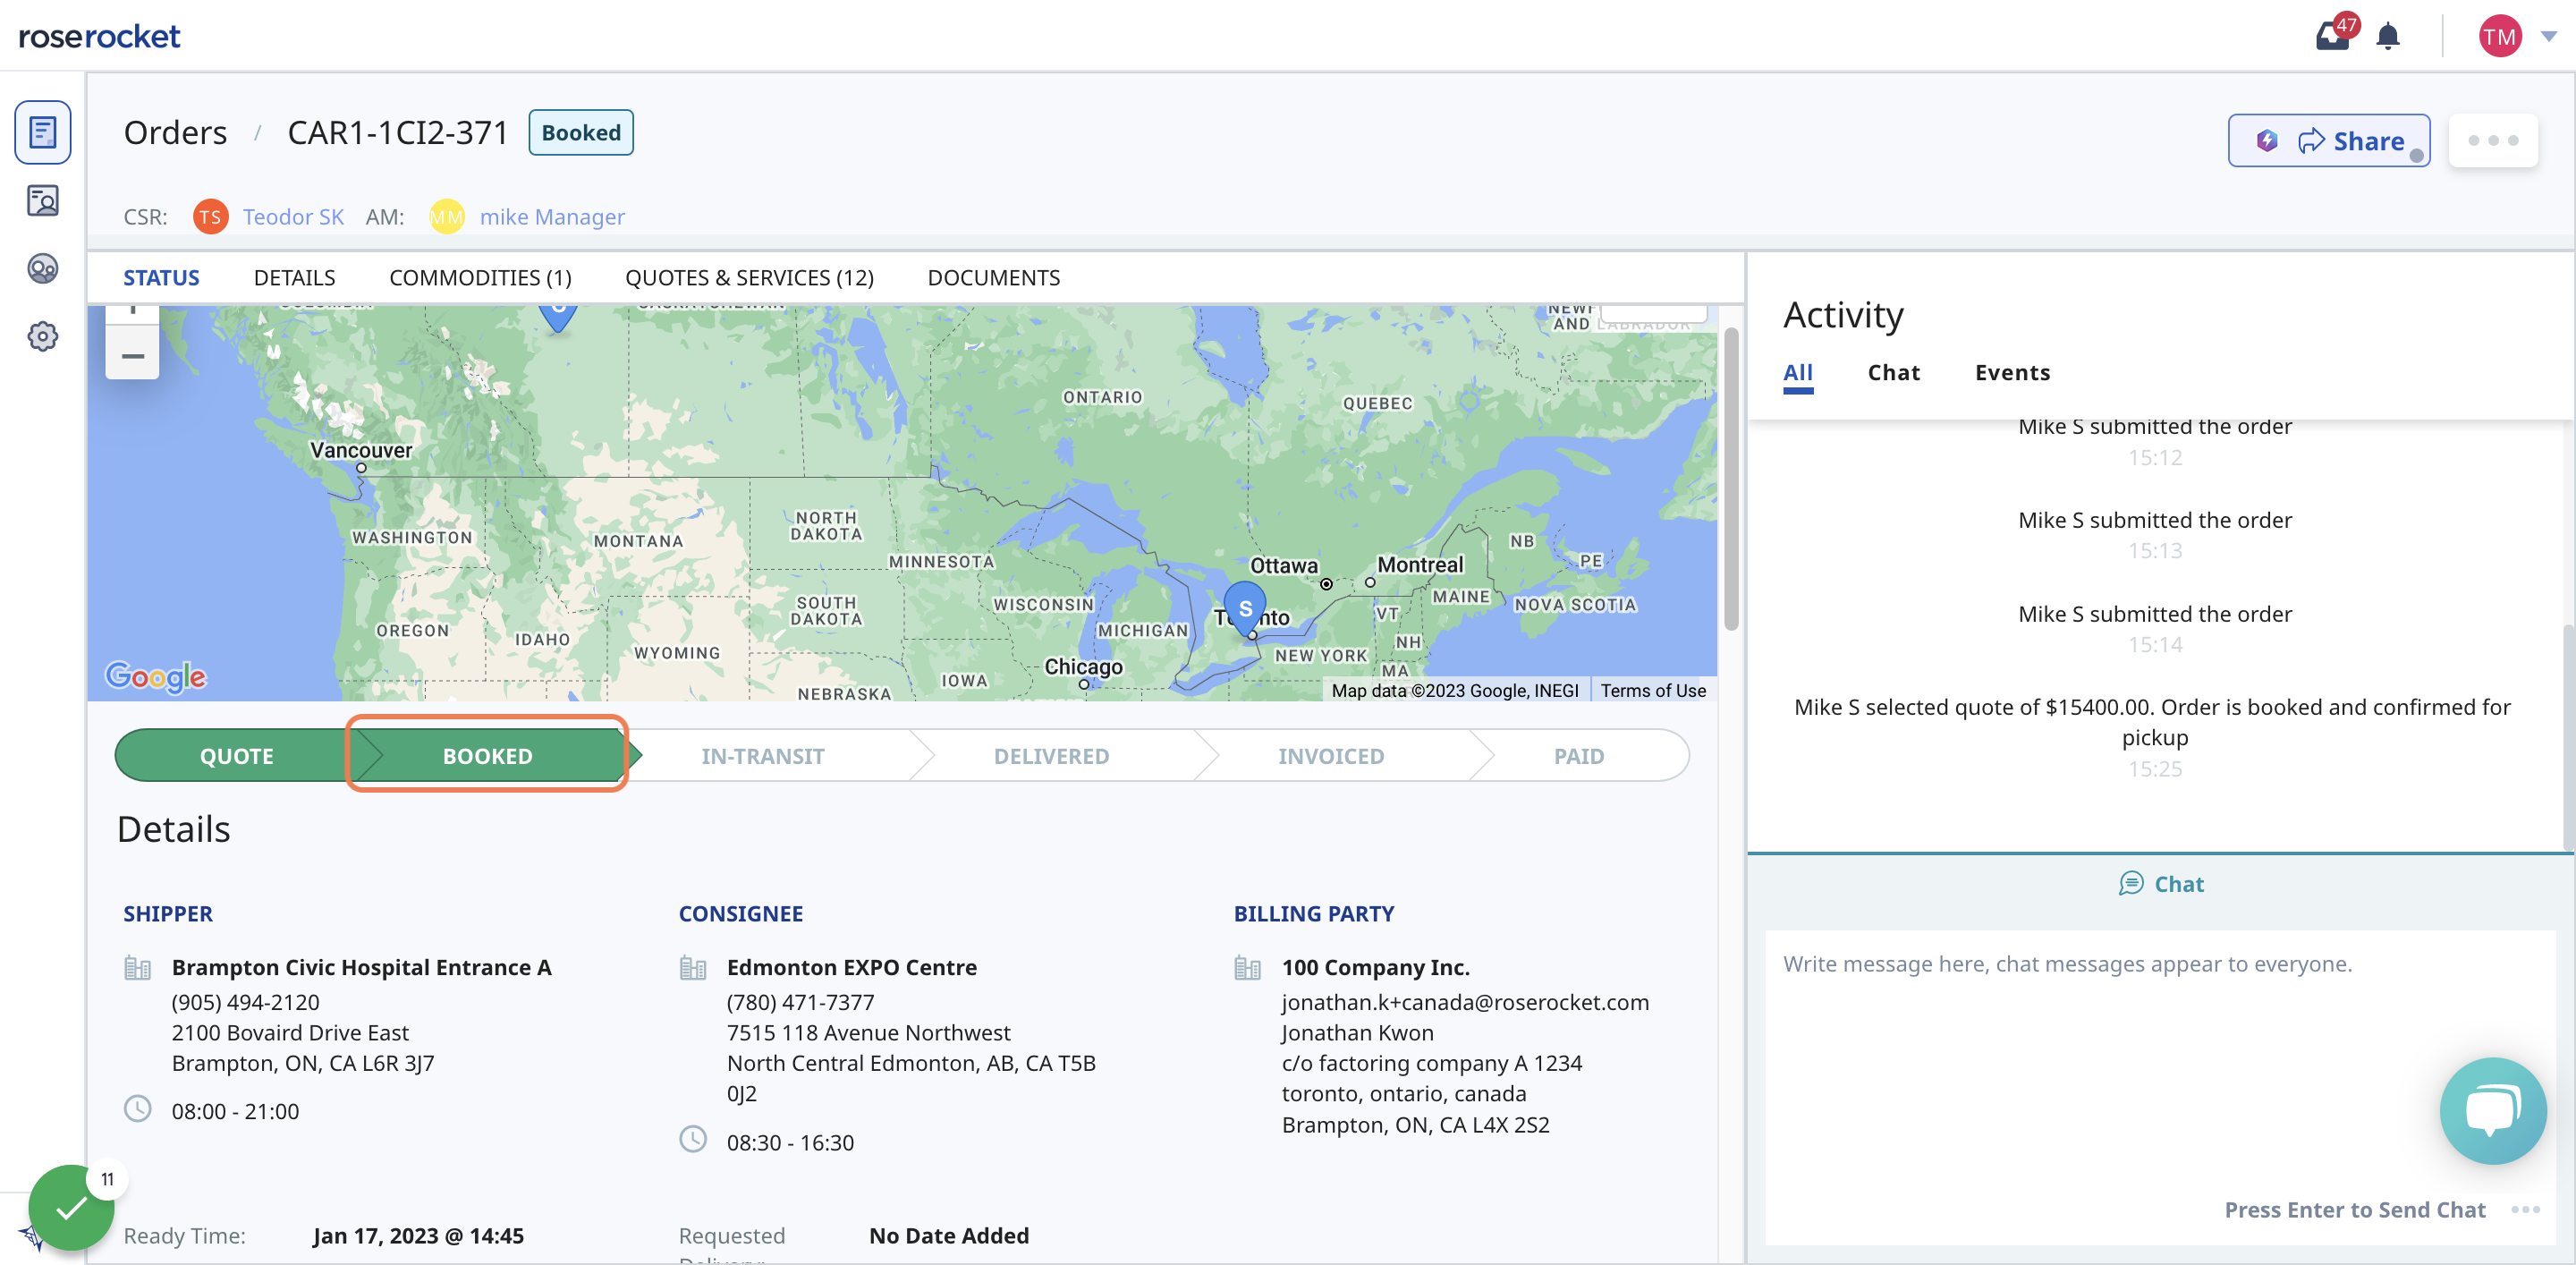
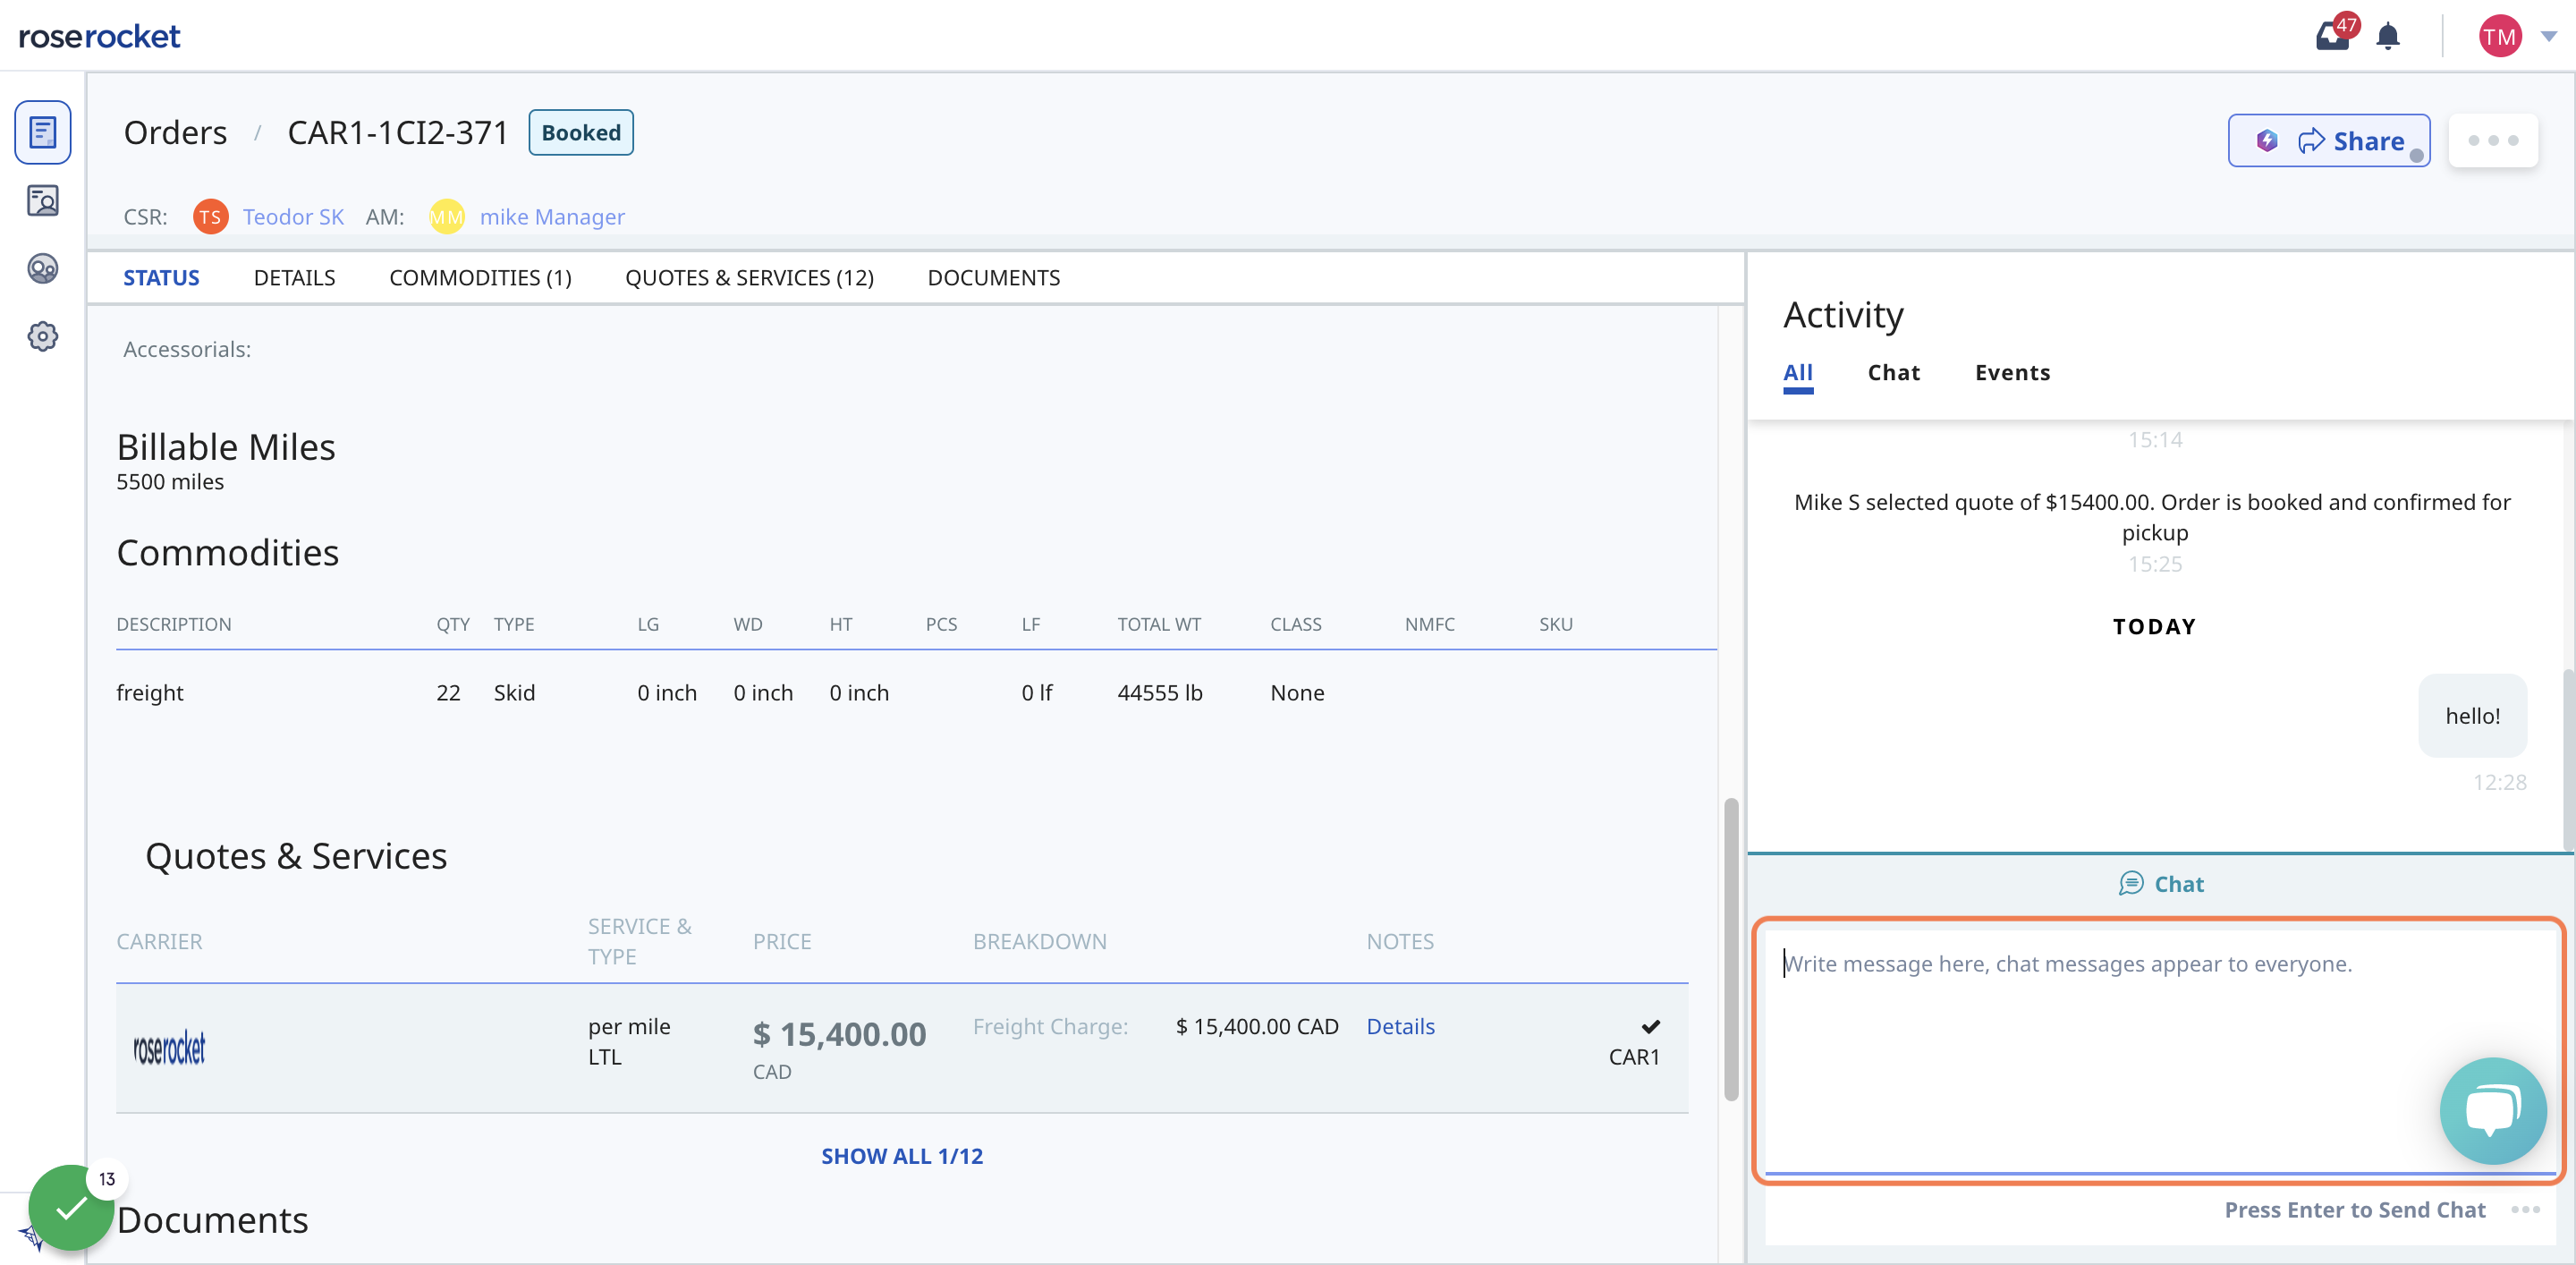
10. To get more details on a particular order, click on an order from the list
11. From the Order Details page, you can find additional details
Details include: map view of your order's location, status, shipper/consignee/billing addresses, pick-up and delivery times, and commodities
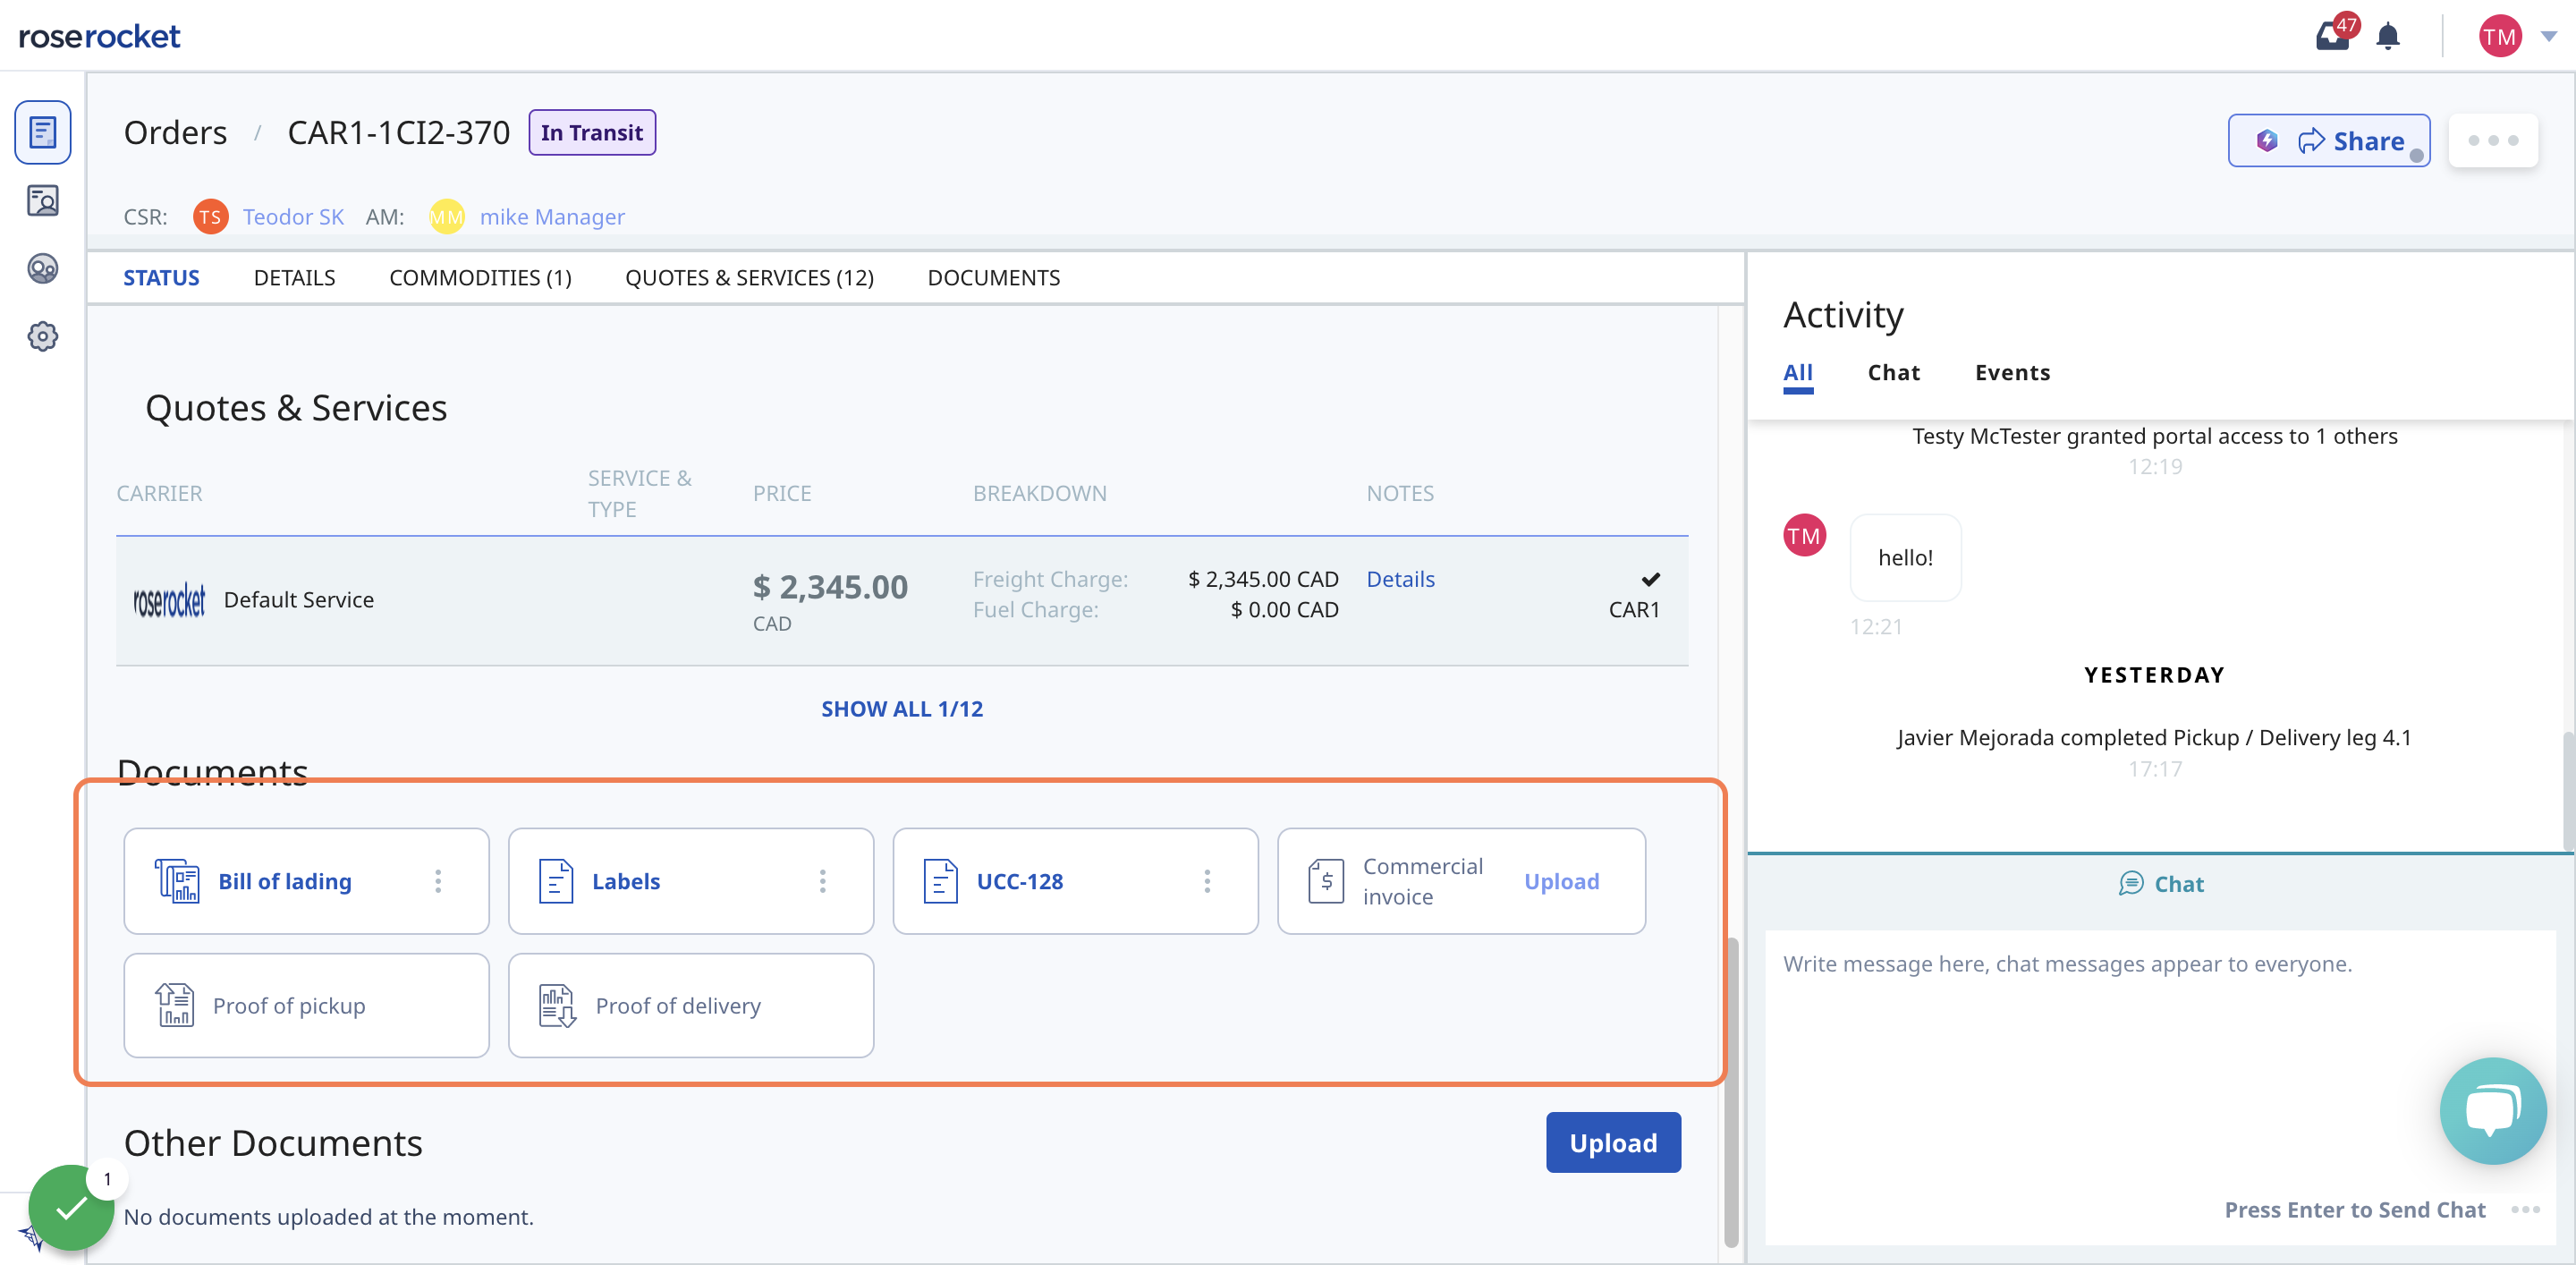
12. You can also find relevant documents related to this order in the Documents section
Here you'll find PDF uploads of documents like: Bill of Lading, Labels, Proof of Delivery, and more.
13. On the right hand side is the Activity Log. This is a real-time log of all important changes to the order. You can also use the chat window to chat directly with your partner in context of the order.
Sharing your e-Tracking Page
Want to quickly share the location and status of an order, without giving full Customer Portal access? e-Tracking Pages are lightweight, shareable links you can send to anyone so they can track an orders status in real time, without granting the full access to the portal
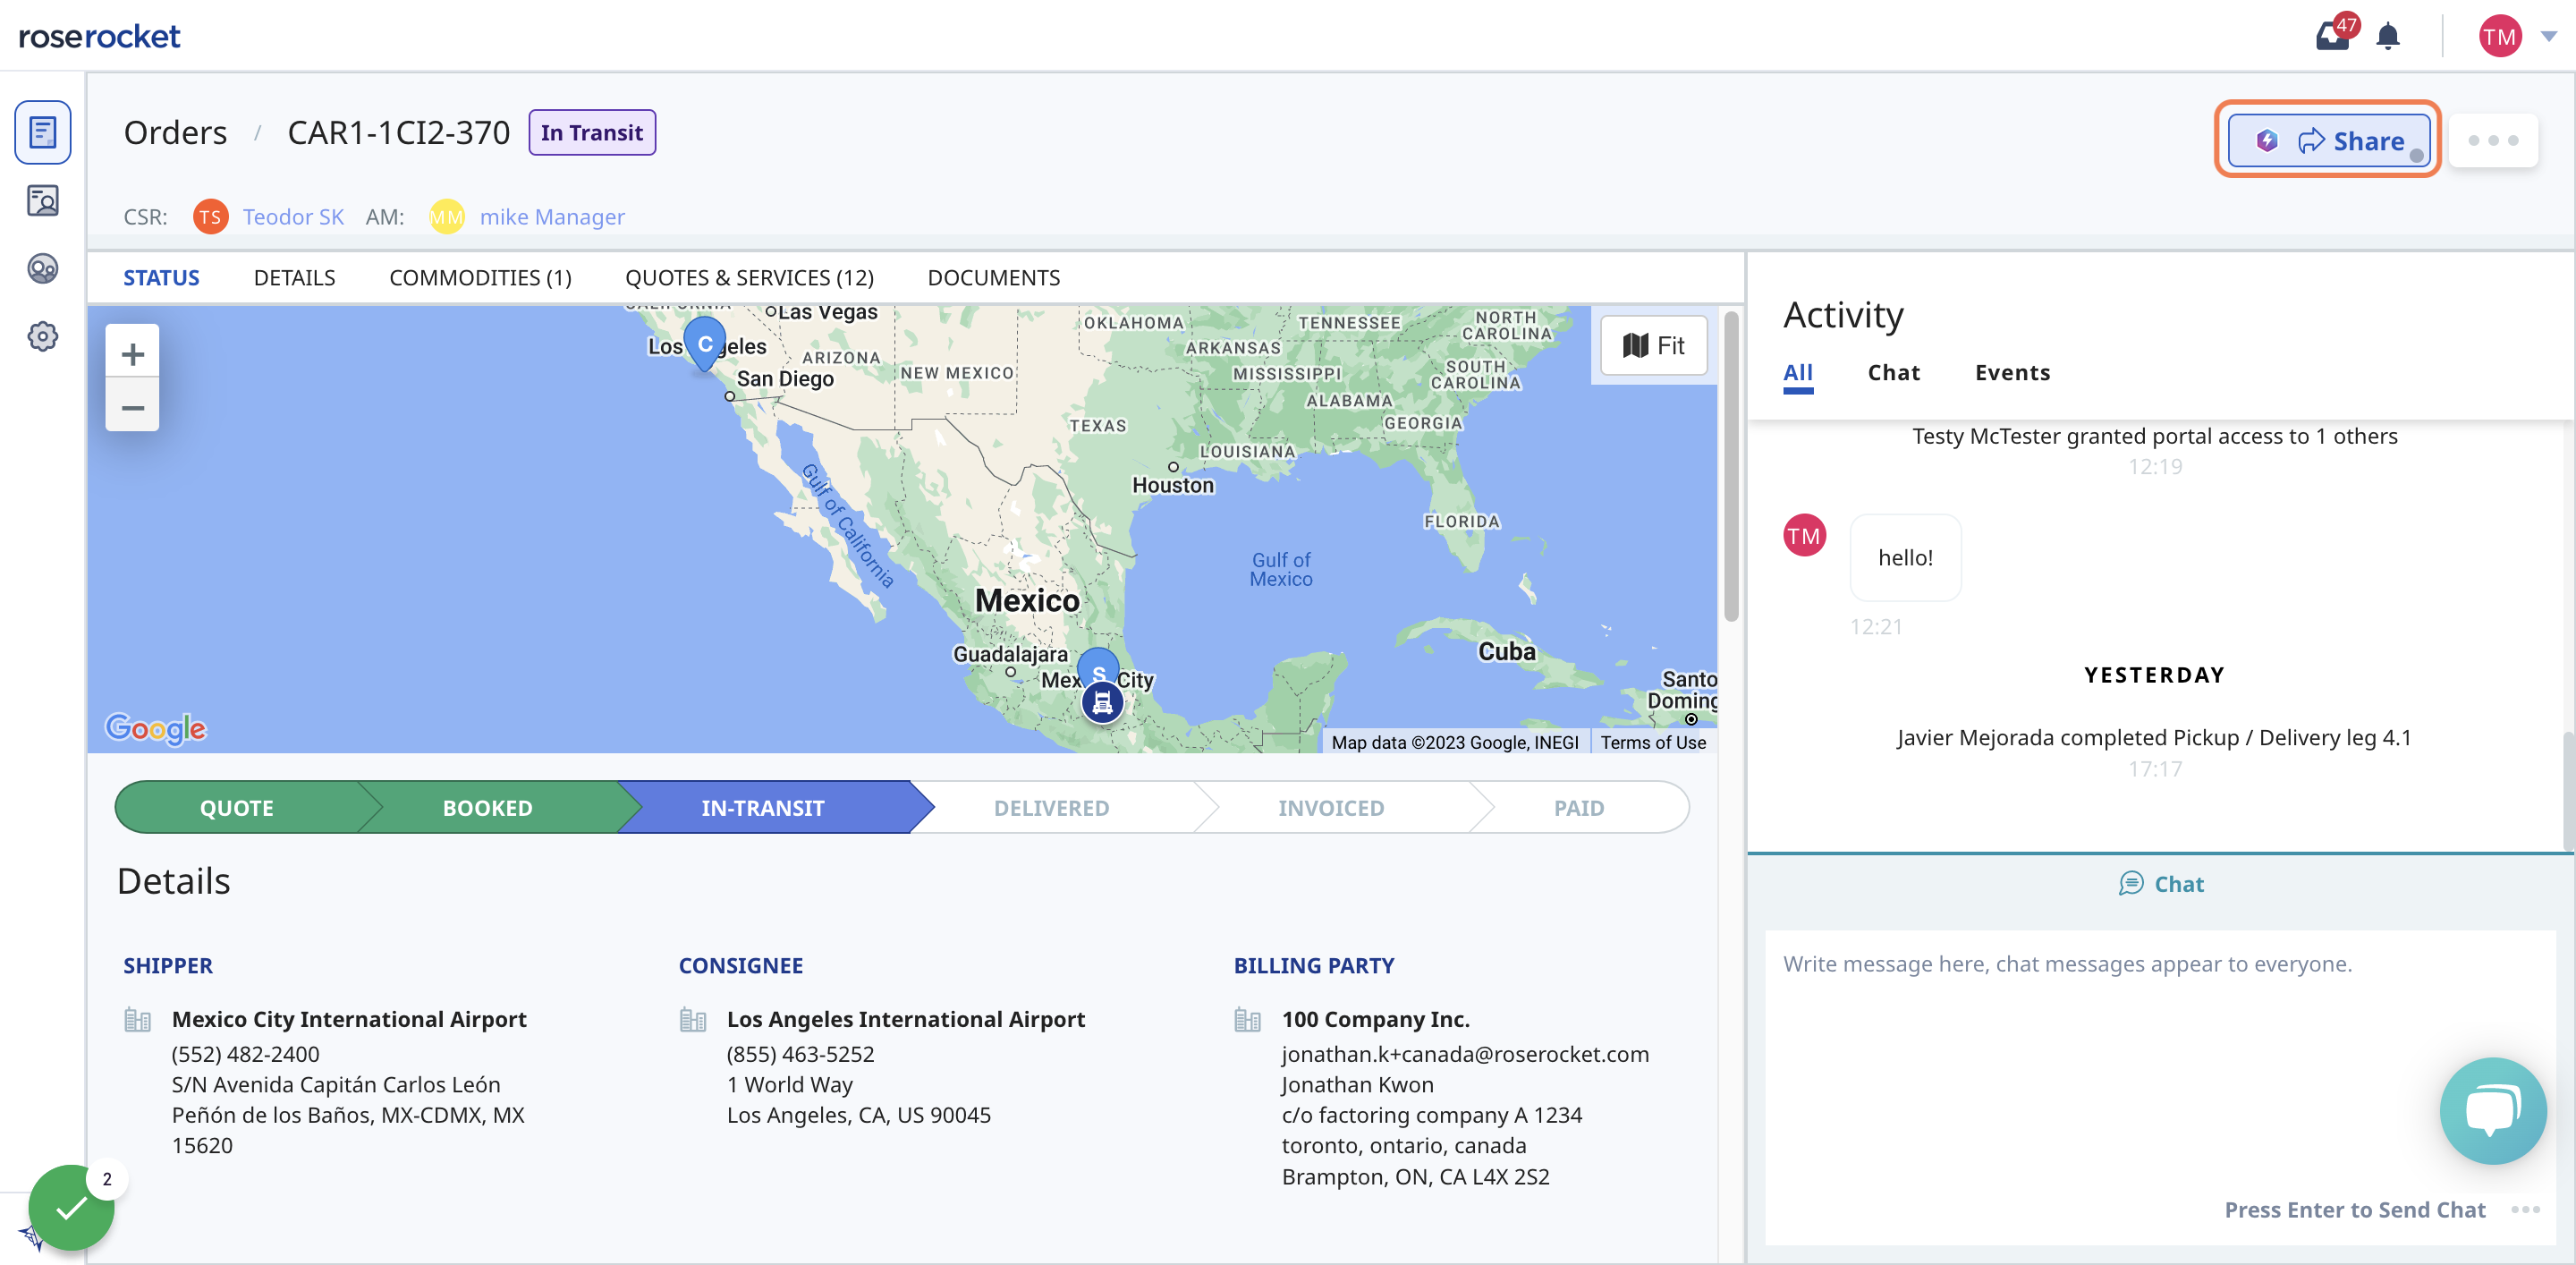
1. From the Orders page, select an order that's in Booked, In-Transit, or Delivered status
2. From that order's Details page, select the "Share" button
3. Copy your generated link for this order's e-Tracking Page, and send it to whomever you wish to share it with.
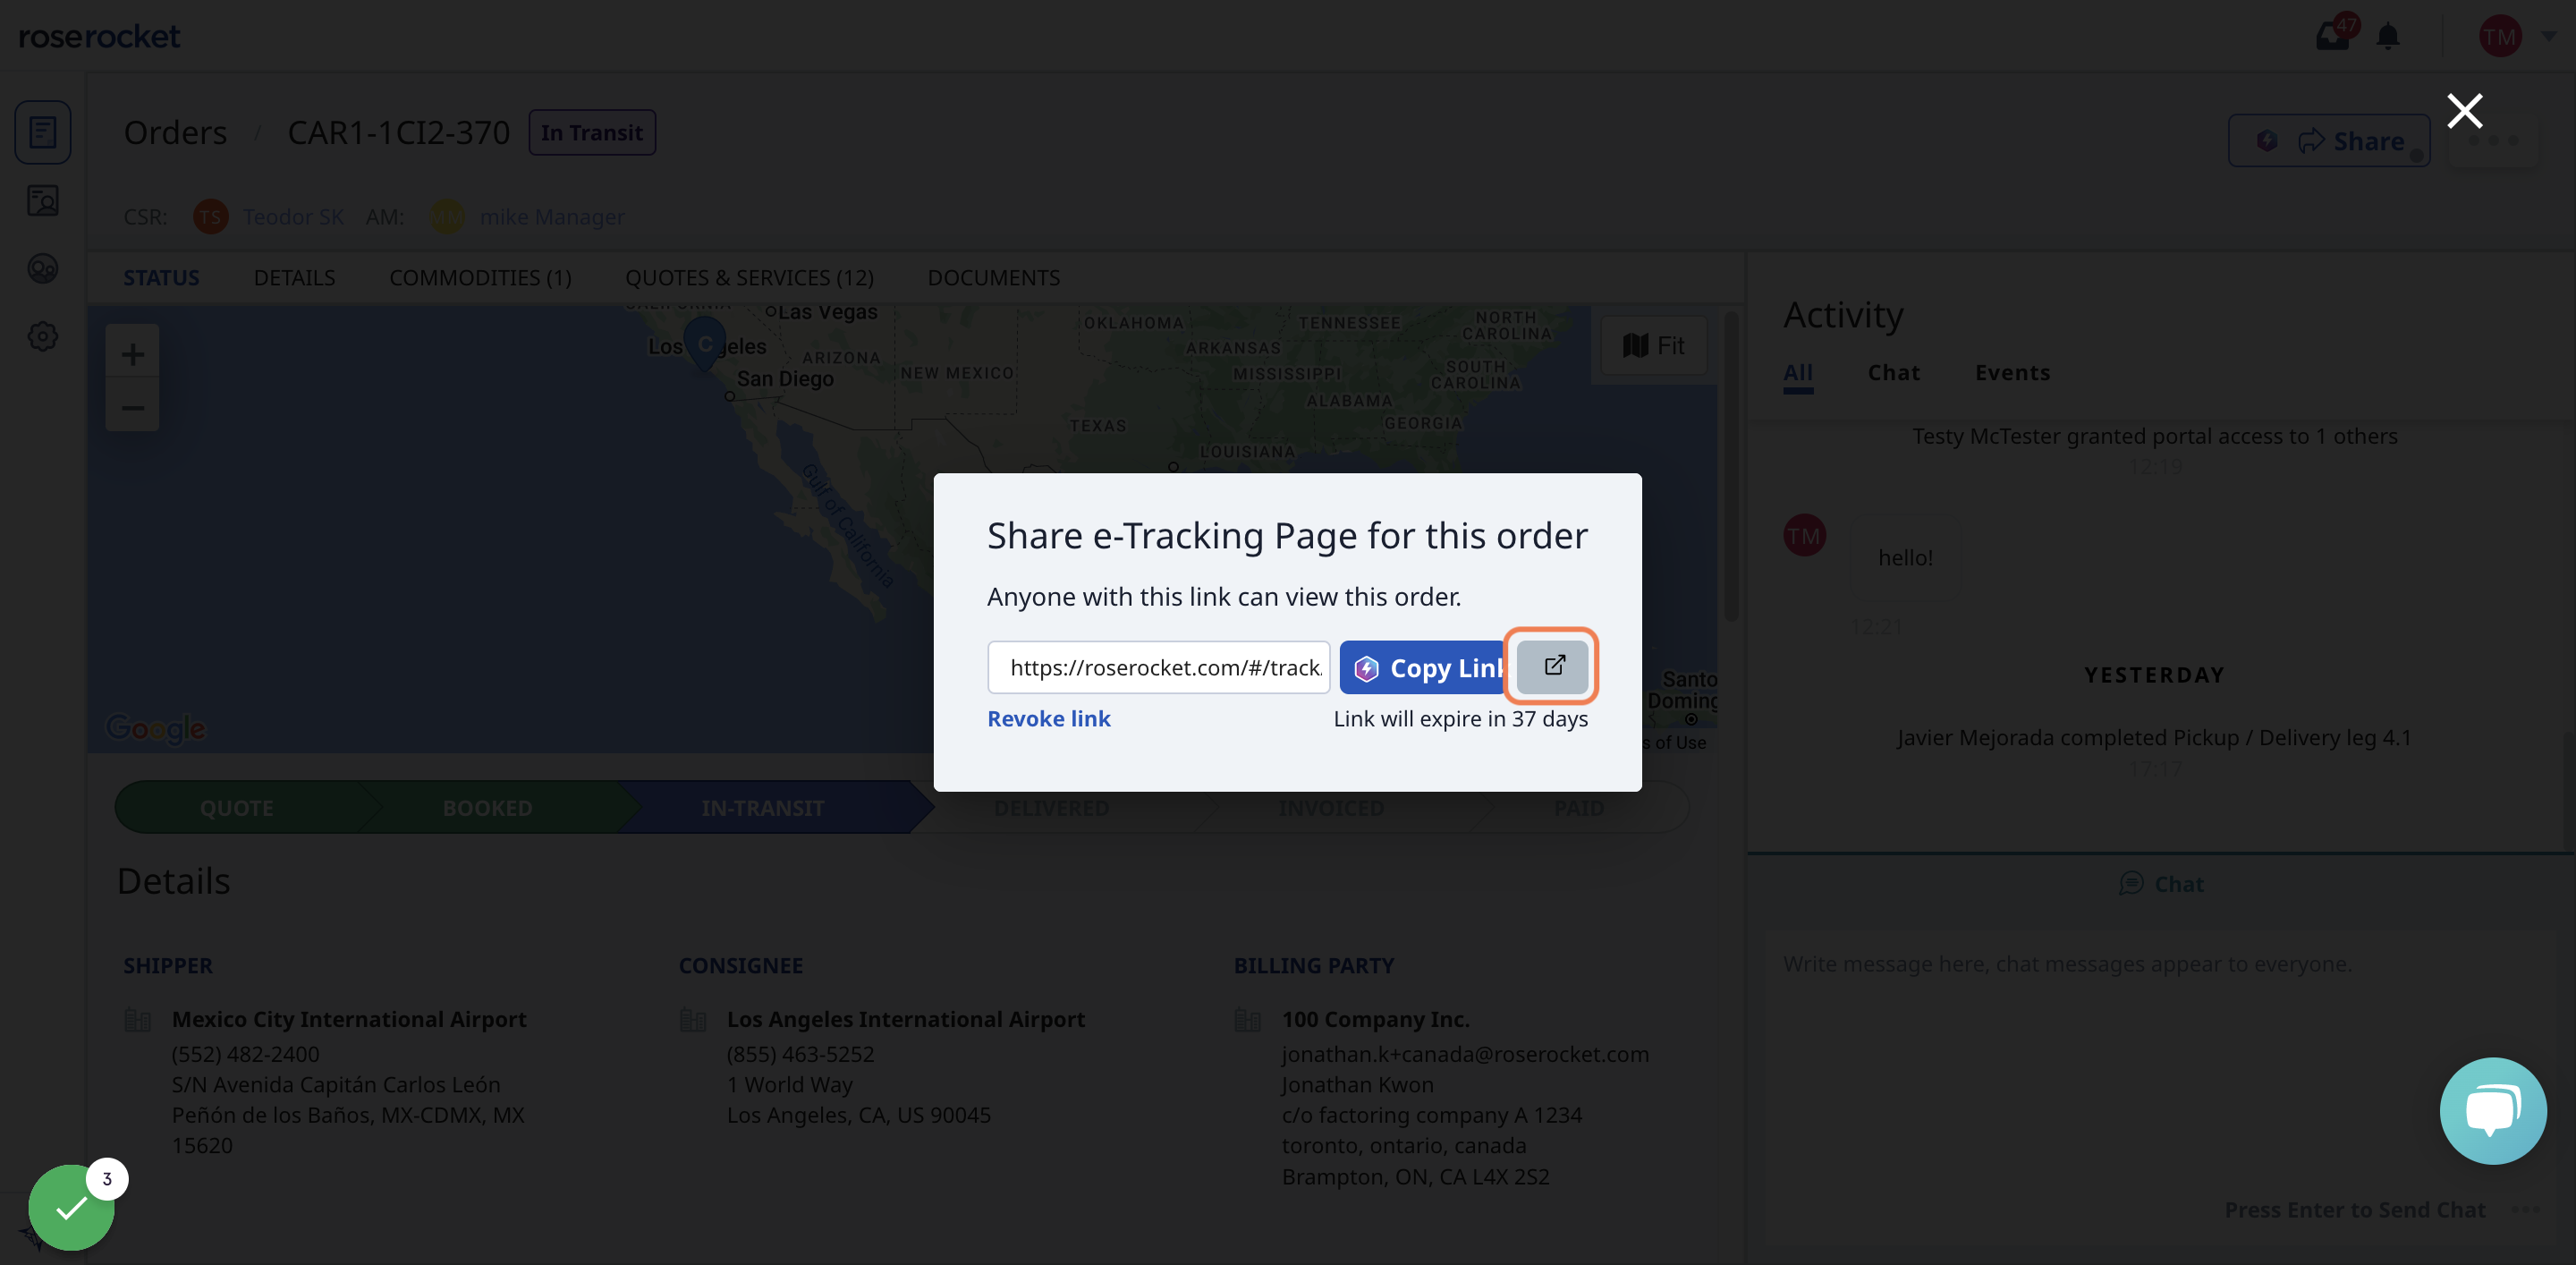
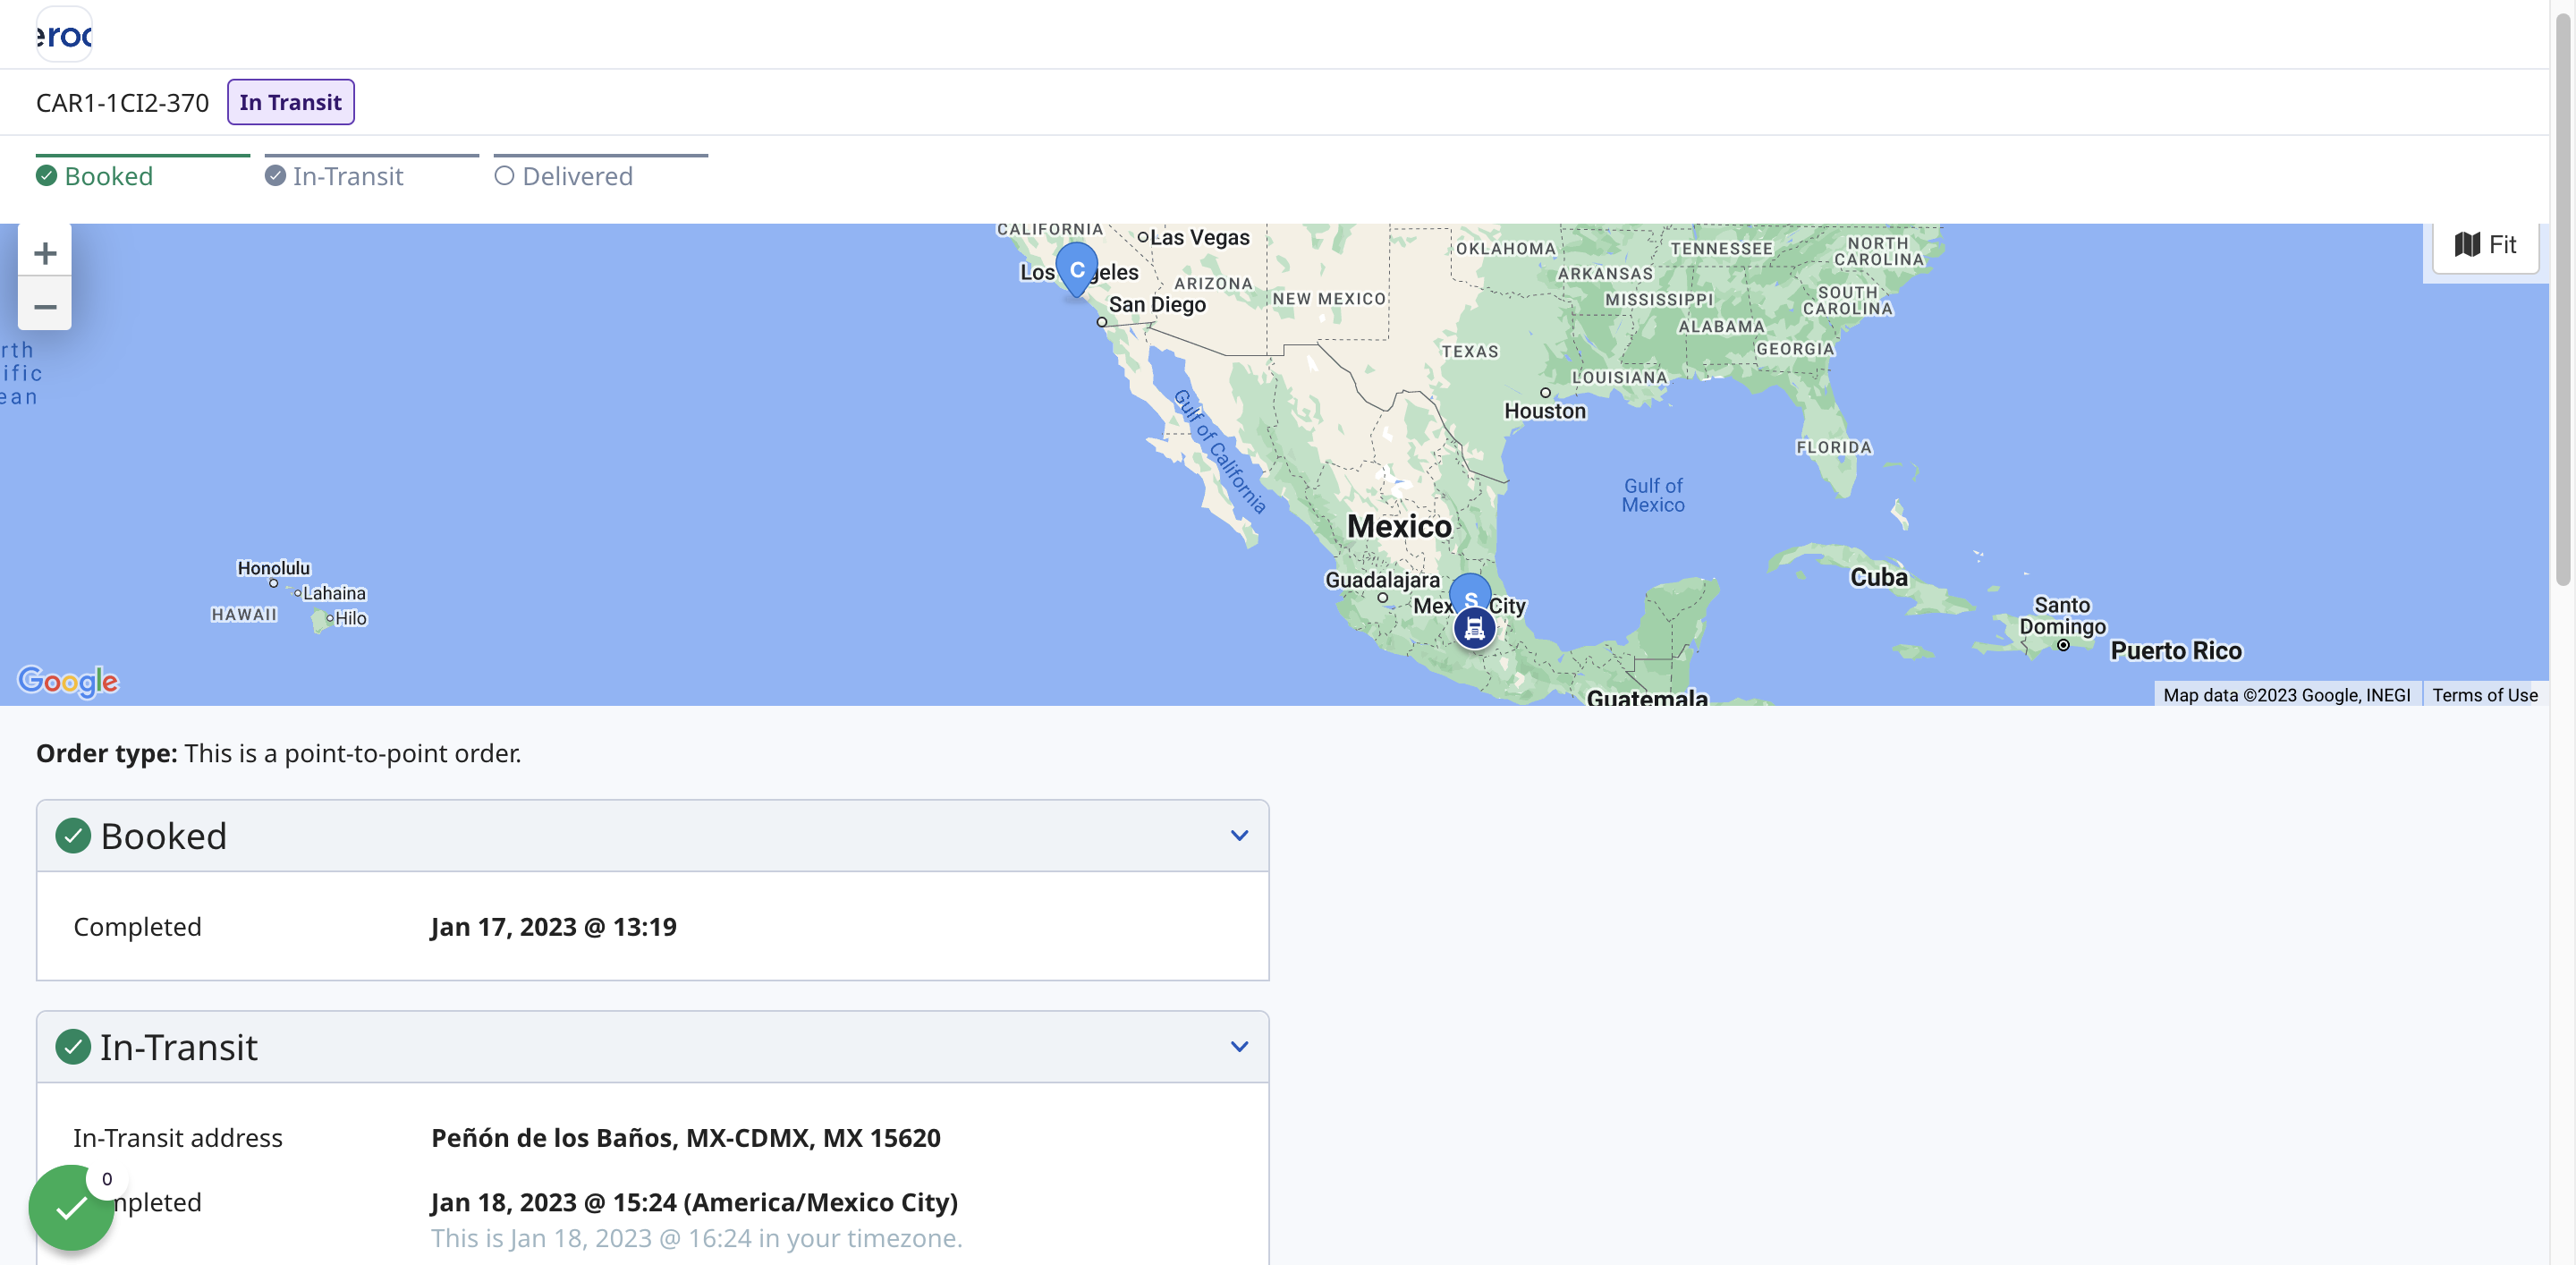
4. Here is what an e-Tracking Page looks like
On the page, those who are interested can view the status of the order, check its location on a map, and find details of the order
Creating a new order
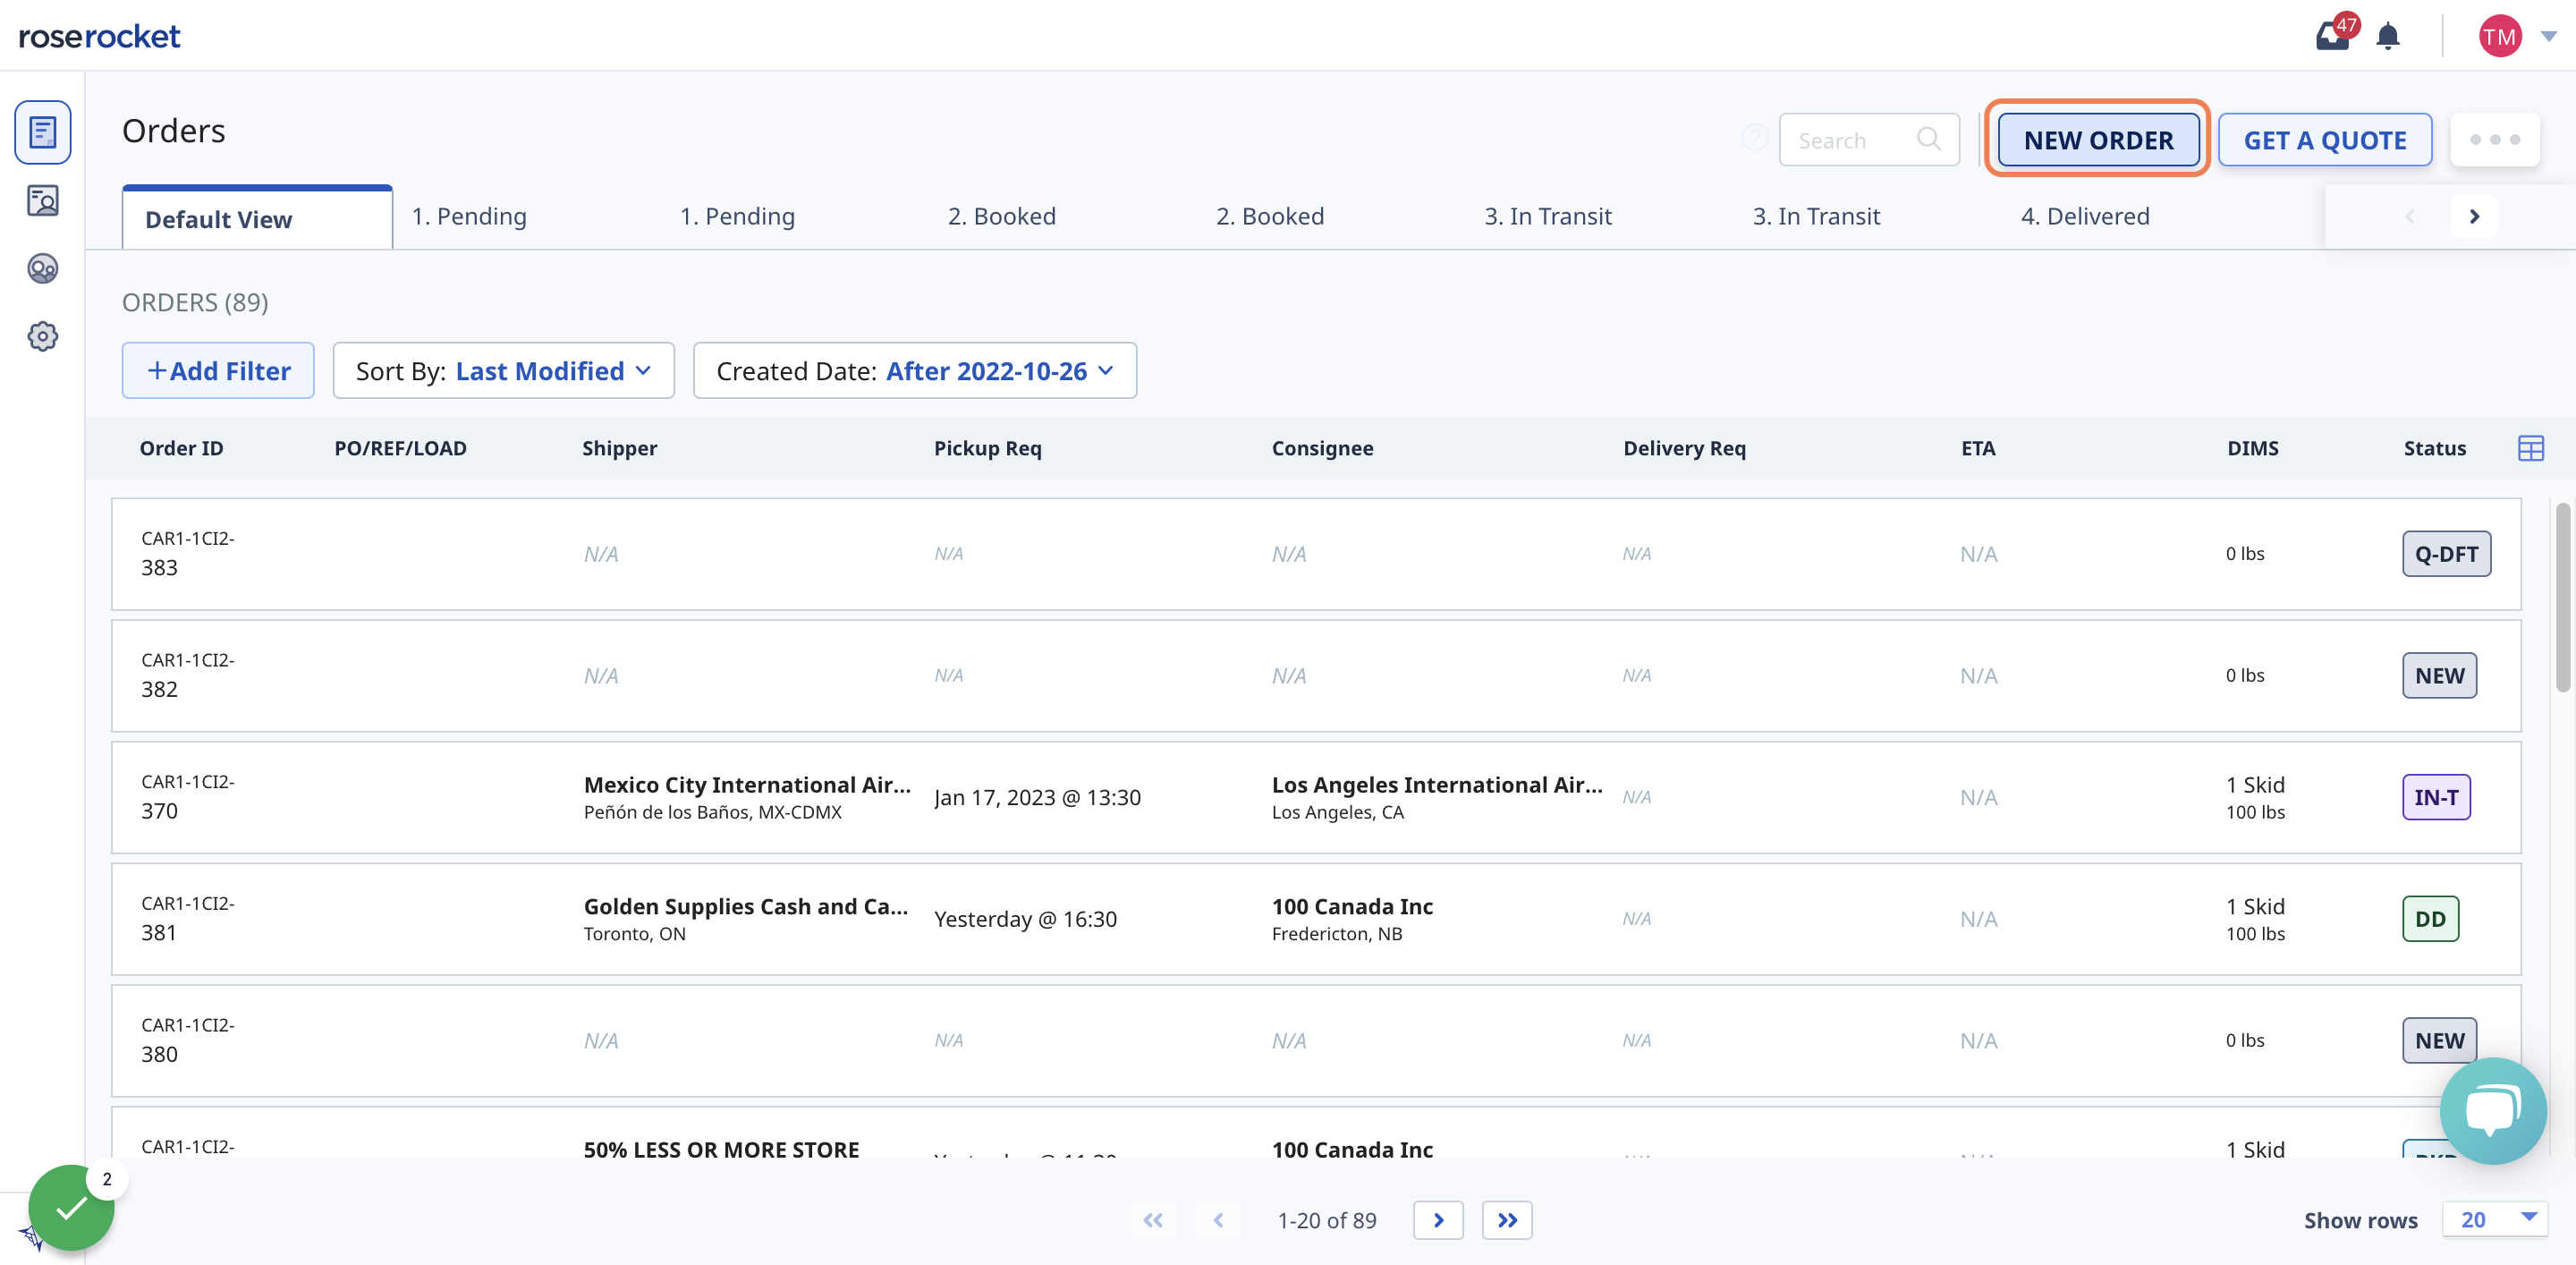
1. Click Orders from the side navigation menu
2. Click on NEW ORDER
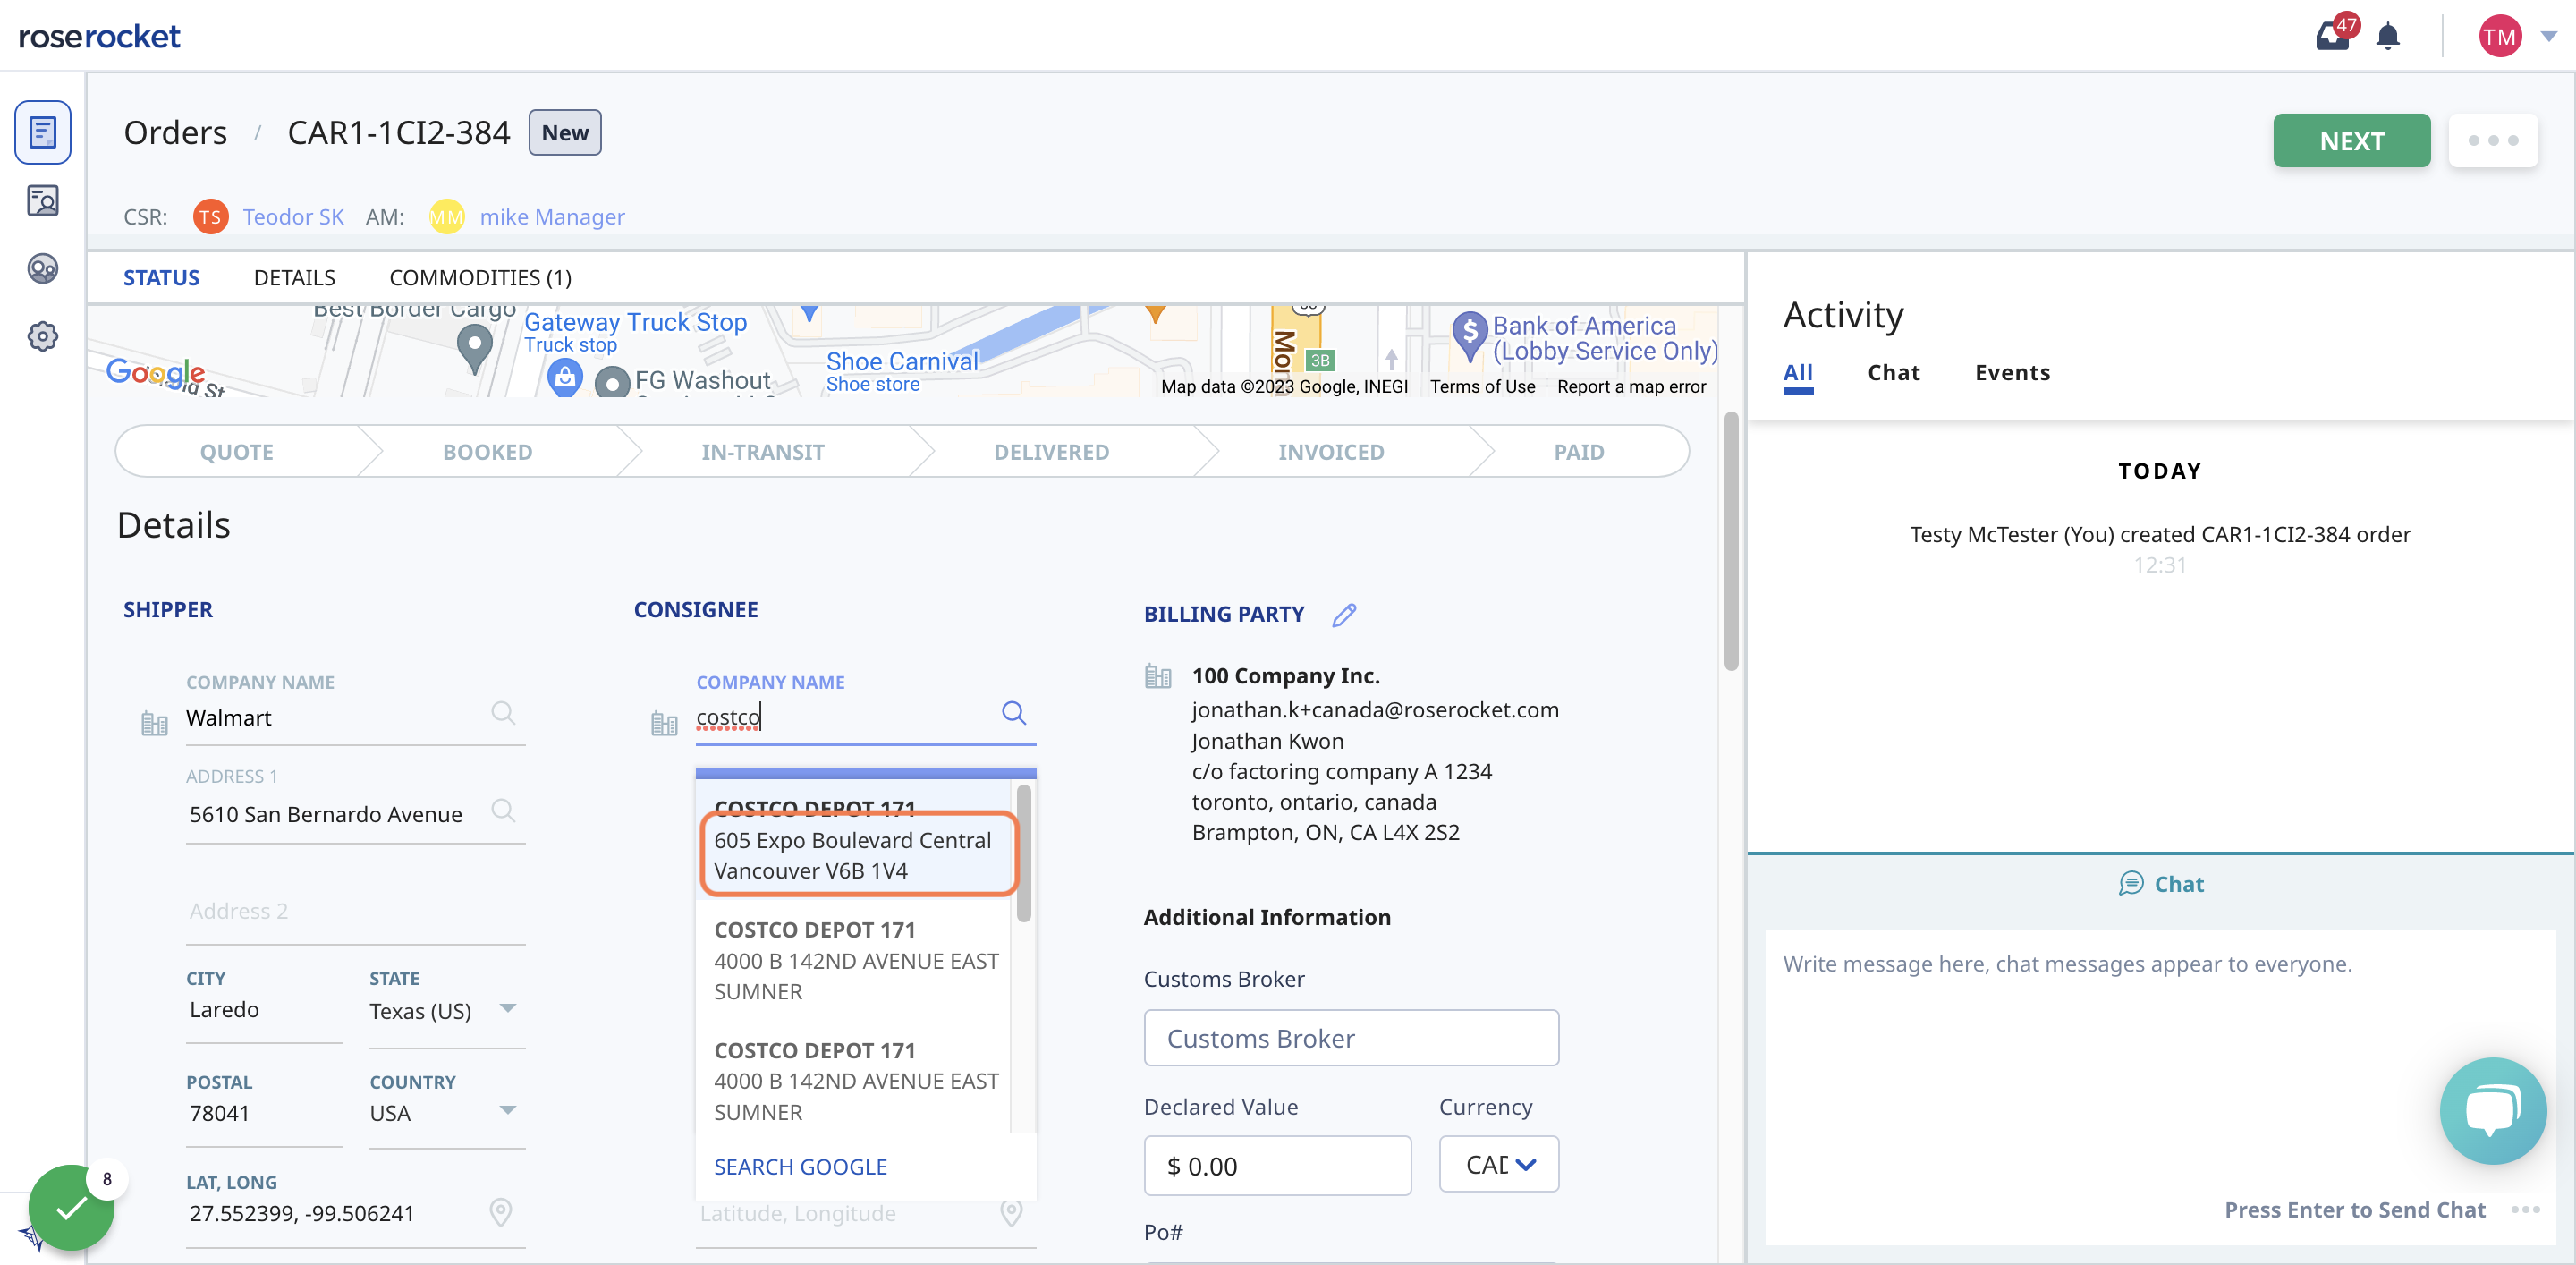
3. From the Create Order page, fill in address and details for shipper and consignee
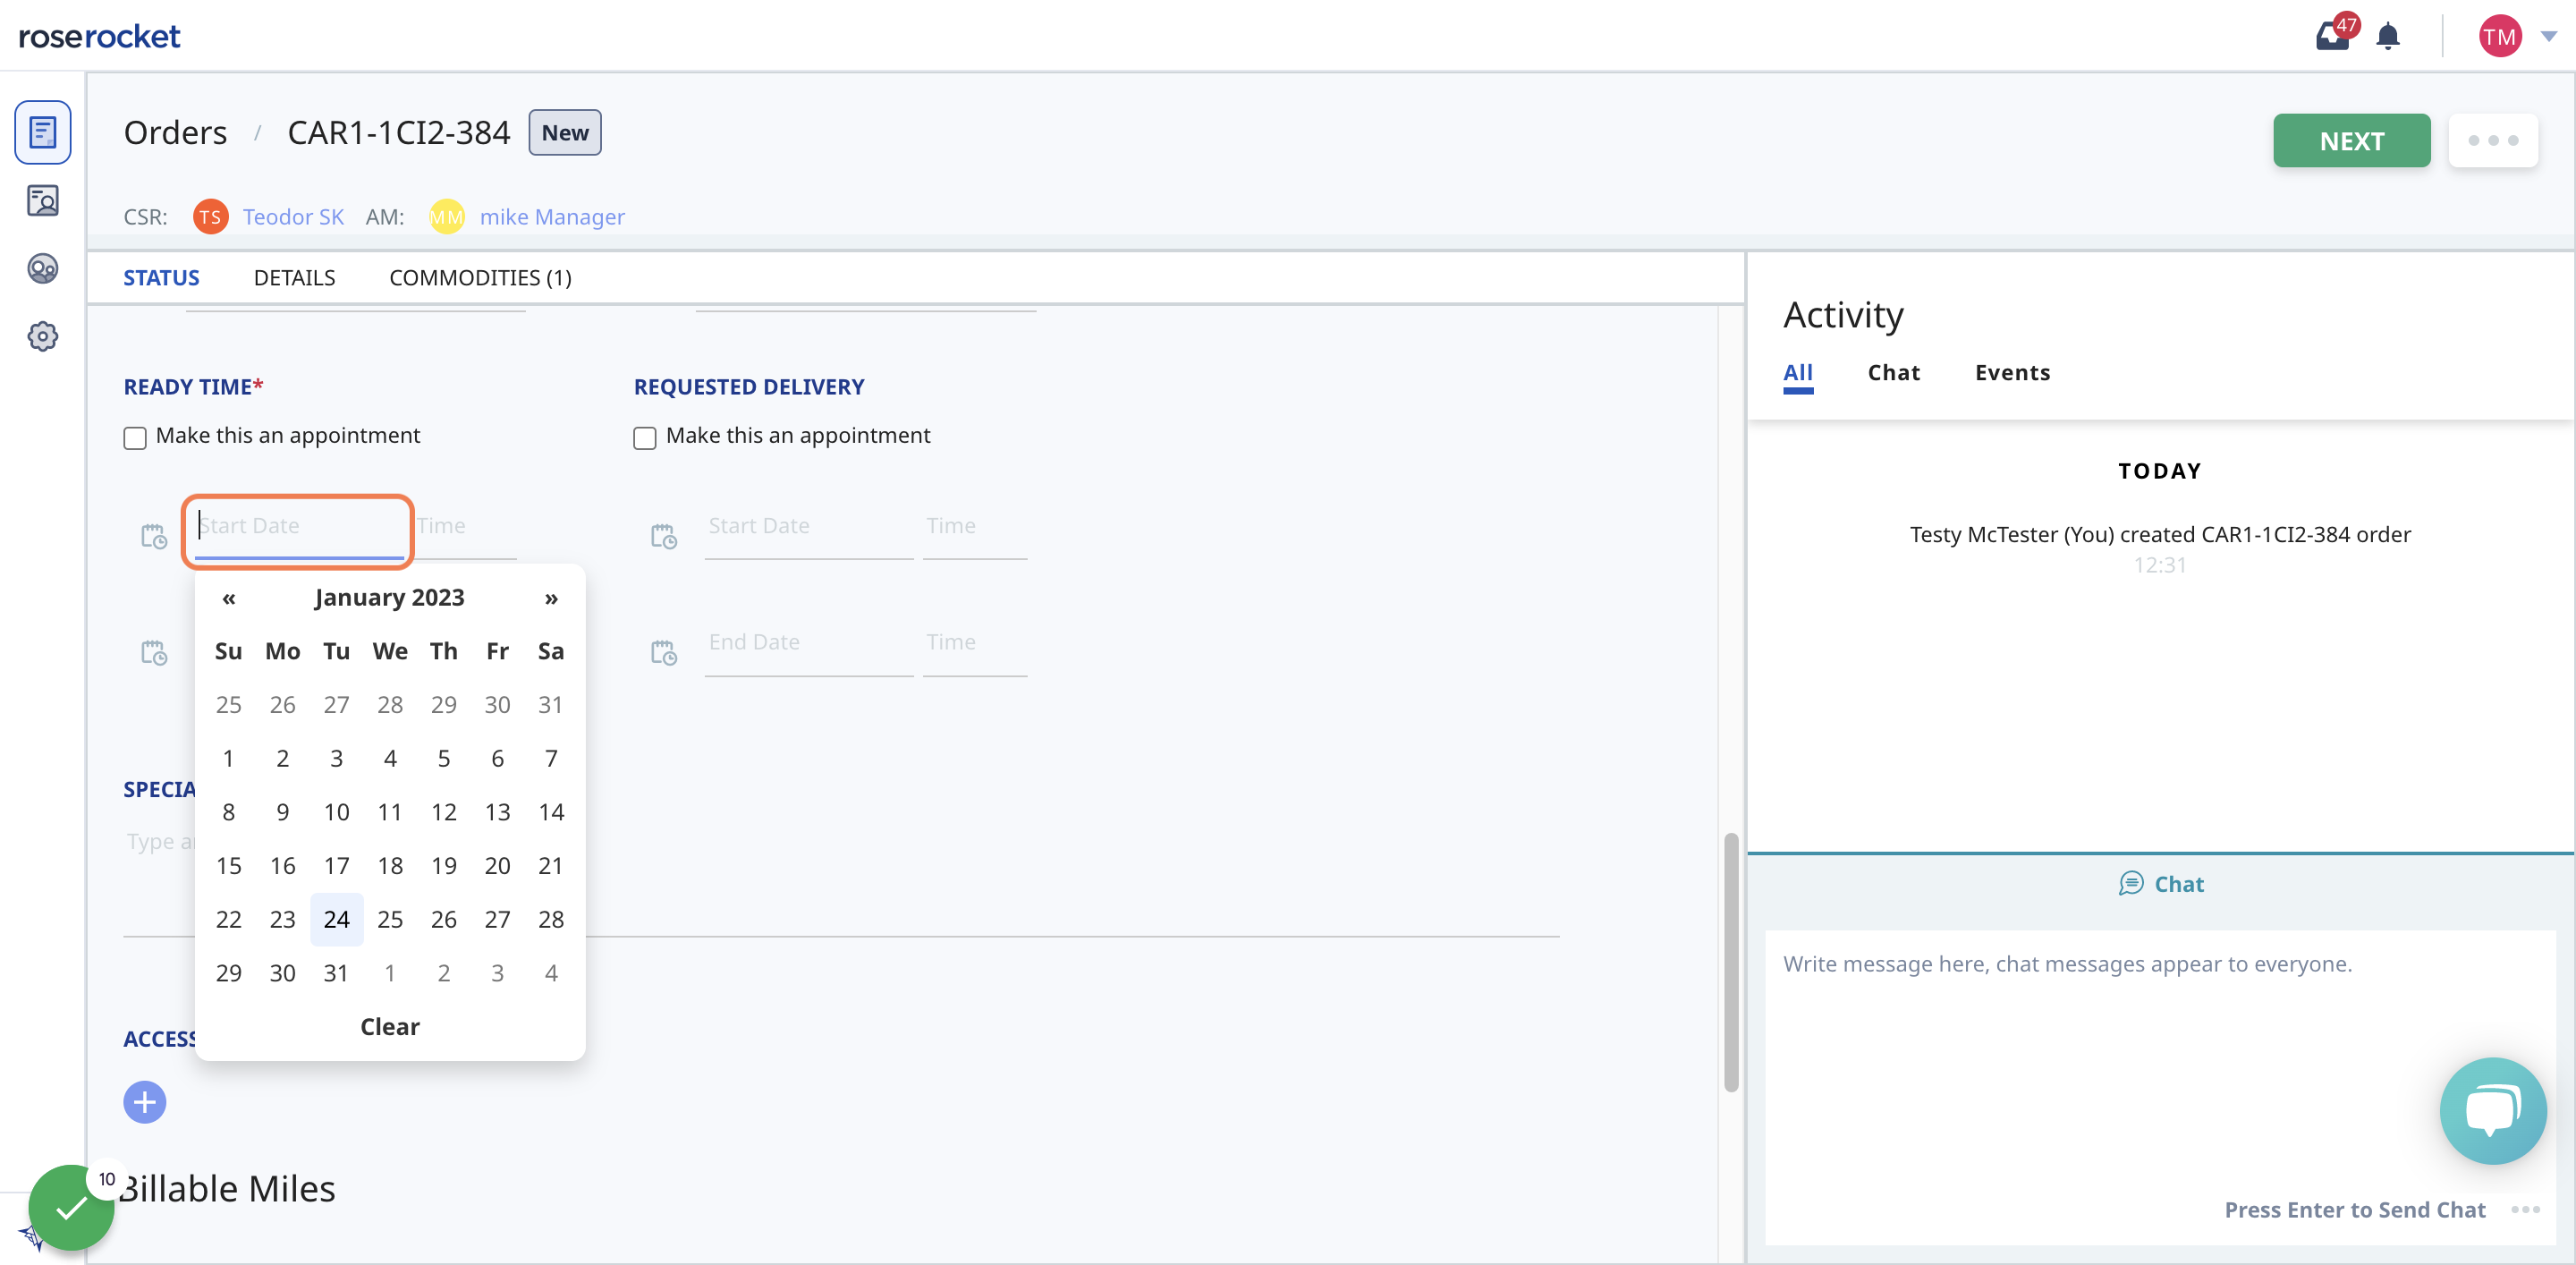
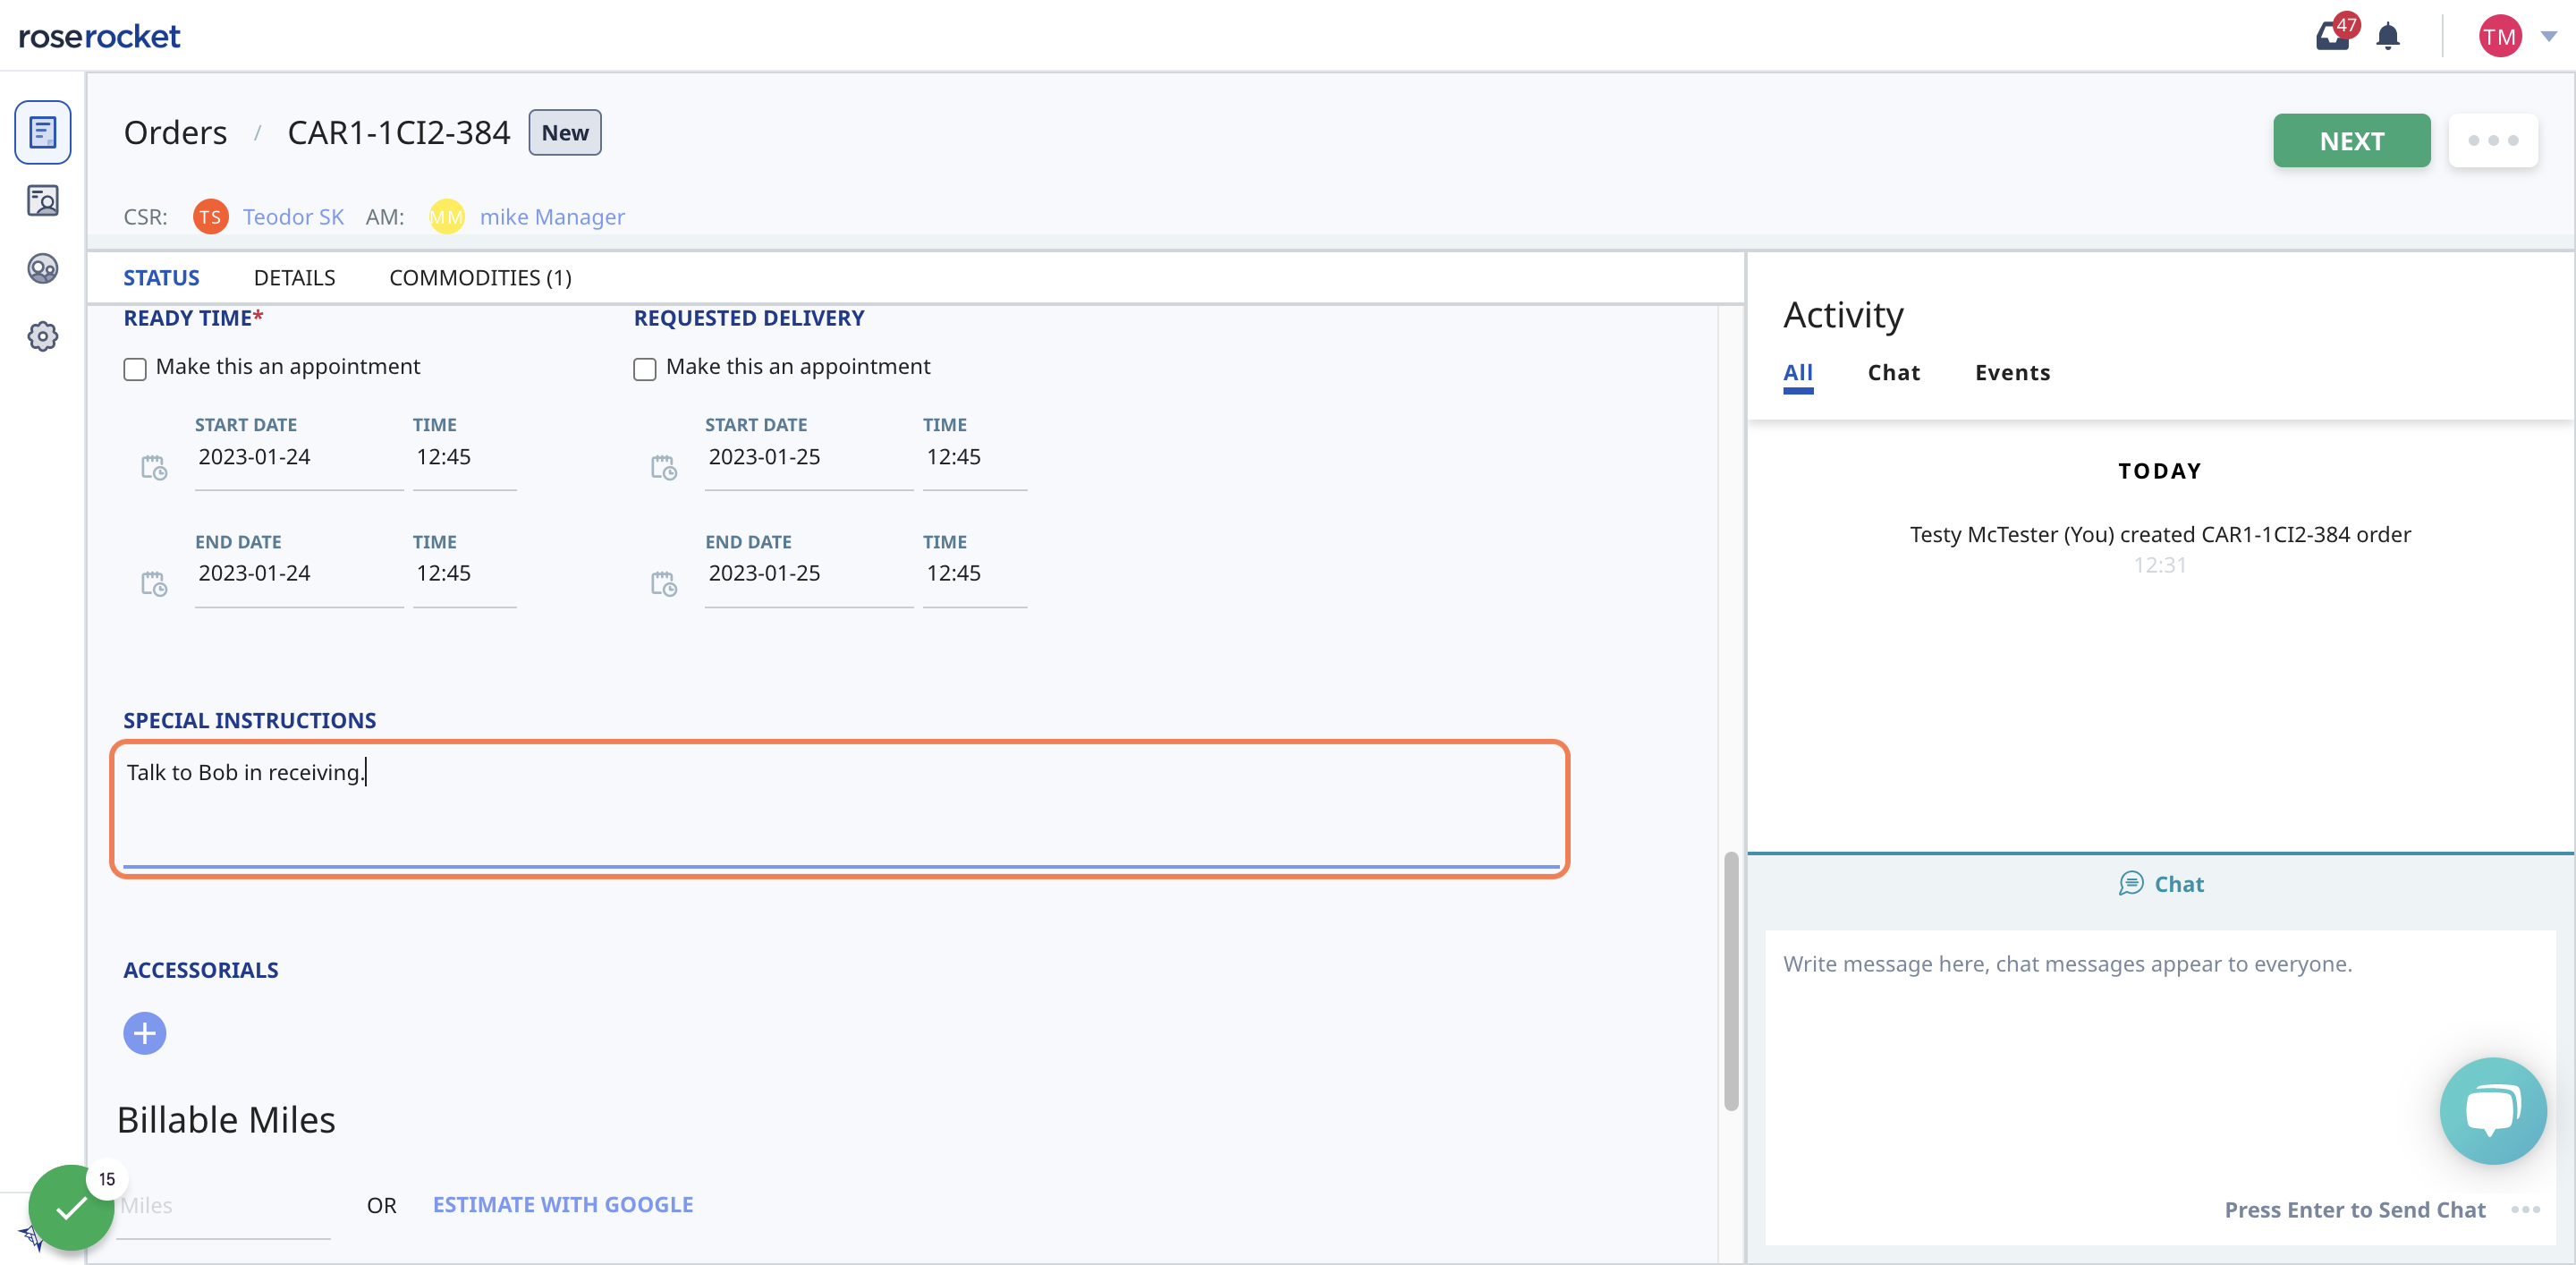
4. Fill out the Ready Time for your order. If applicable, check to make it an appointment, and add a Requested Delivery date
5. If you have any notes you want your partner to know, add them in the Special Instructions field
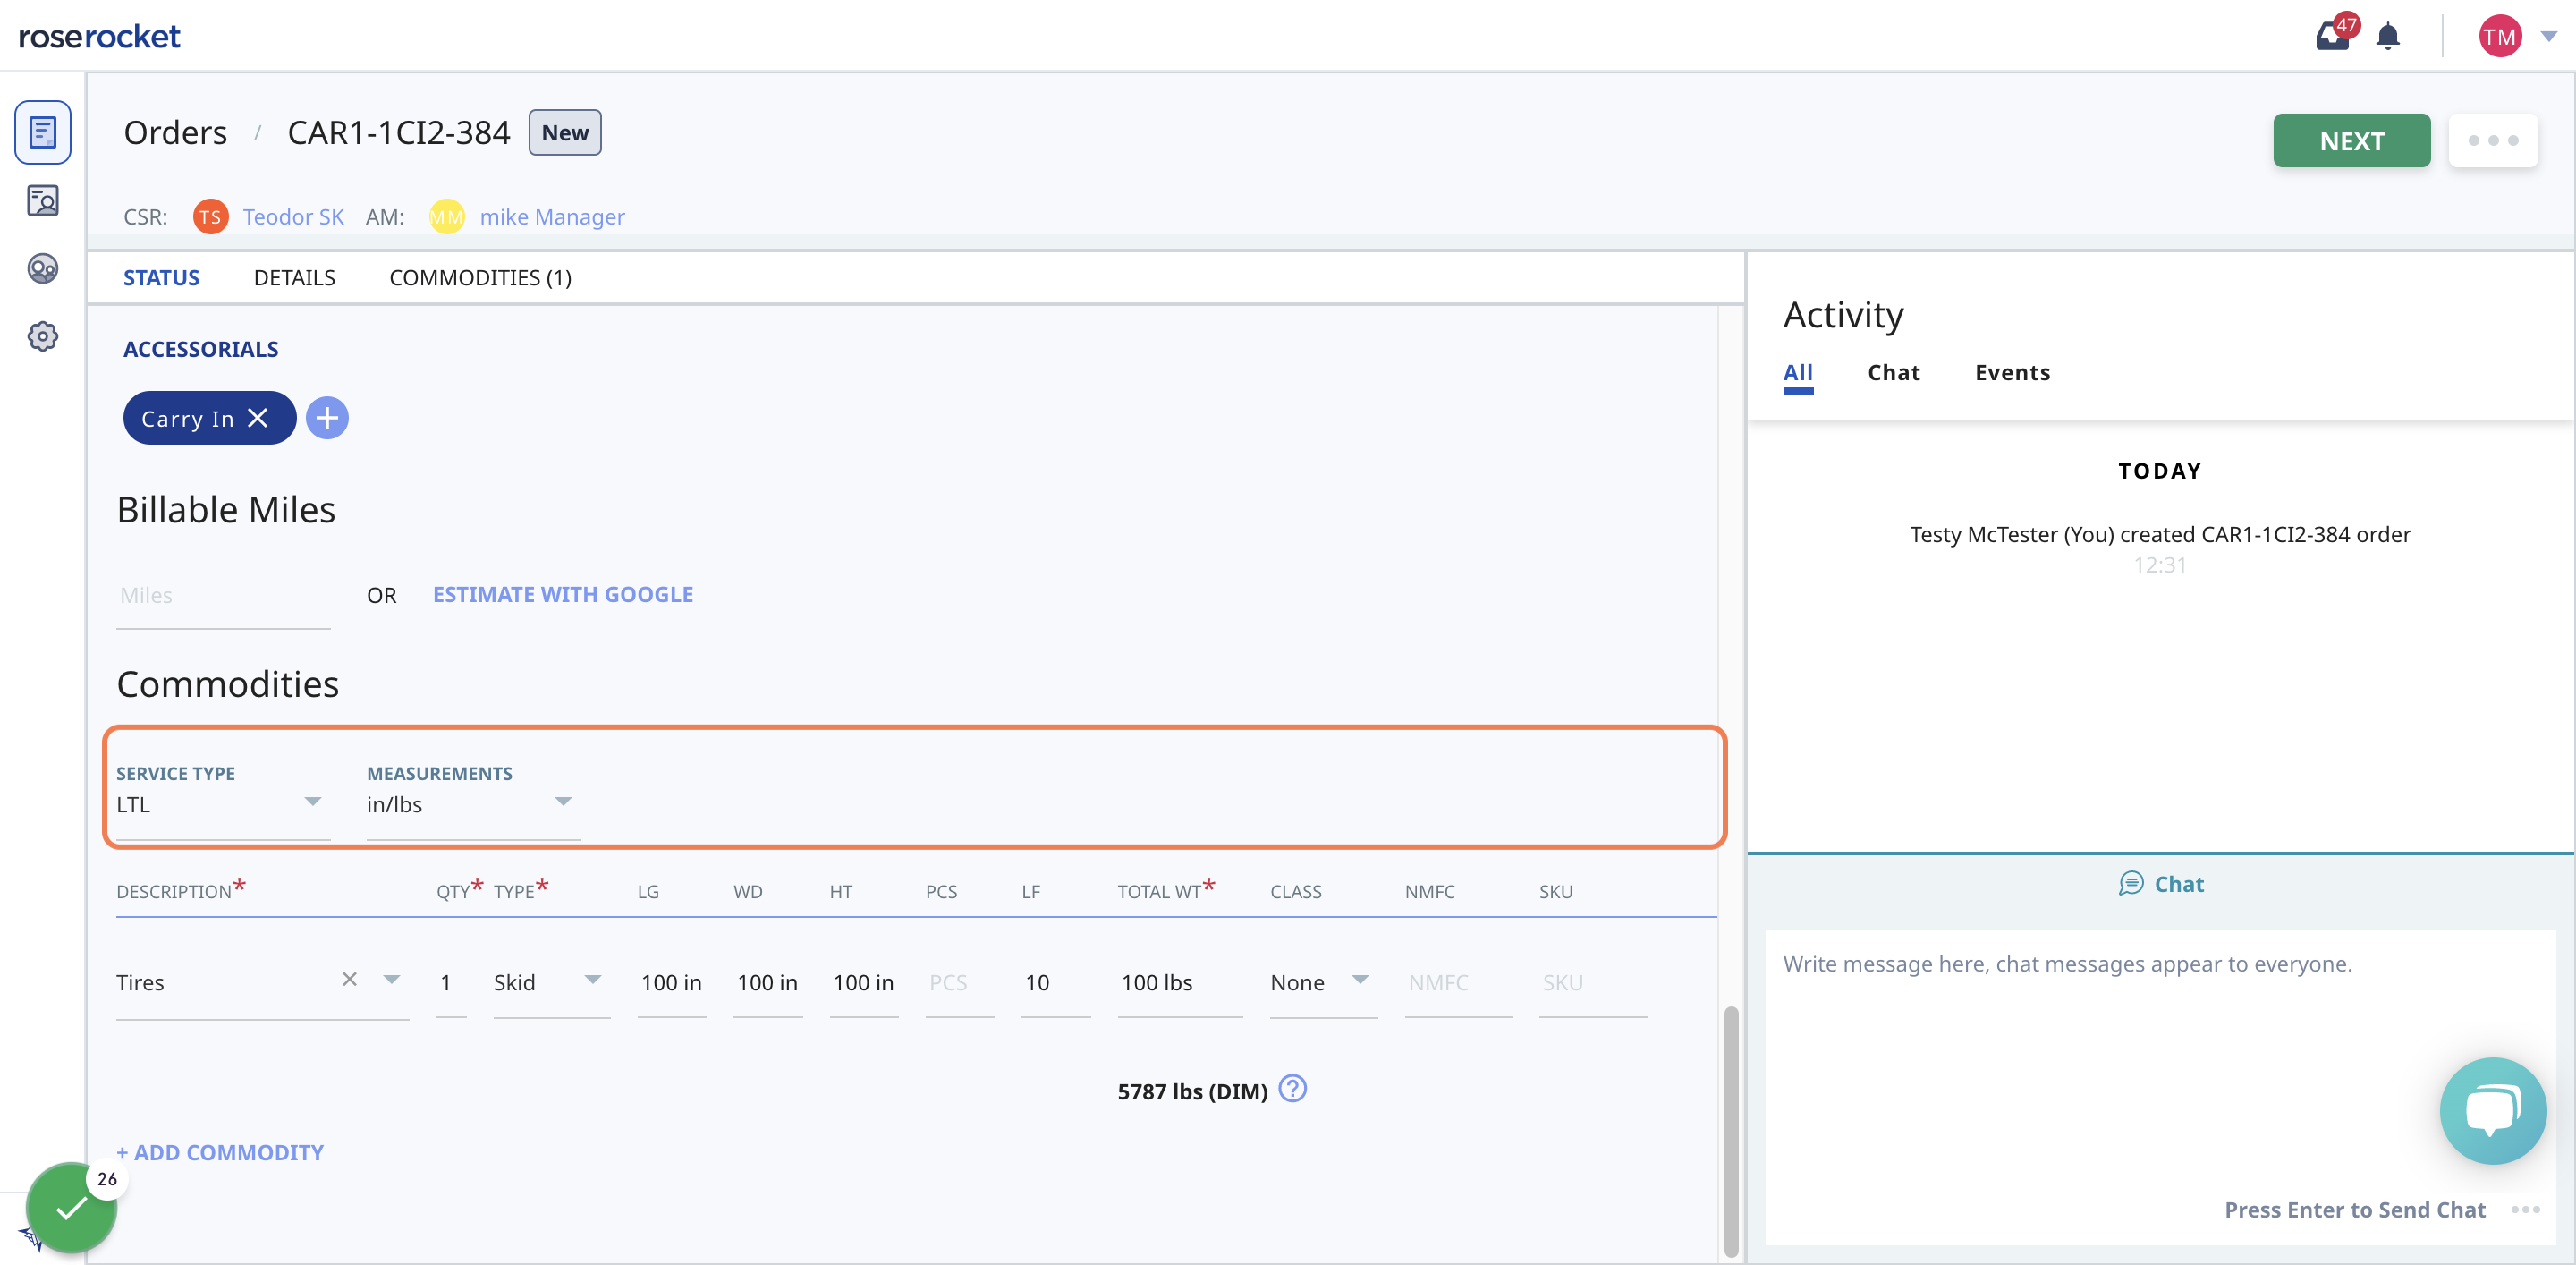
6. Enter the commodities you're shipping
Fill in description, quantity, type, dimensions, and weight.
Check to make sure the SERVICE TYPE and MEASUREMENTS units are correct, and add any relevant accessorials.
7. Click NEXT, and you're done! Your order has been submitted directly to your partner's system to quote.
Be sure to have your notifications turned on so you'll be emailed once they have finished quoting.
Submitting an order that's identical to a previous shipment? Save time by using "Duplicate Order"
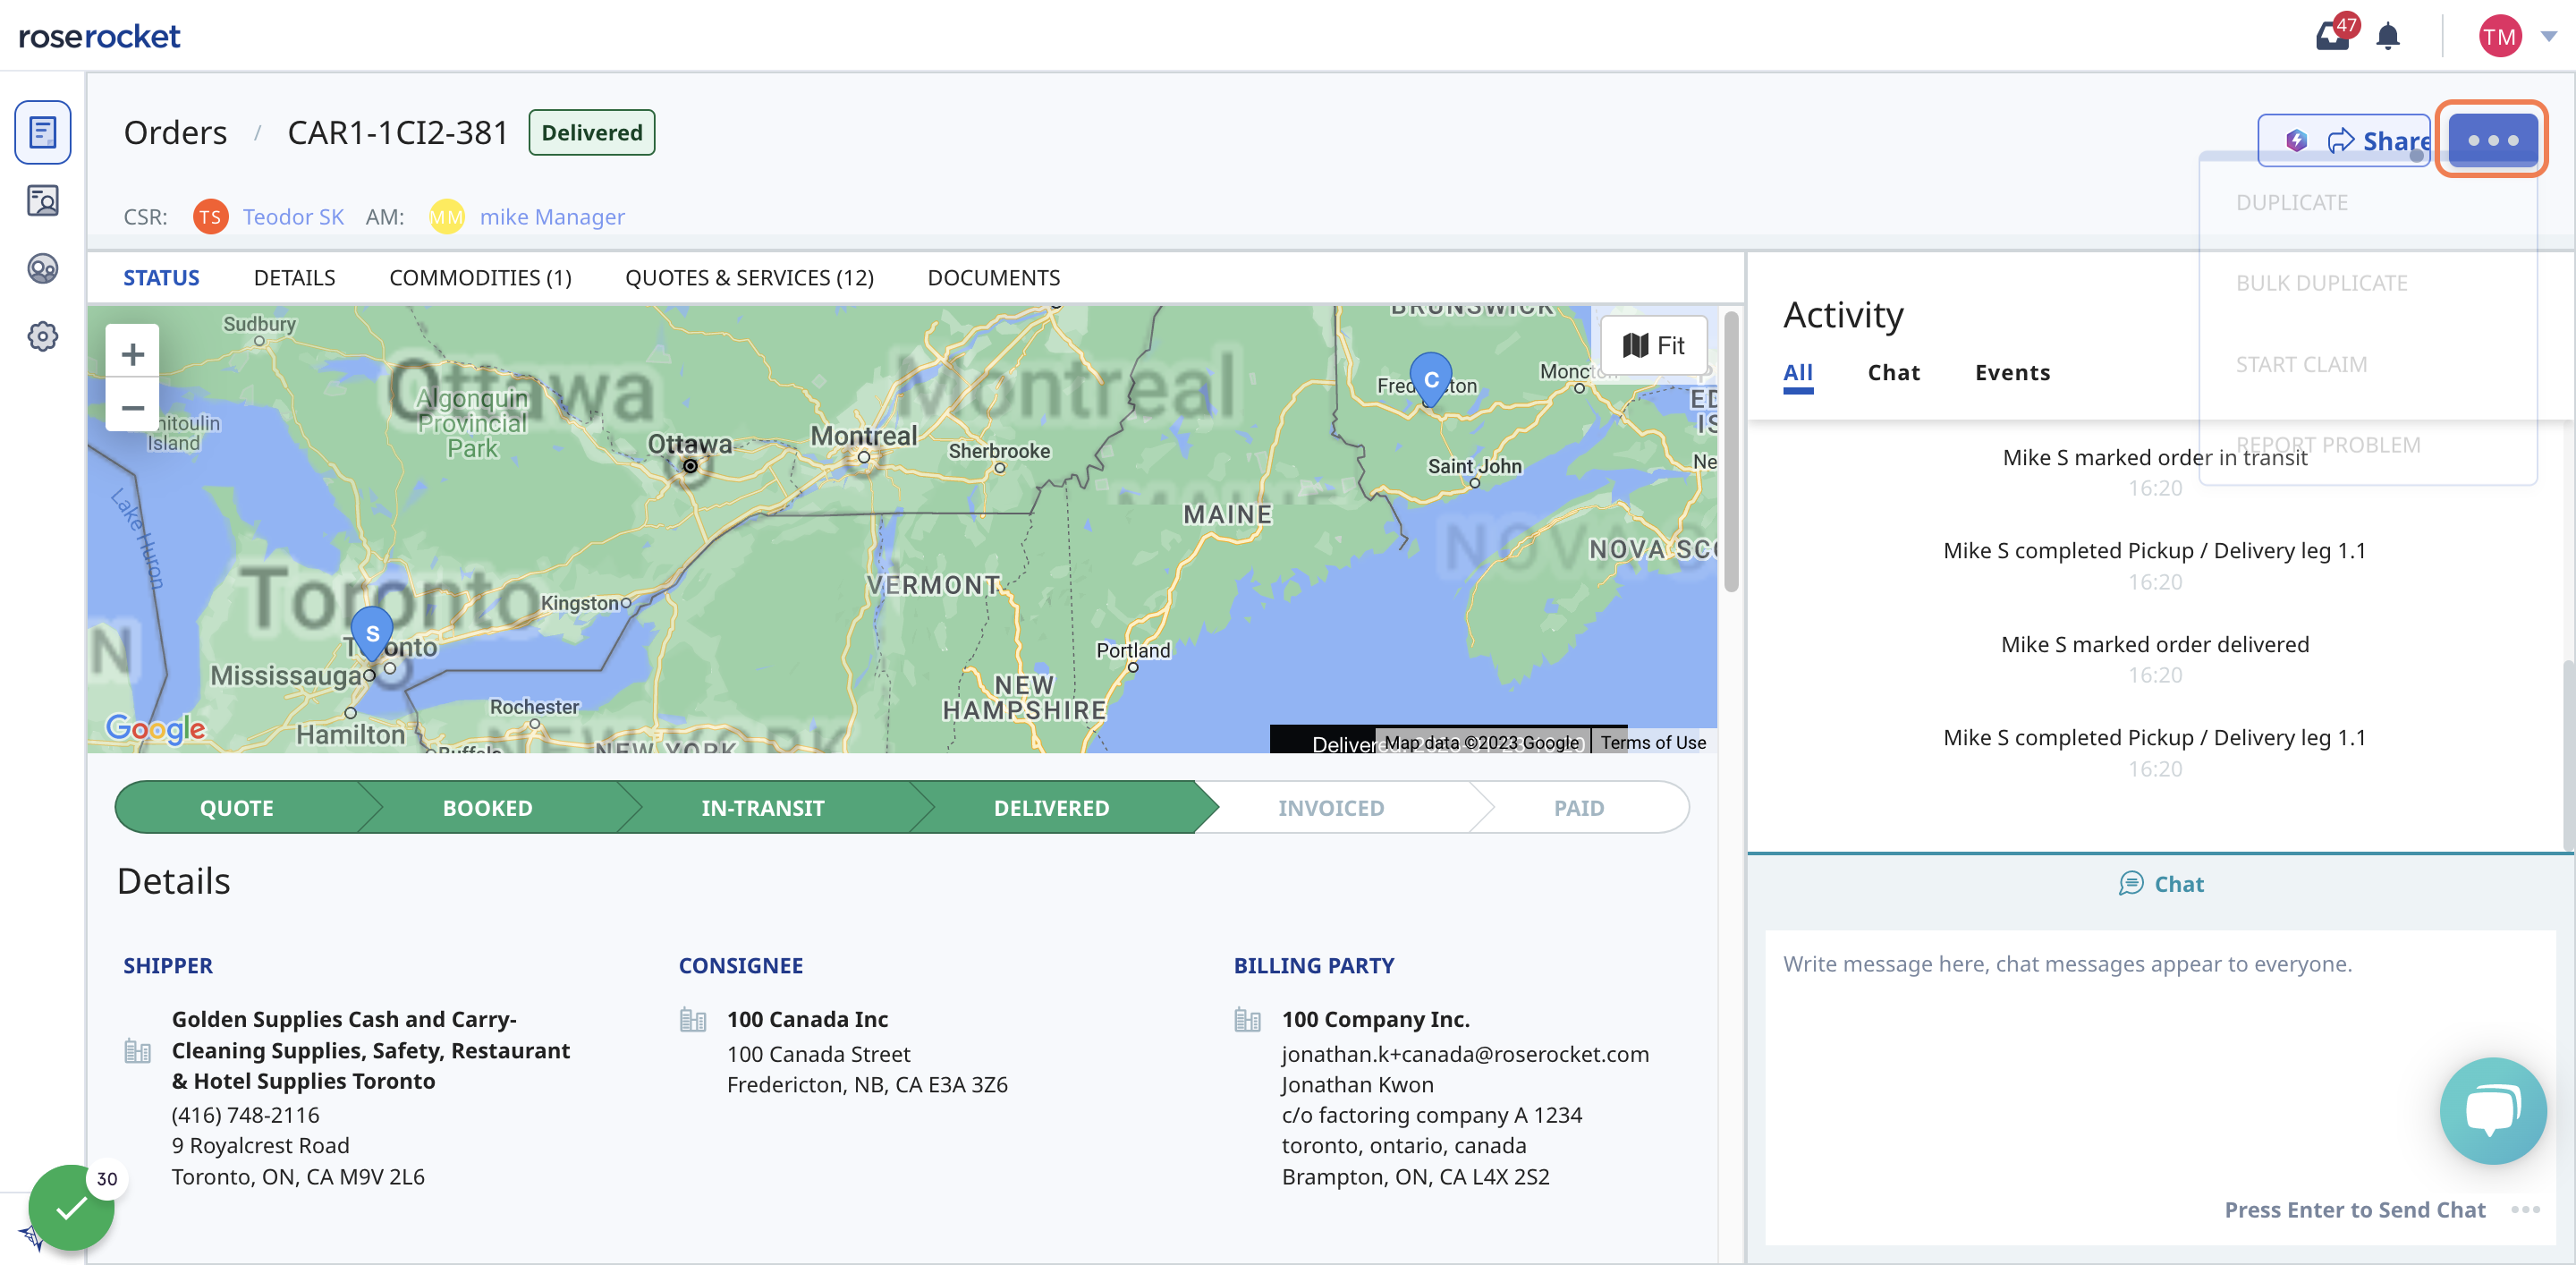
1. From the Orders page, select the order you wish to duplicate
2. From the Order Details page, click on the ellipsis "..." in the corner and select "Duplicate" from the menu
3. In the Duplicate modal, enter in Ready Time, and if applicable, Requested Delivery date, and select "Create"
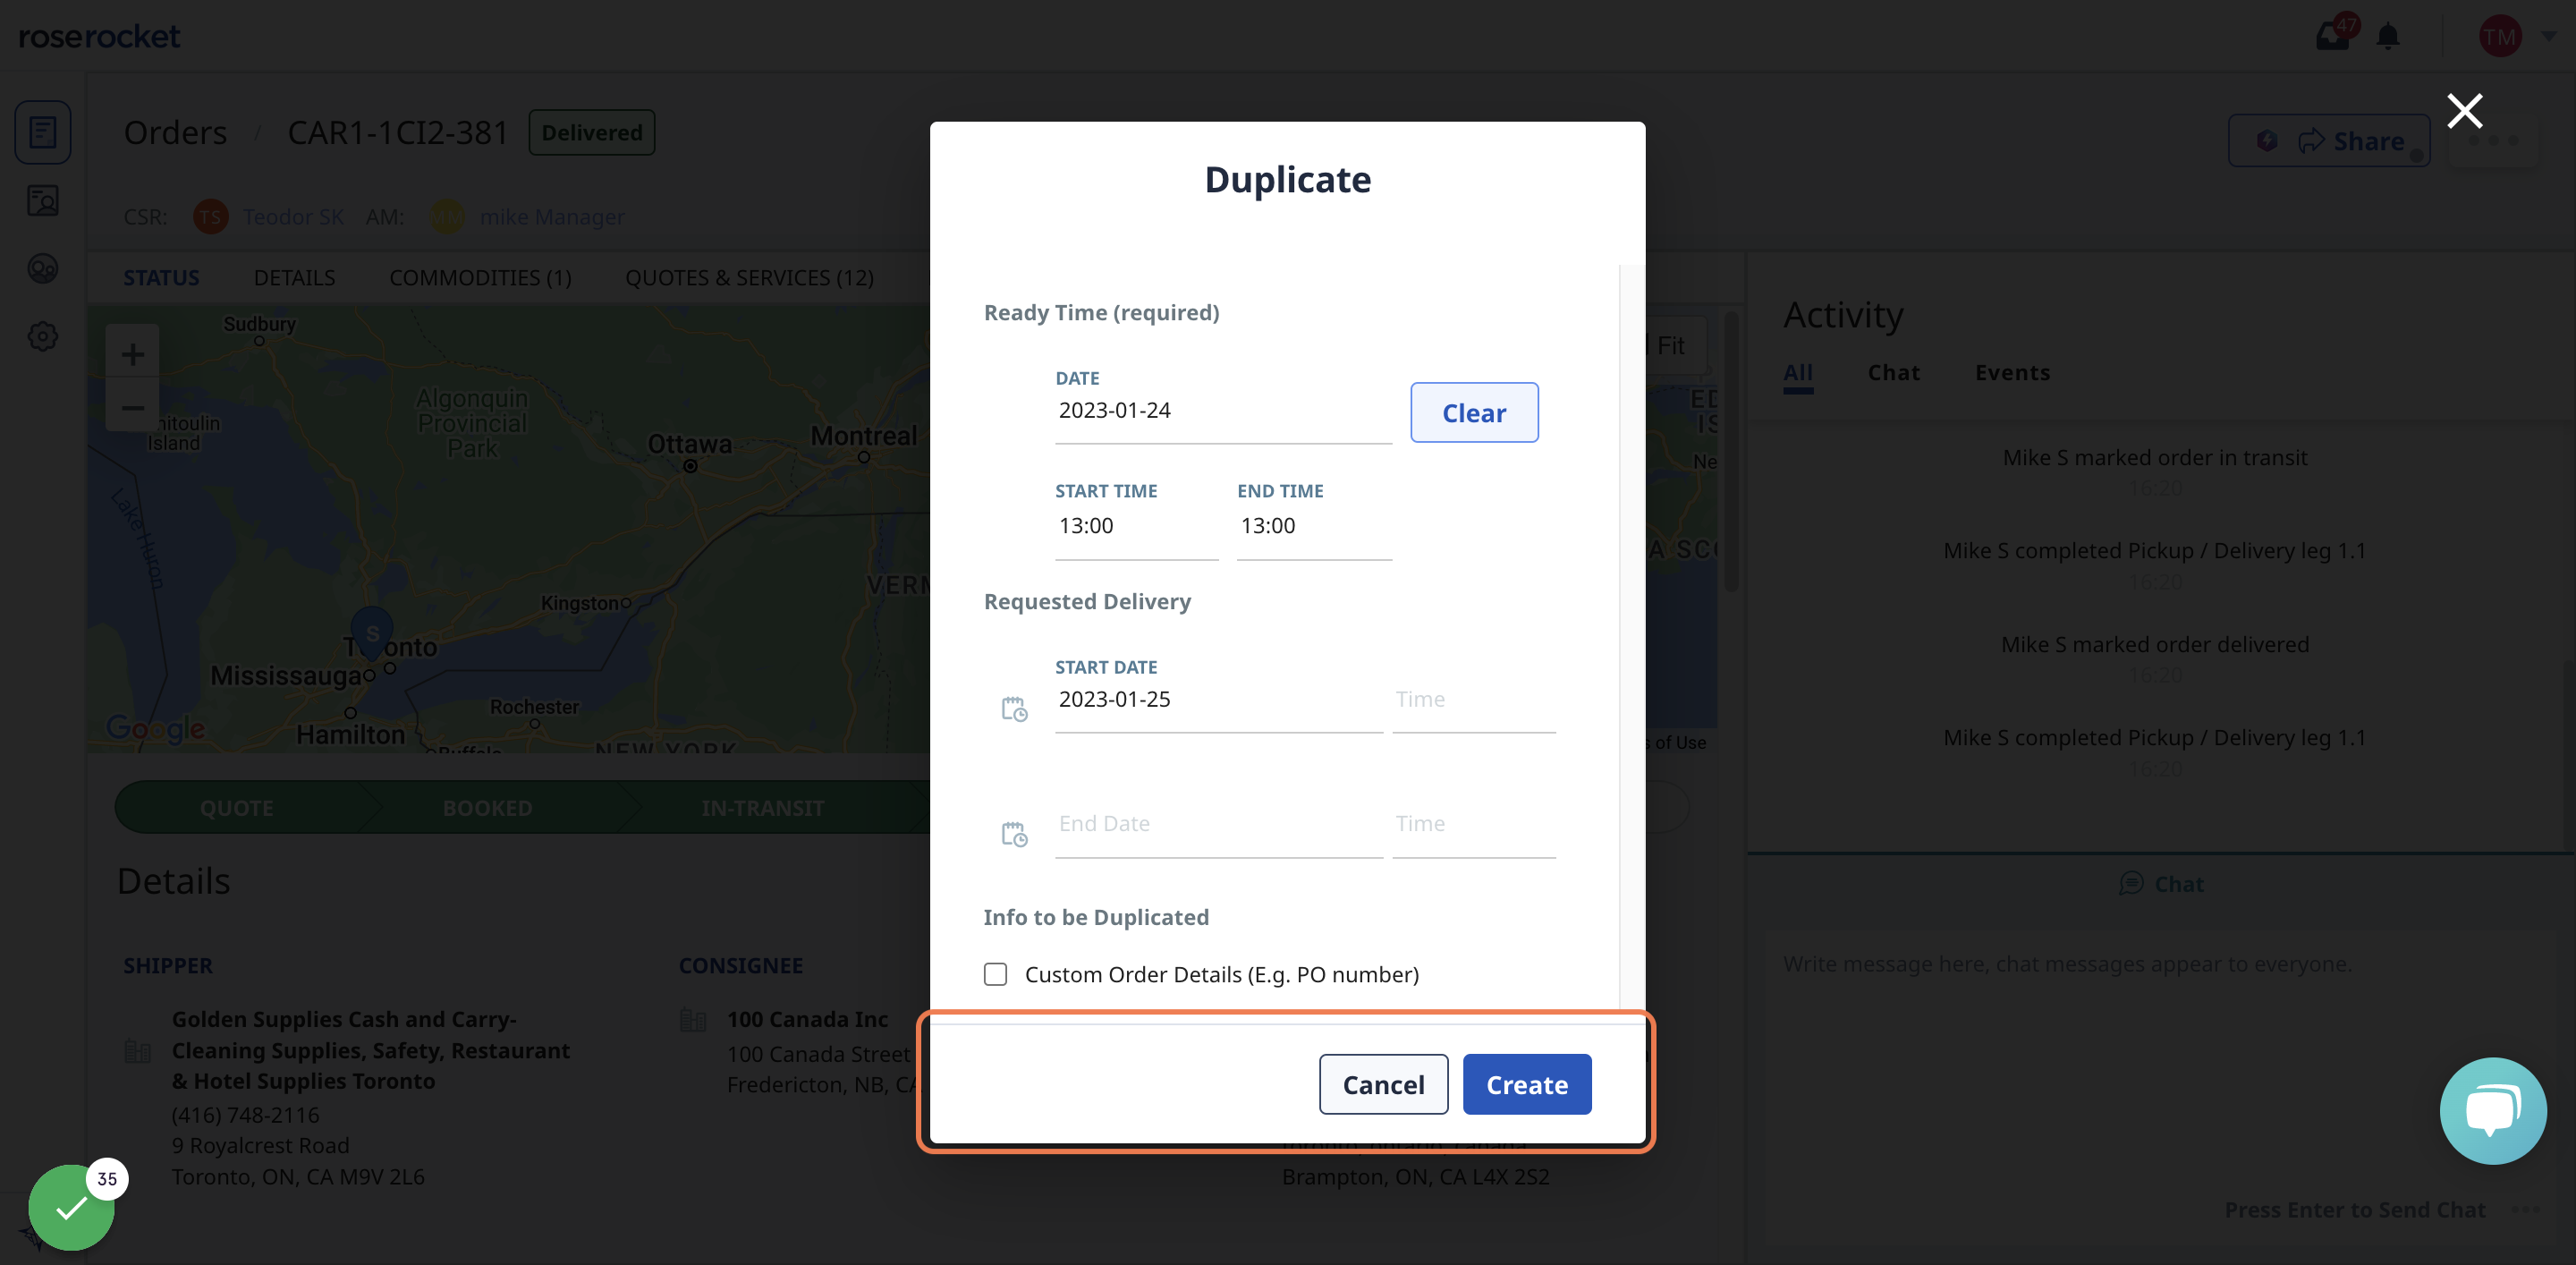
...and that's it! Your order has been created.
Request a Quick Quote
Looking to get a quick quote on an order? Use Rose Rocket's Quick Quote feature in the Customer Portal to submit a quote request in seconds.
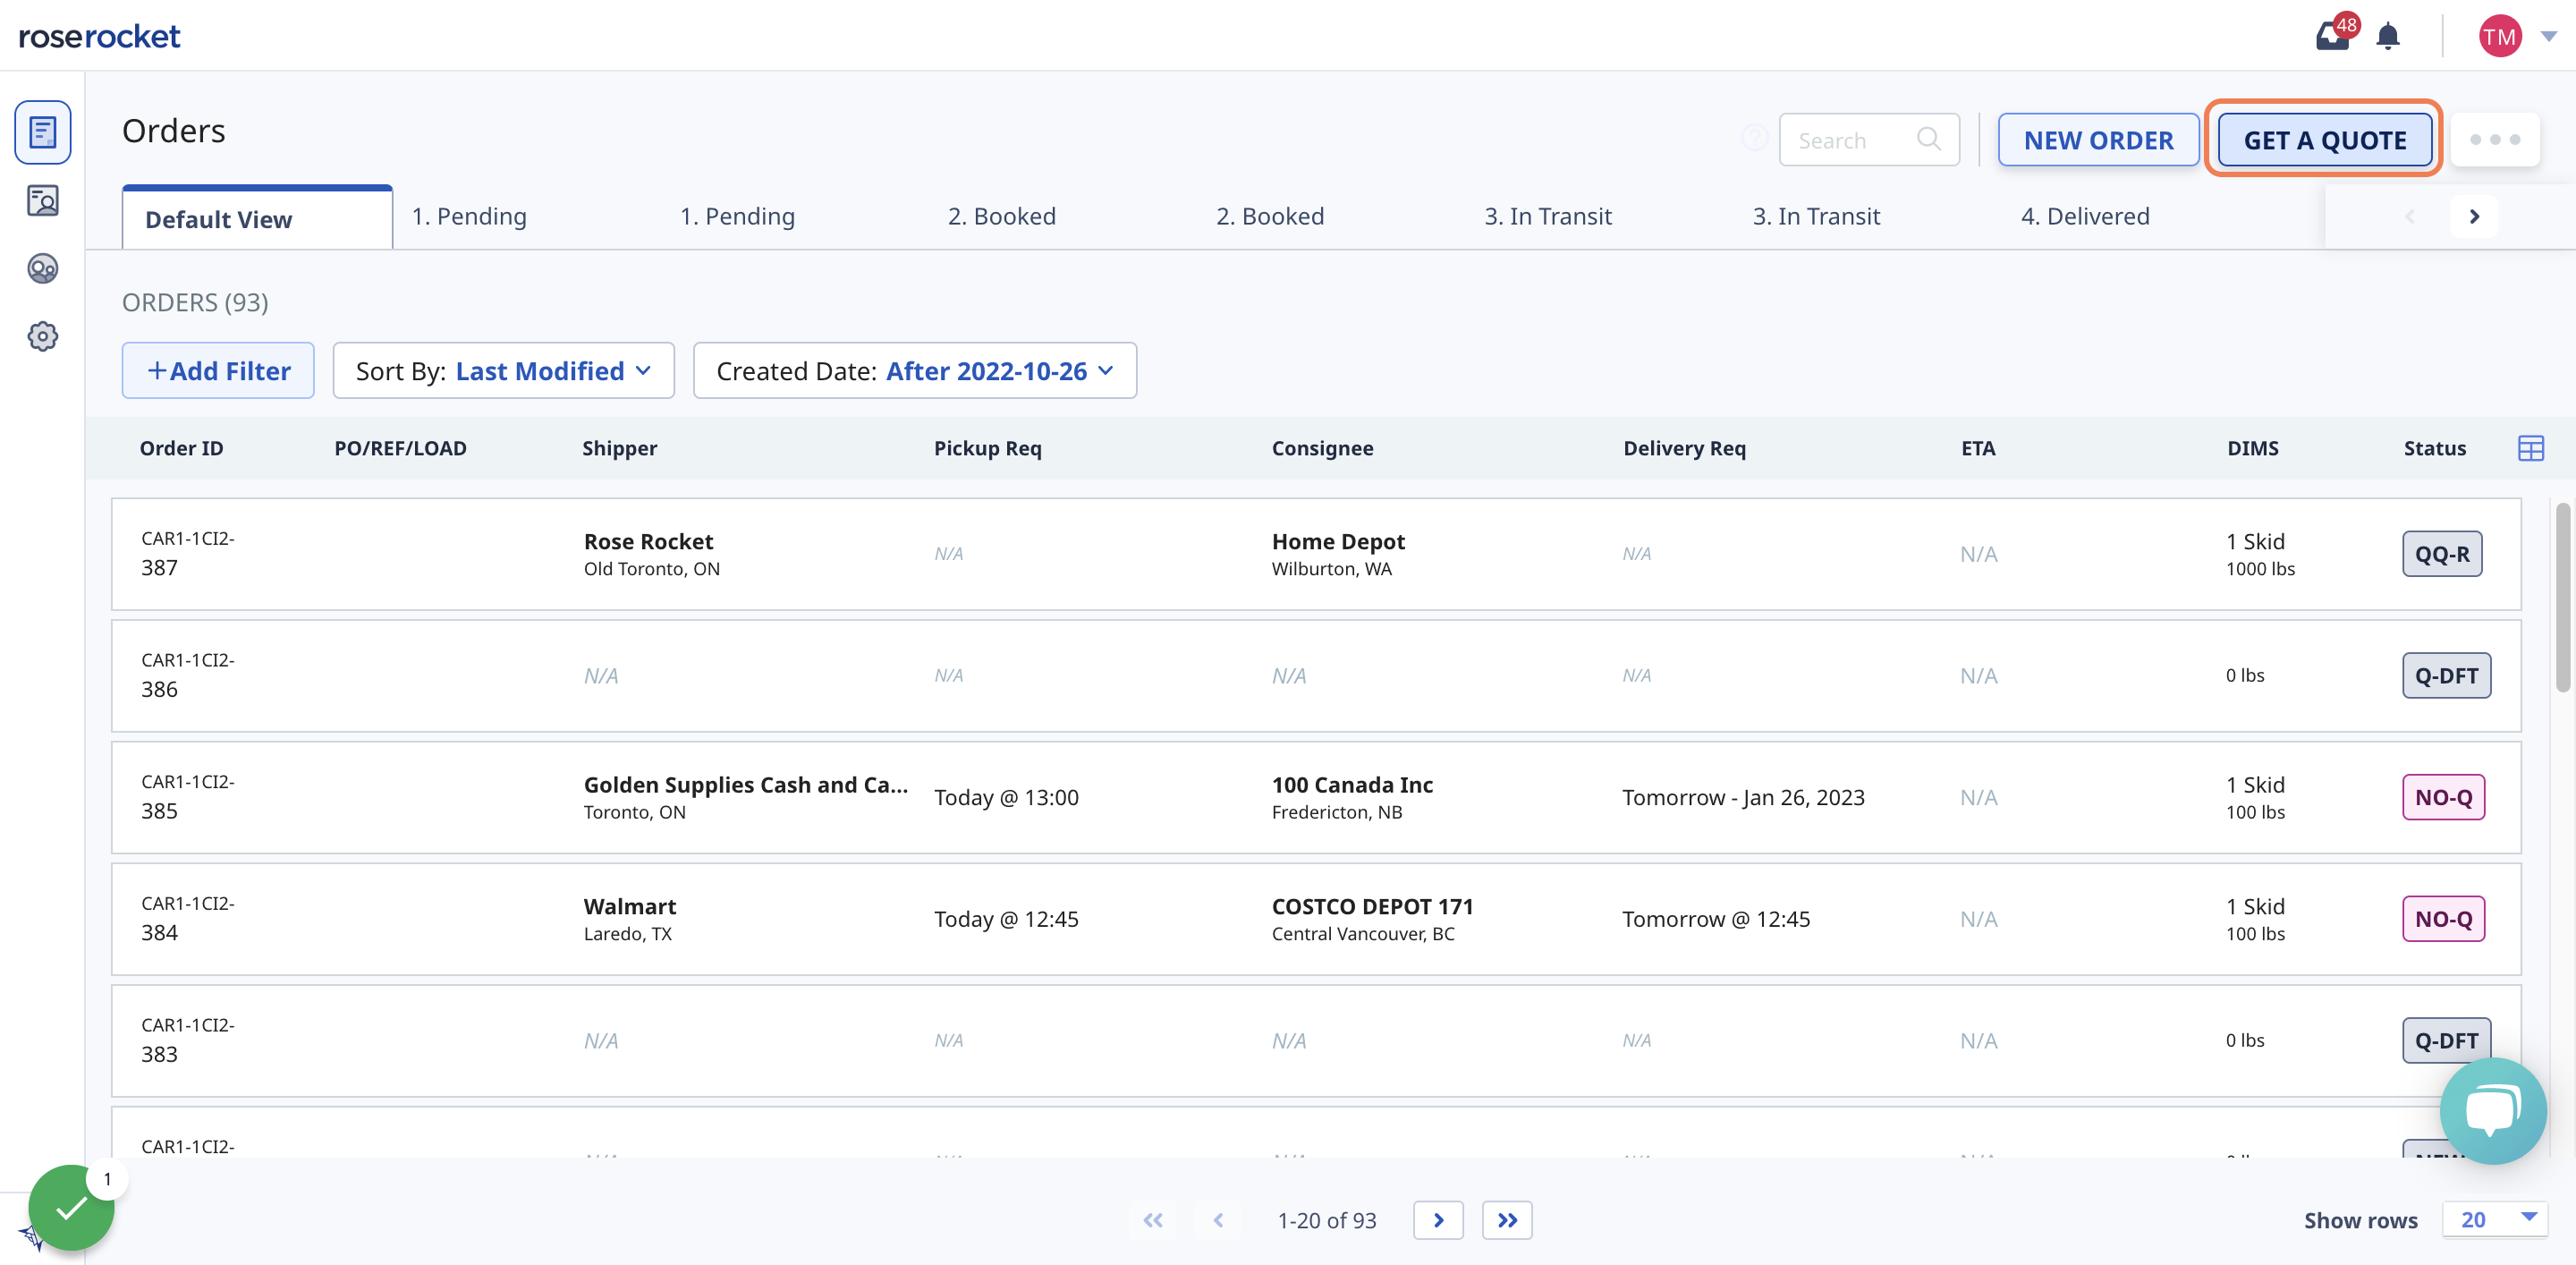
1. From the Orders page, select GET A QUOTE
2. Enter Shipper and Consignee addresses
Use company name or zip code to quickly autofill their address
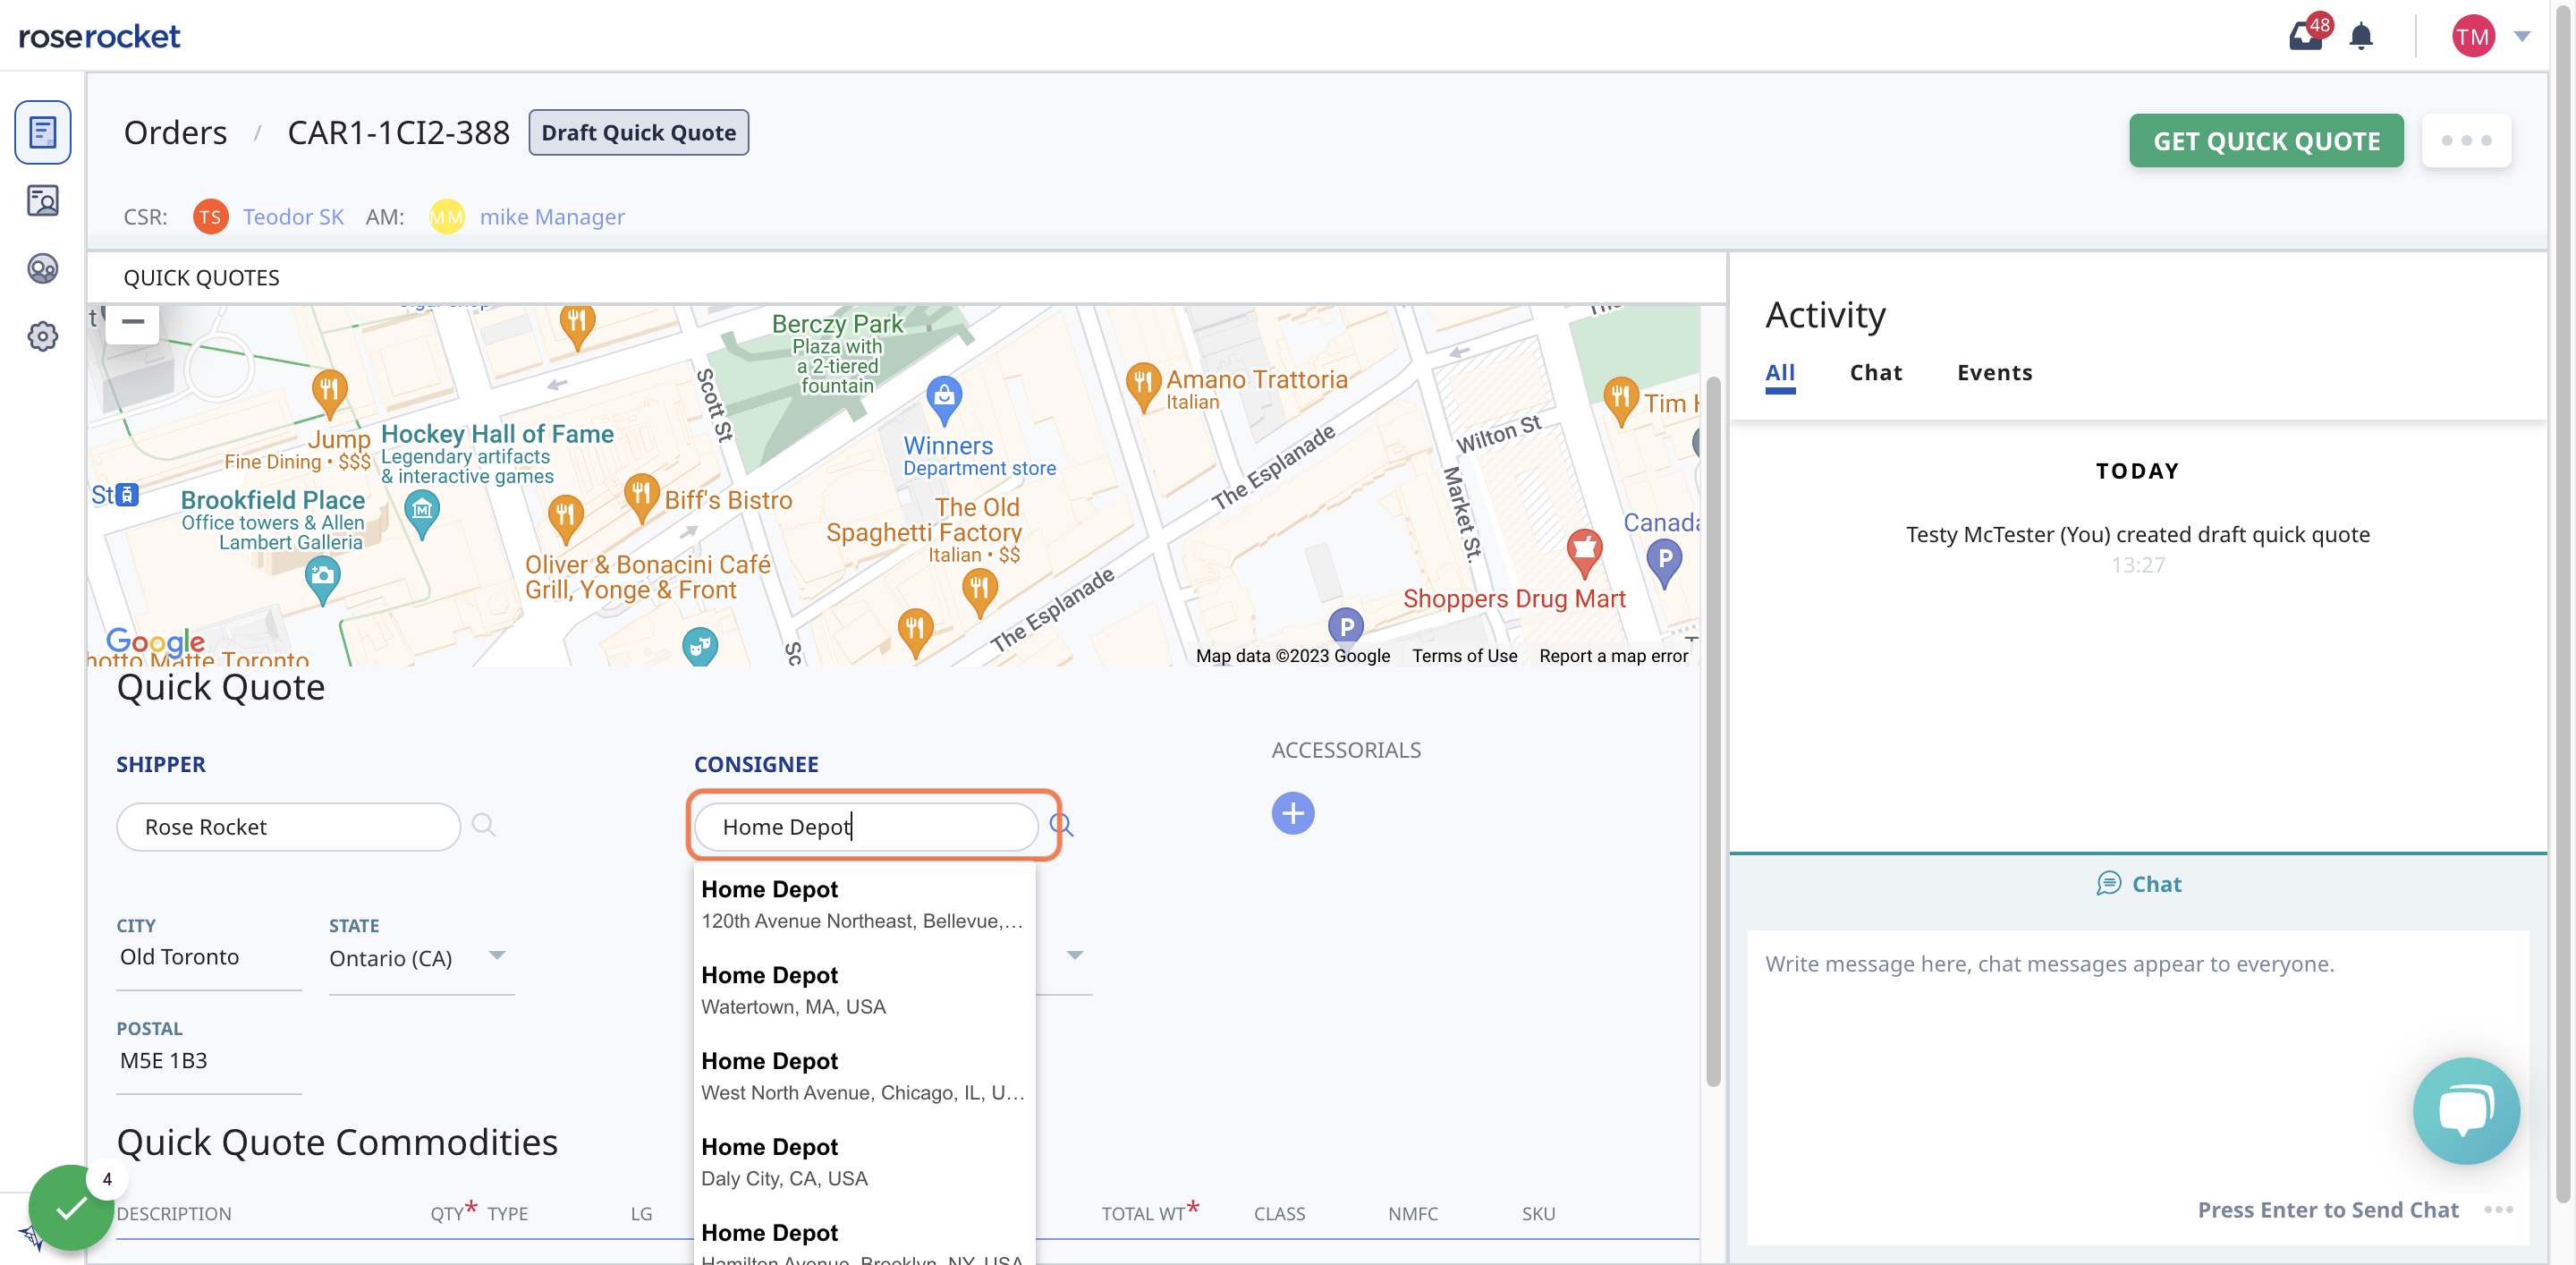
3. Fill out Commodity details
Mandatory fields: description, quantity, and weight
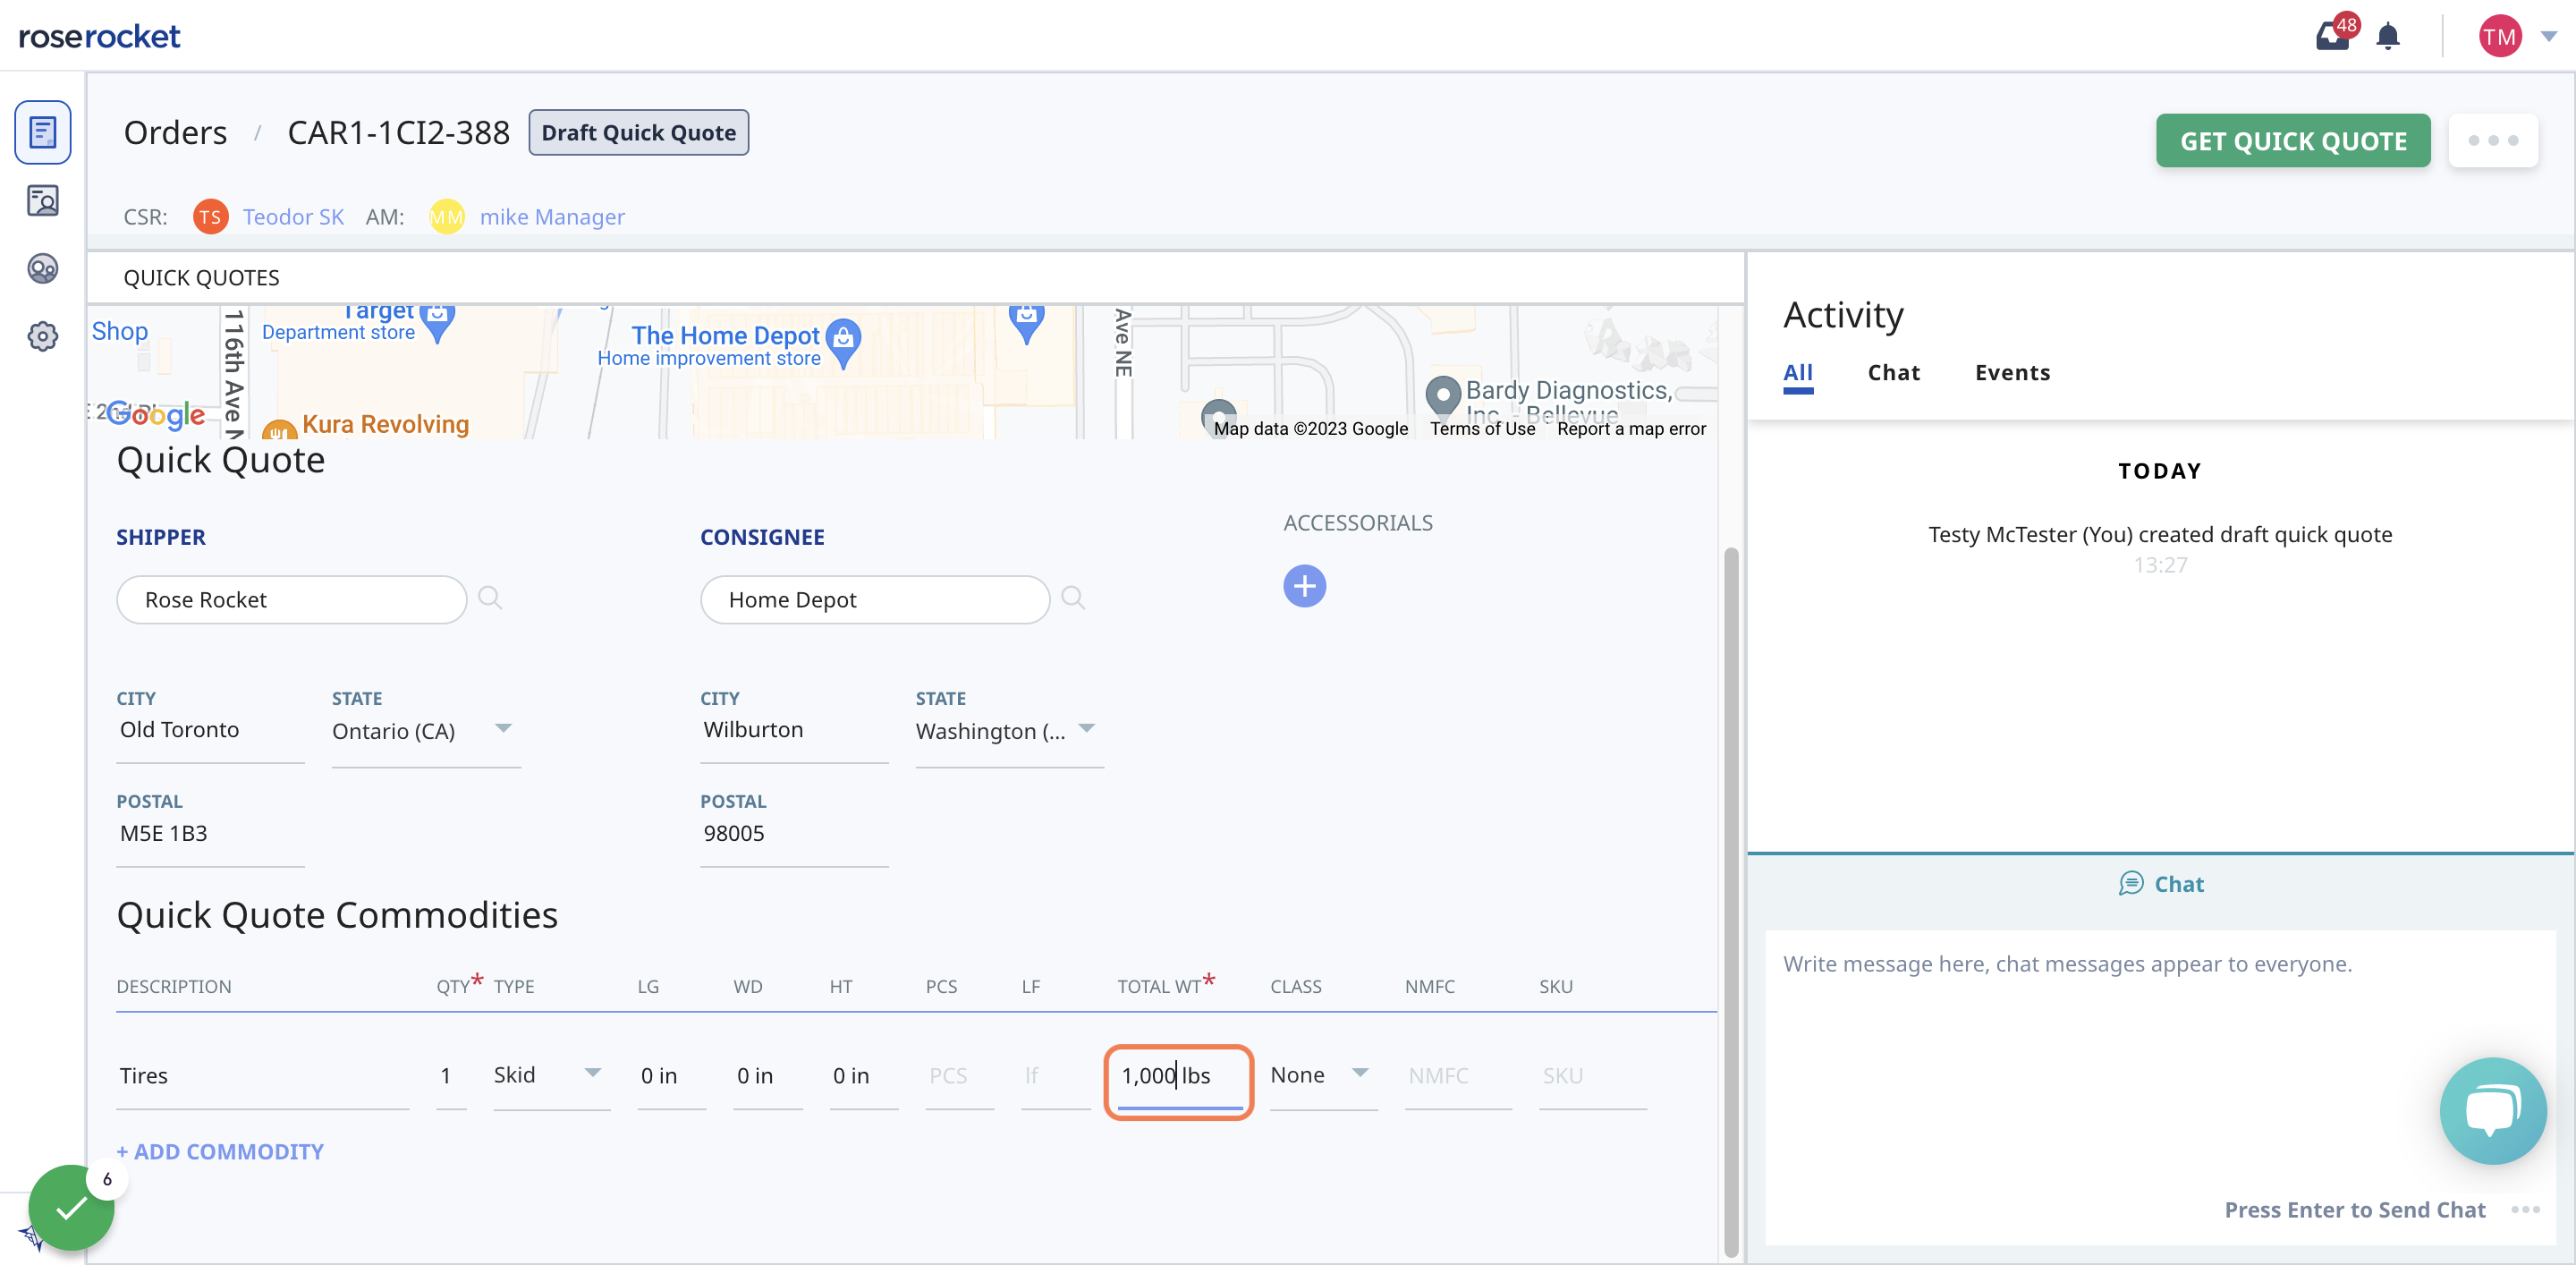
4. Click on GET QUICK QUOTE
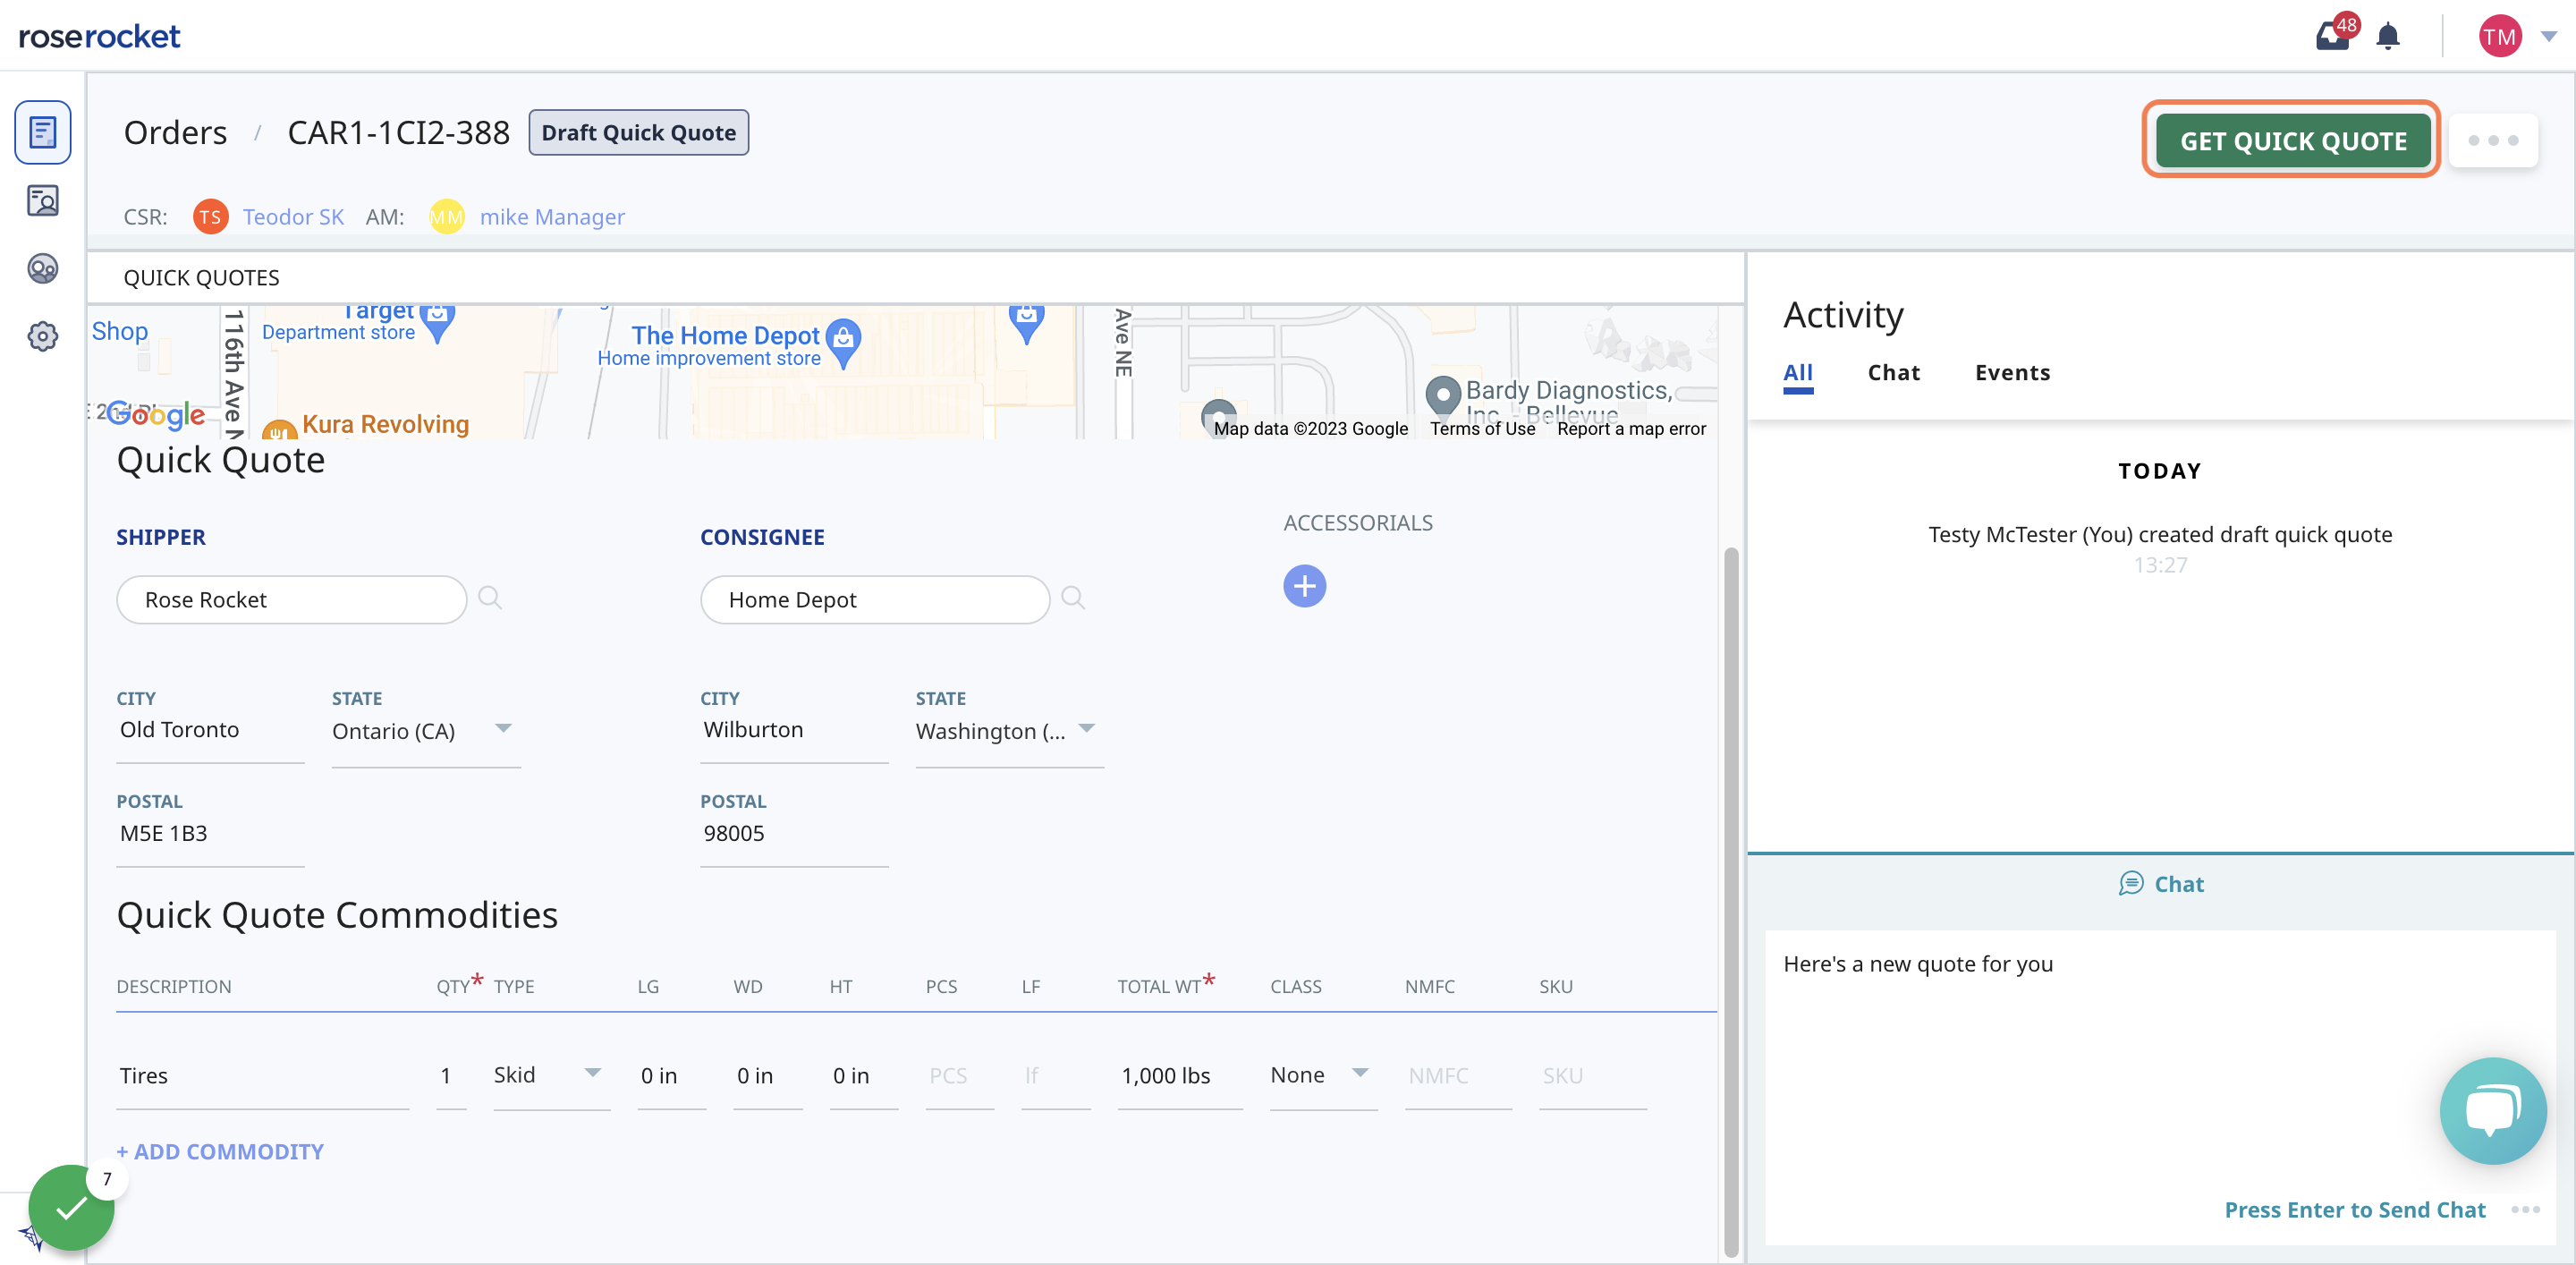
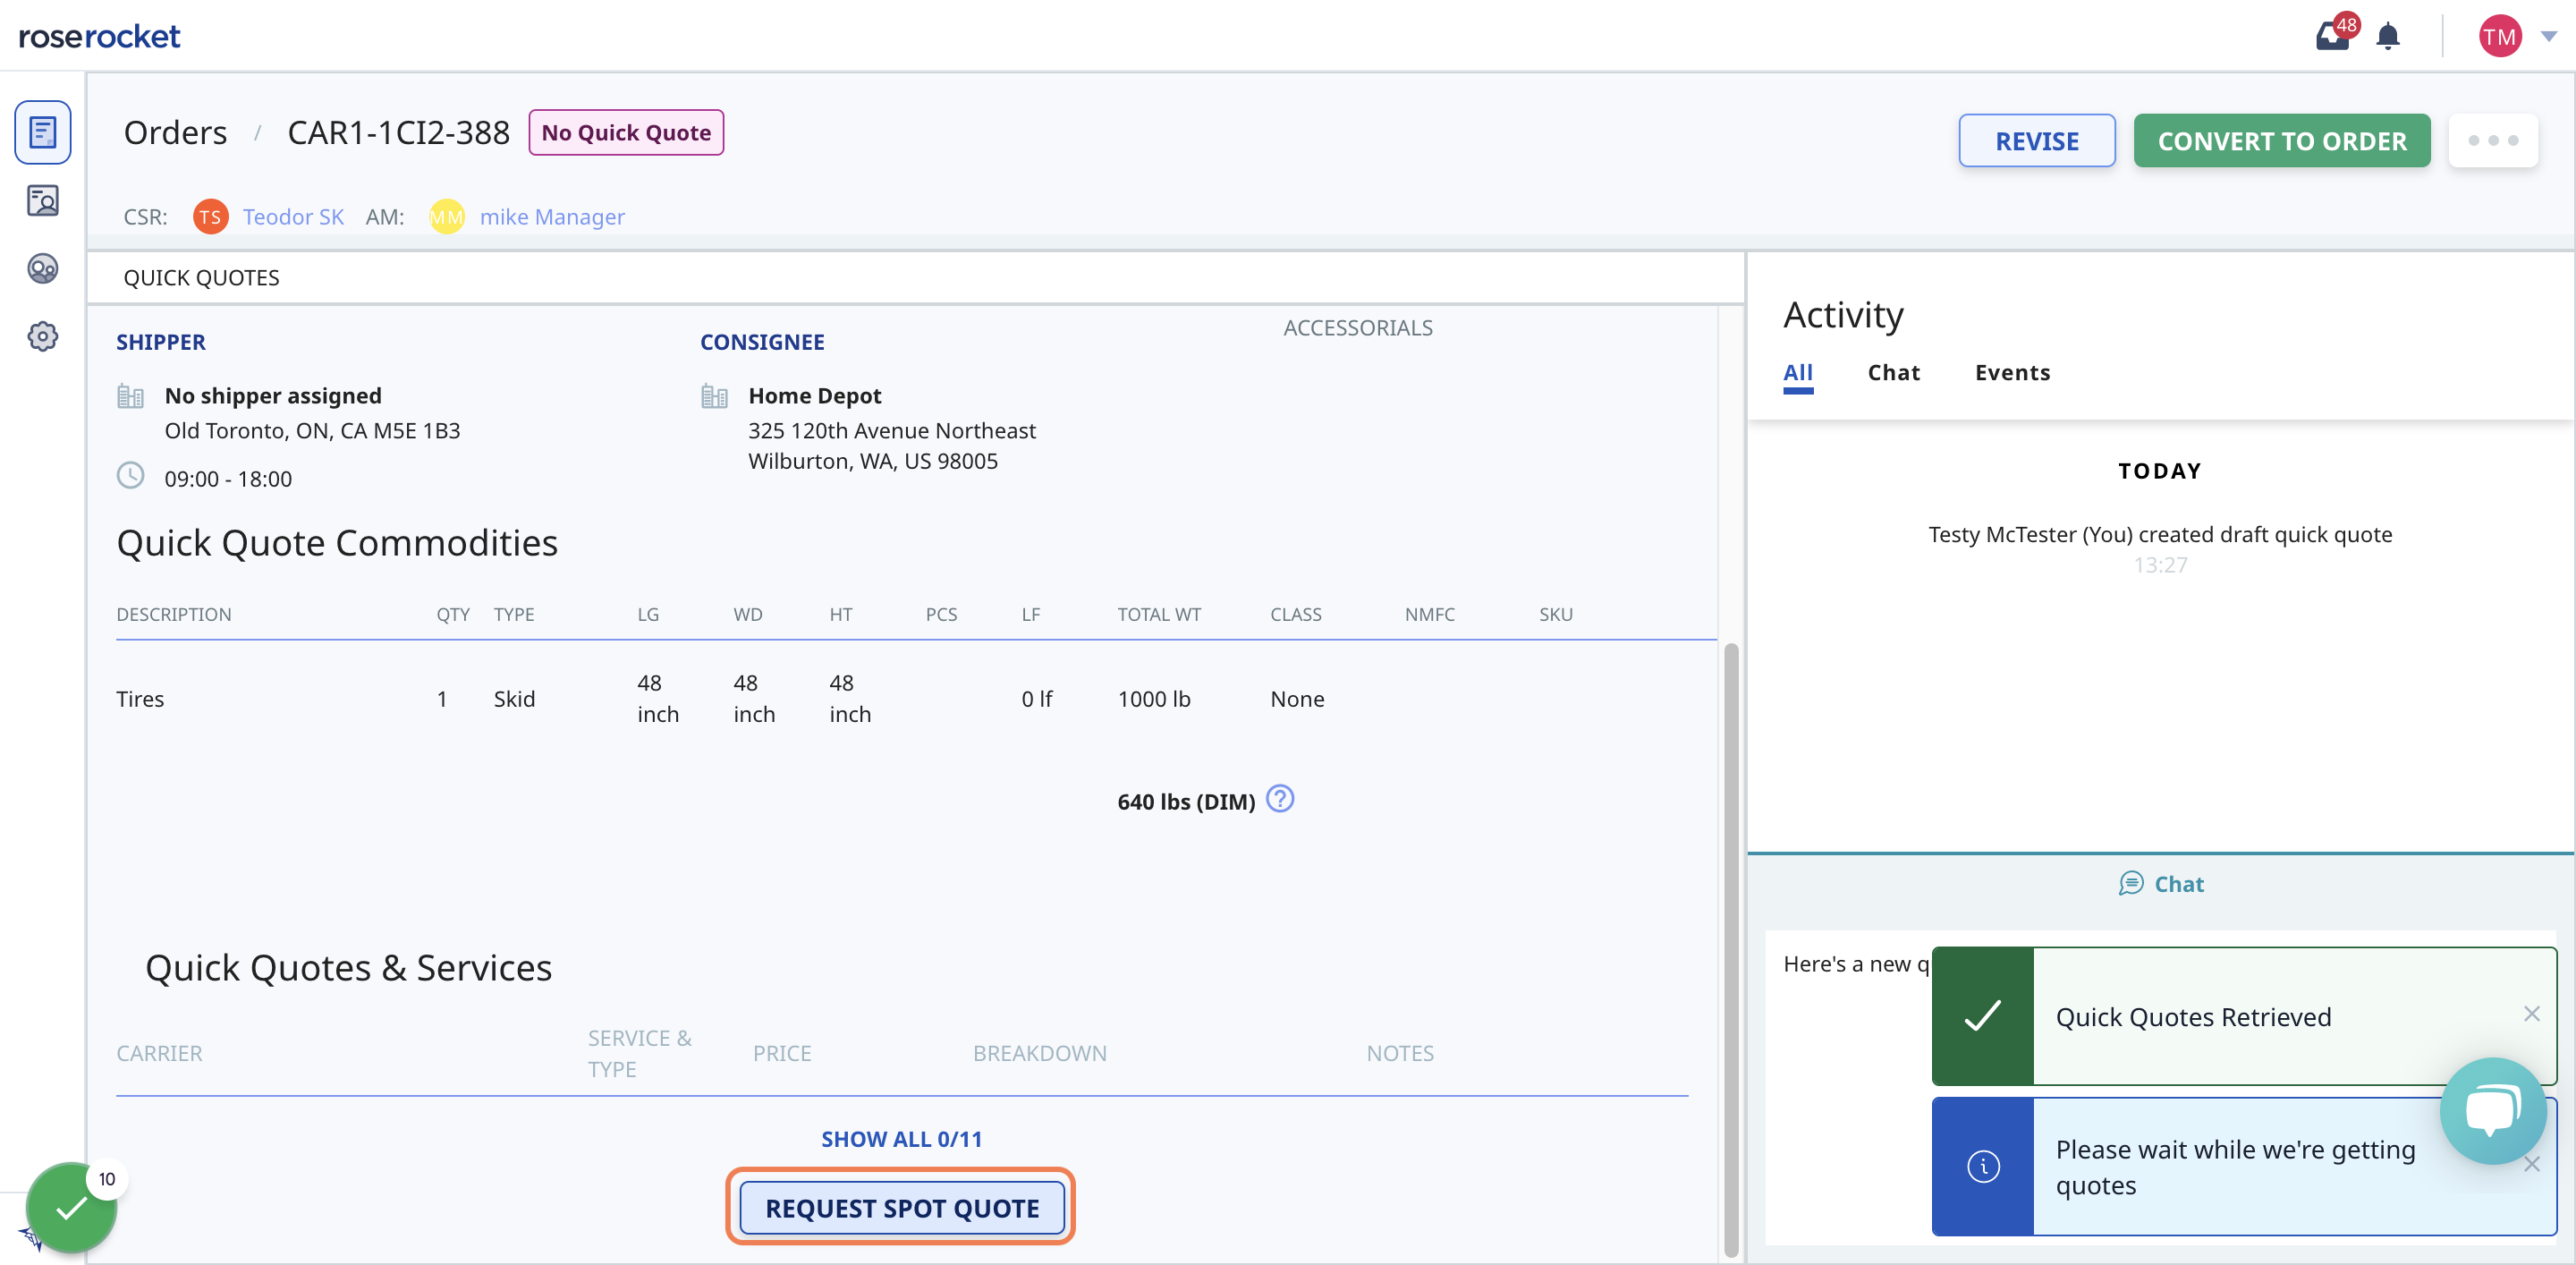
5. If your partner uses our Tariffs feature, quick quotes will be generated automatically
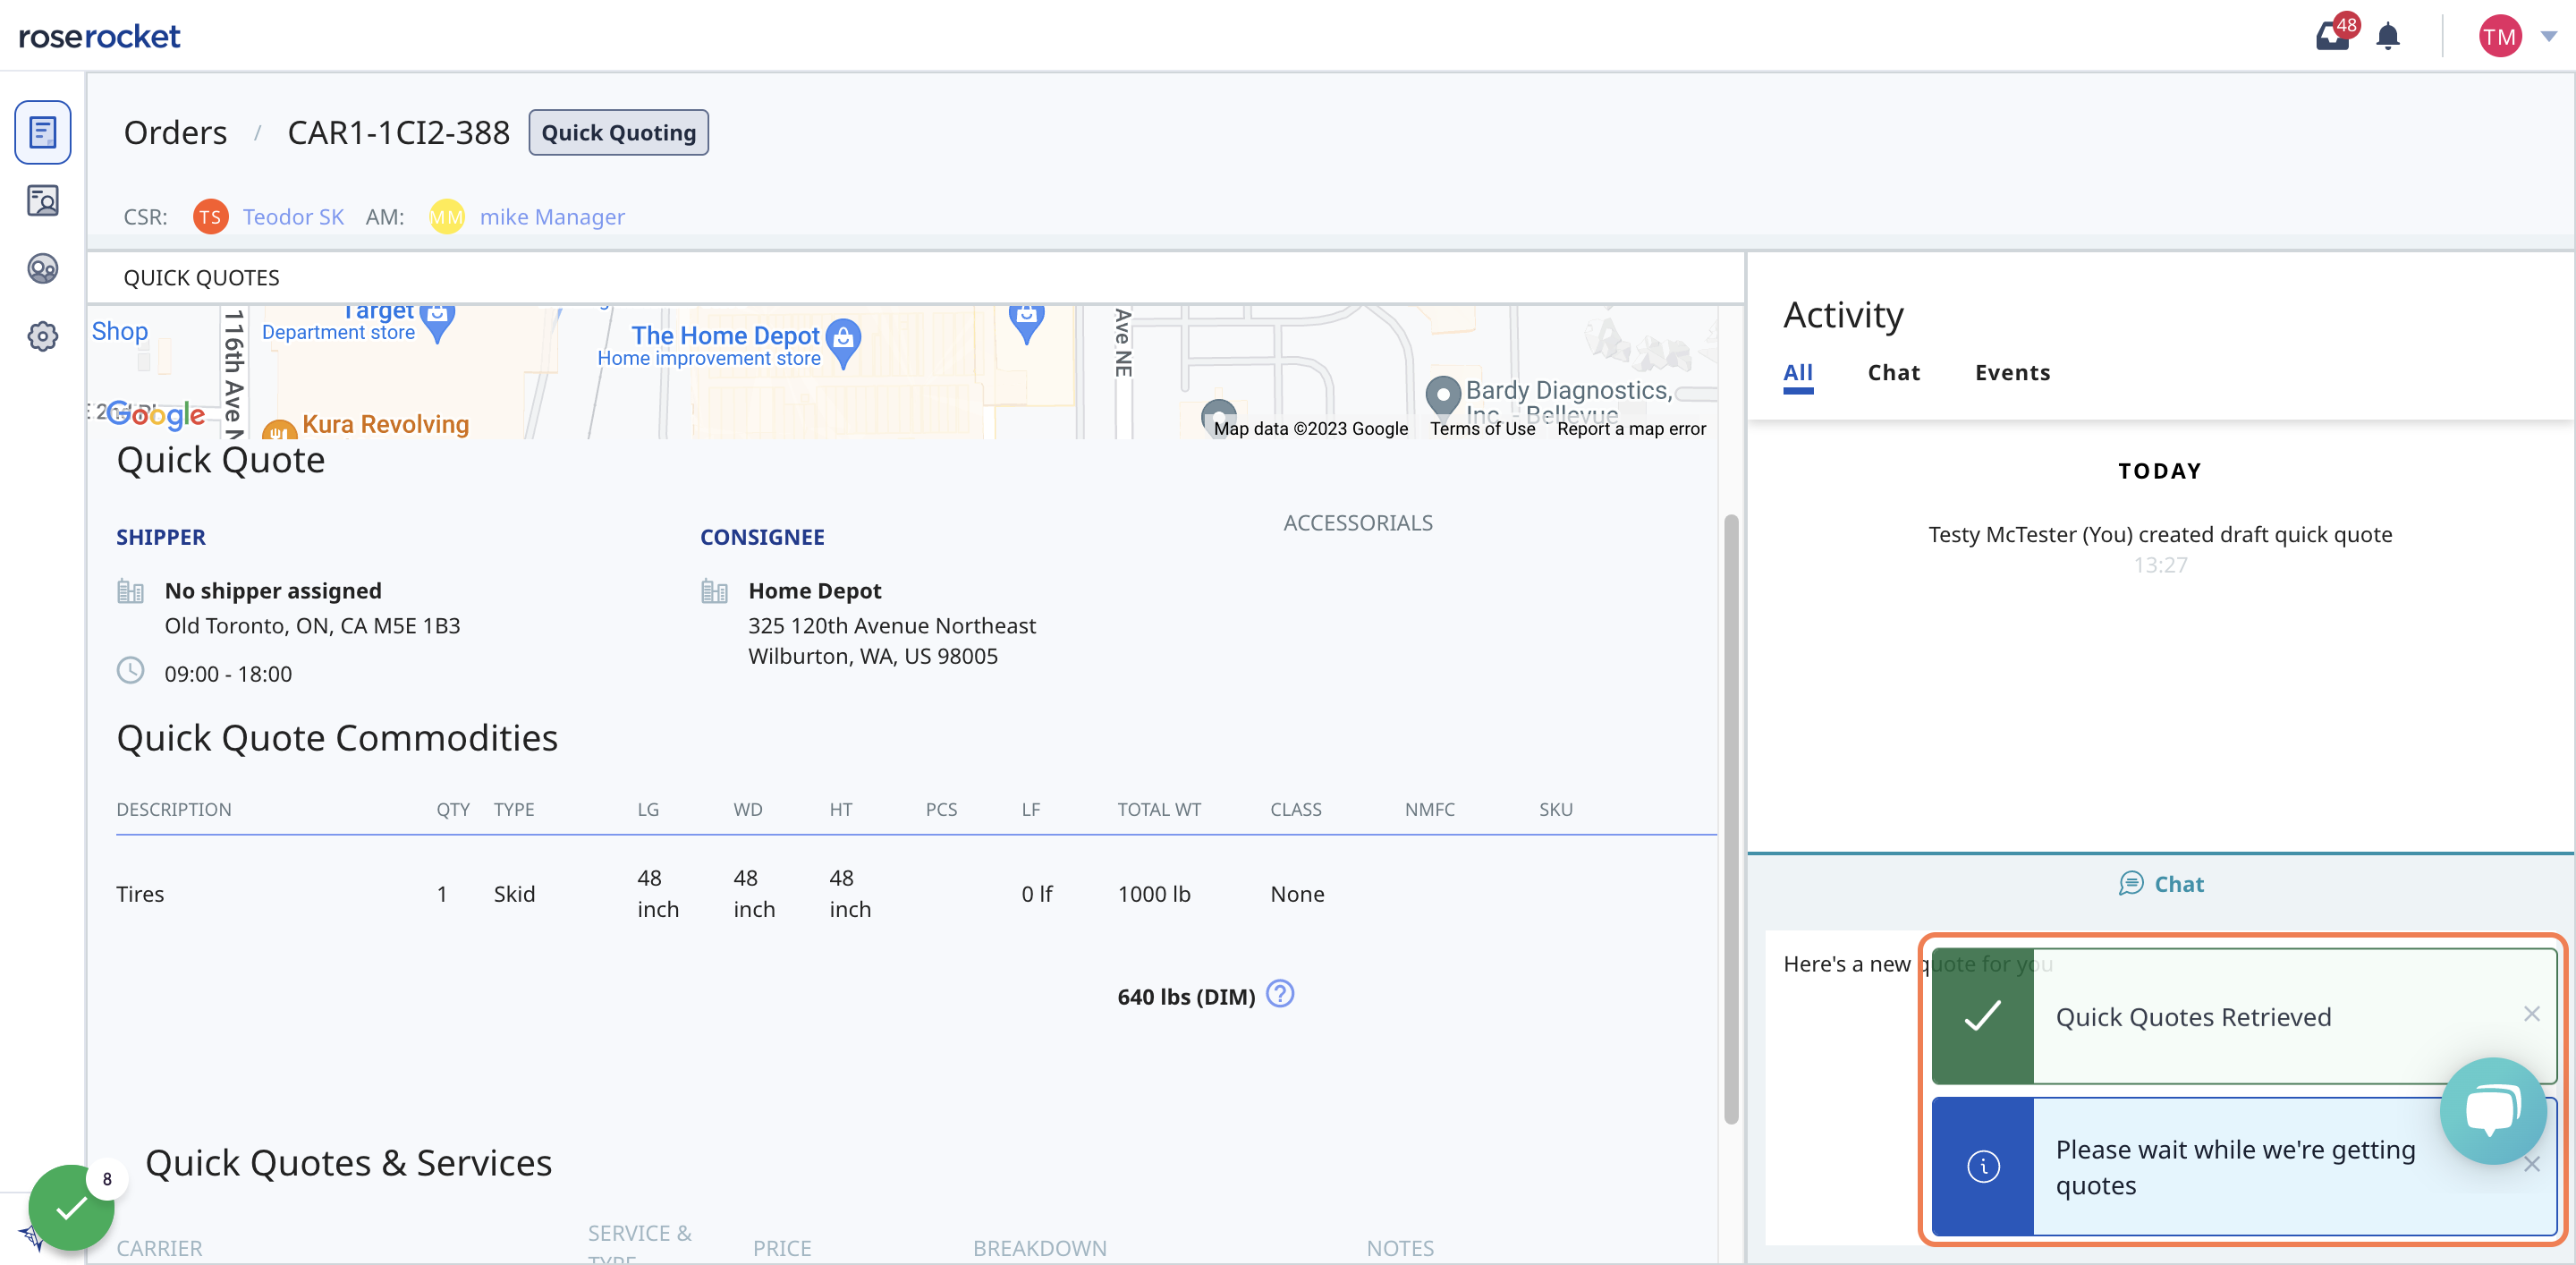
6. If not, or you wish for a new quote different from what was generated, select REQUEST SPOT QUOTE
Add/Remove/Edit team member access to your Customer Portal
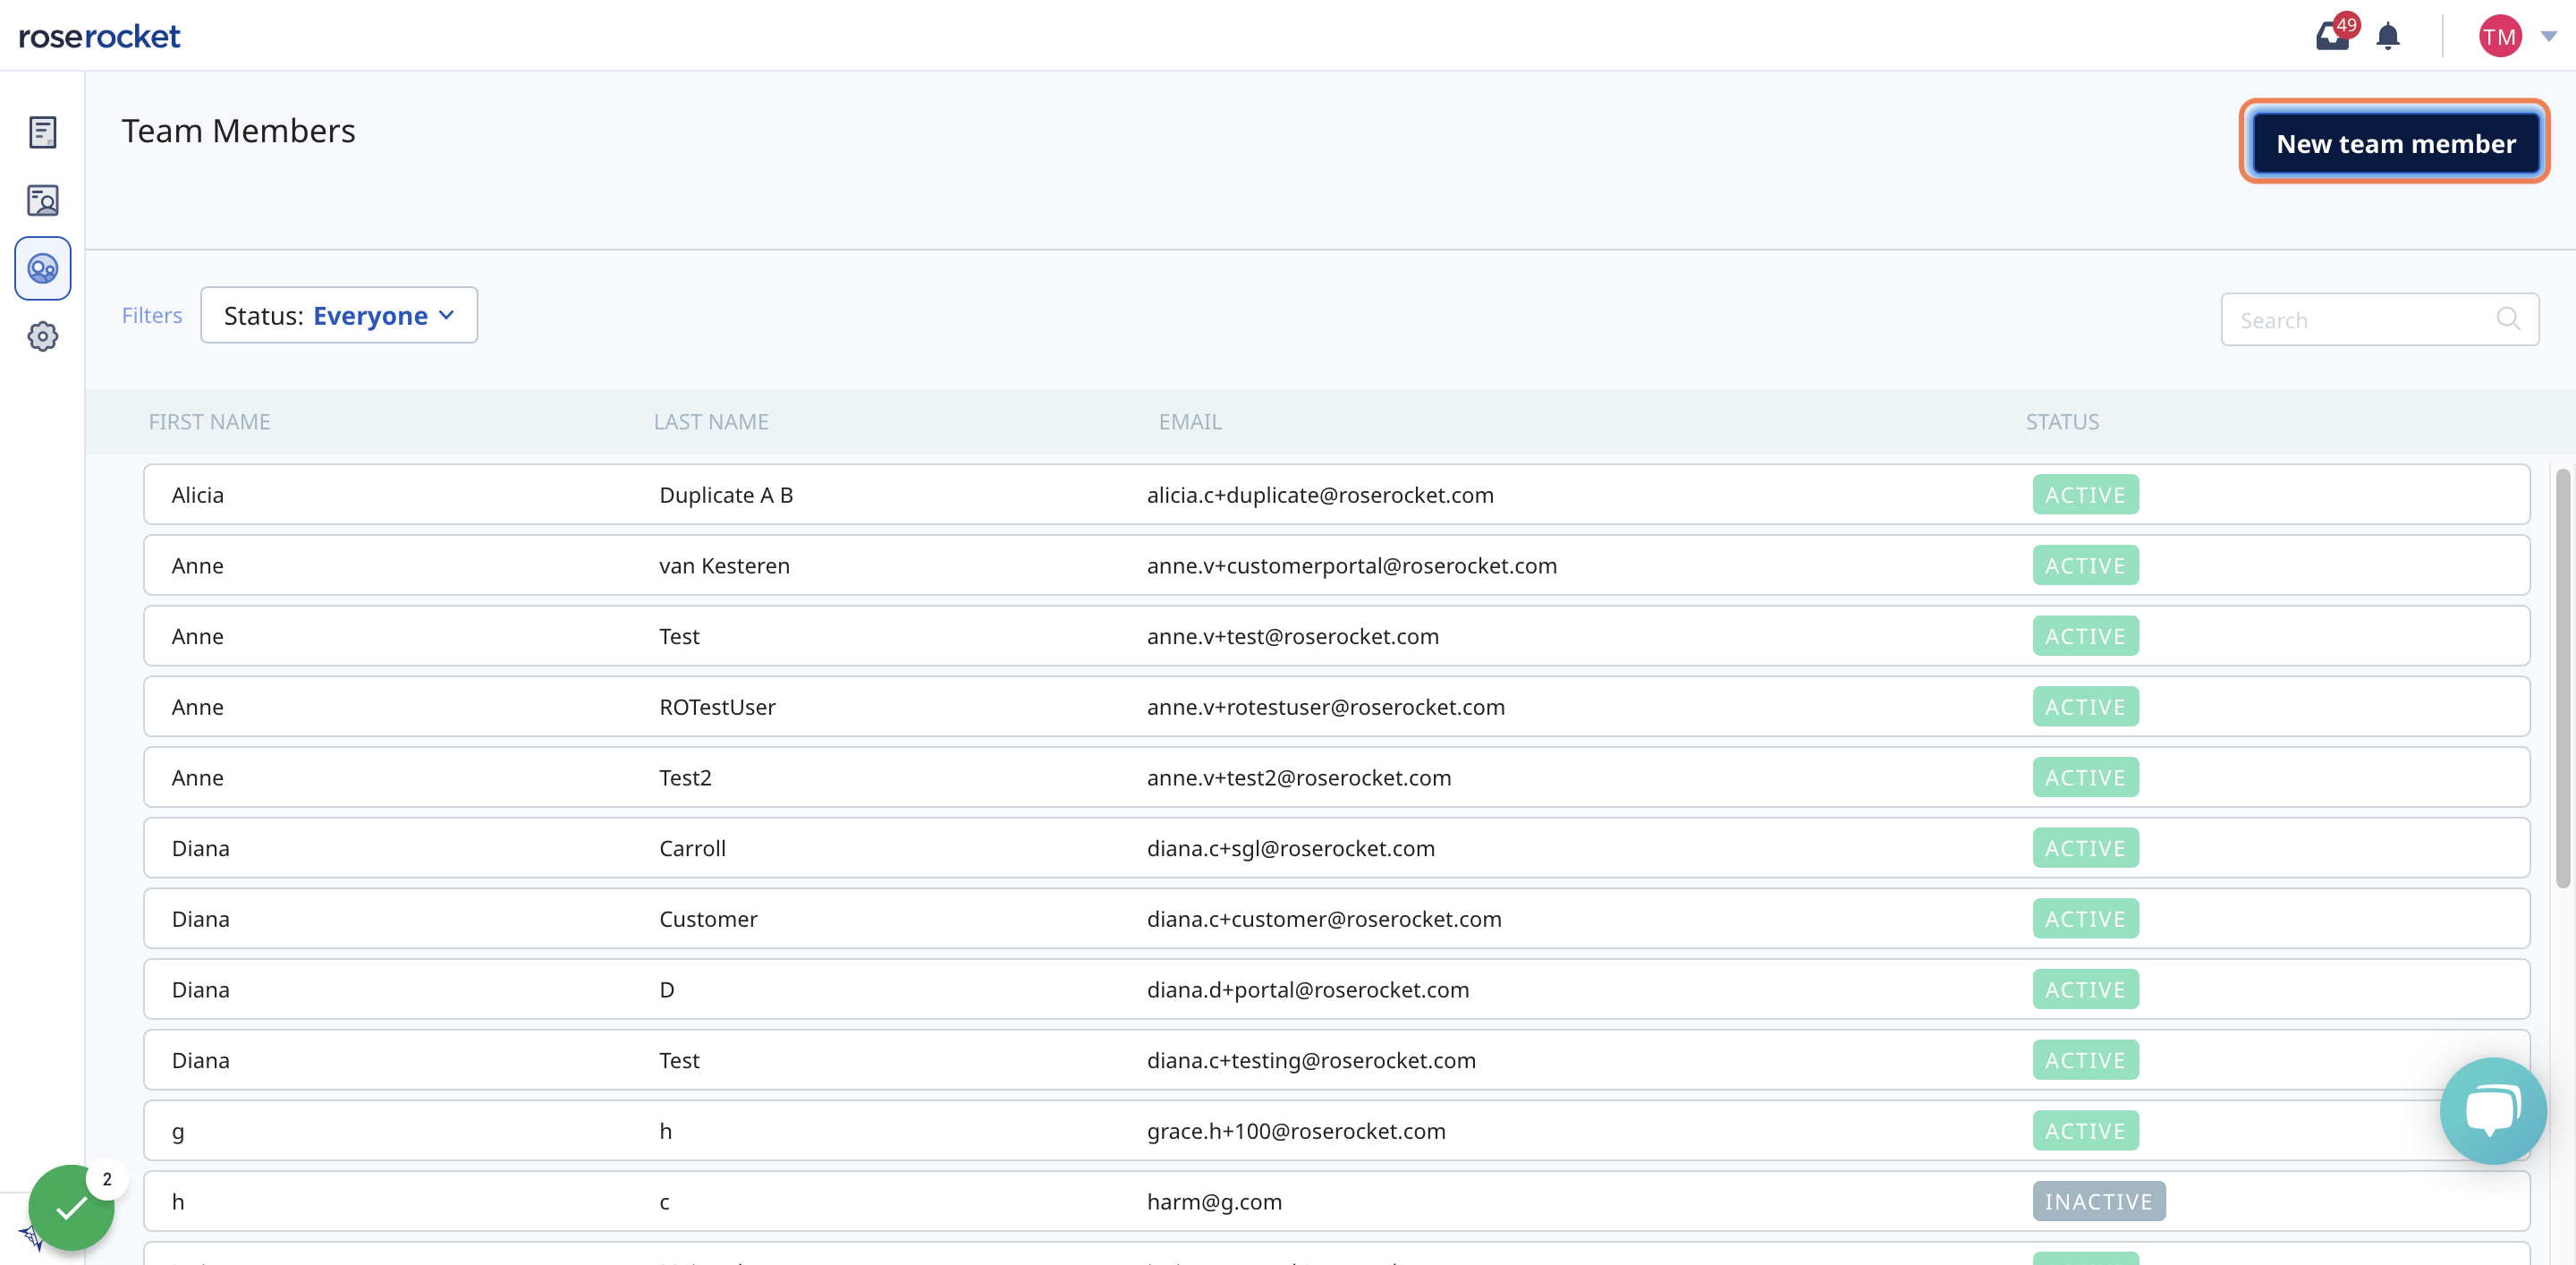
1. Select the Team page from the side navigation menu
2. Click on New team member
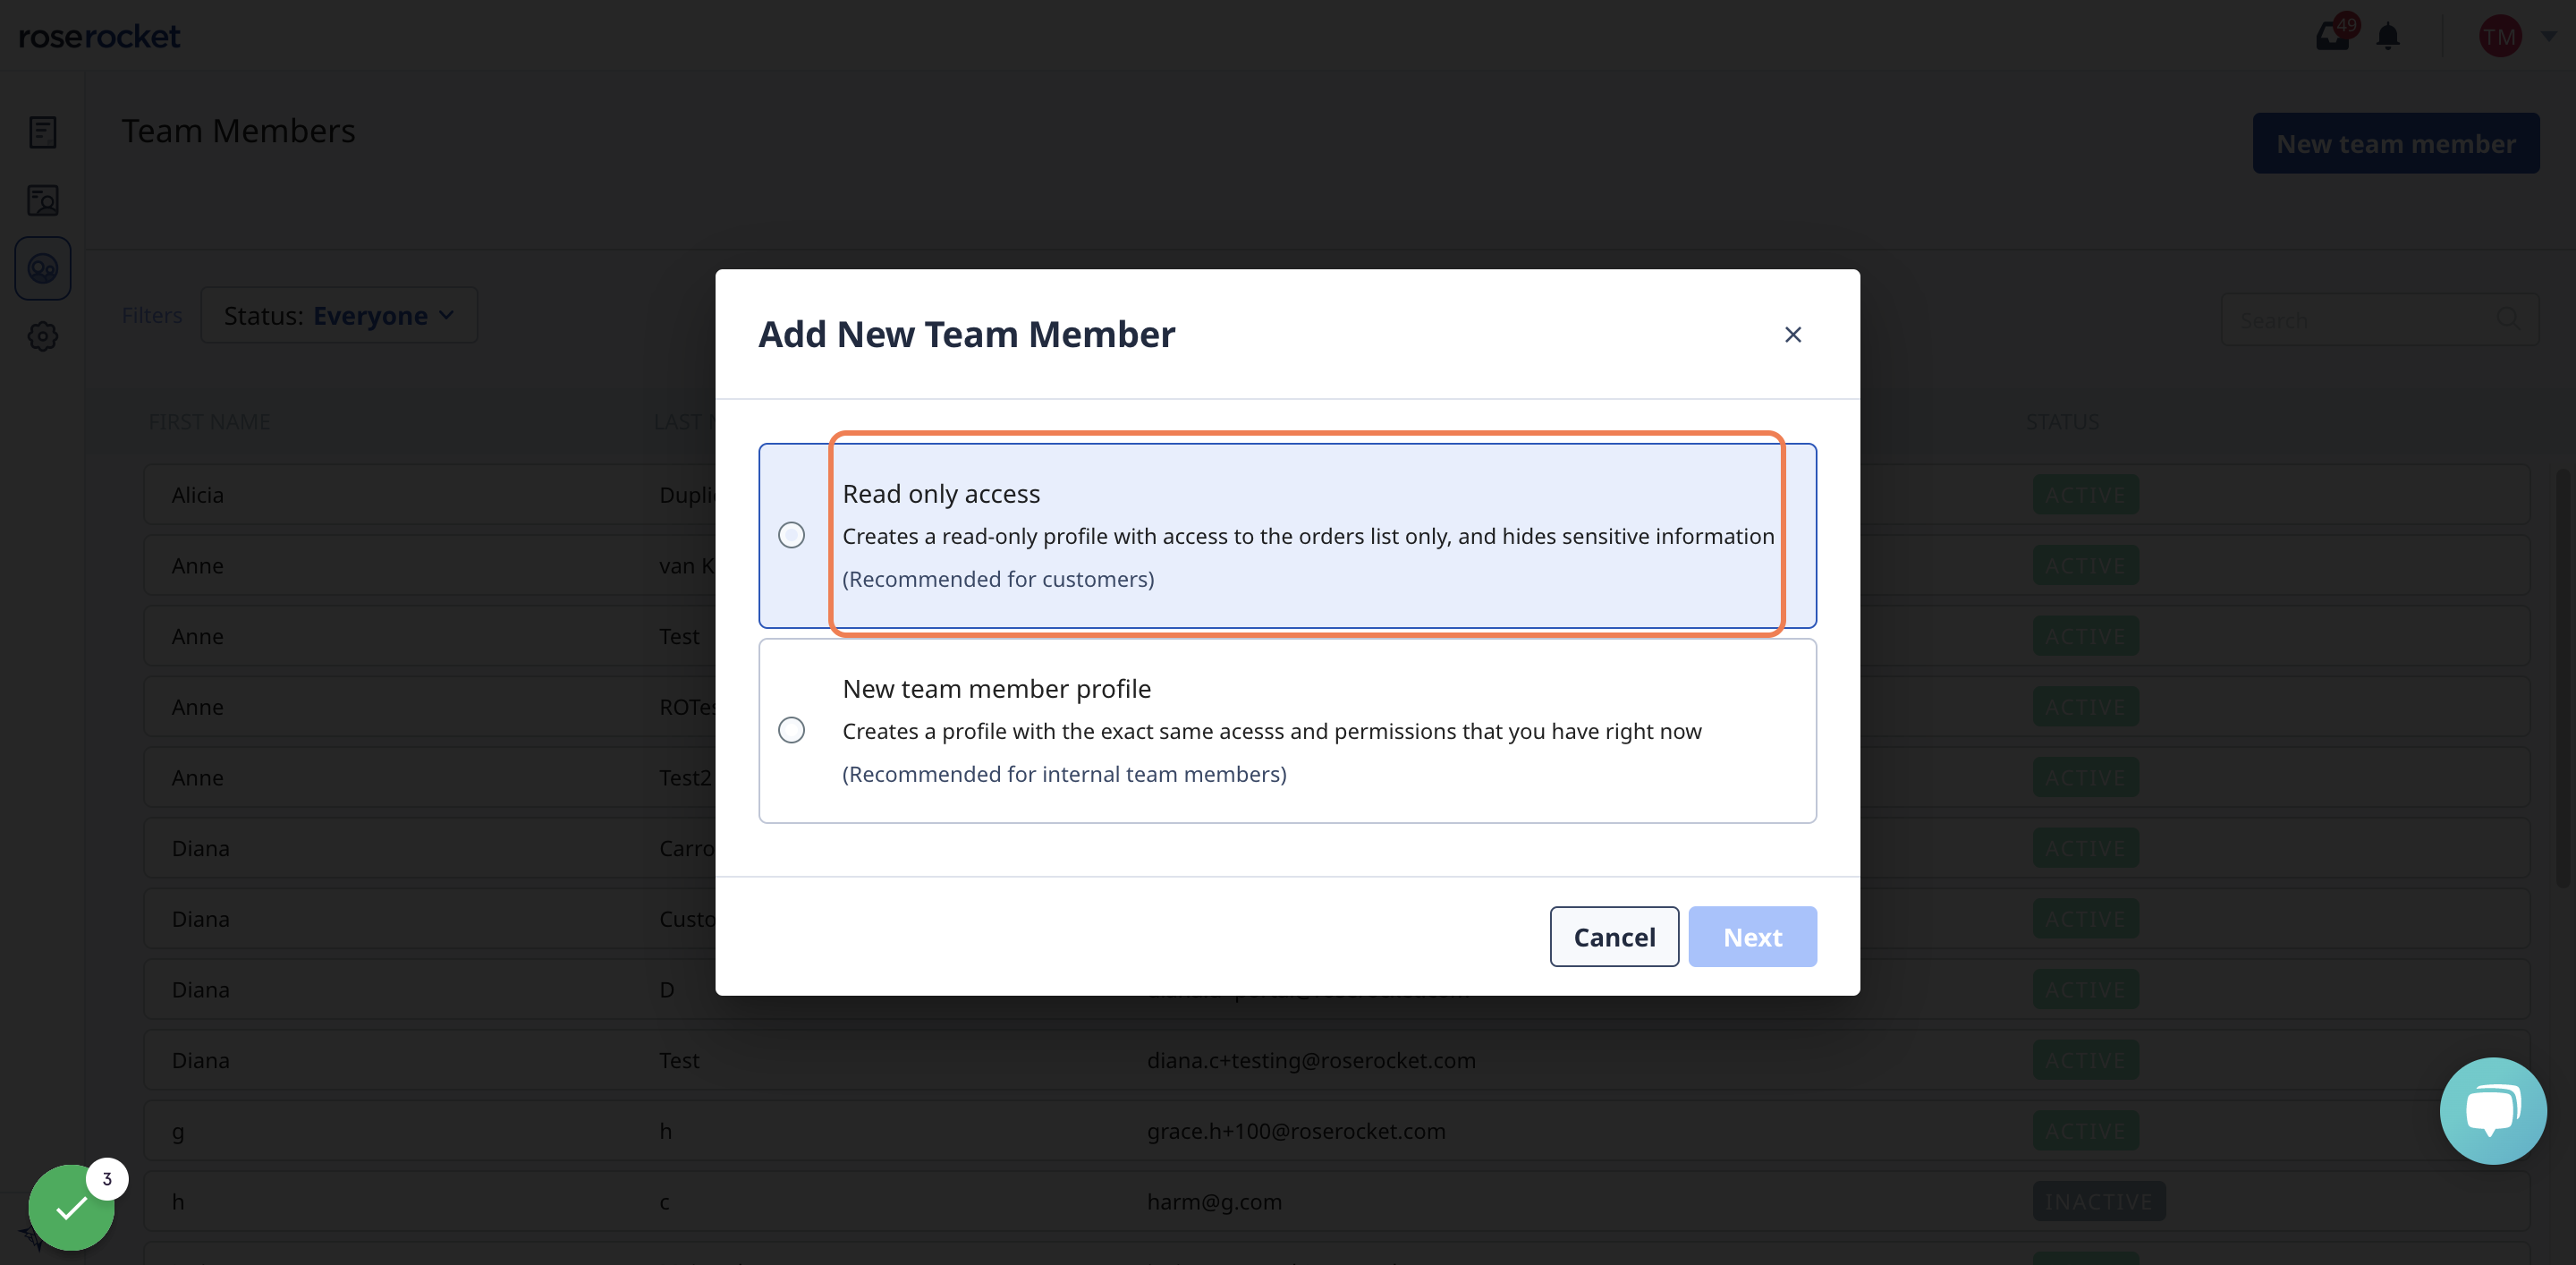
3. Choose whether this user should have full, or Read Only access, and click "Next"
Read Only access portal users will only have access to the orders list, with no permission to add/remove users, change settings, create an order, or request a quote.
4. Enter in the Team Member's information, and click "Save"
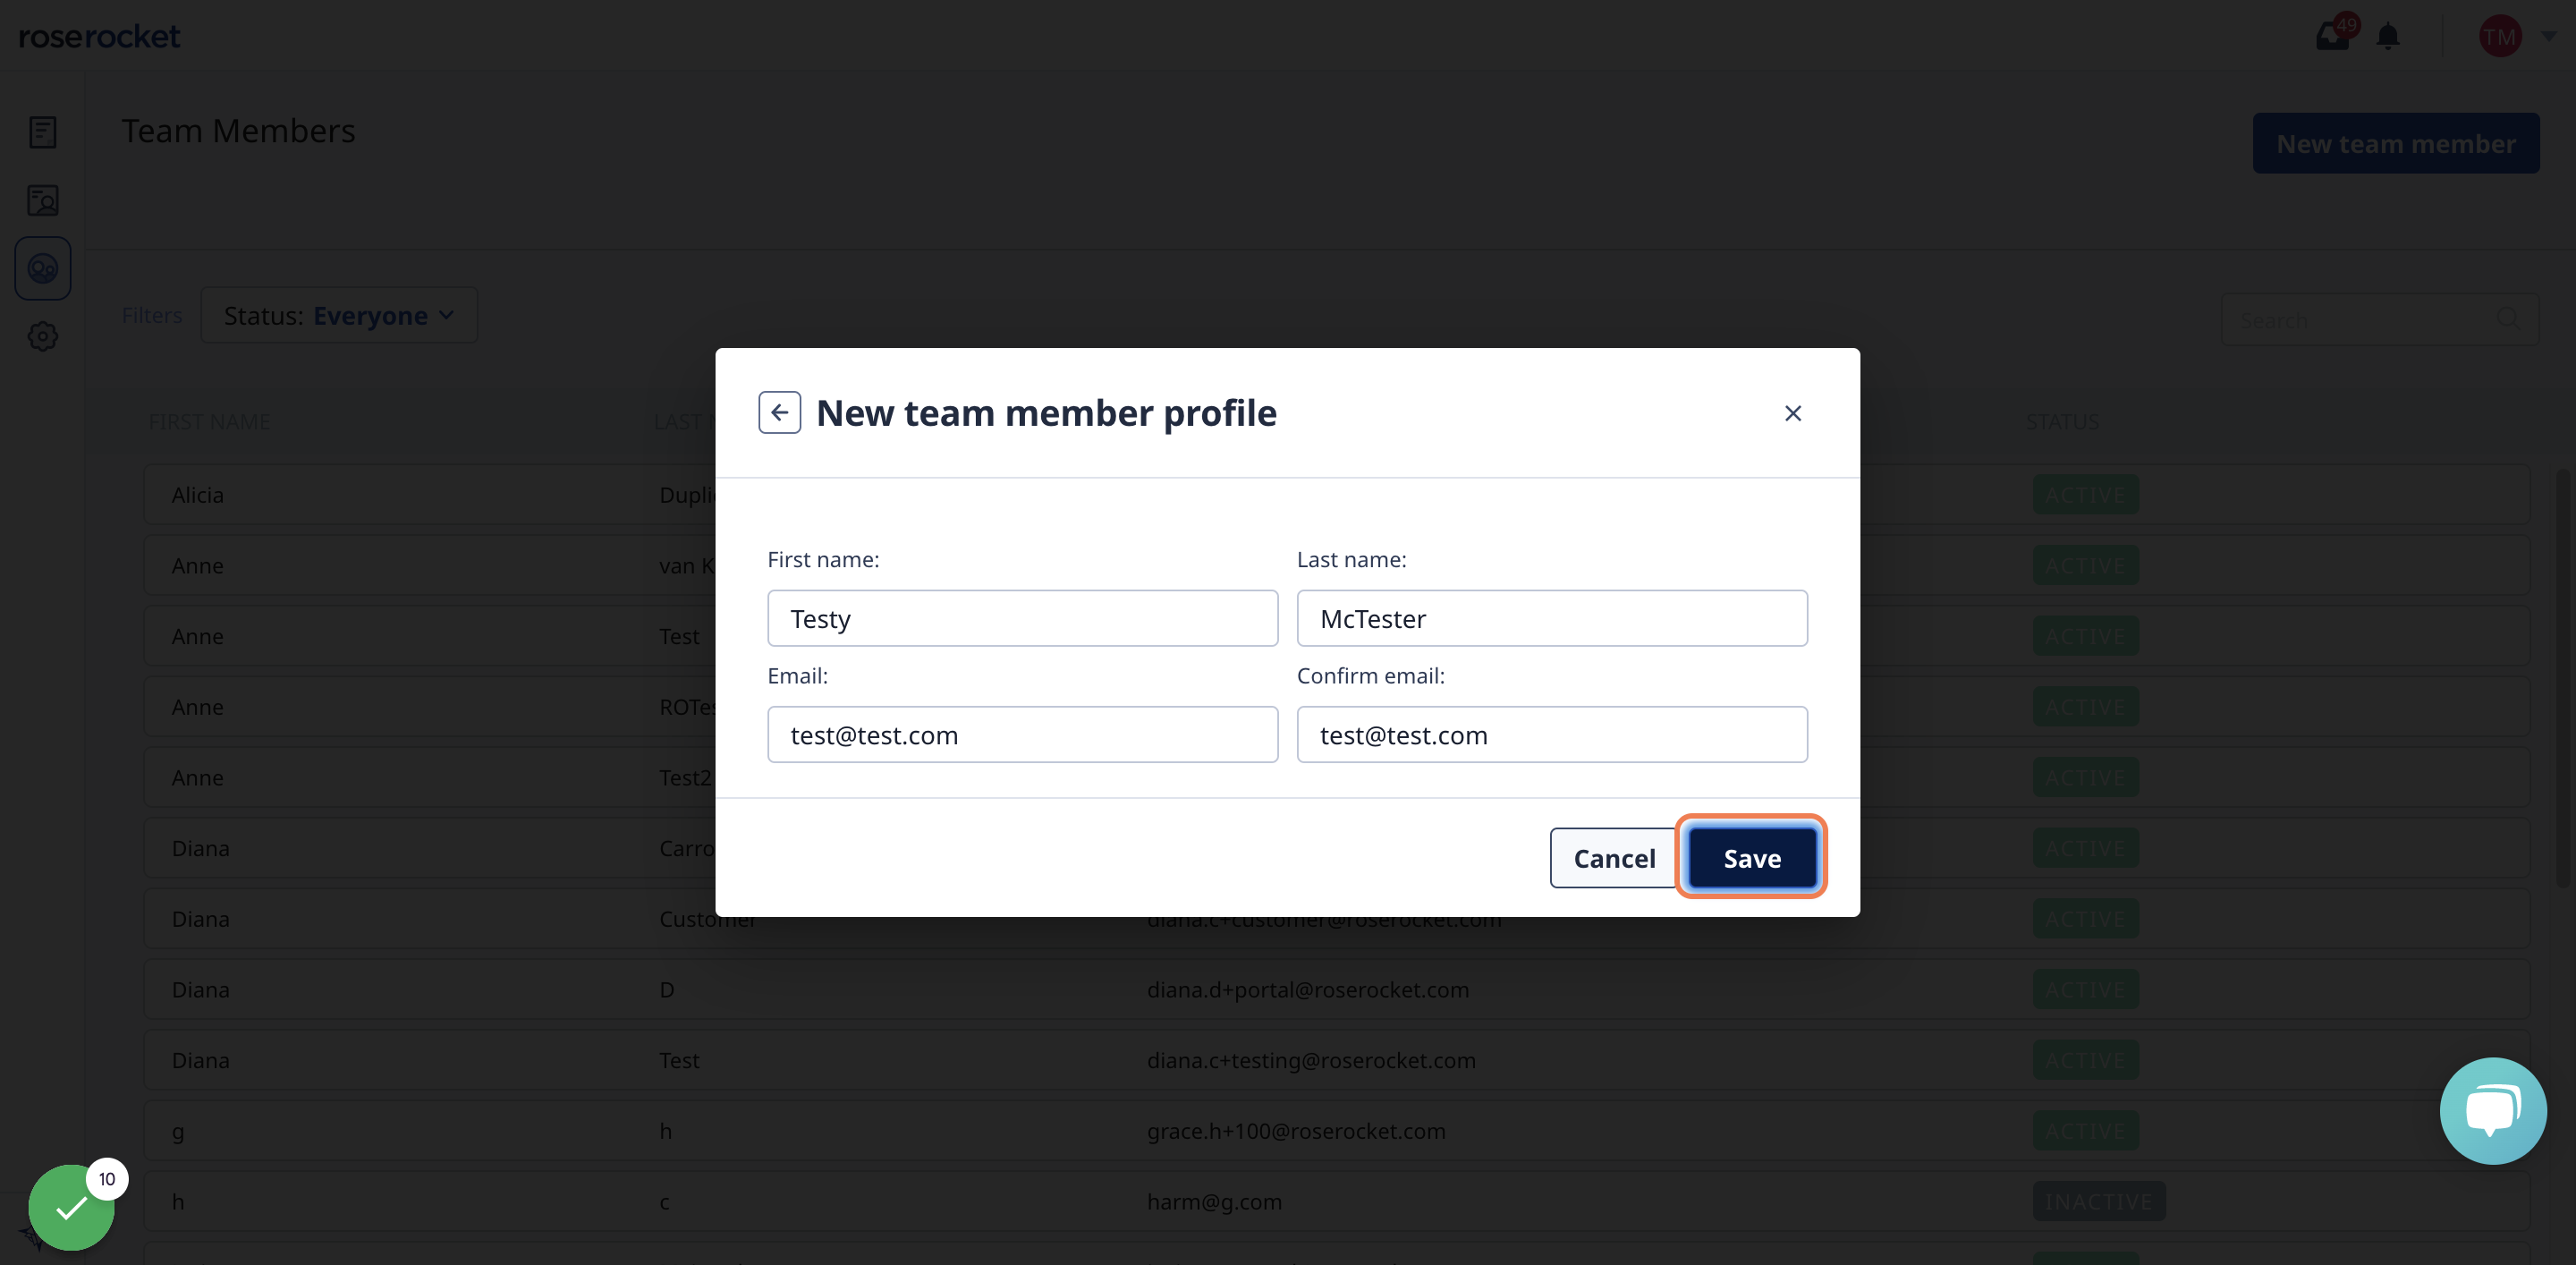
5. ...and that's it! Your team member will be sent an activation email to set-up their Customer Portal
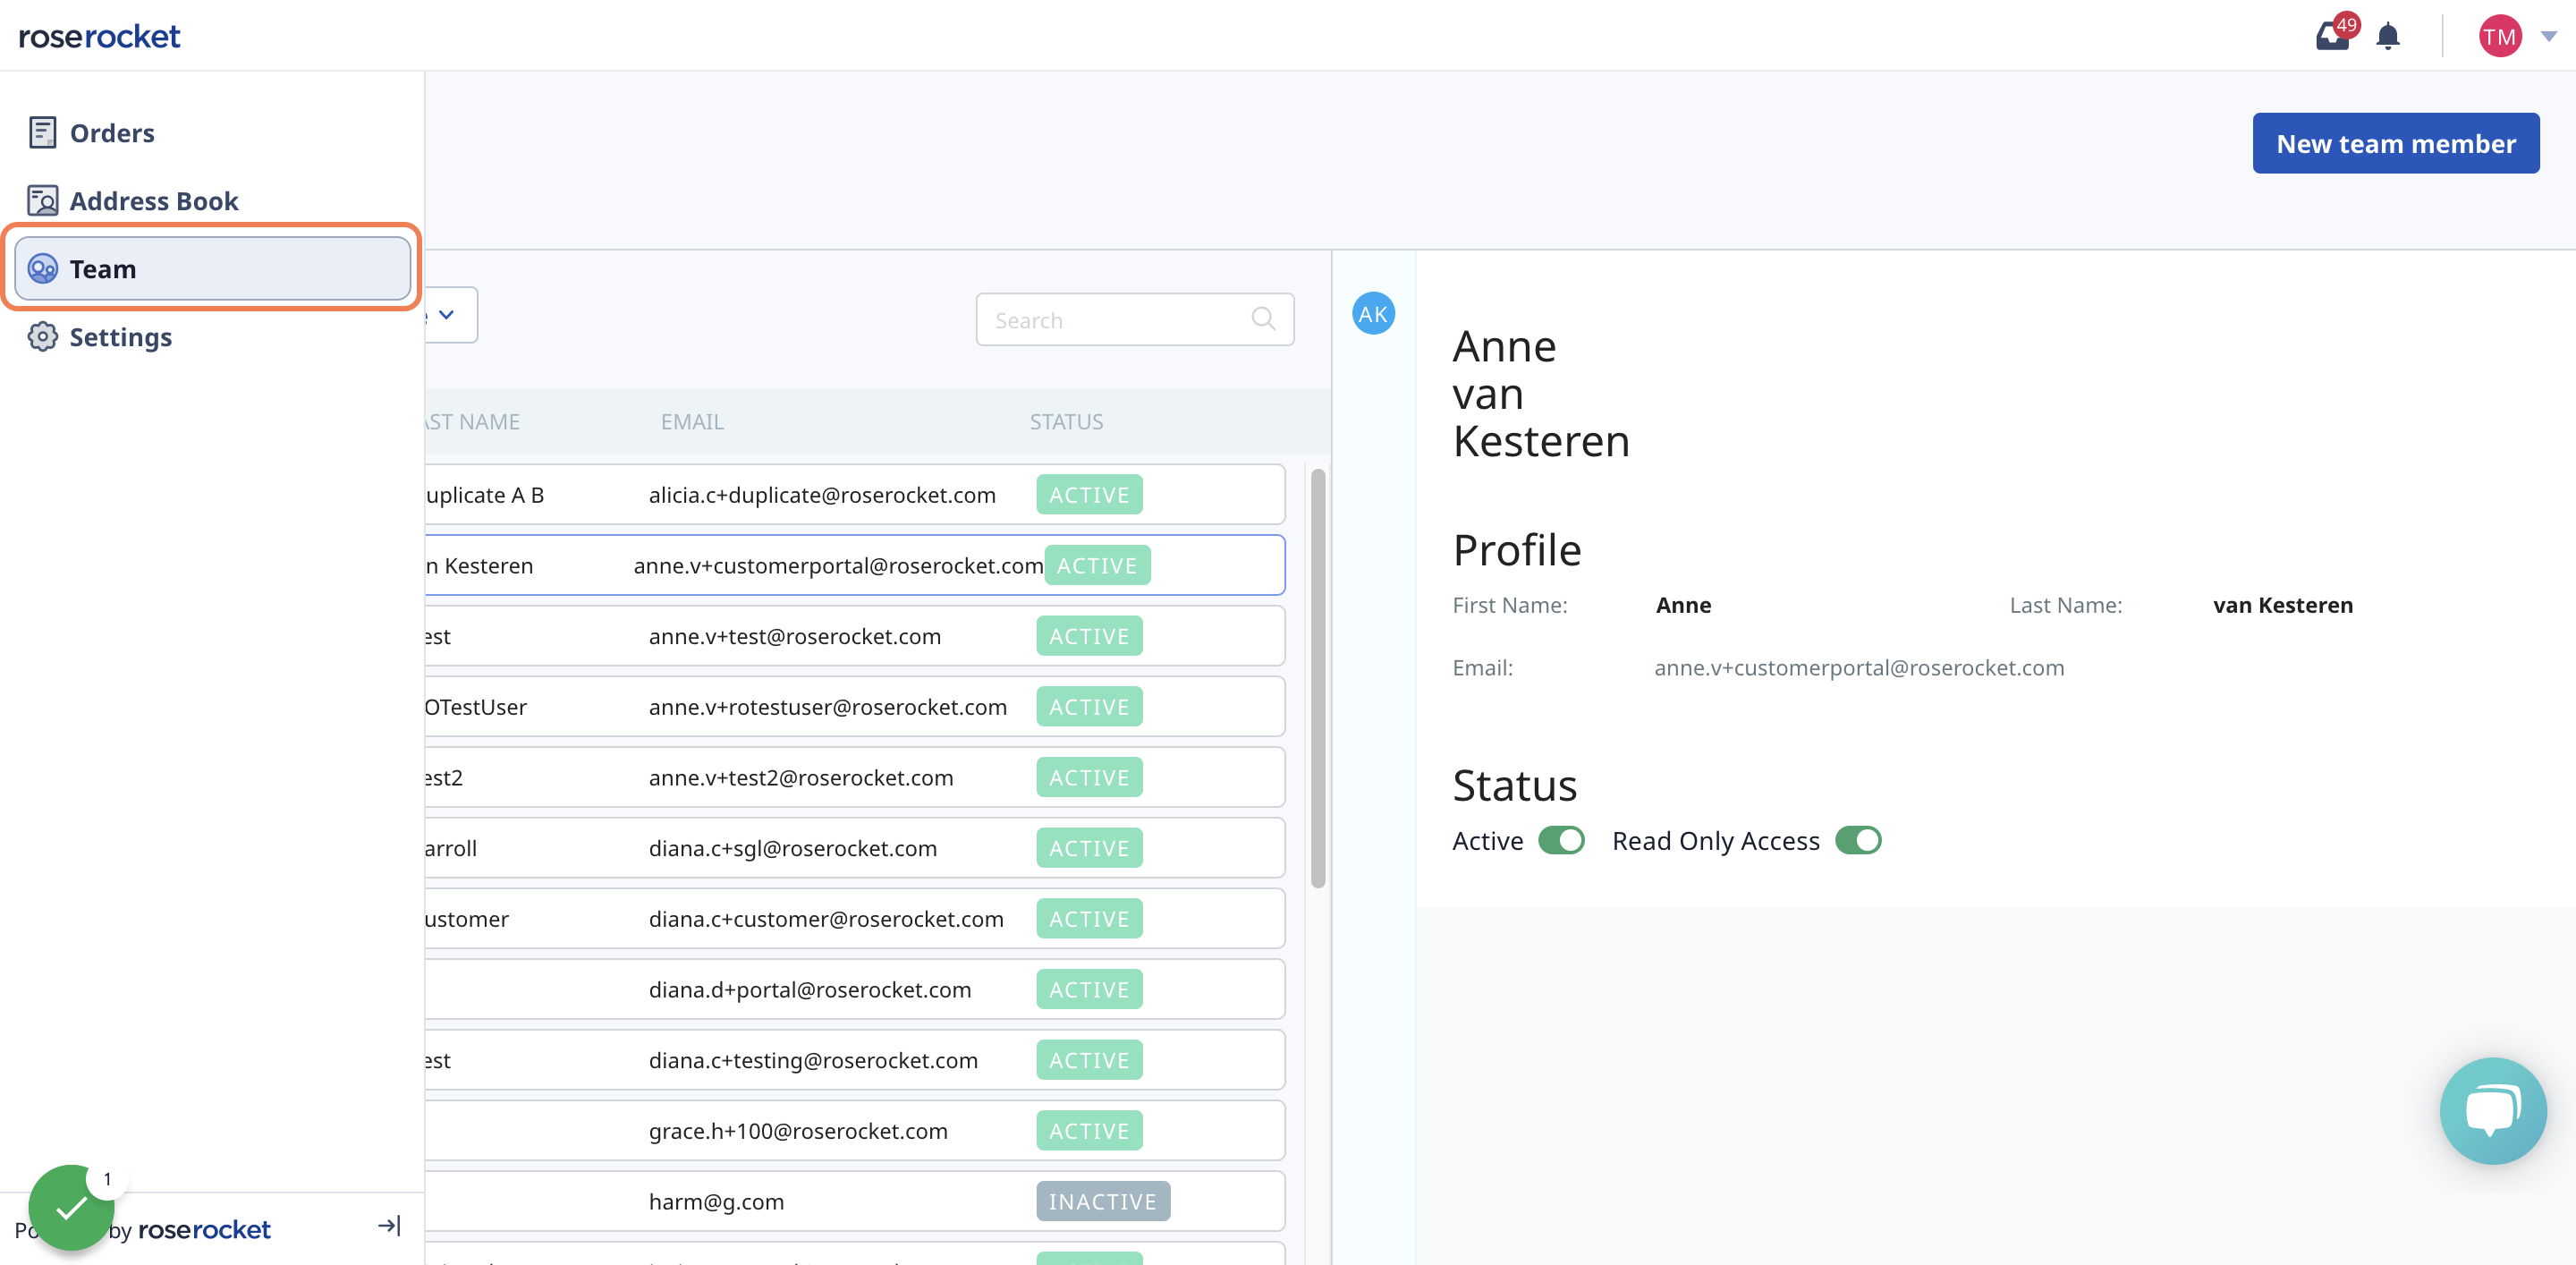
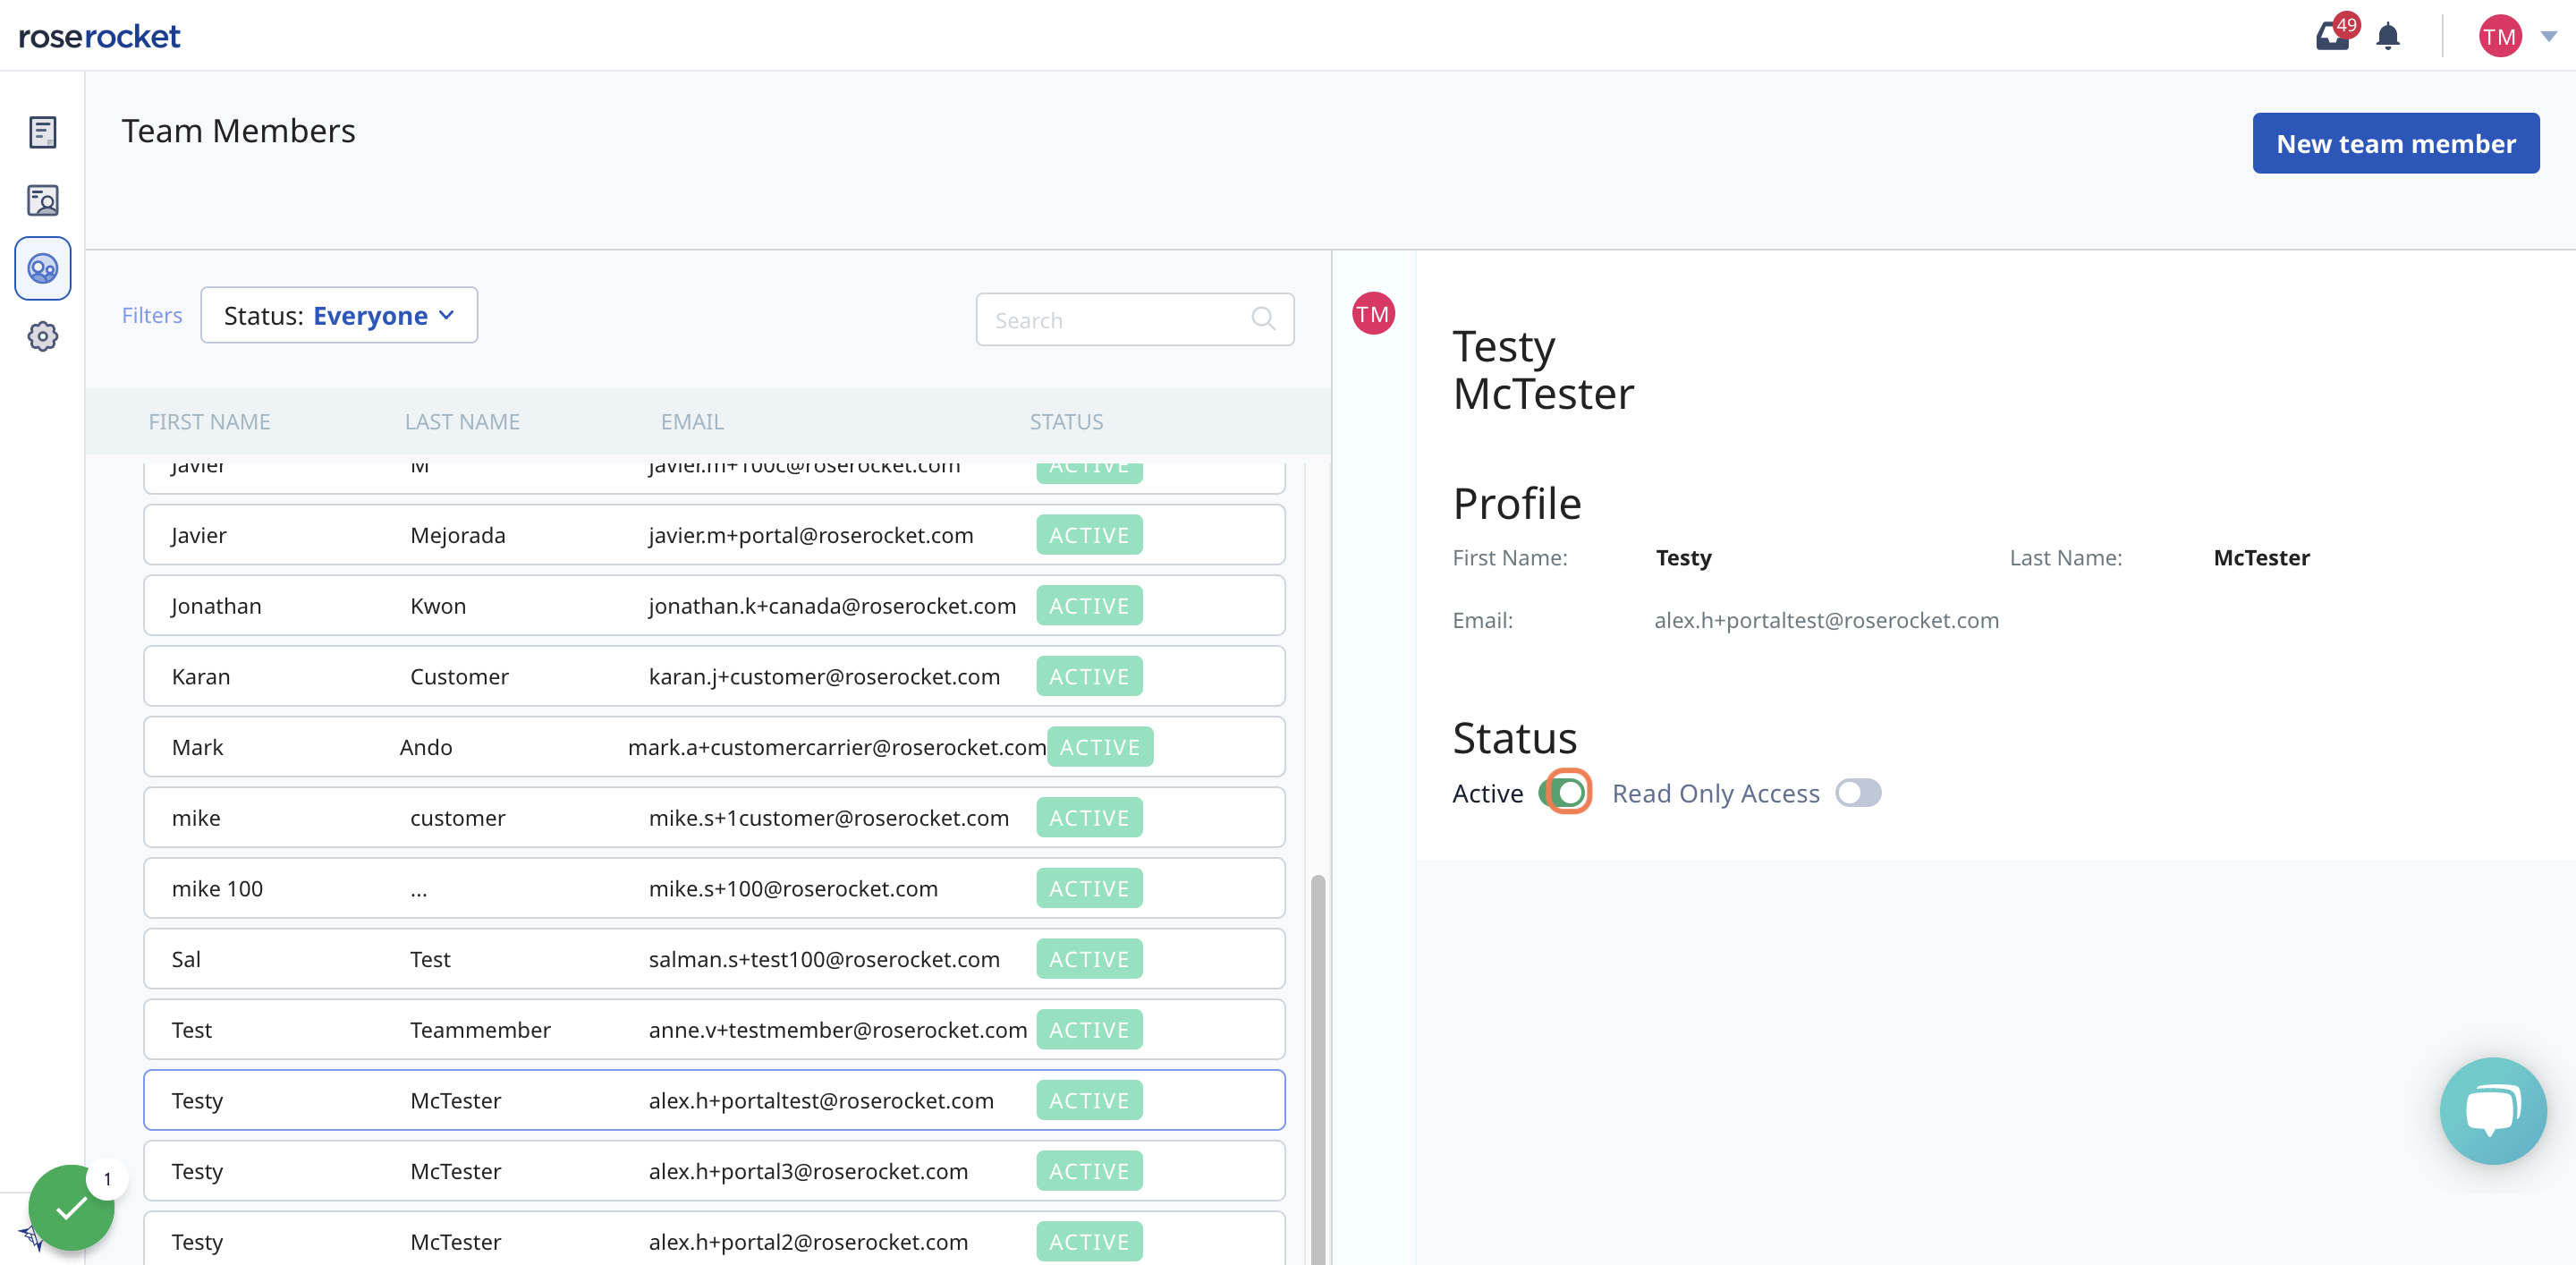
6. To update who has access to your Customer Portal, as well as their permission level, click on a team member from the Team page list
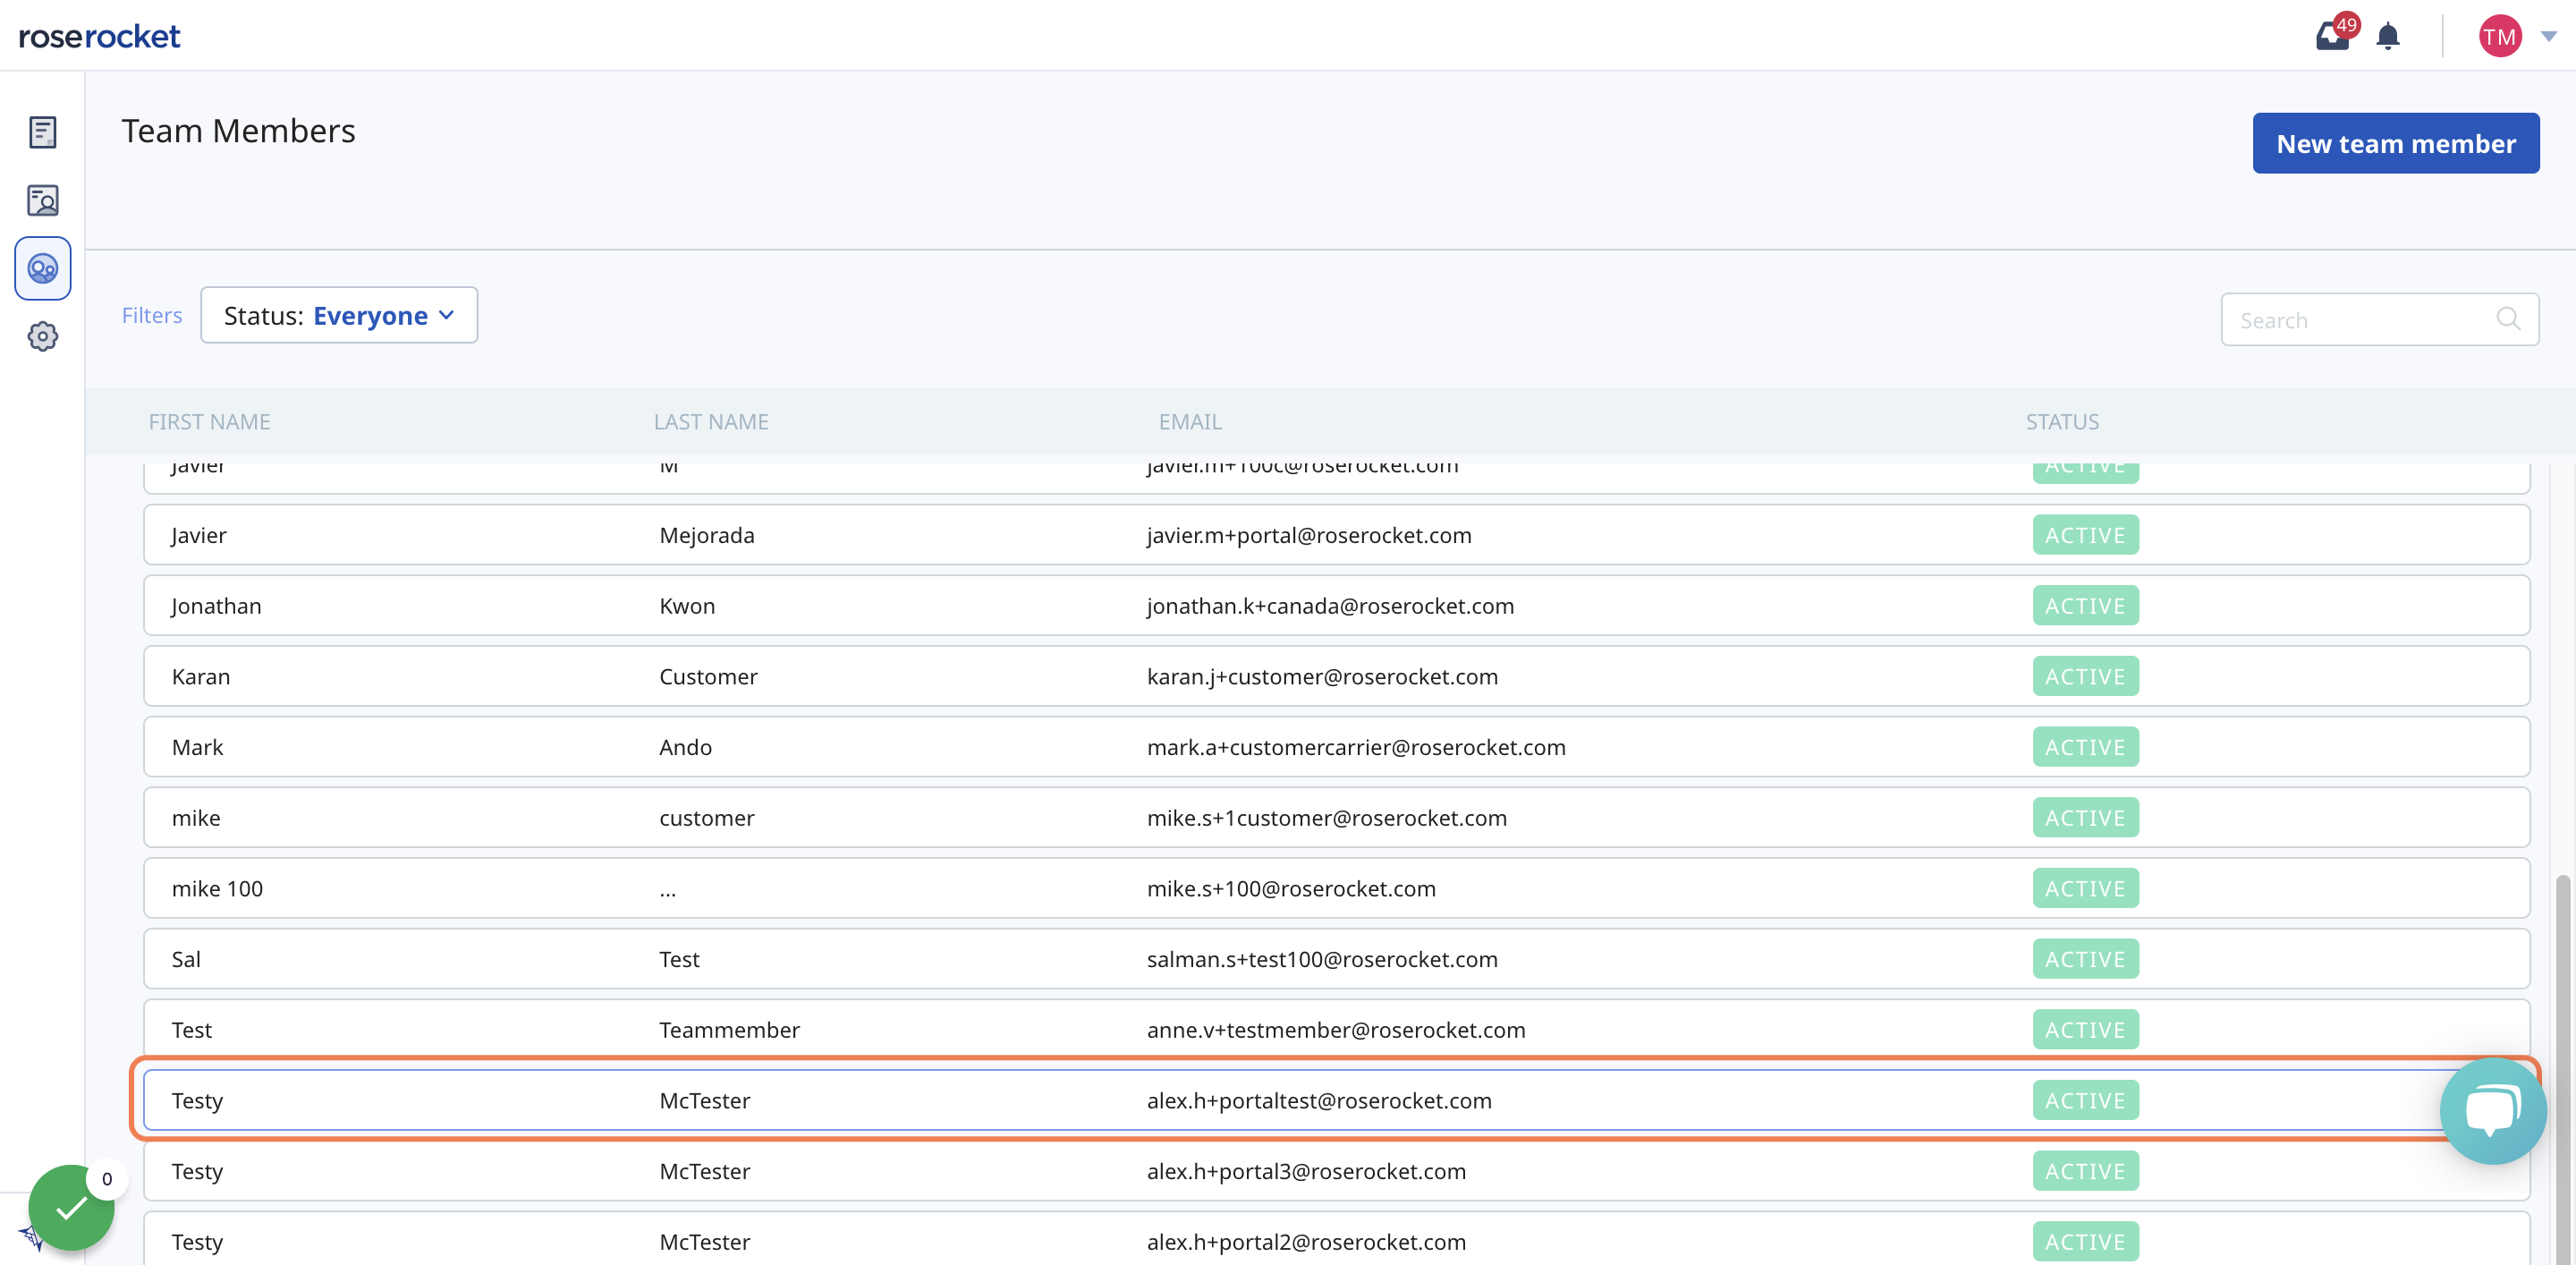
7. To edit their name or email, click on the relevant field, update the information, and select the checkmark to save your changes
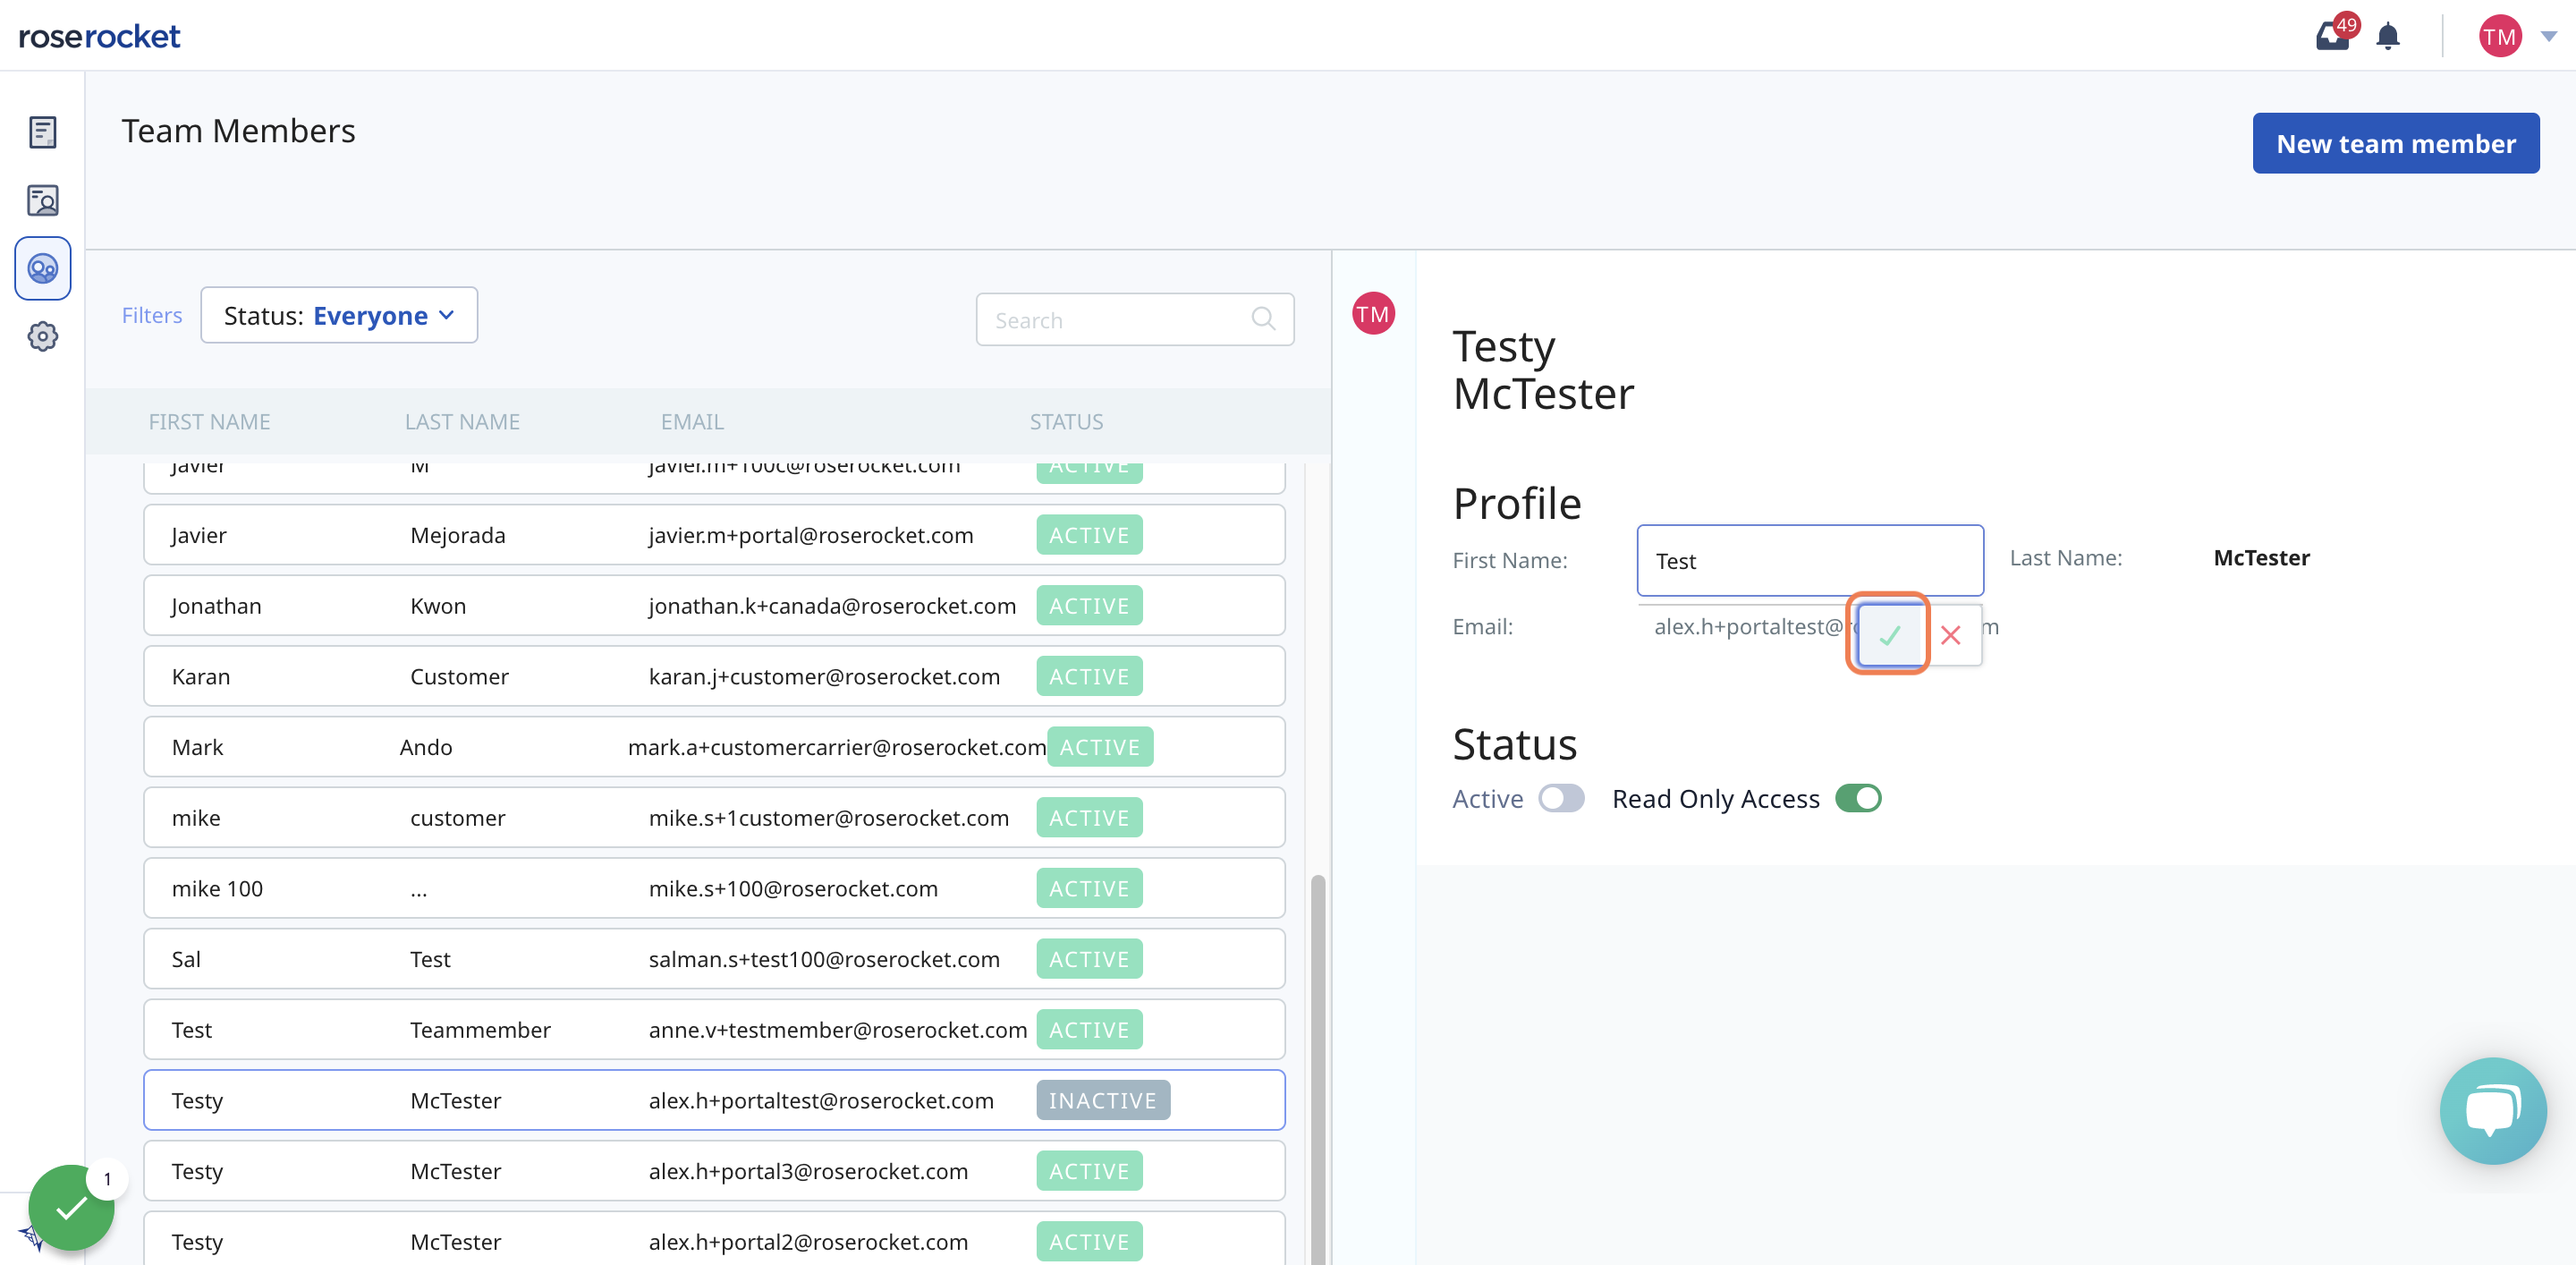
8. Under Status, select the toggle for Active and Read Only Access
- Setting a team member to inactive will remove their access to your Customer Portal
- Setting a team member to Read Only Access will limit their access to Orders - they will not be able to add/remove users, change settings, create an order, or request a quote.
Your changes will be saved automatically.
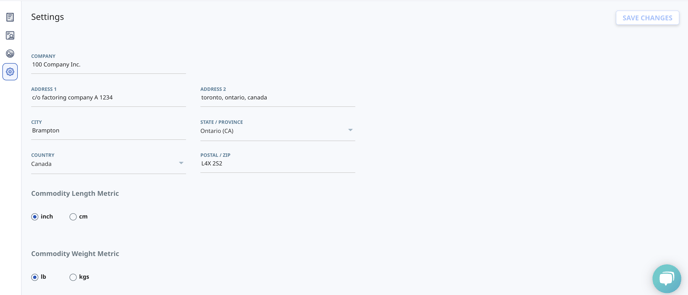
Change your Customer Portal Settings
On the Settings page, you can update your company information, such as name and address, as well as set the measurement system you use for commodities - imperial or metric.