The Carrier Onboarding Feature in Rose Rocket streamlines the process of adding and onboarding carriers by automating data collection, document management, and compliance checks.
Table of Contents
Set Up Your Carrier Onboarding Packet
Customize Carrier Onboarding Workflow
Review Carrier Onboarding Submission
Check out this tutorial video, or keep scrolling for written step-by-step:
Step 1: Set Up Your Carrier Onboarding Packet
1. Customize the Document Requirements:
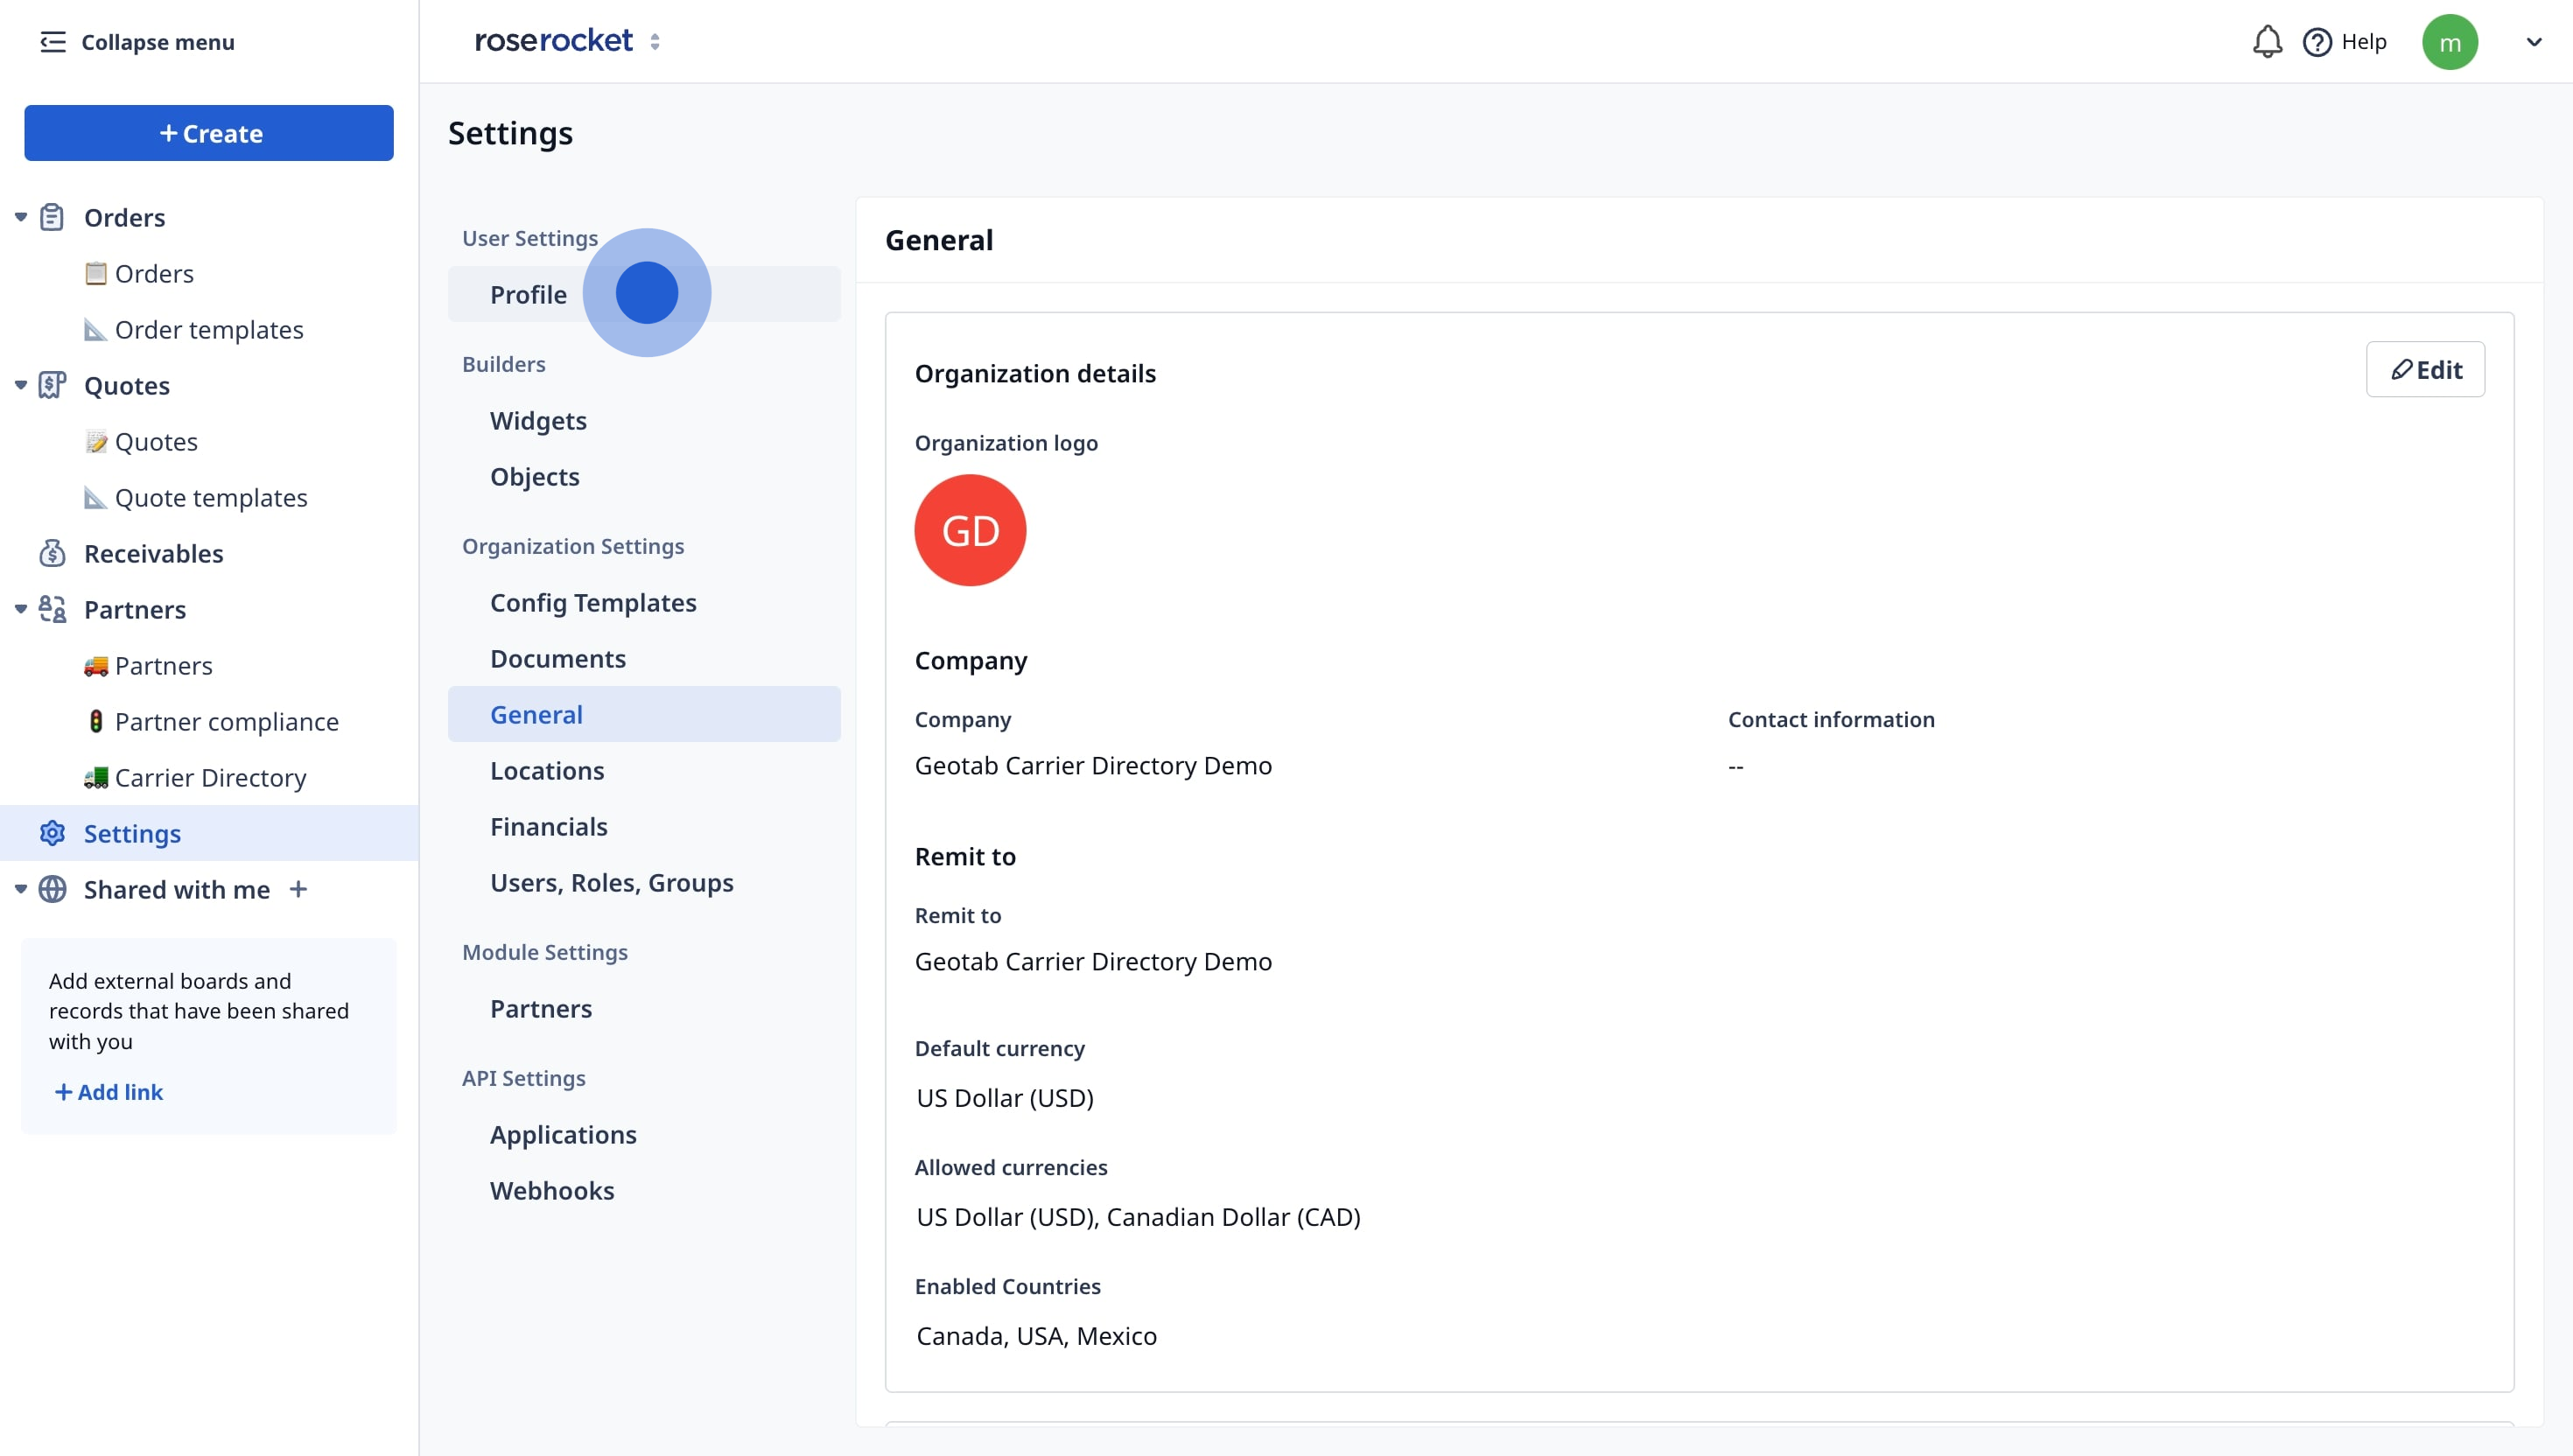
- Start by navigating to your Settings.
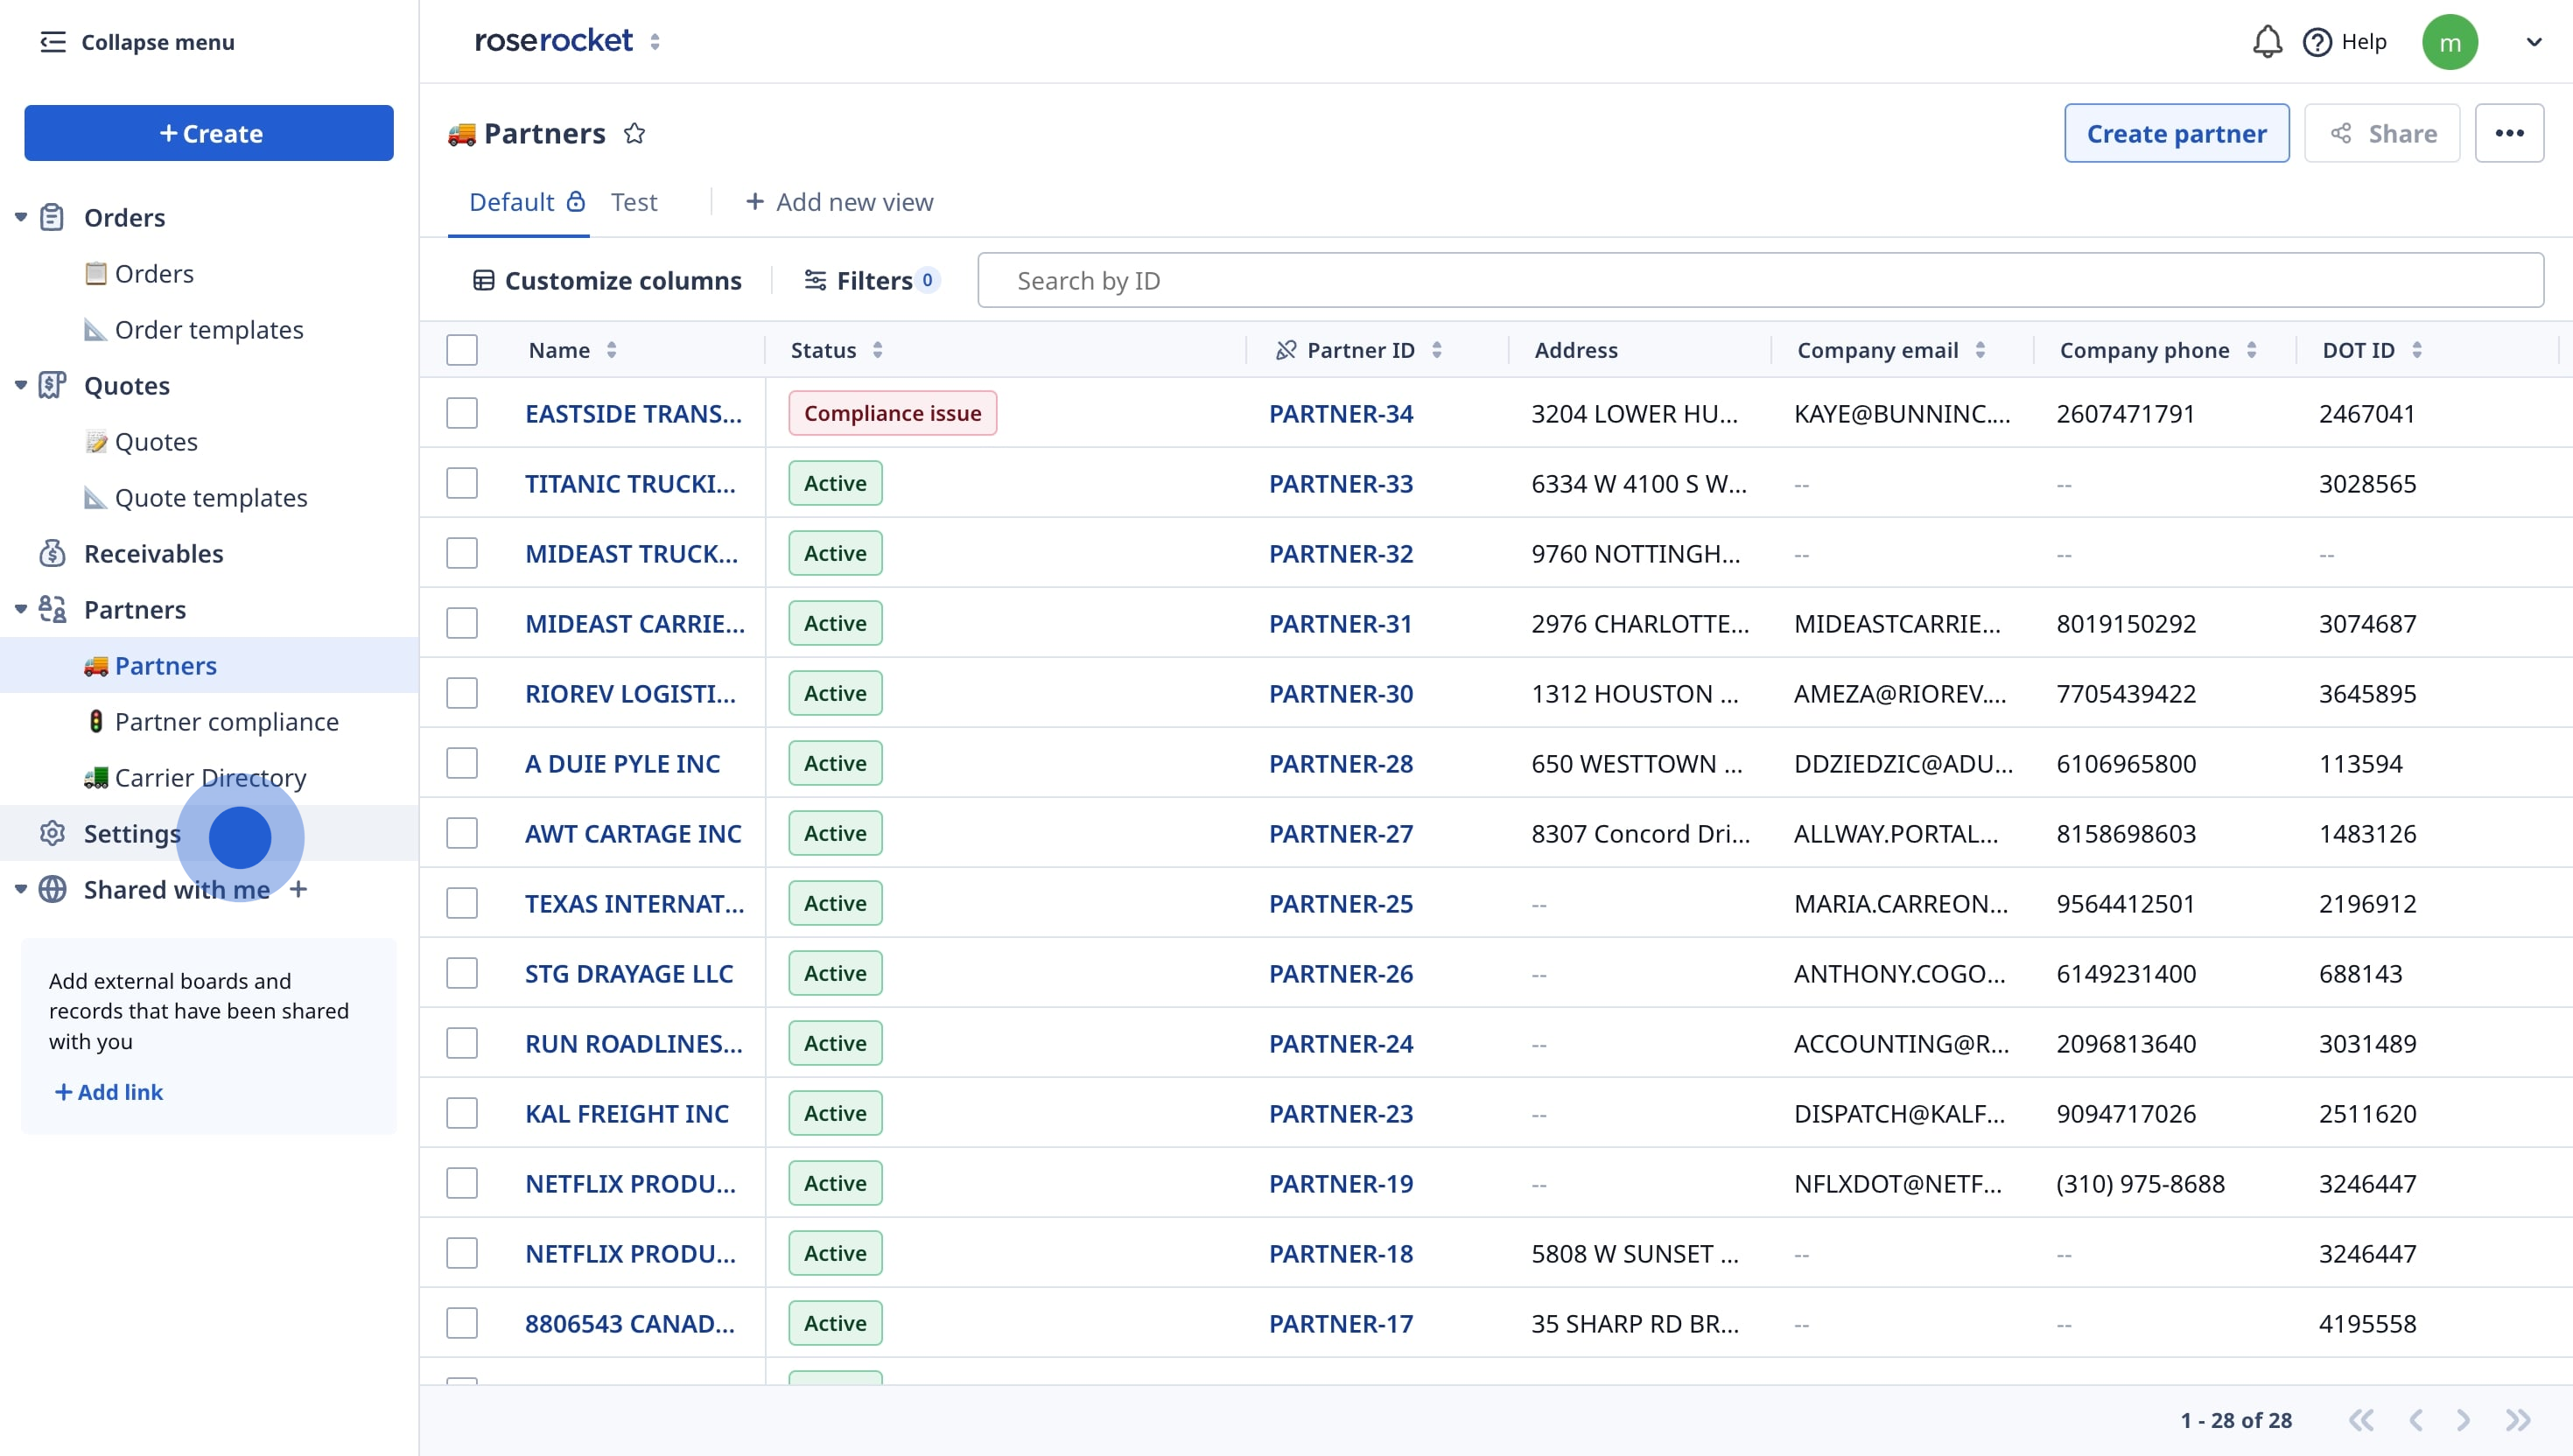
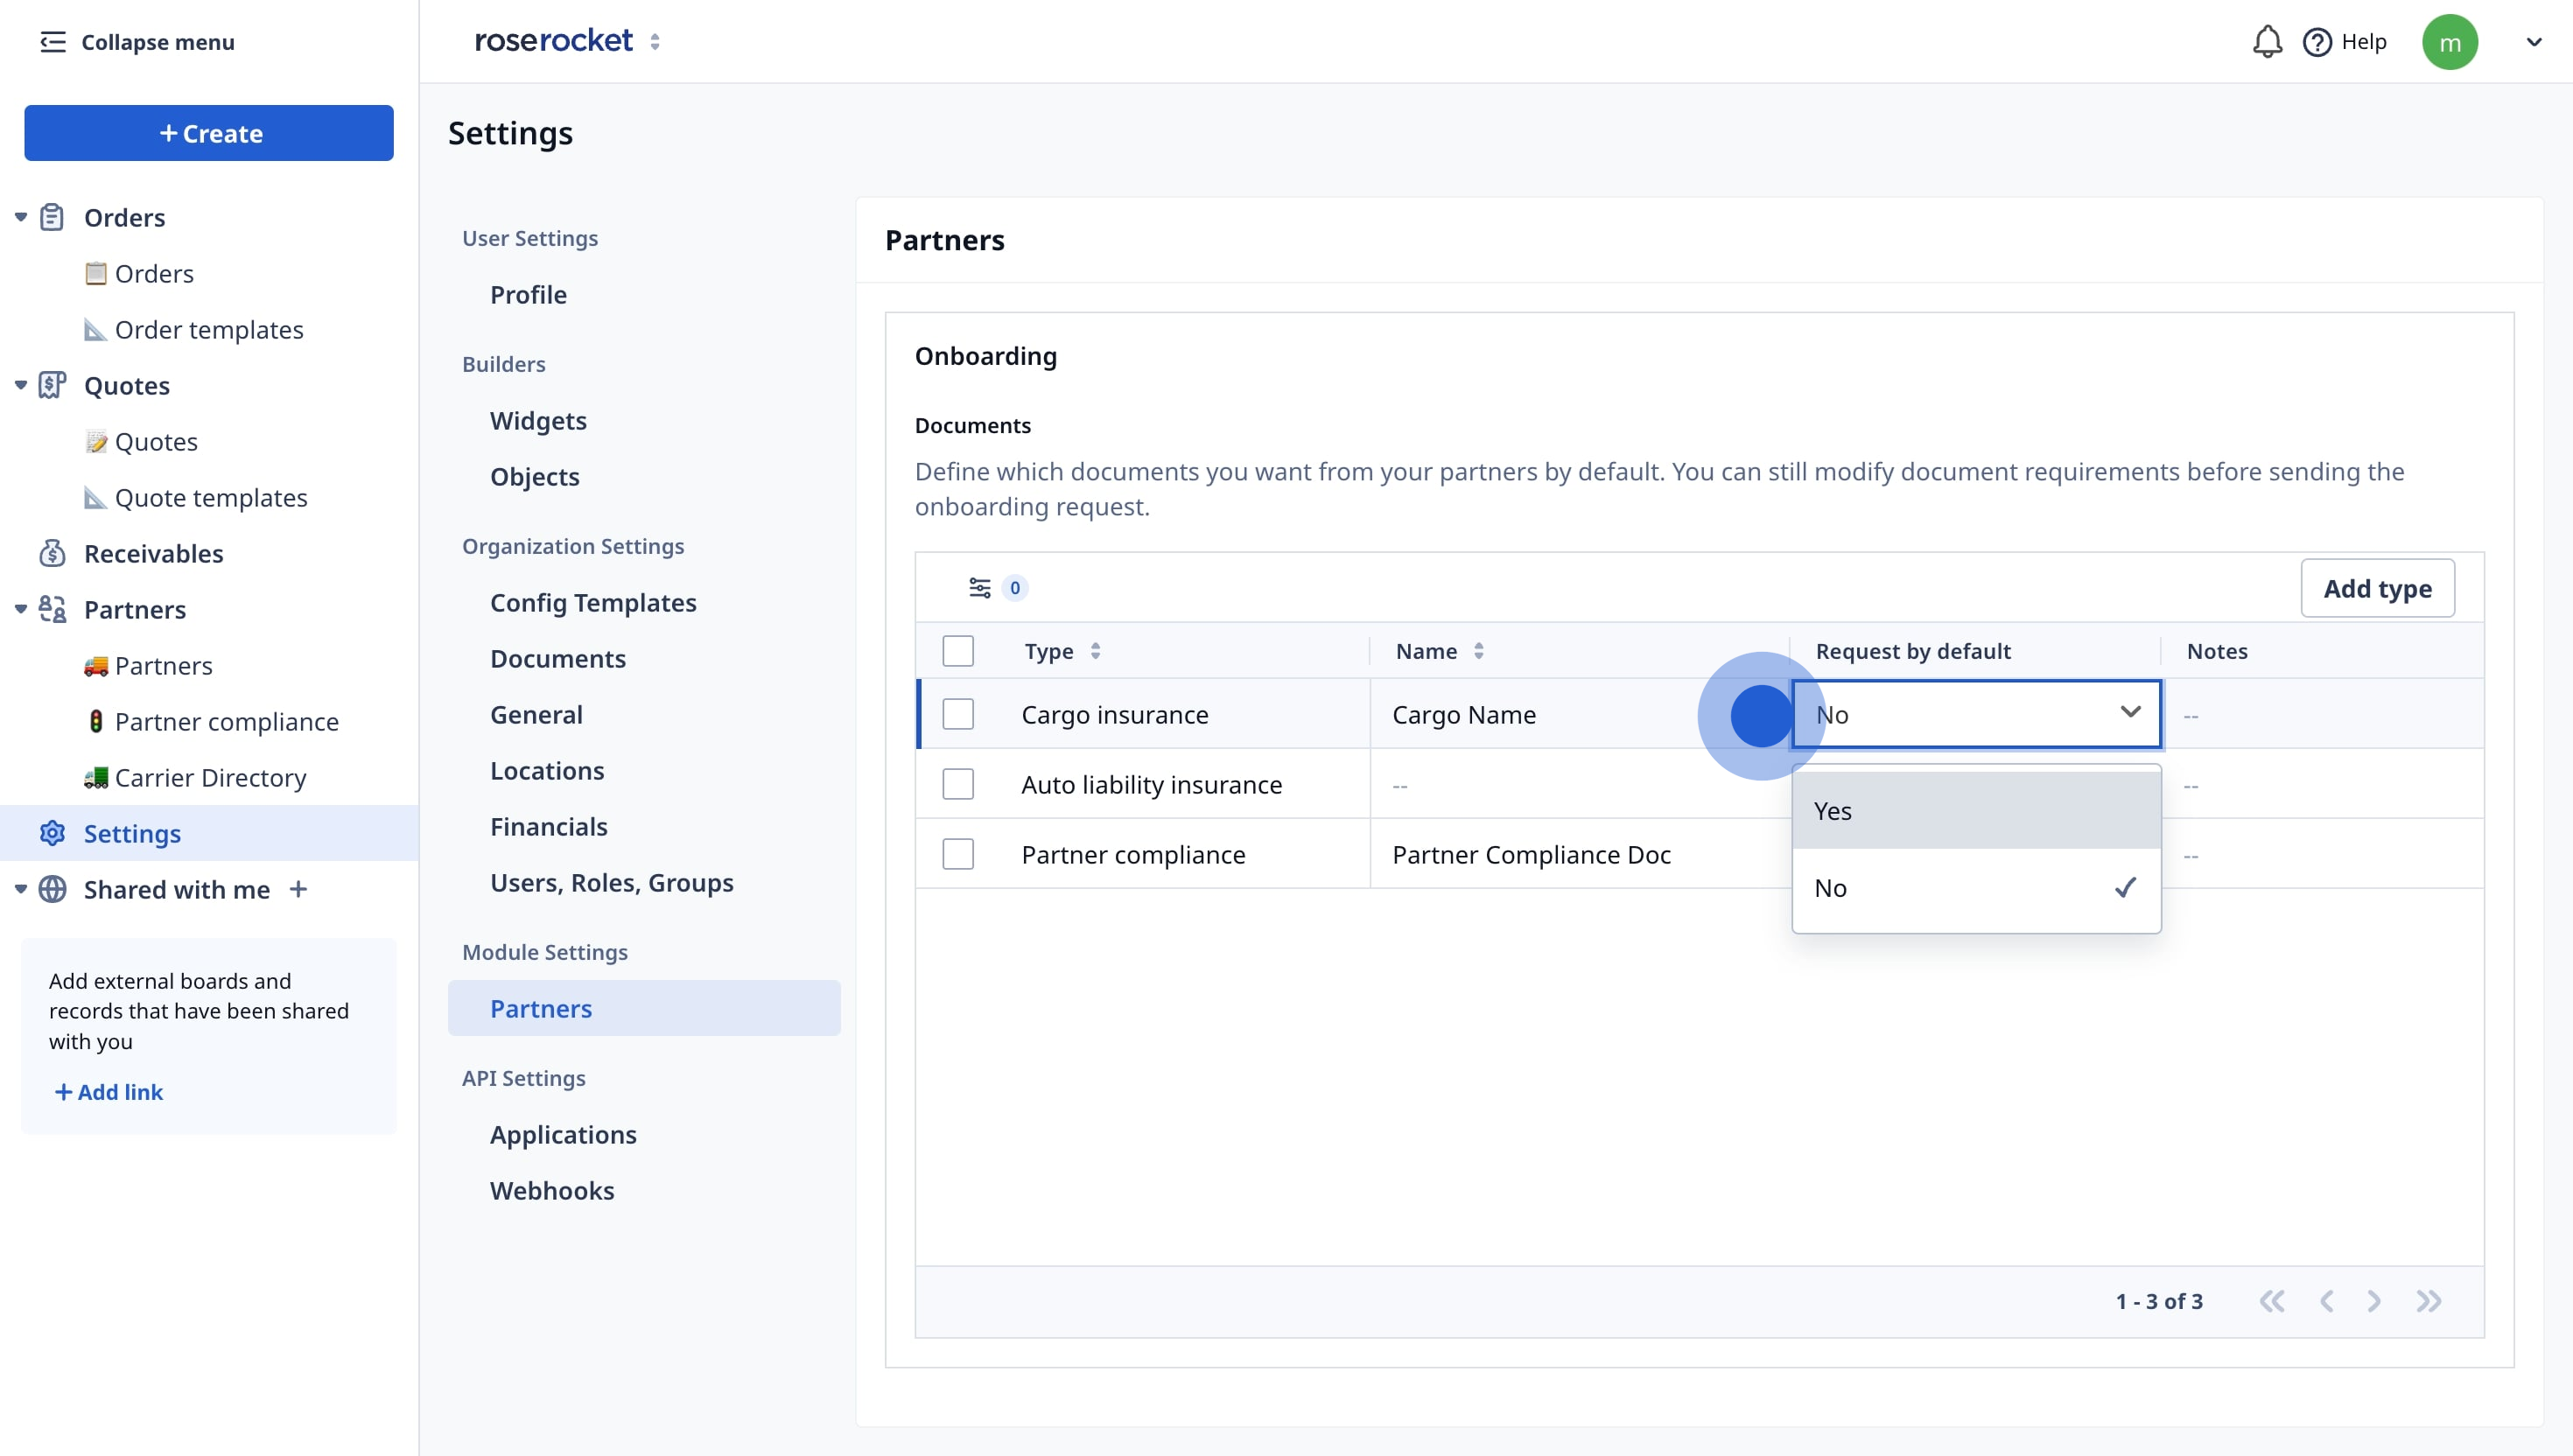
- Next, choose the Partners under Module Settings, then Add type.
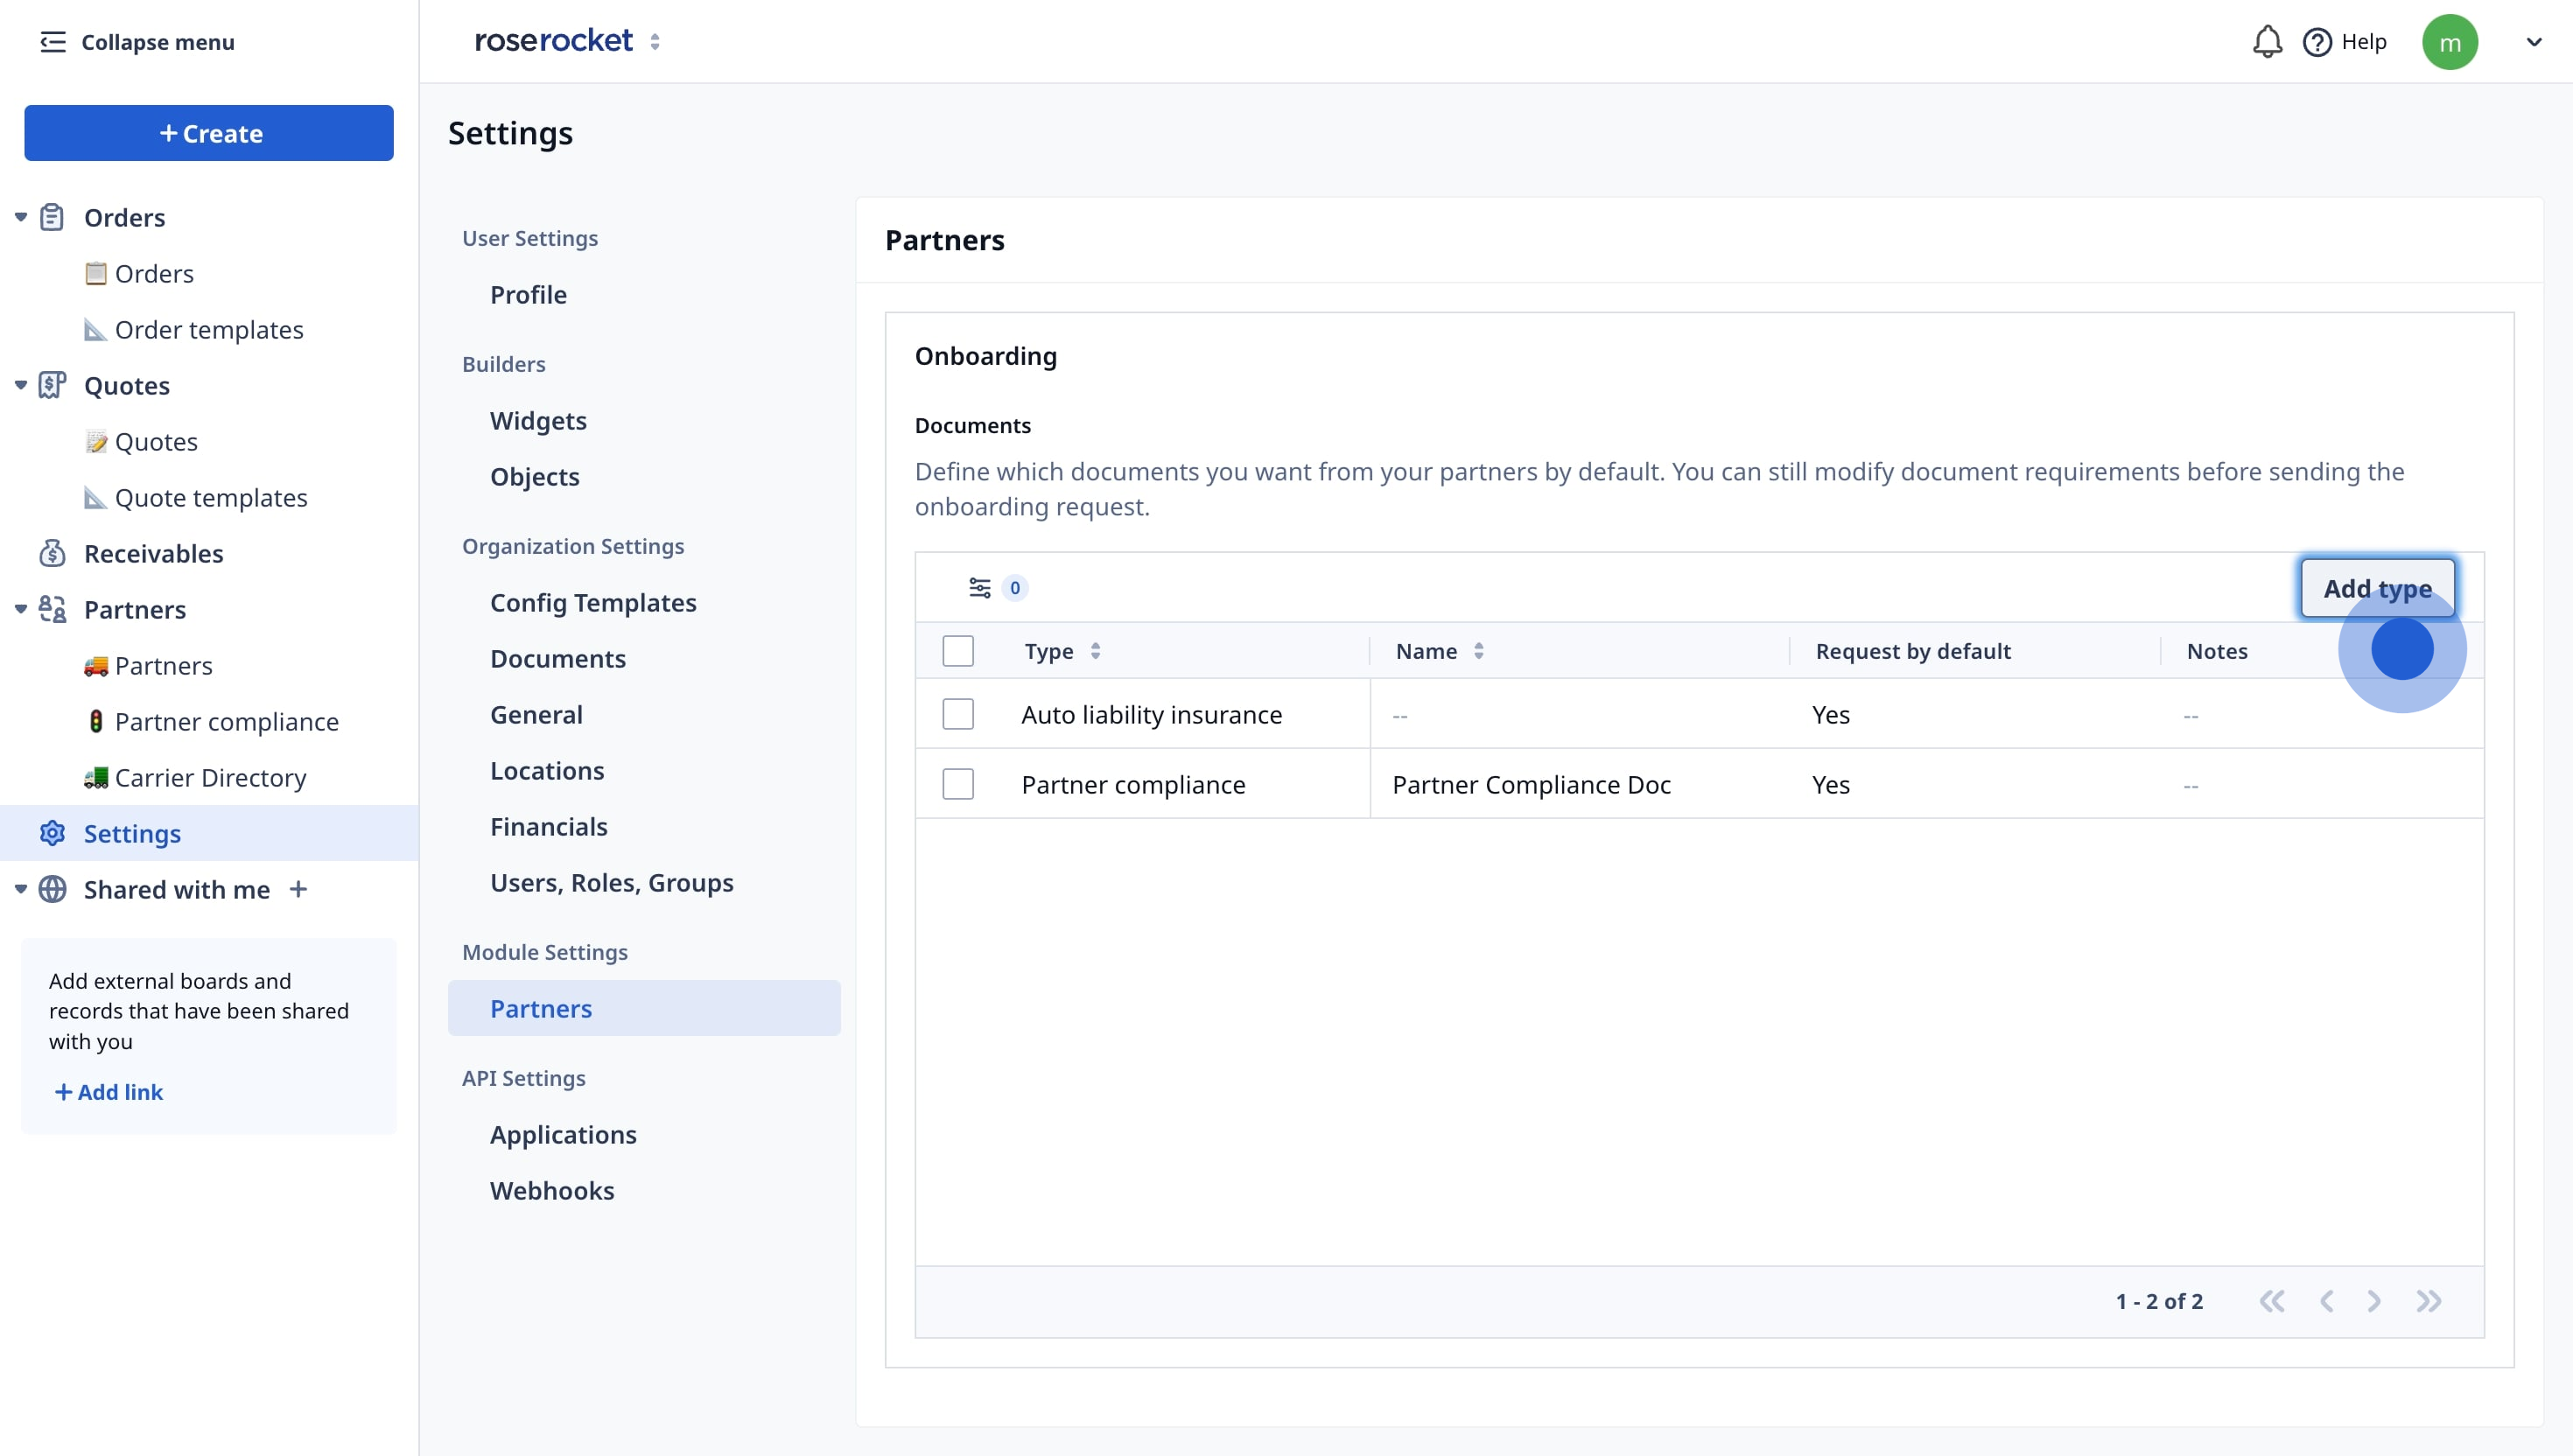
- Choose the documents required for onboarding, such as:
- WSIB (for Canadian carriers)
- Cargo insurance
- Hazardous materials certification
- General liability insurance
- C-TPAT certification
- And more!
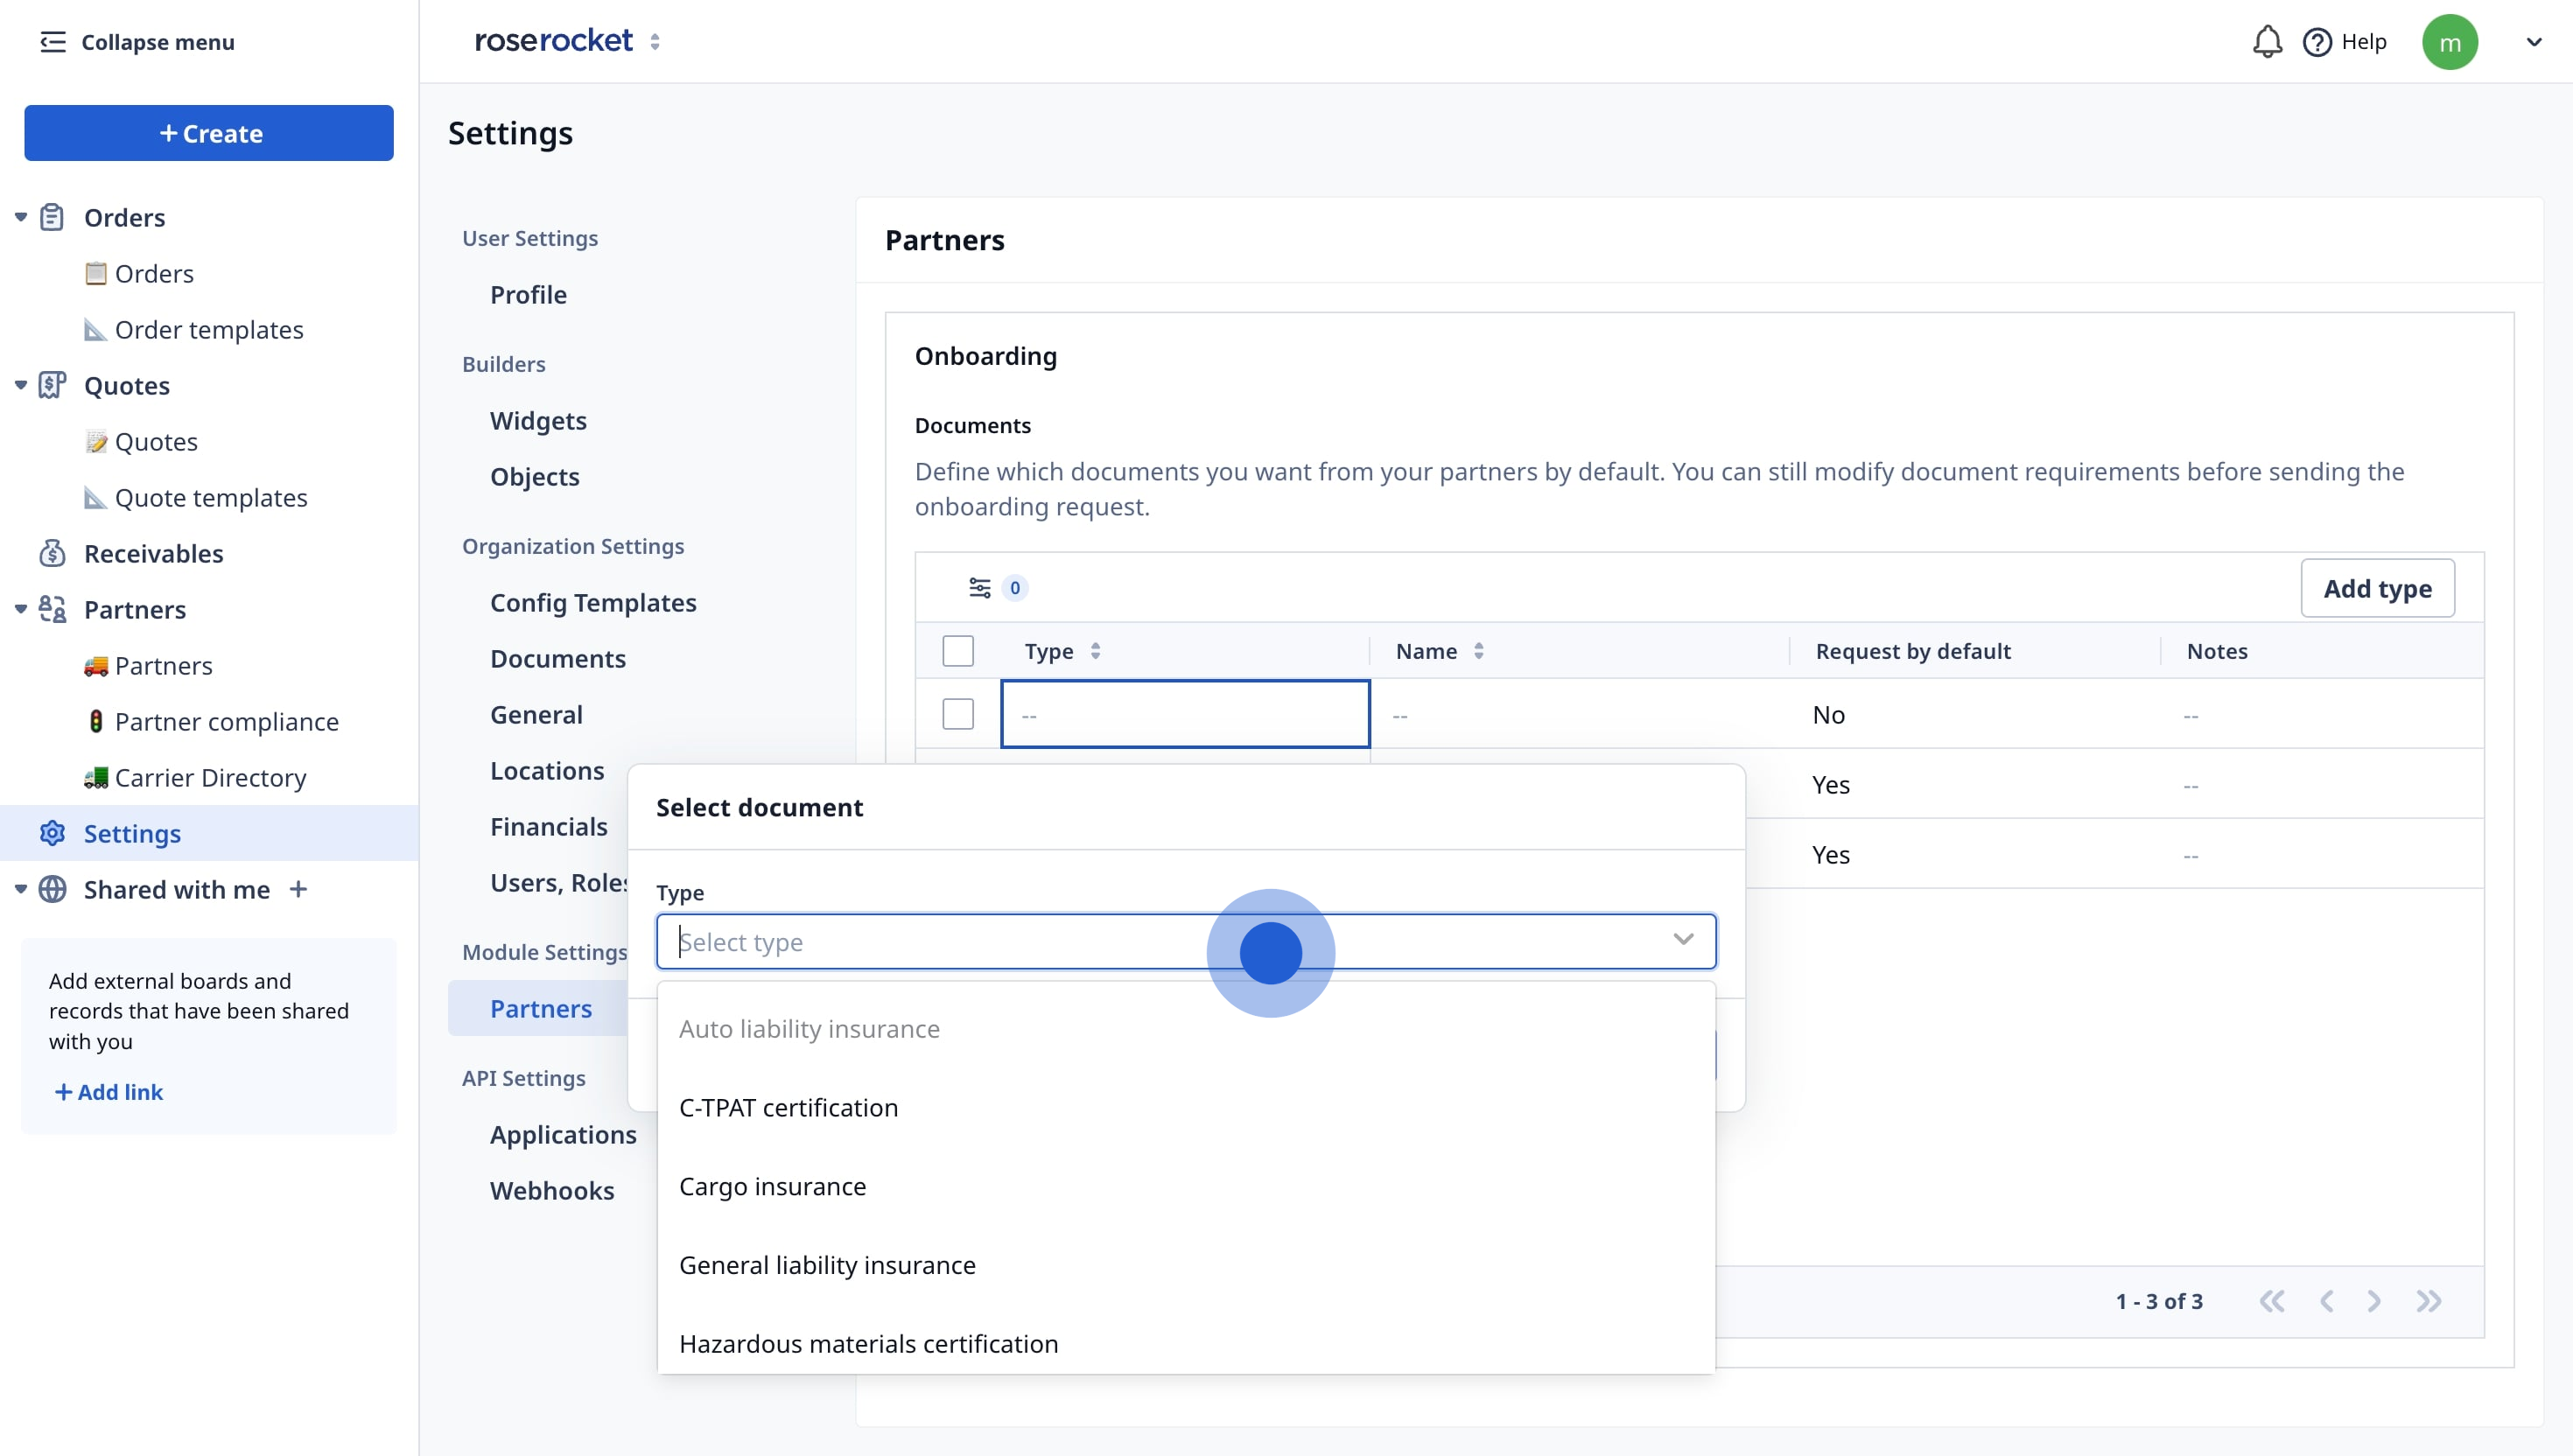
- Choose whether the document type is defaulted to Yes or No, depending on your requirements.
Step 2: Customize carrier onboarding workflow with Widgets
Please reach out to your Acccount Representative or help@roserocket.com to customize your onboarding workflow.
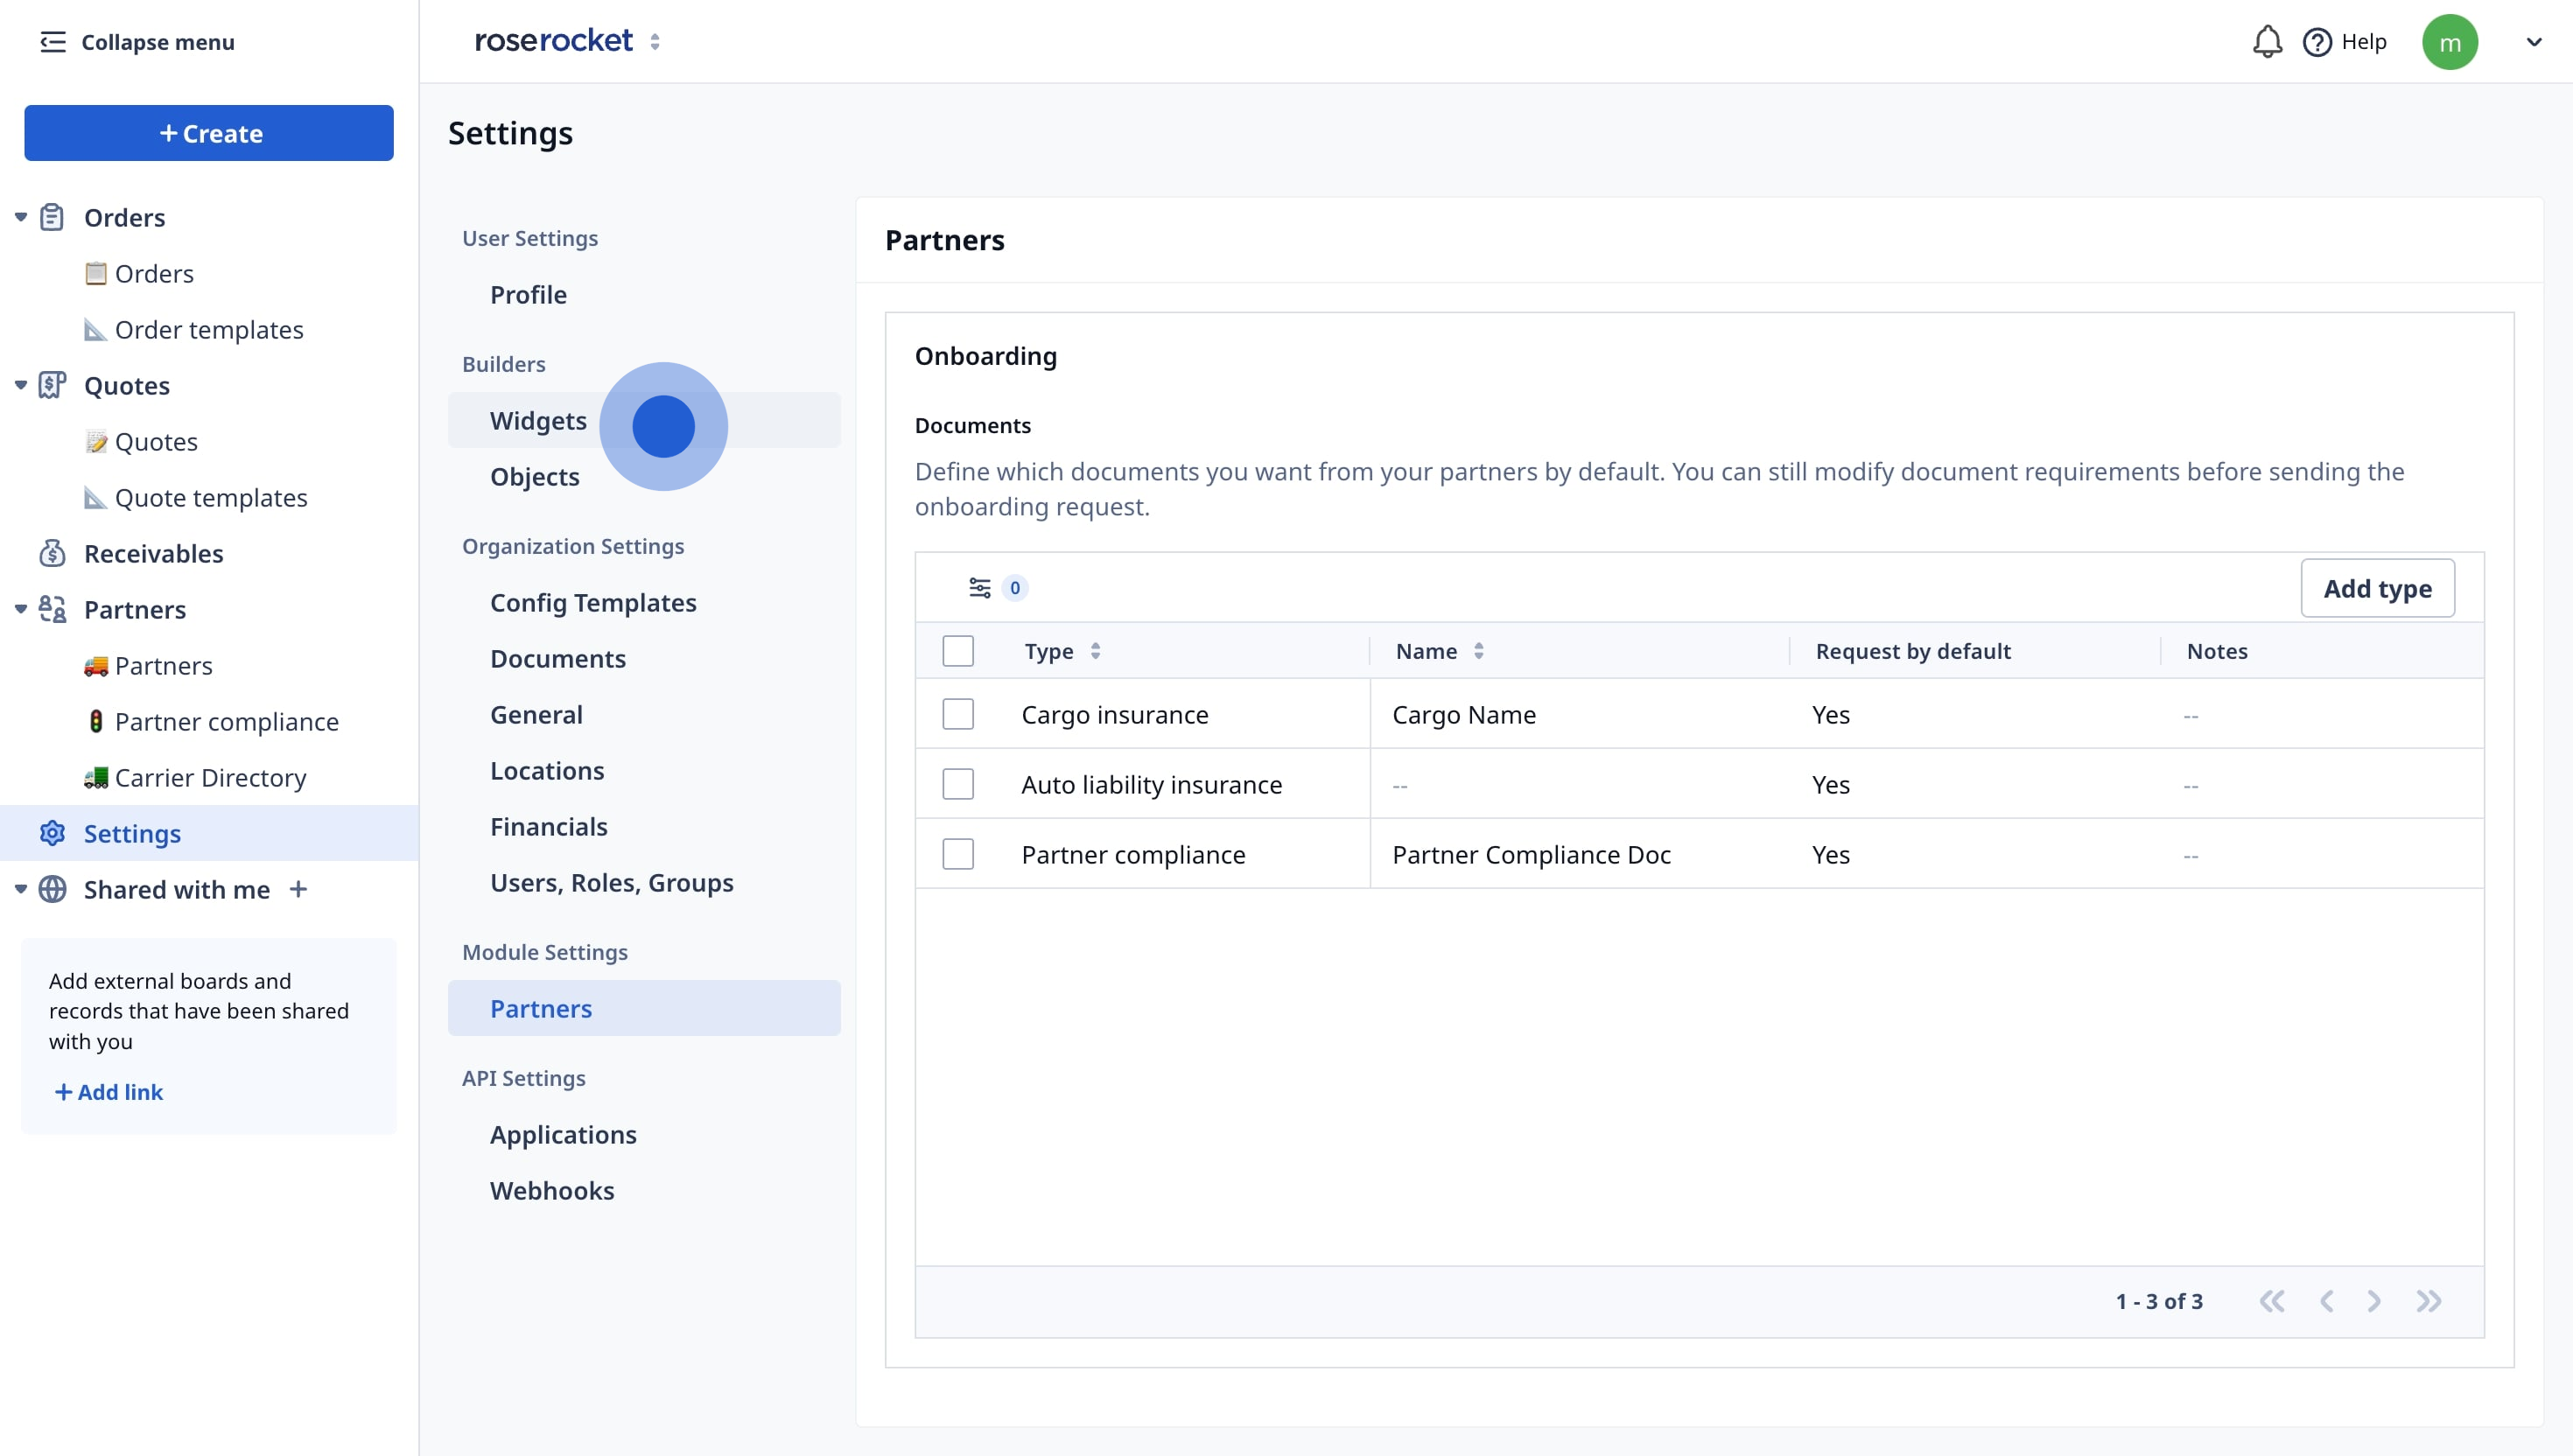
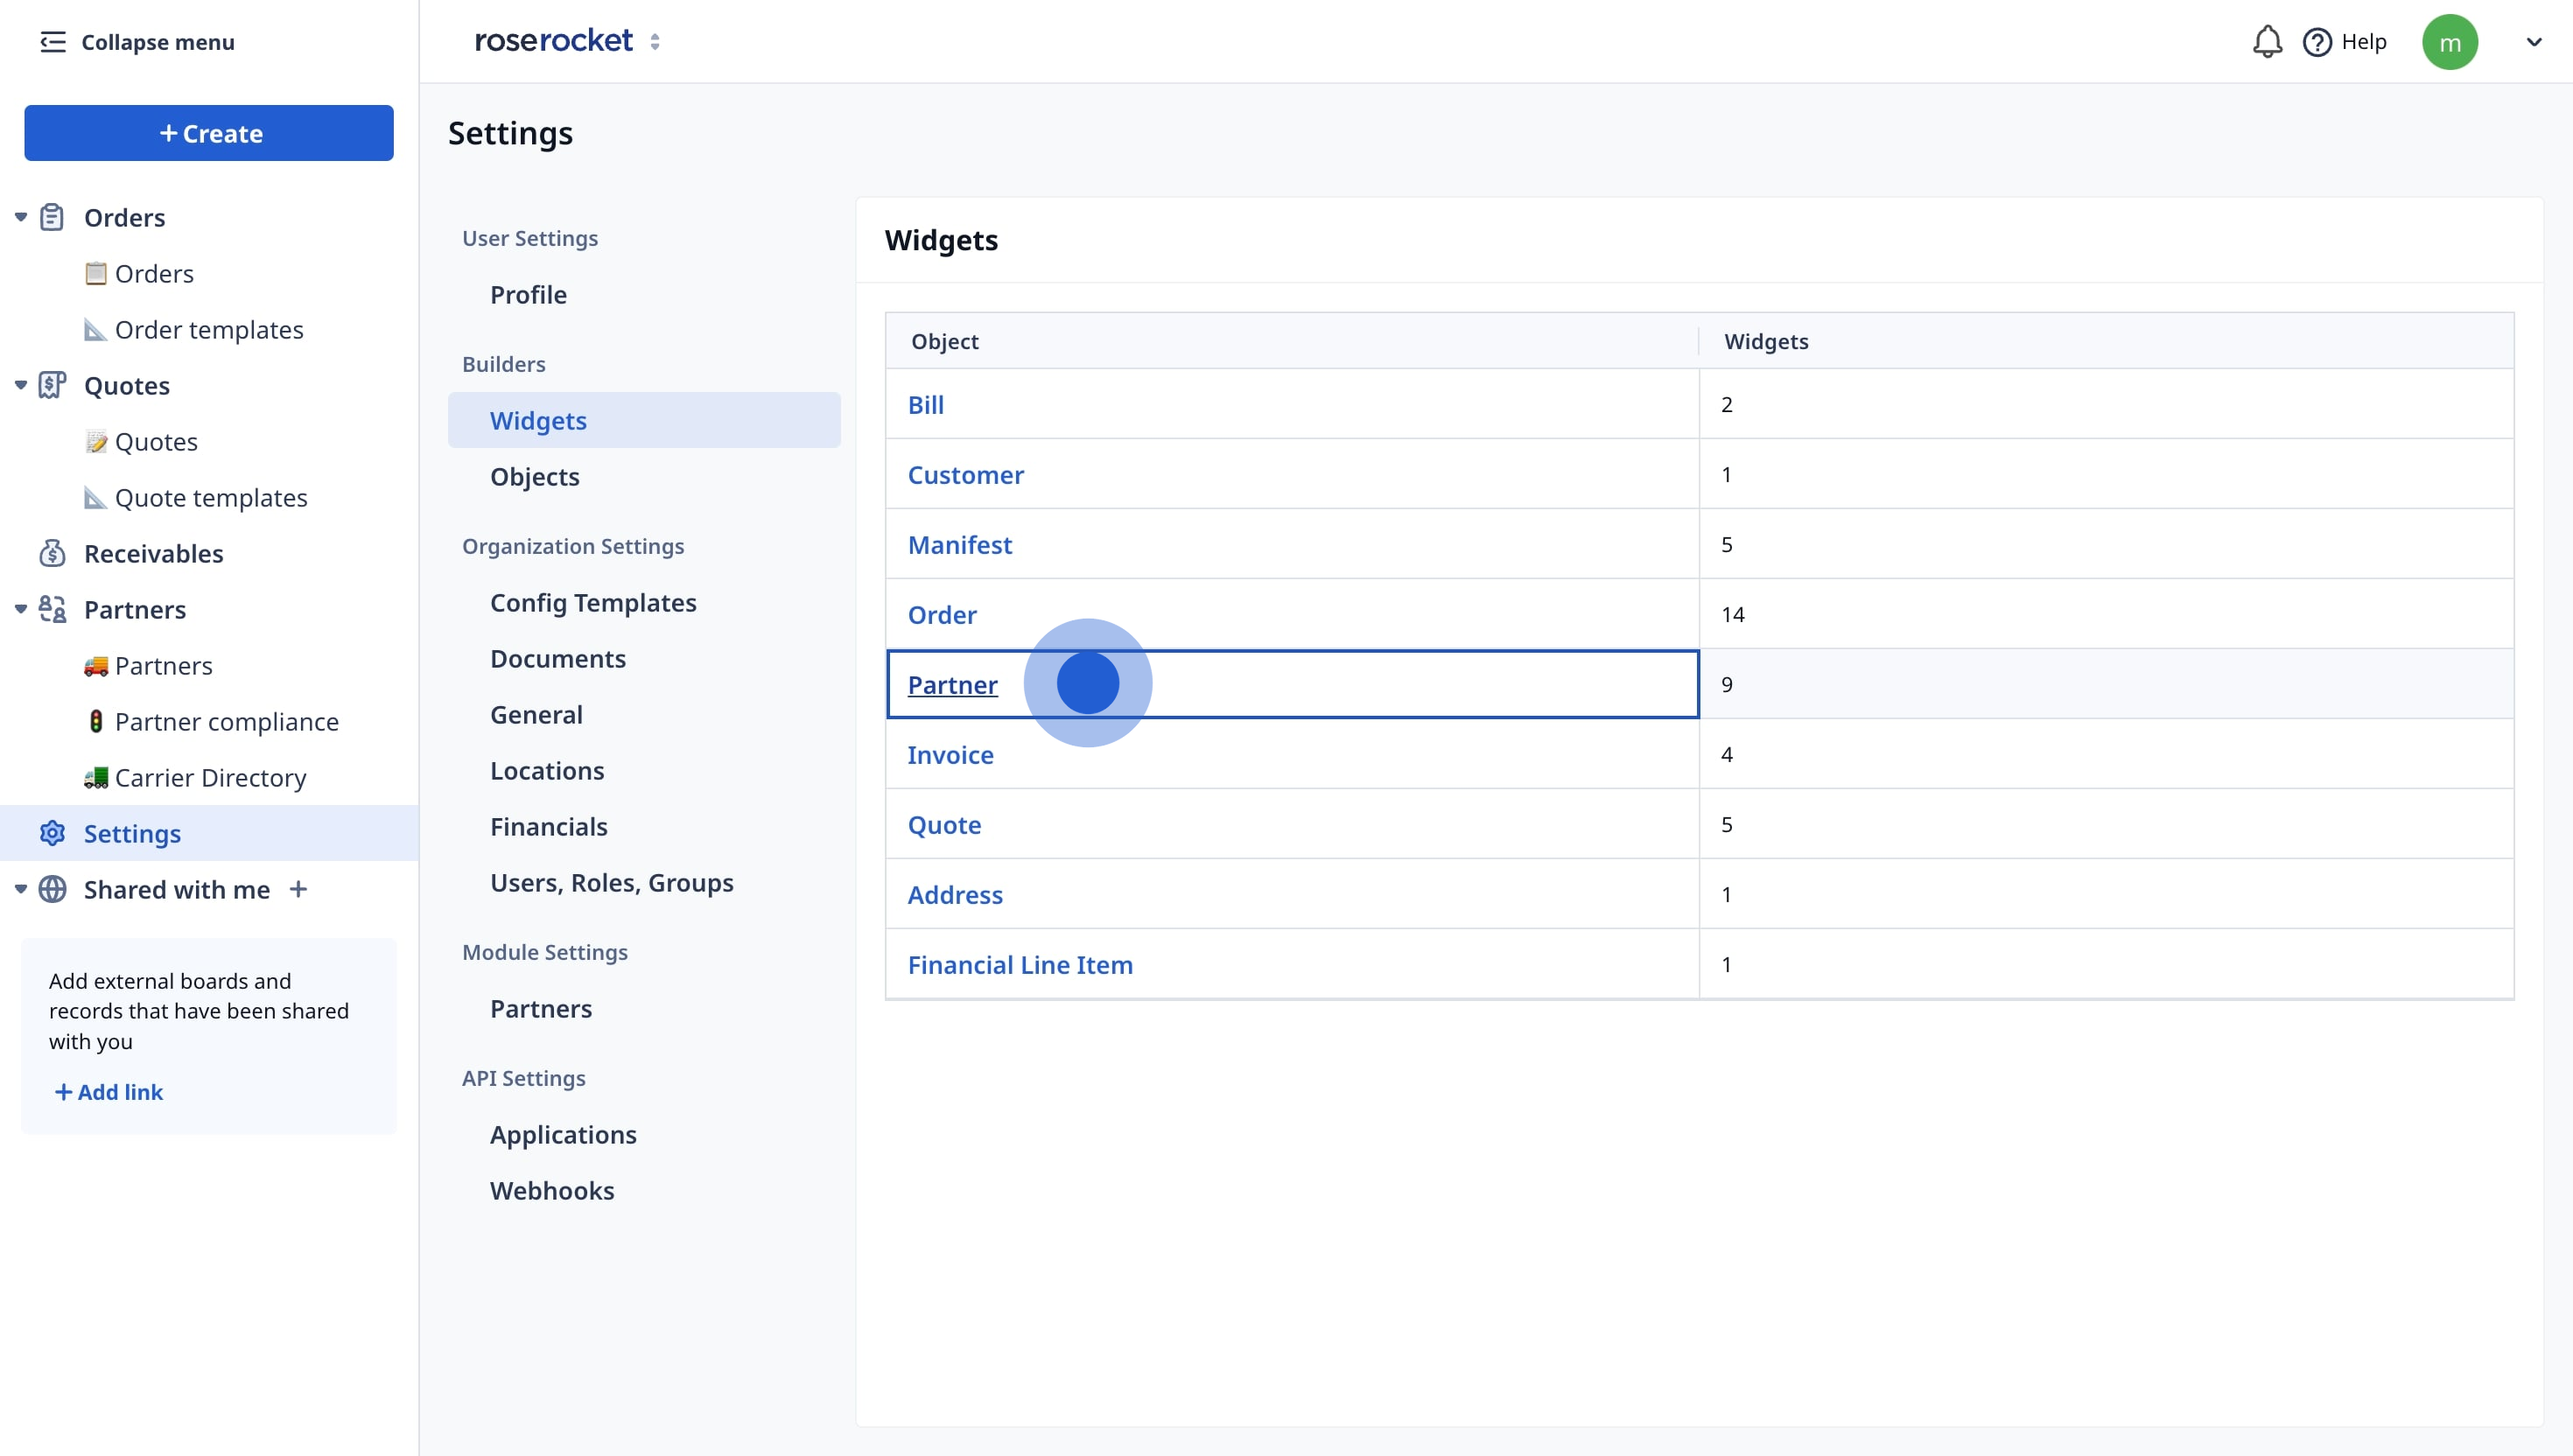
- Go to Widgets -> Partner.
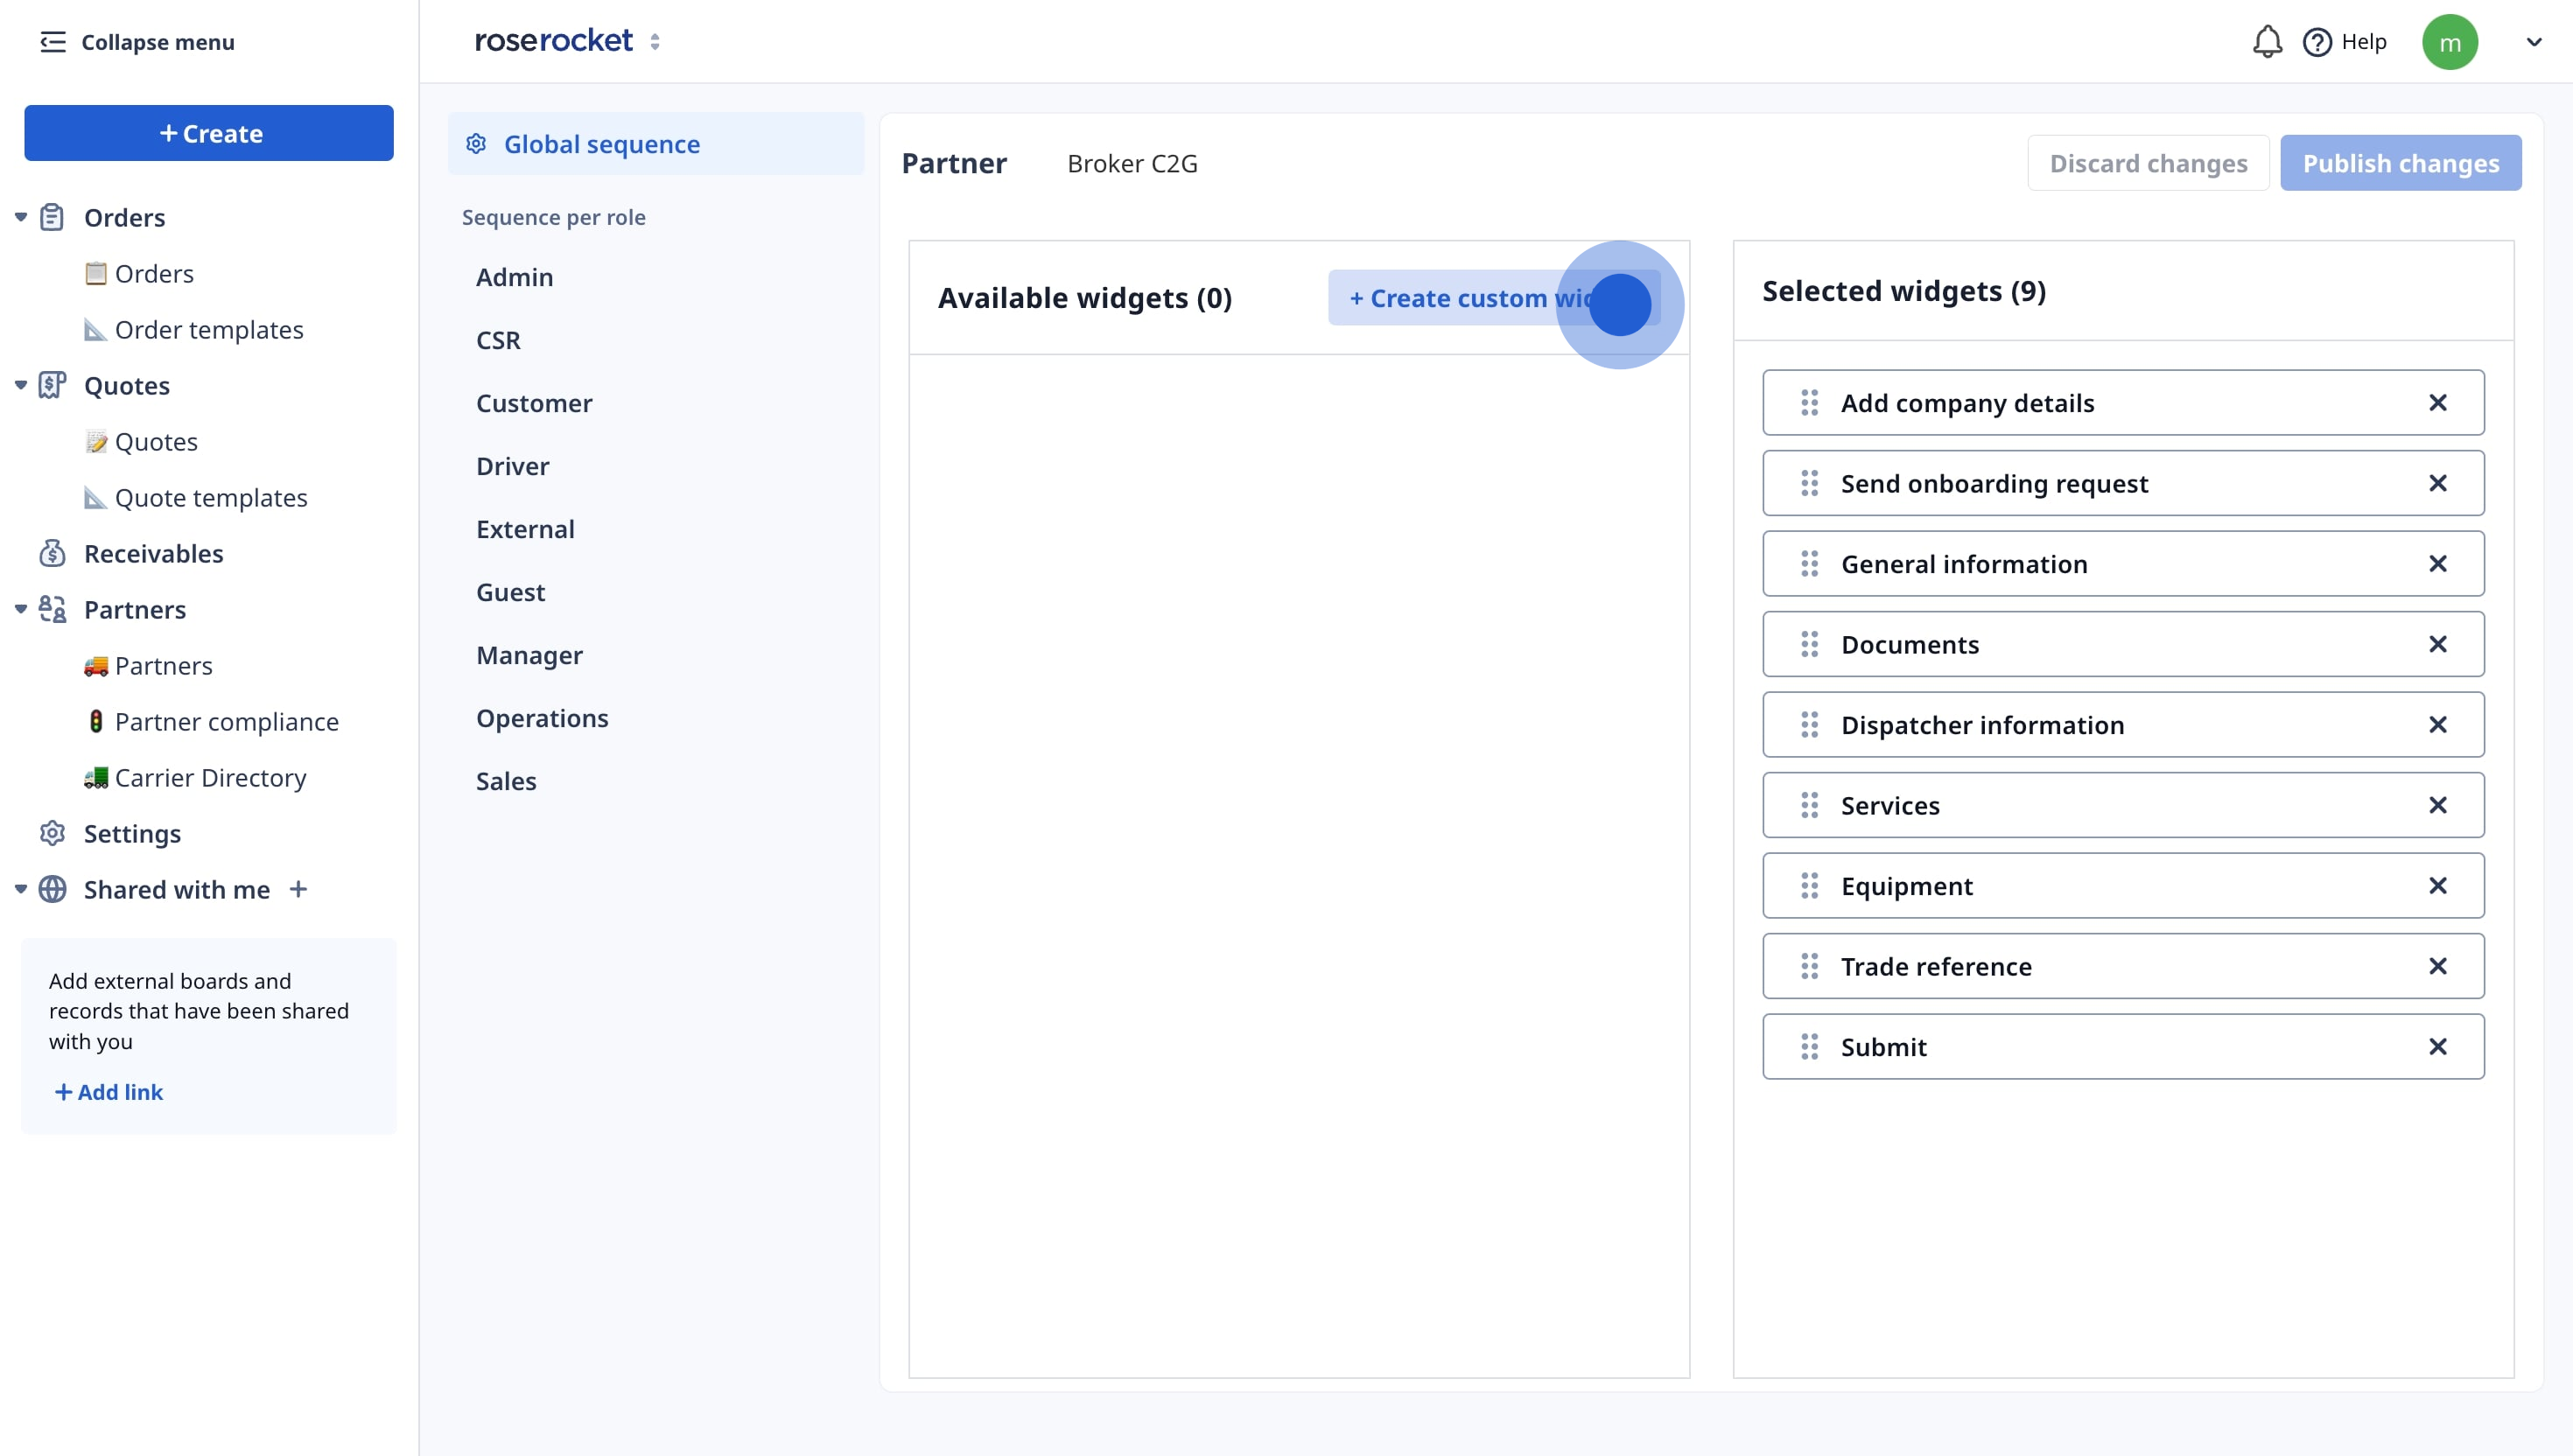
- Now, create a custom widget to suit your compliance requirements.
- Fill in the details to configure the custom widget.
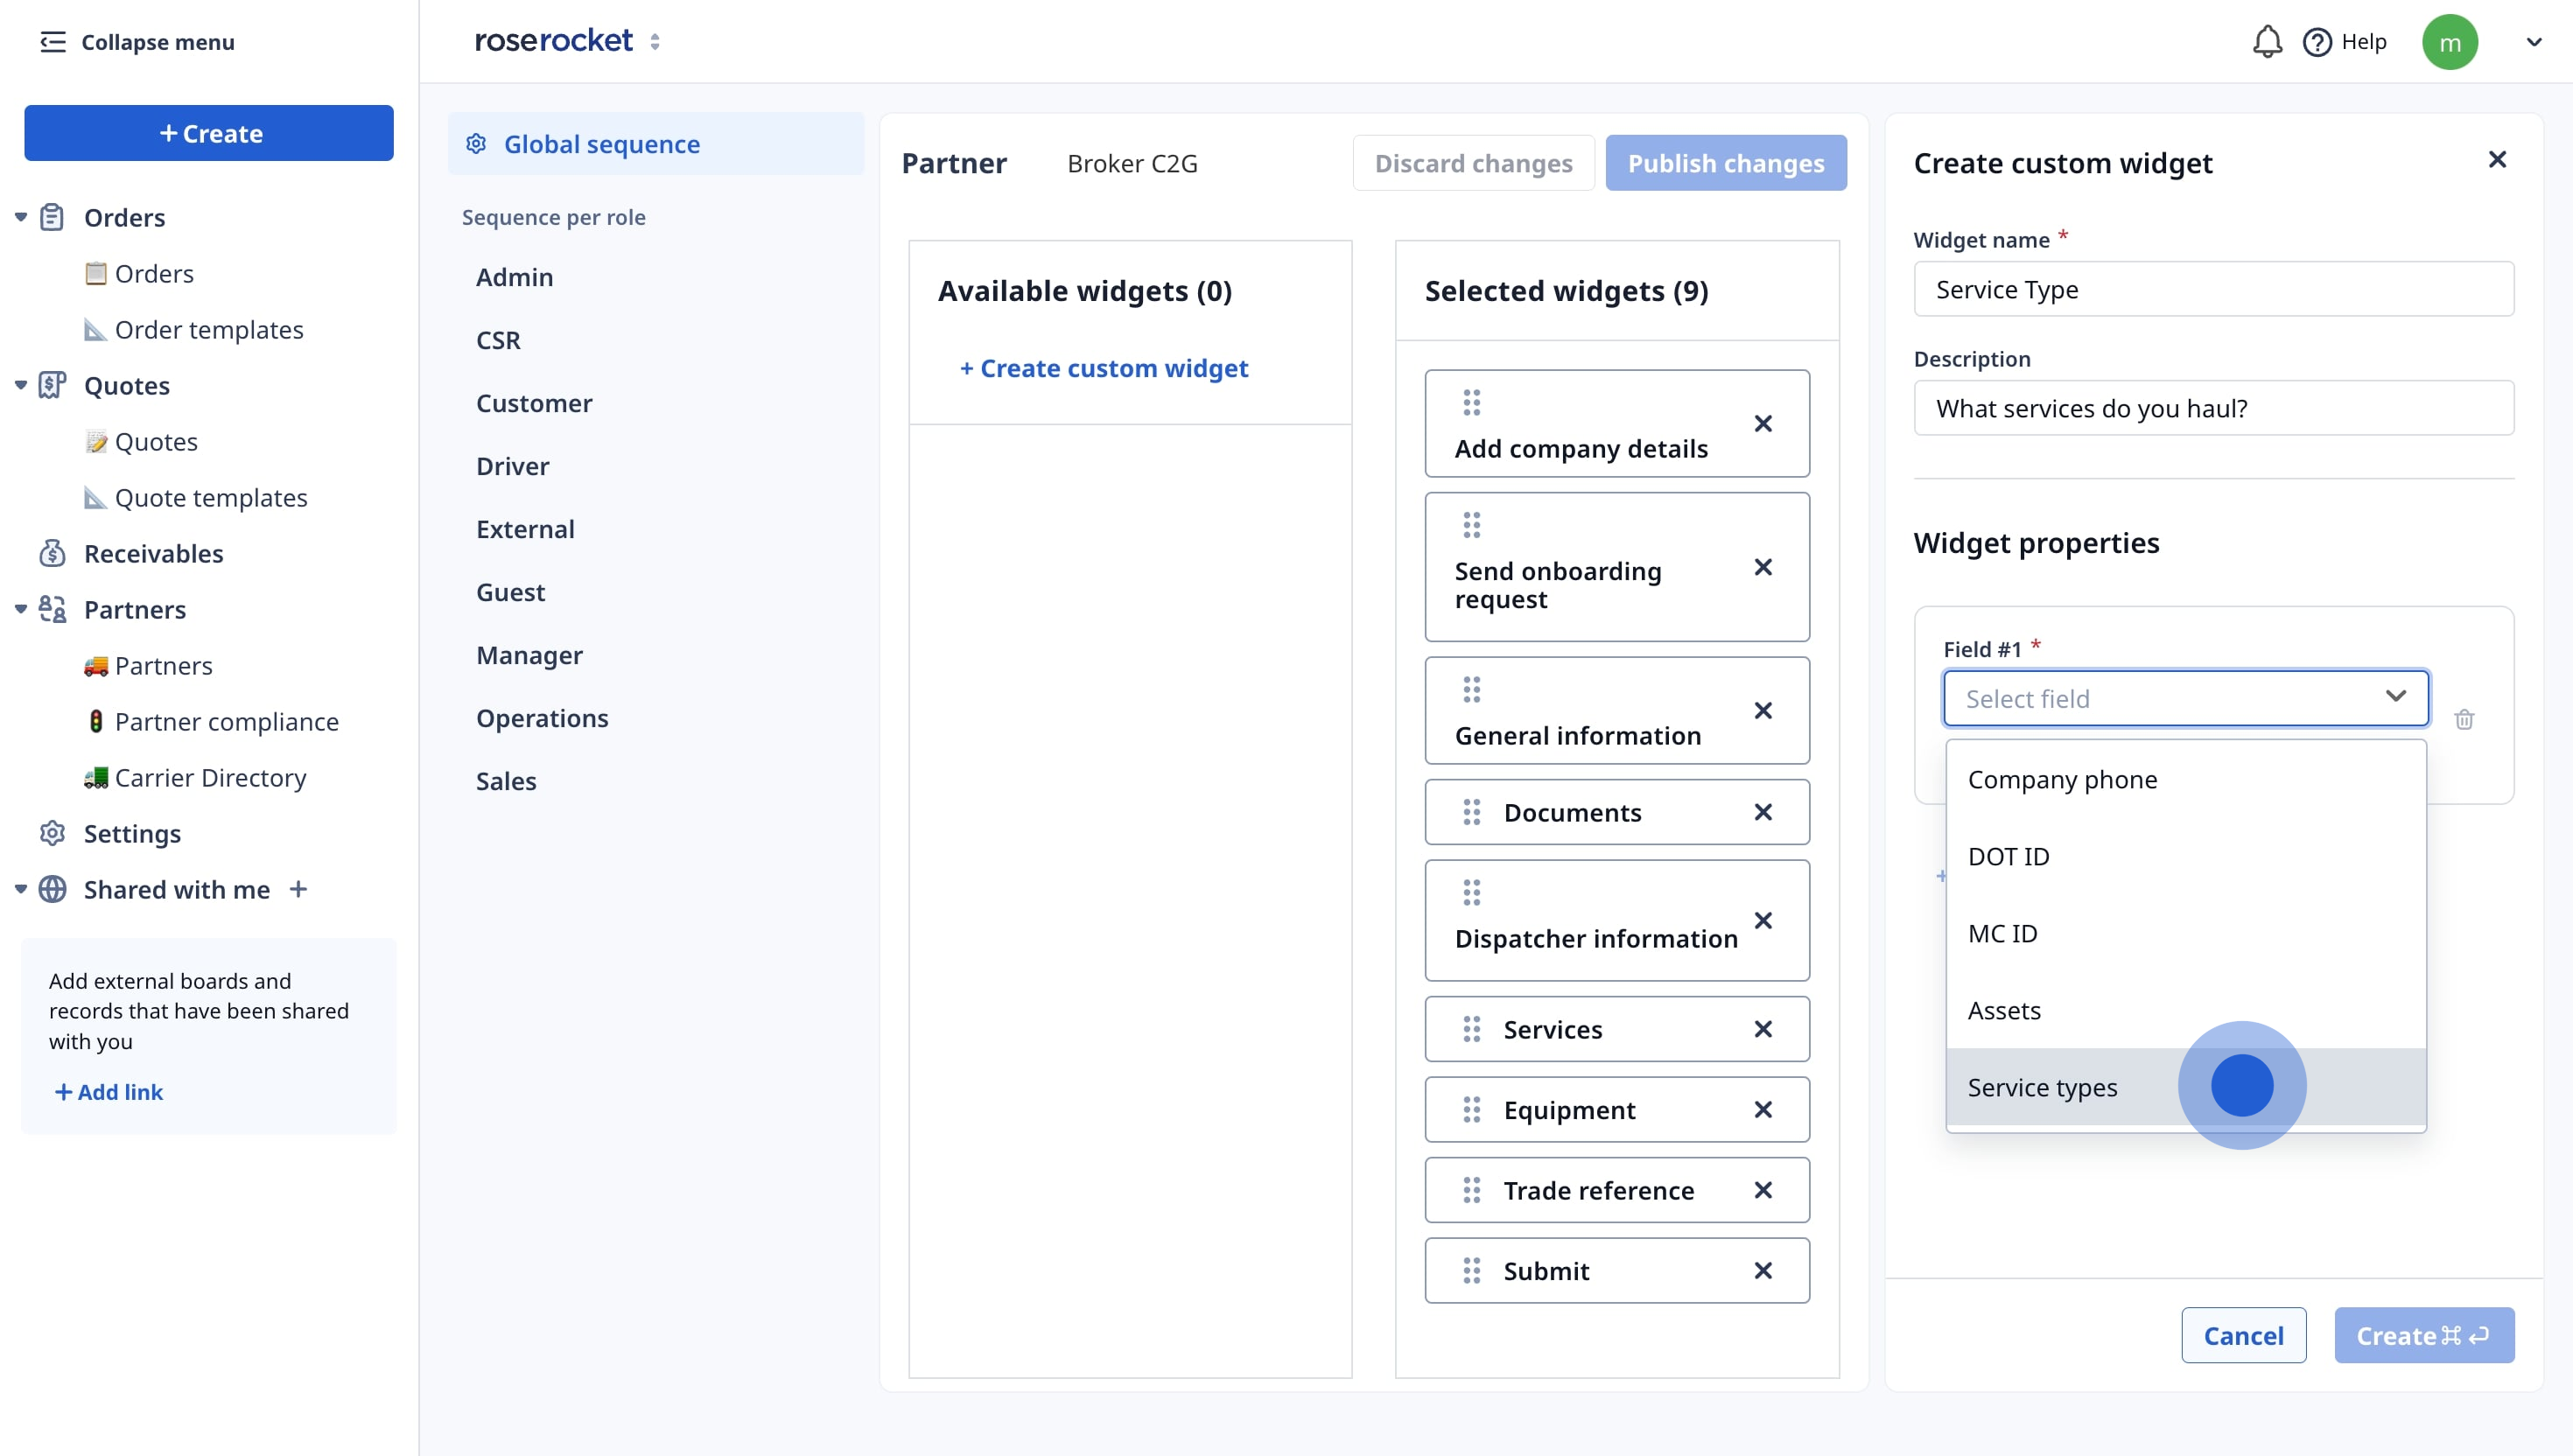
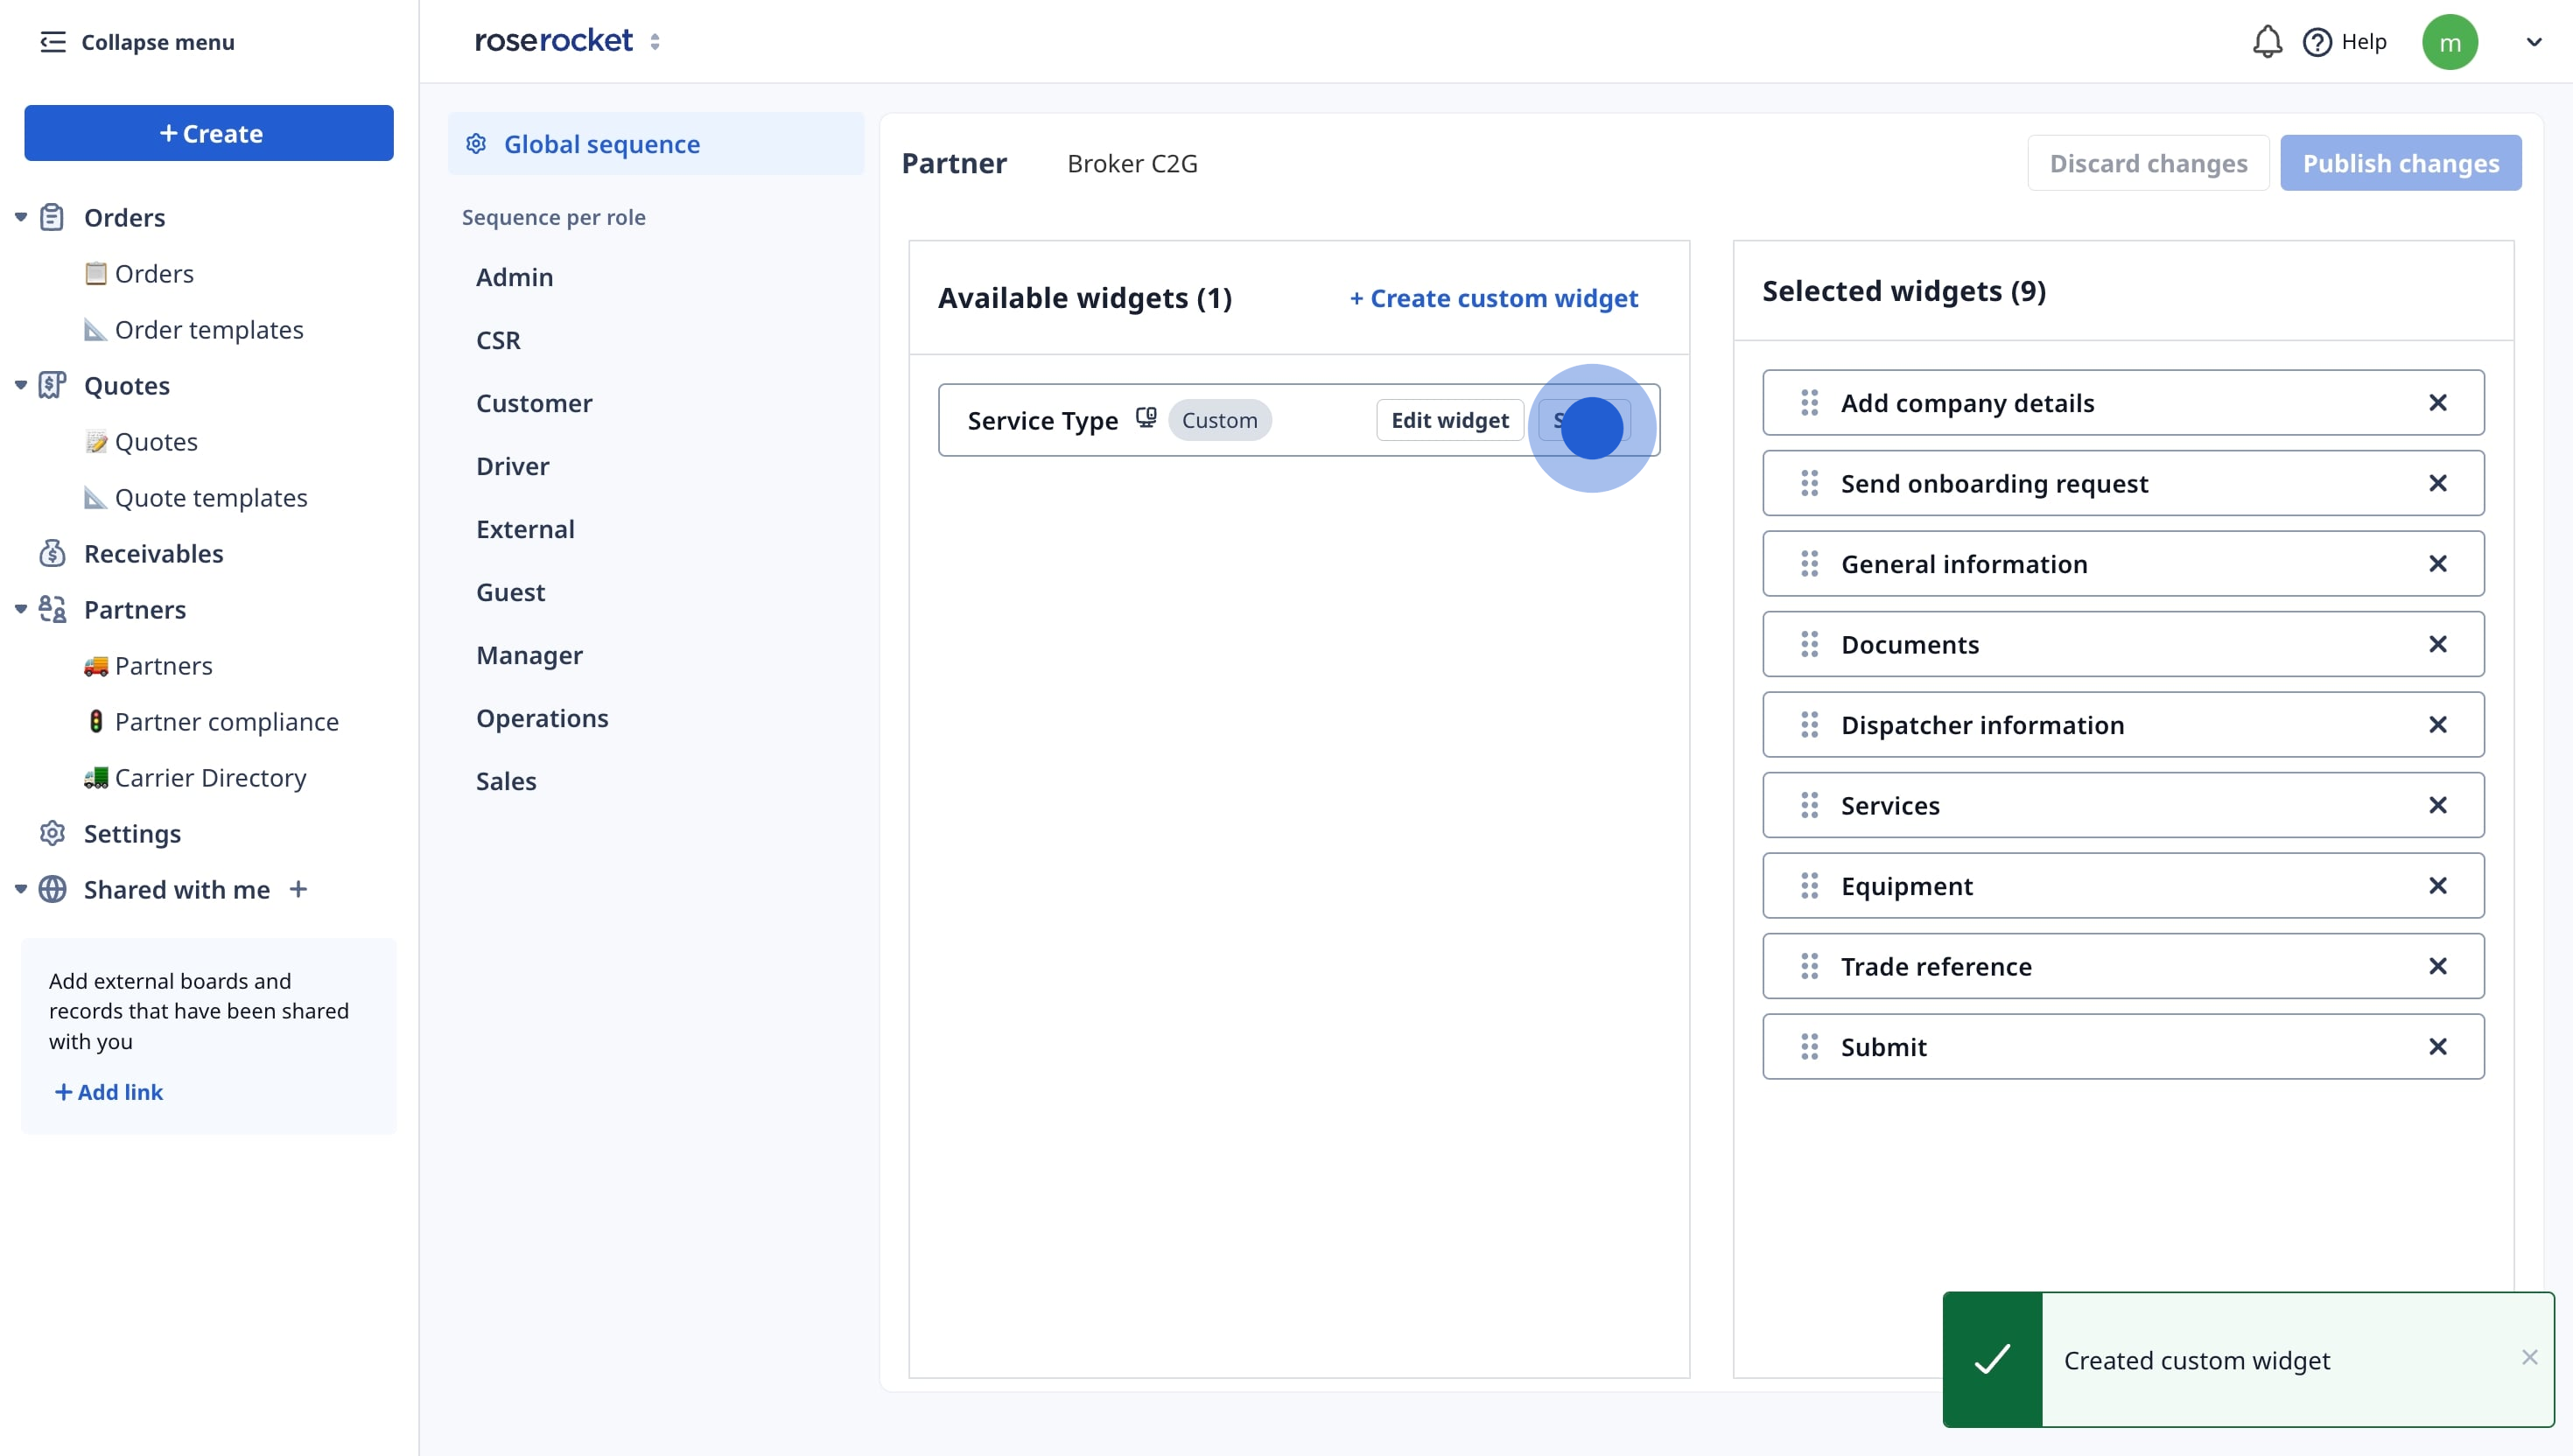
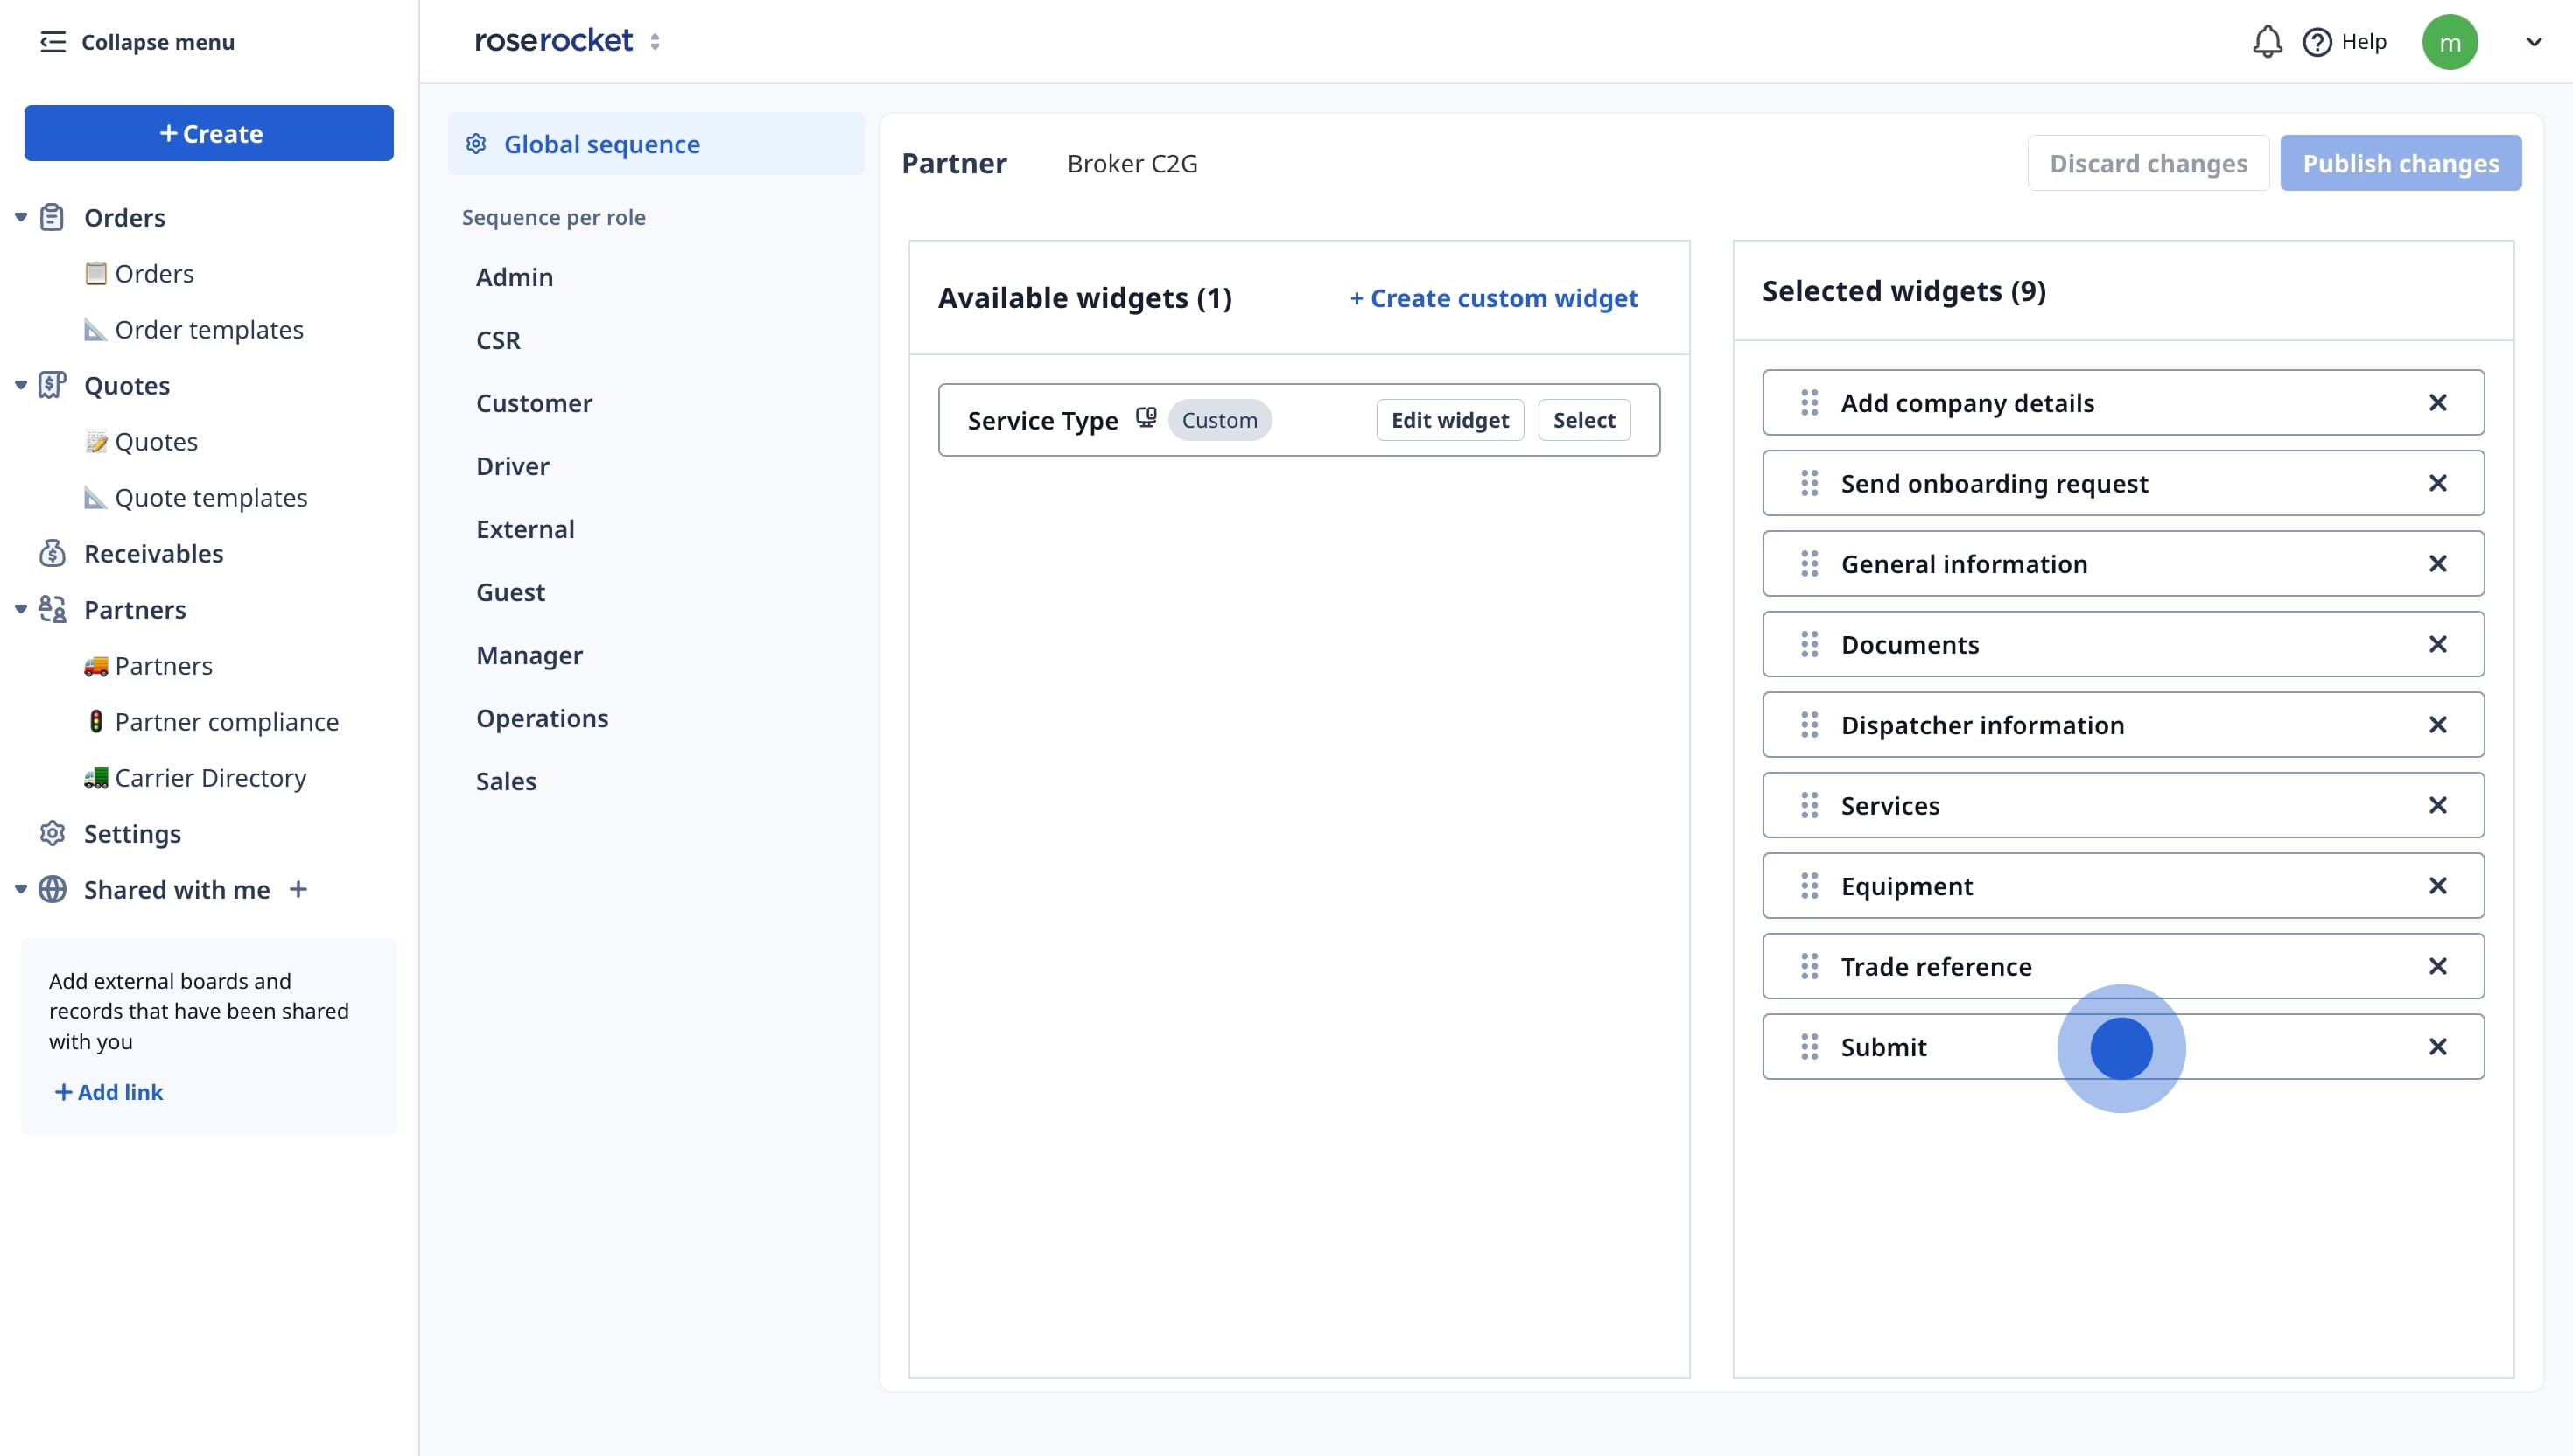
- Add the newly created widget to the carrier onboarding list of actions.
Ensure the Submit widget is always at the end since this is the confirmation button.
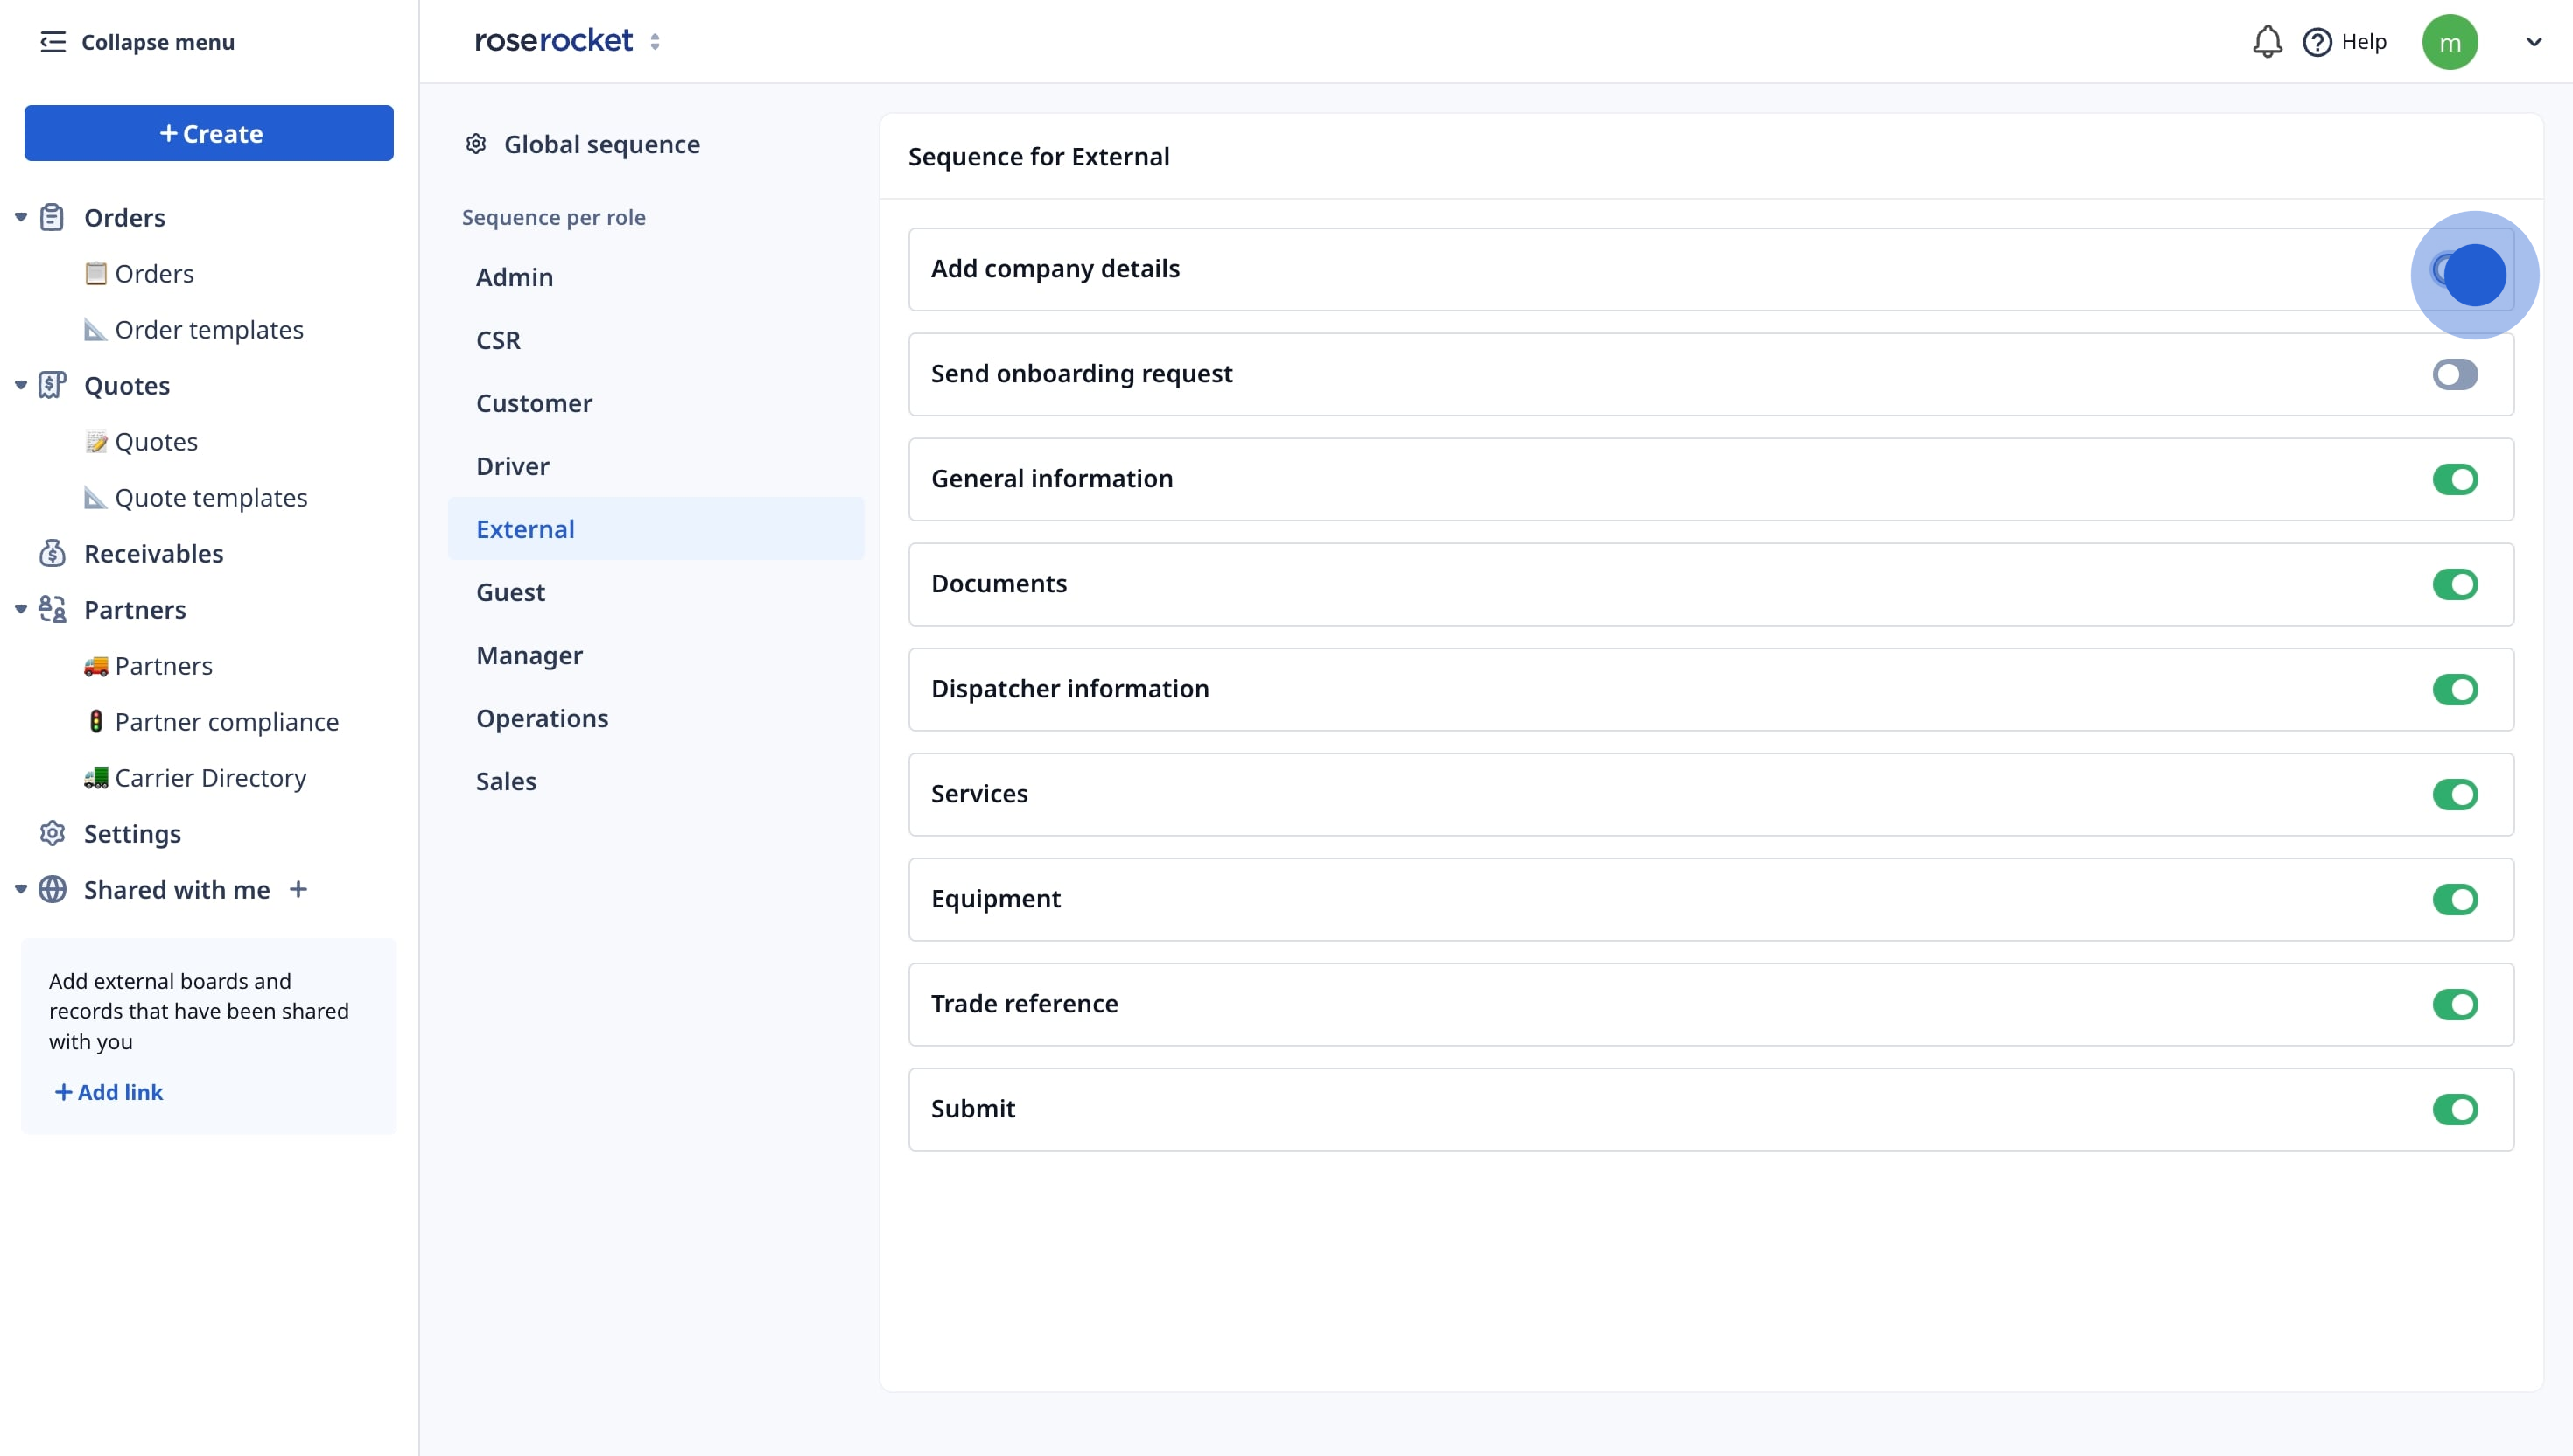
- If you have created custom widgets, you'll need to update the security setting for the widgets to show up for your external users, i.e. your partner carriers. Go to the External tab.
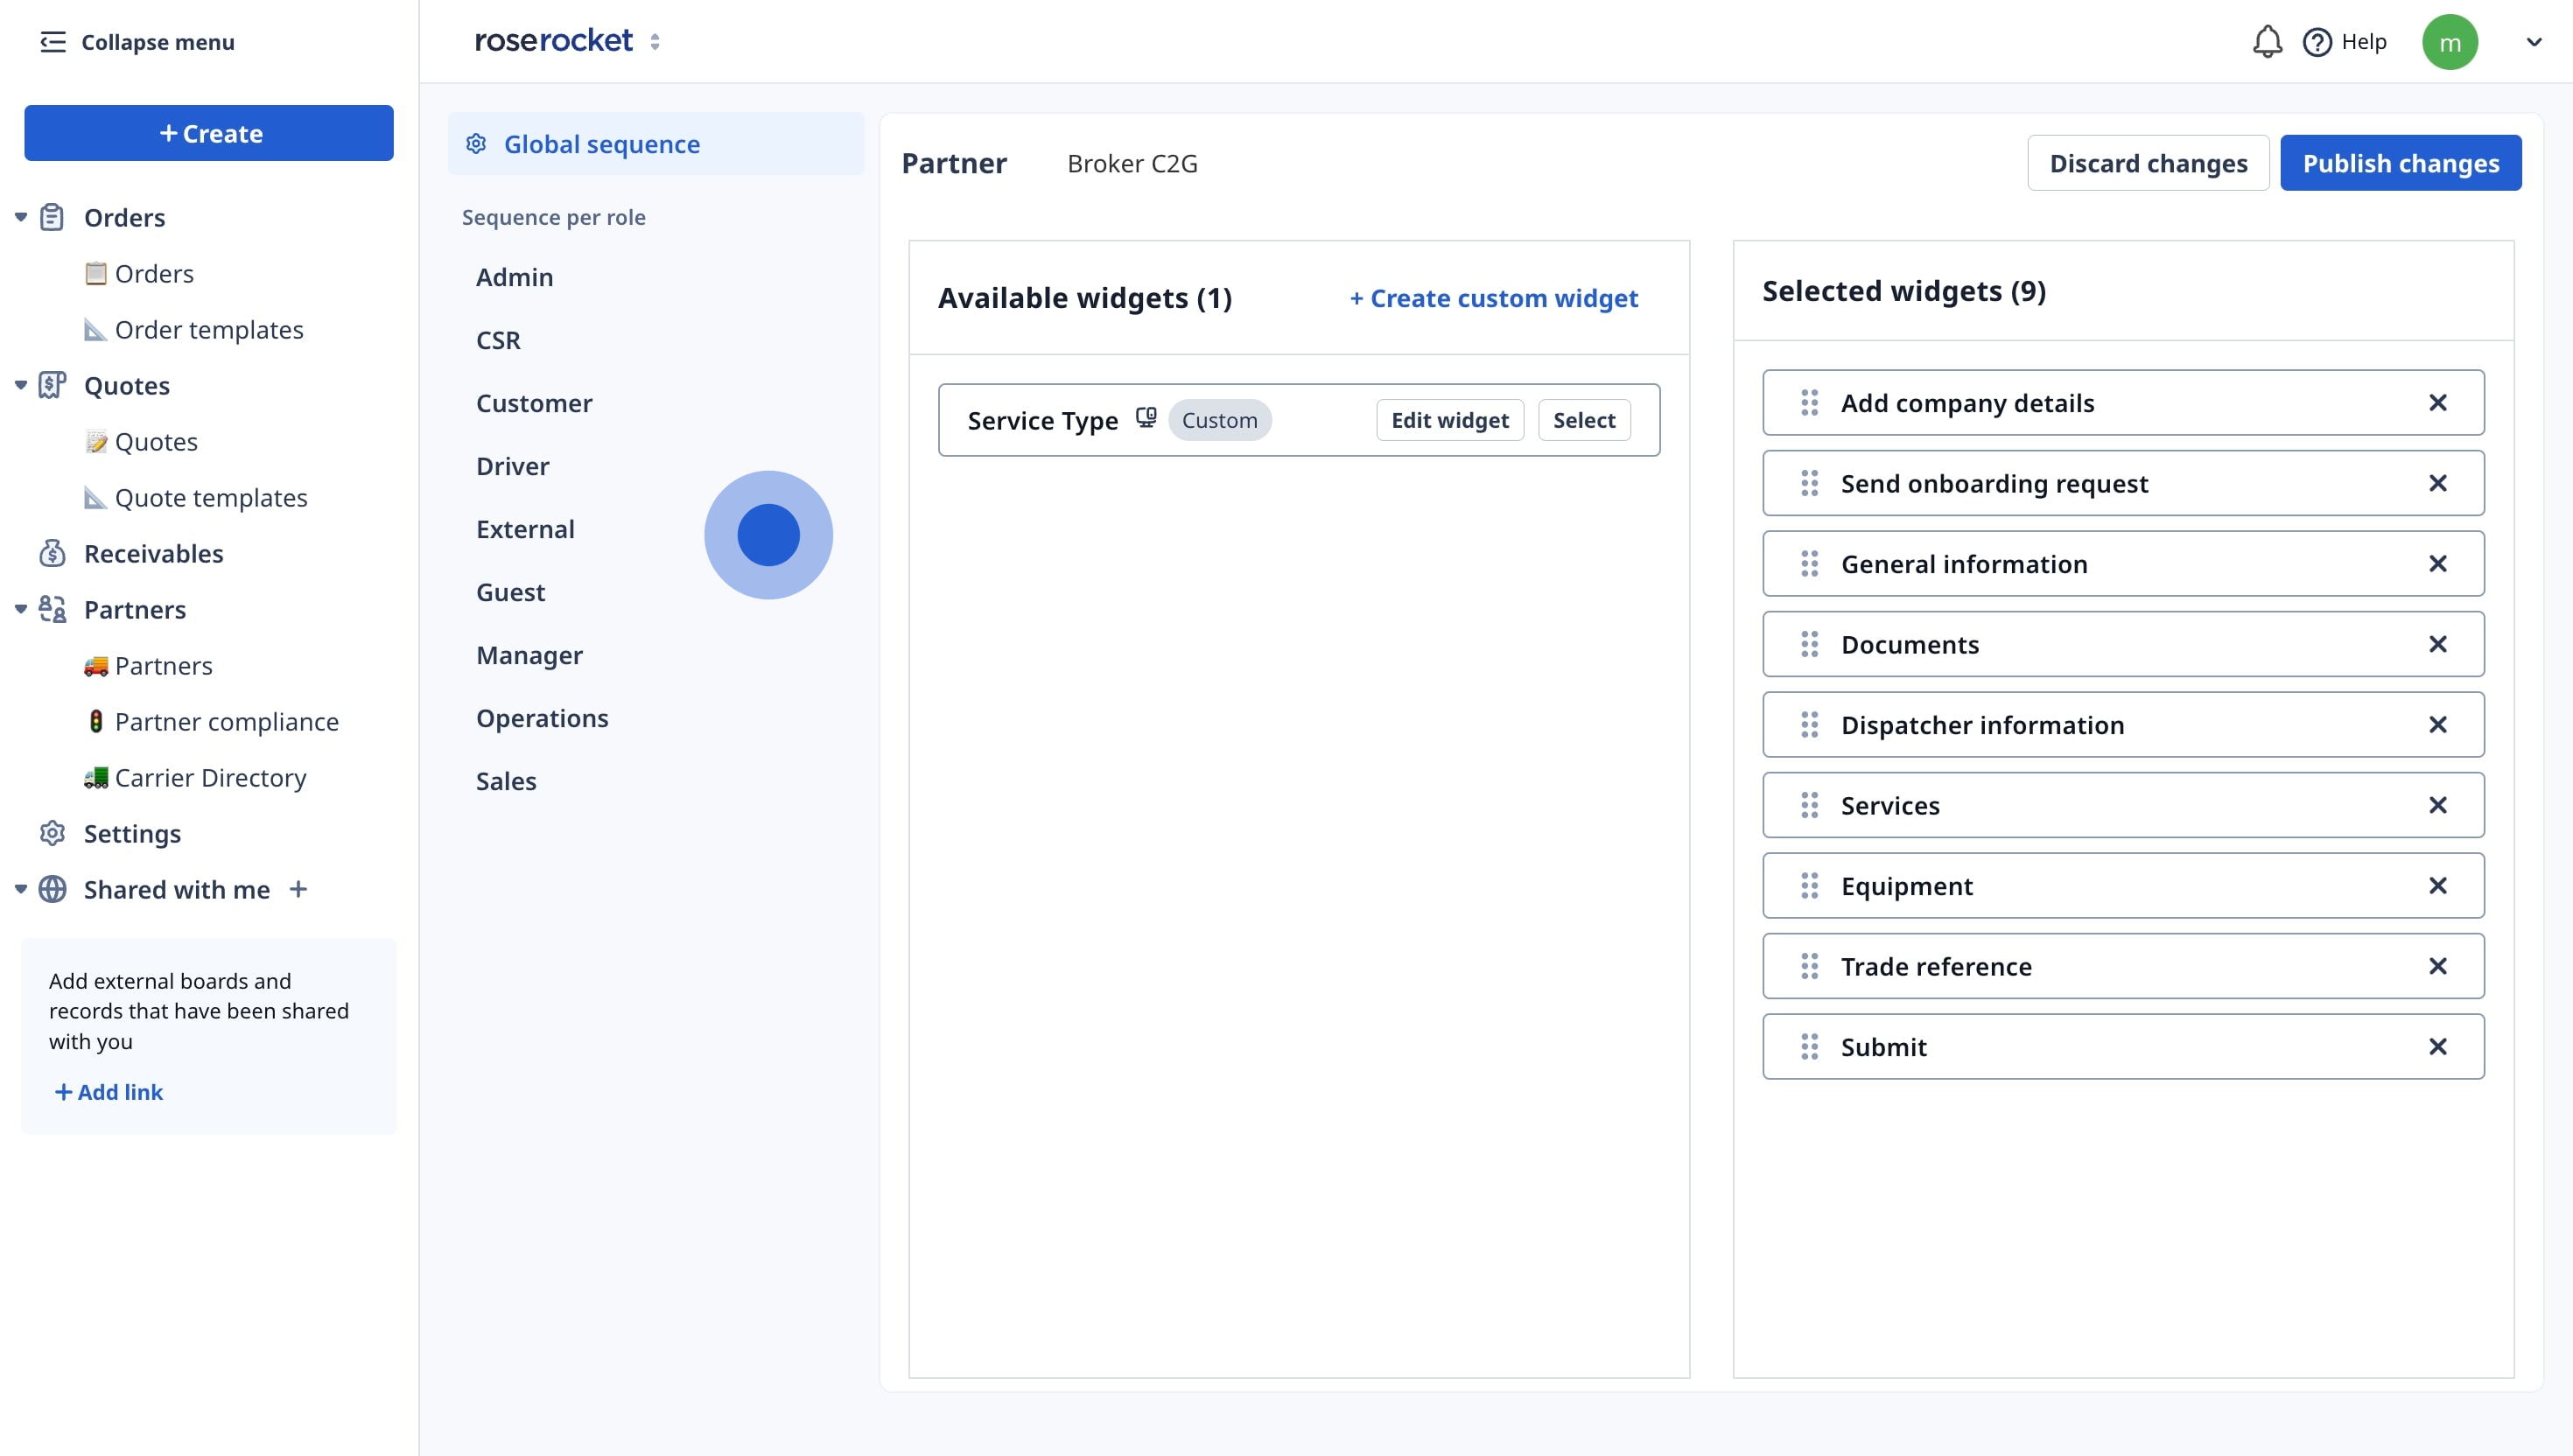
- Review the sequence and turn on any widgets you want your partner carriers to see.
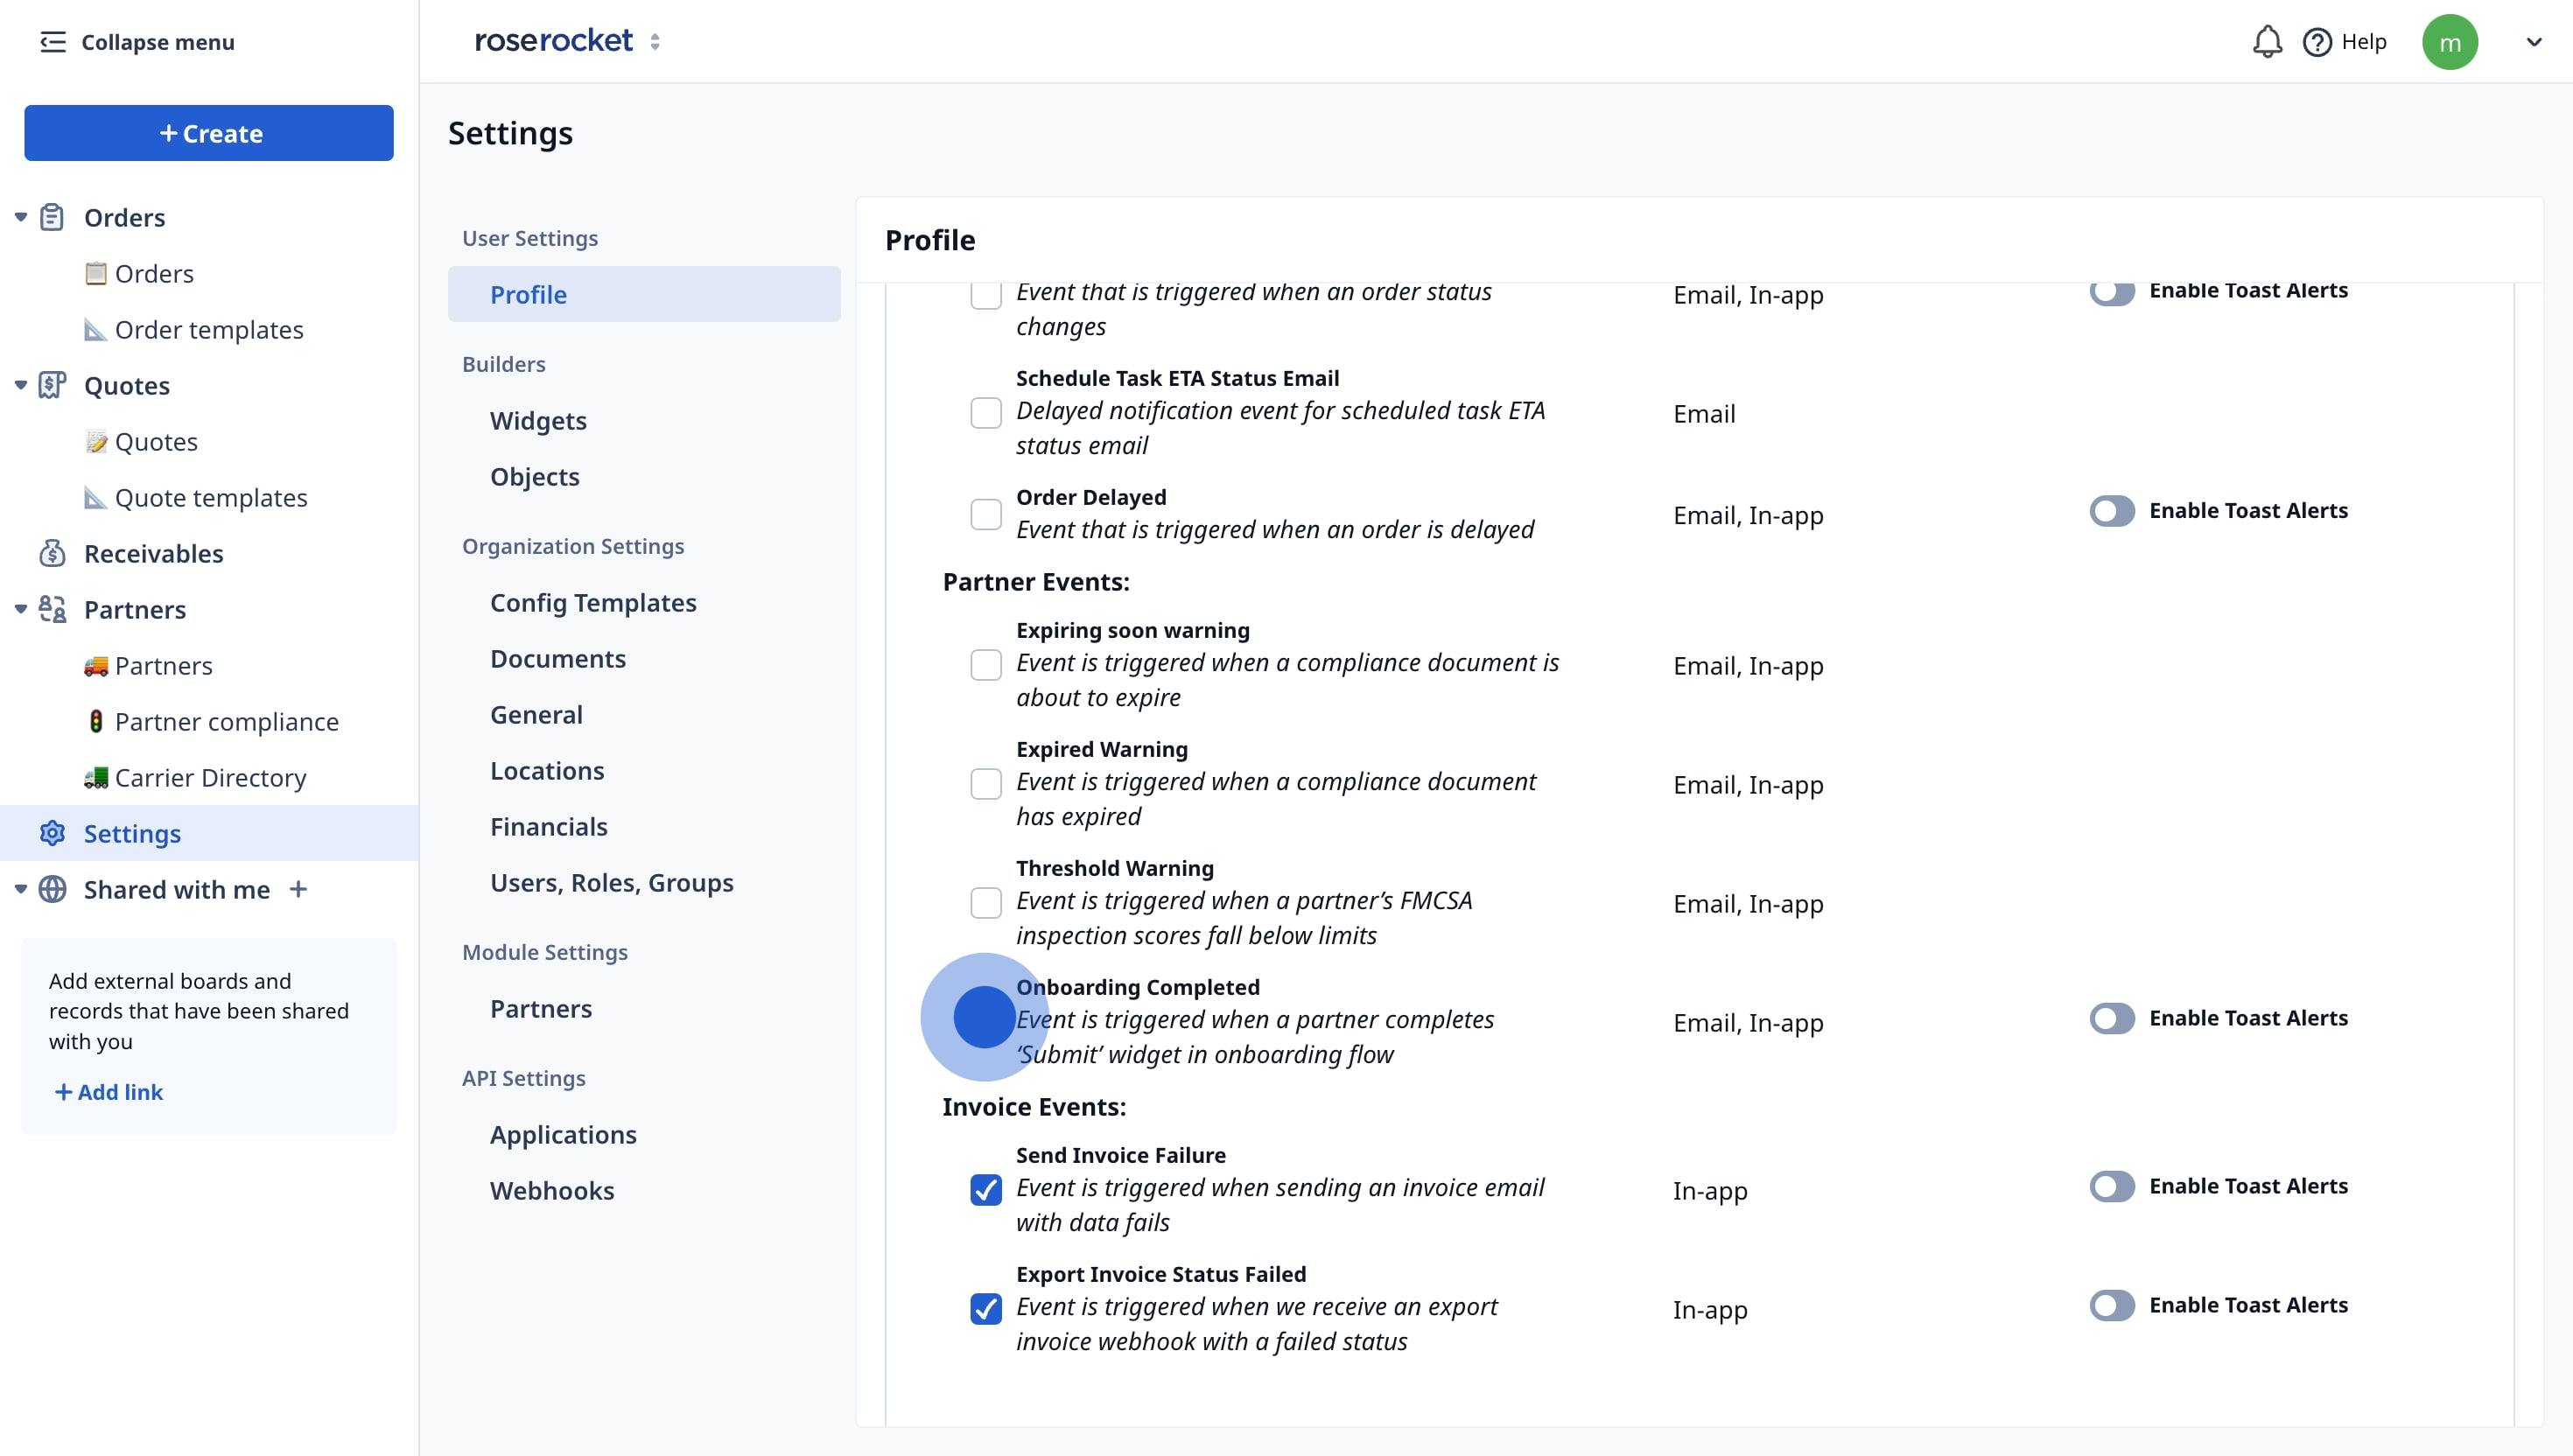
- Check the box Onboarding Completed to receive progress notifications.
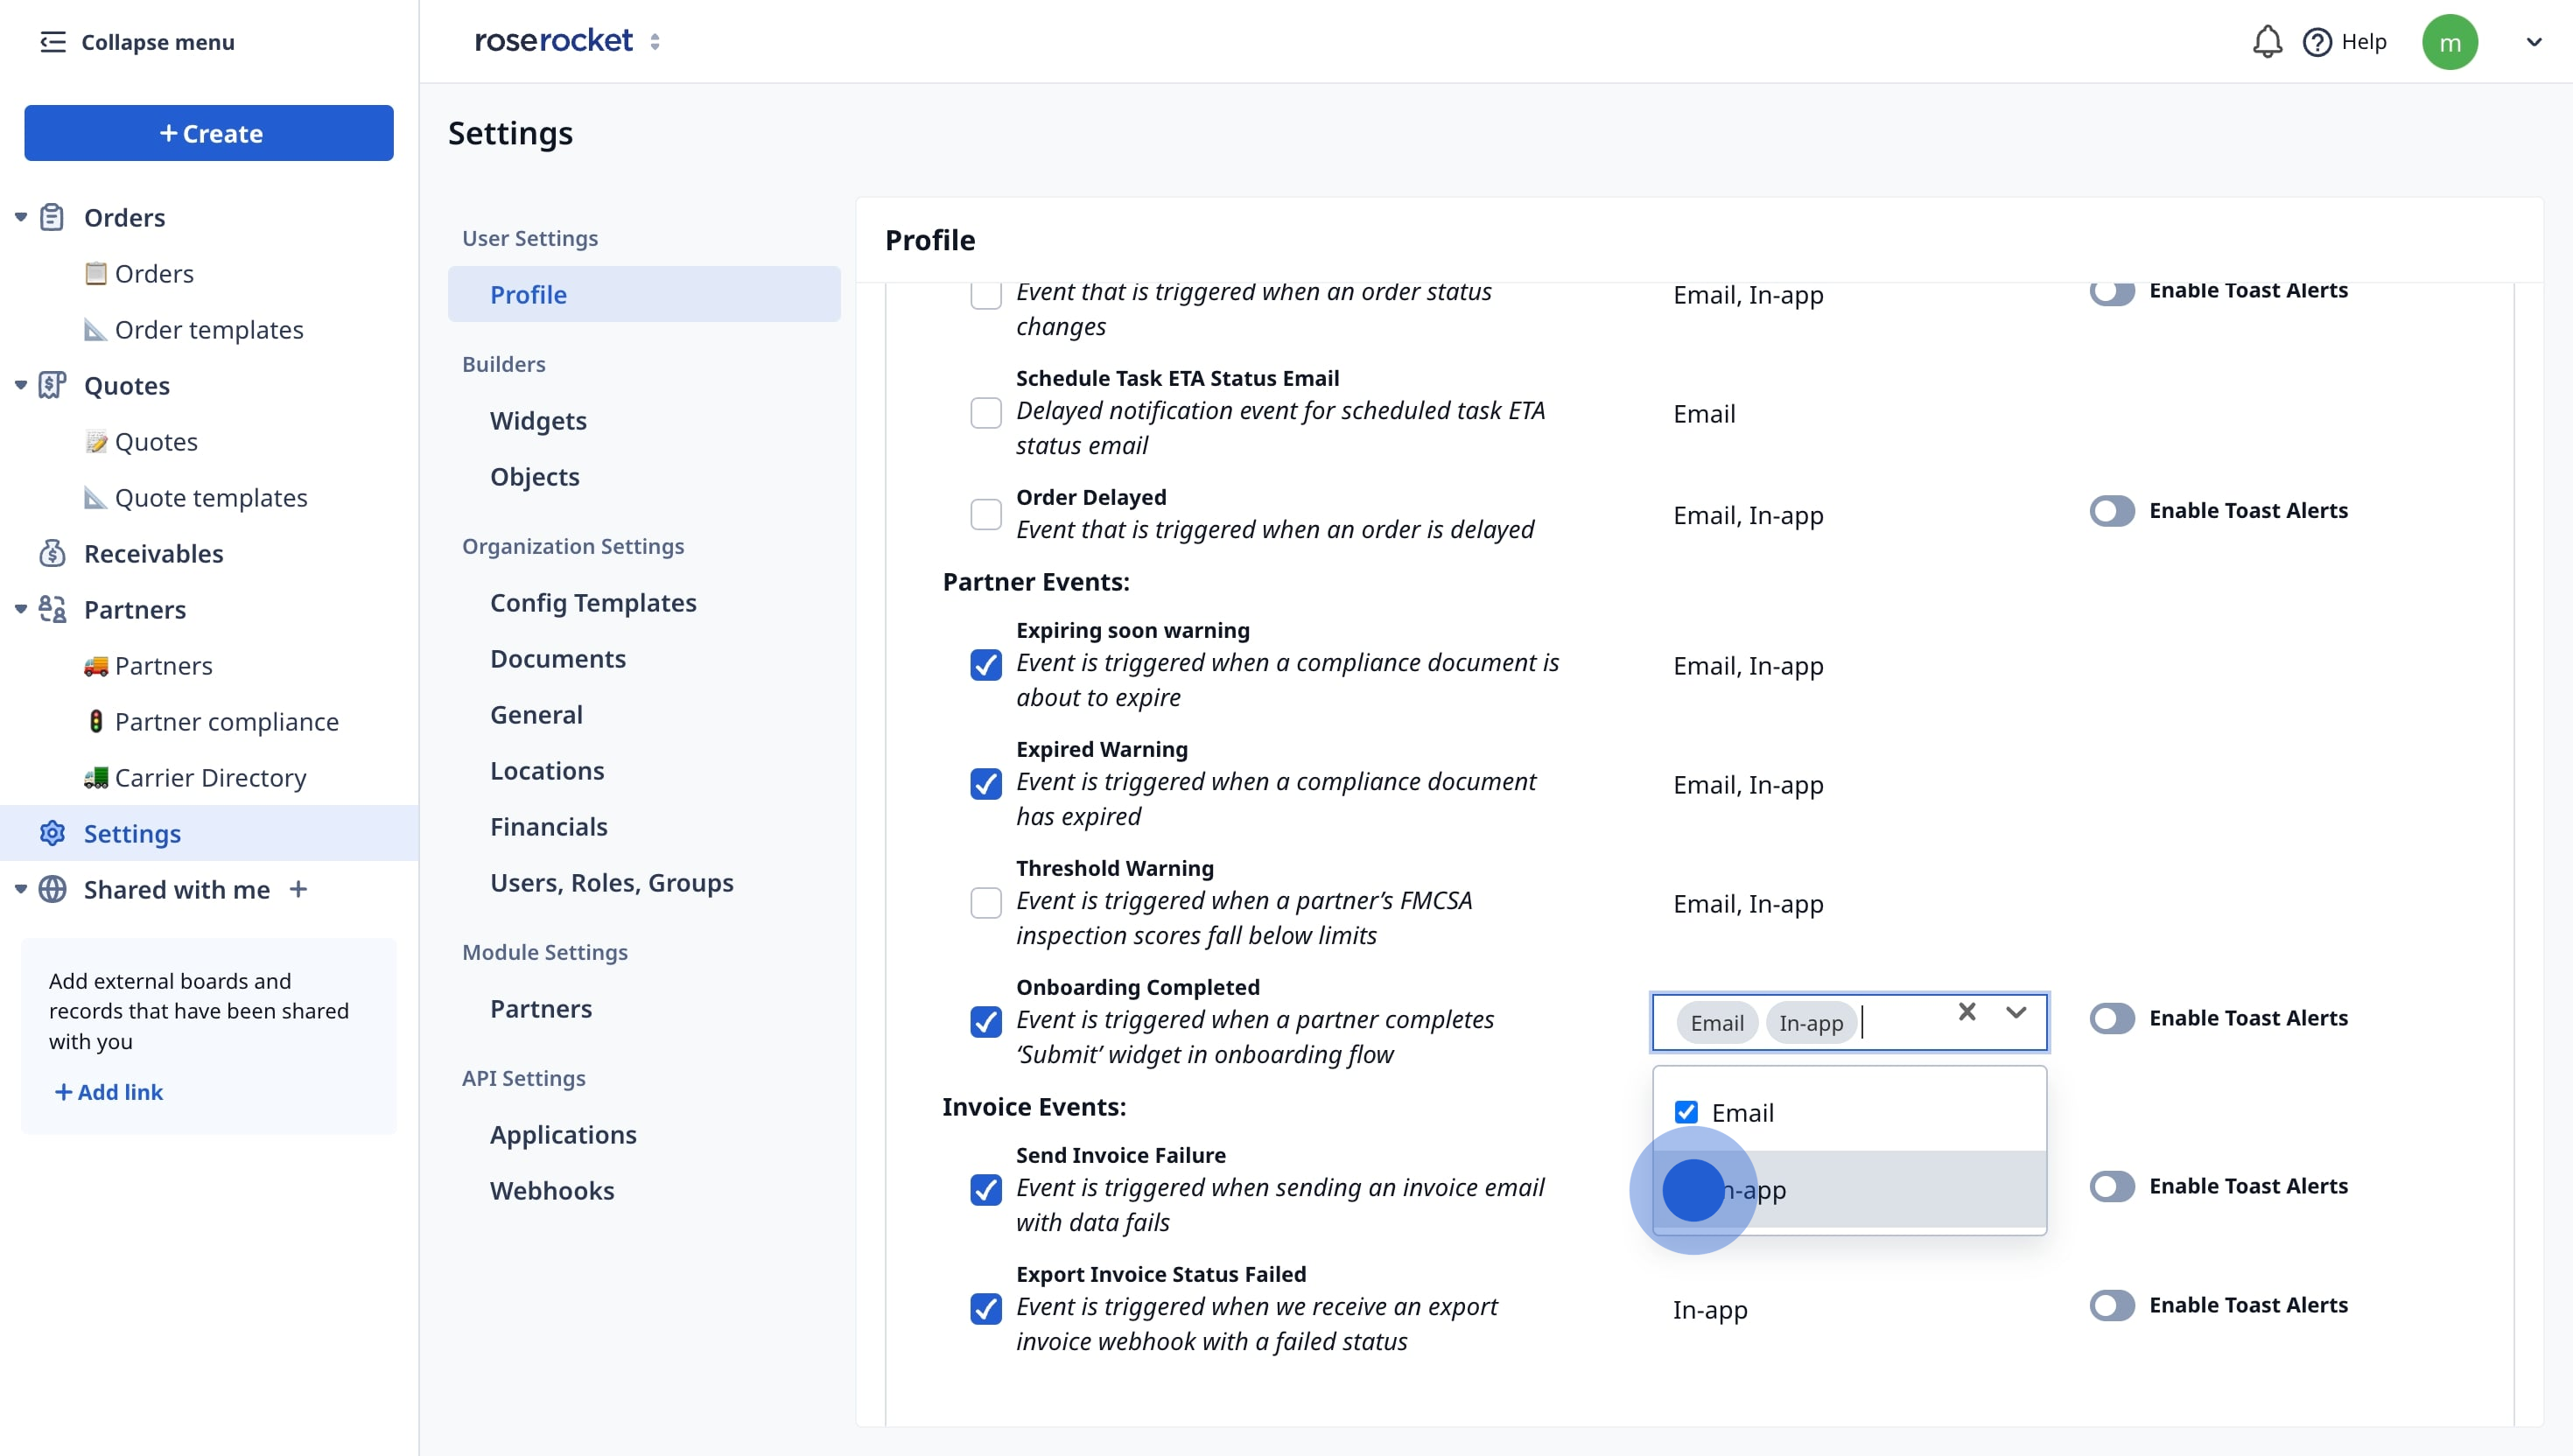
- You can choose to receive notifications via email, in-app or both.
Step 4: Now you're ready to add & onboard a new carrier. Click on '🚚 Partners' module in the main menu.
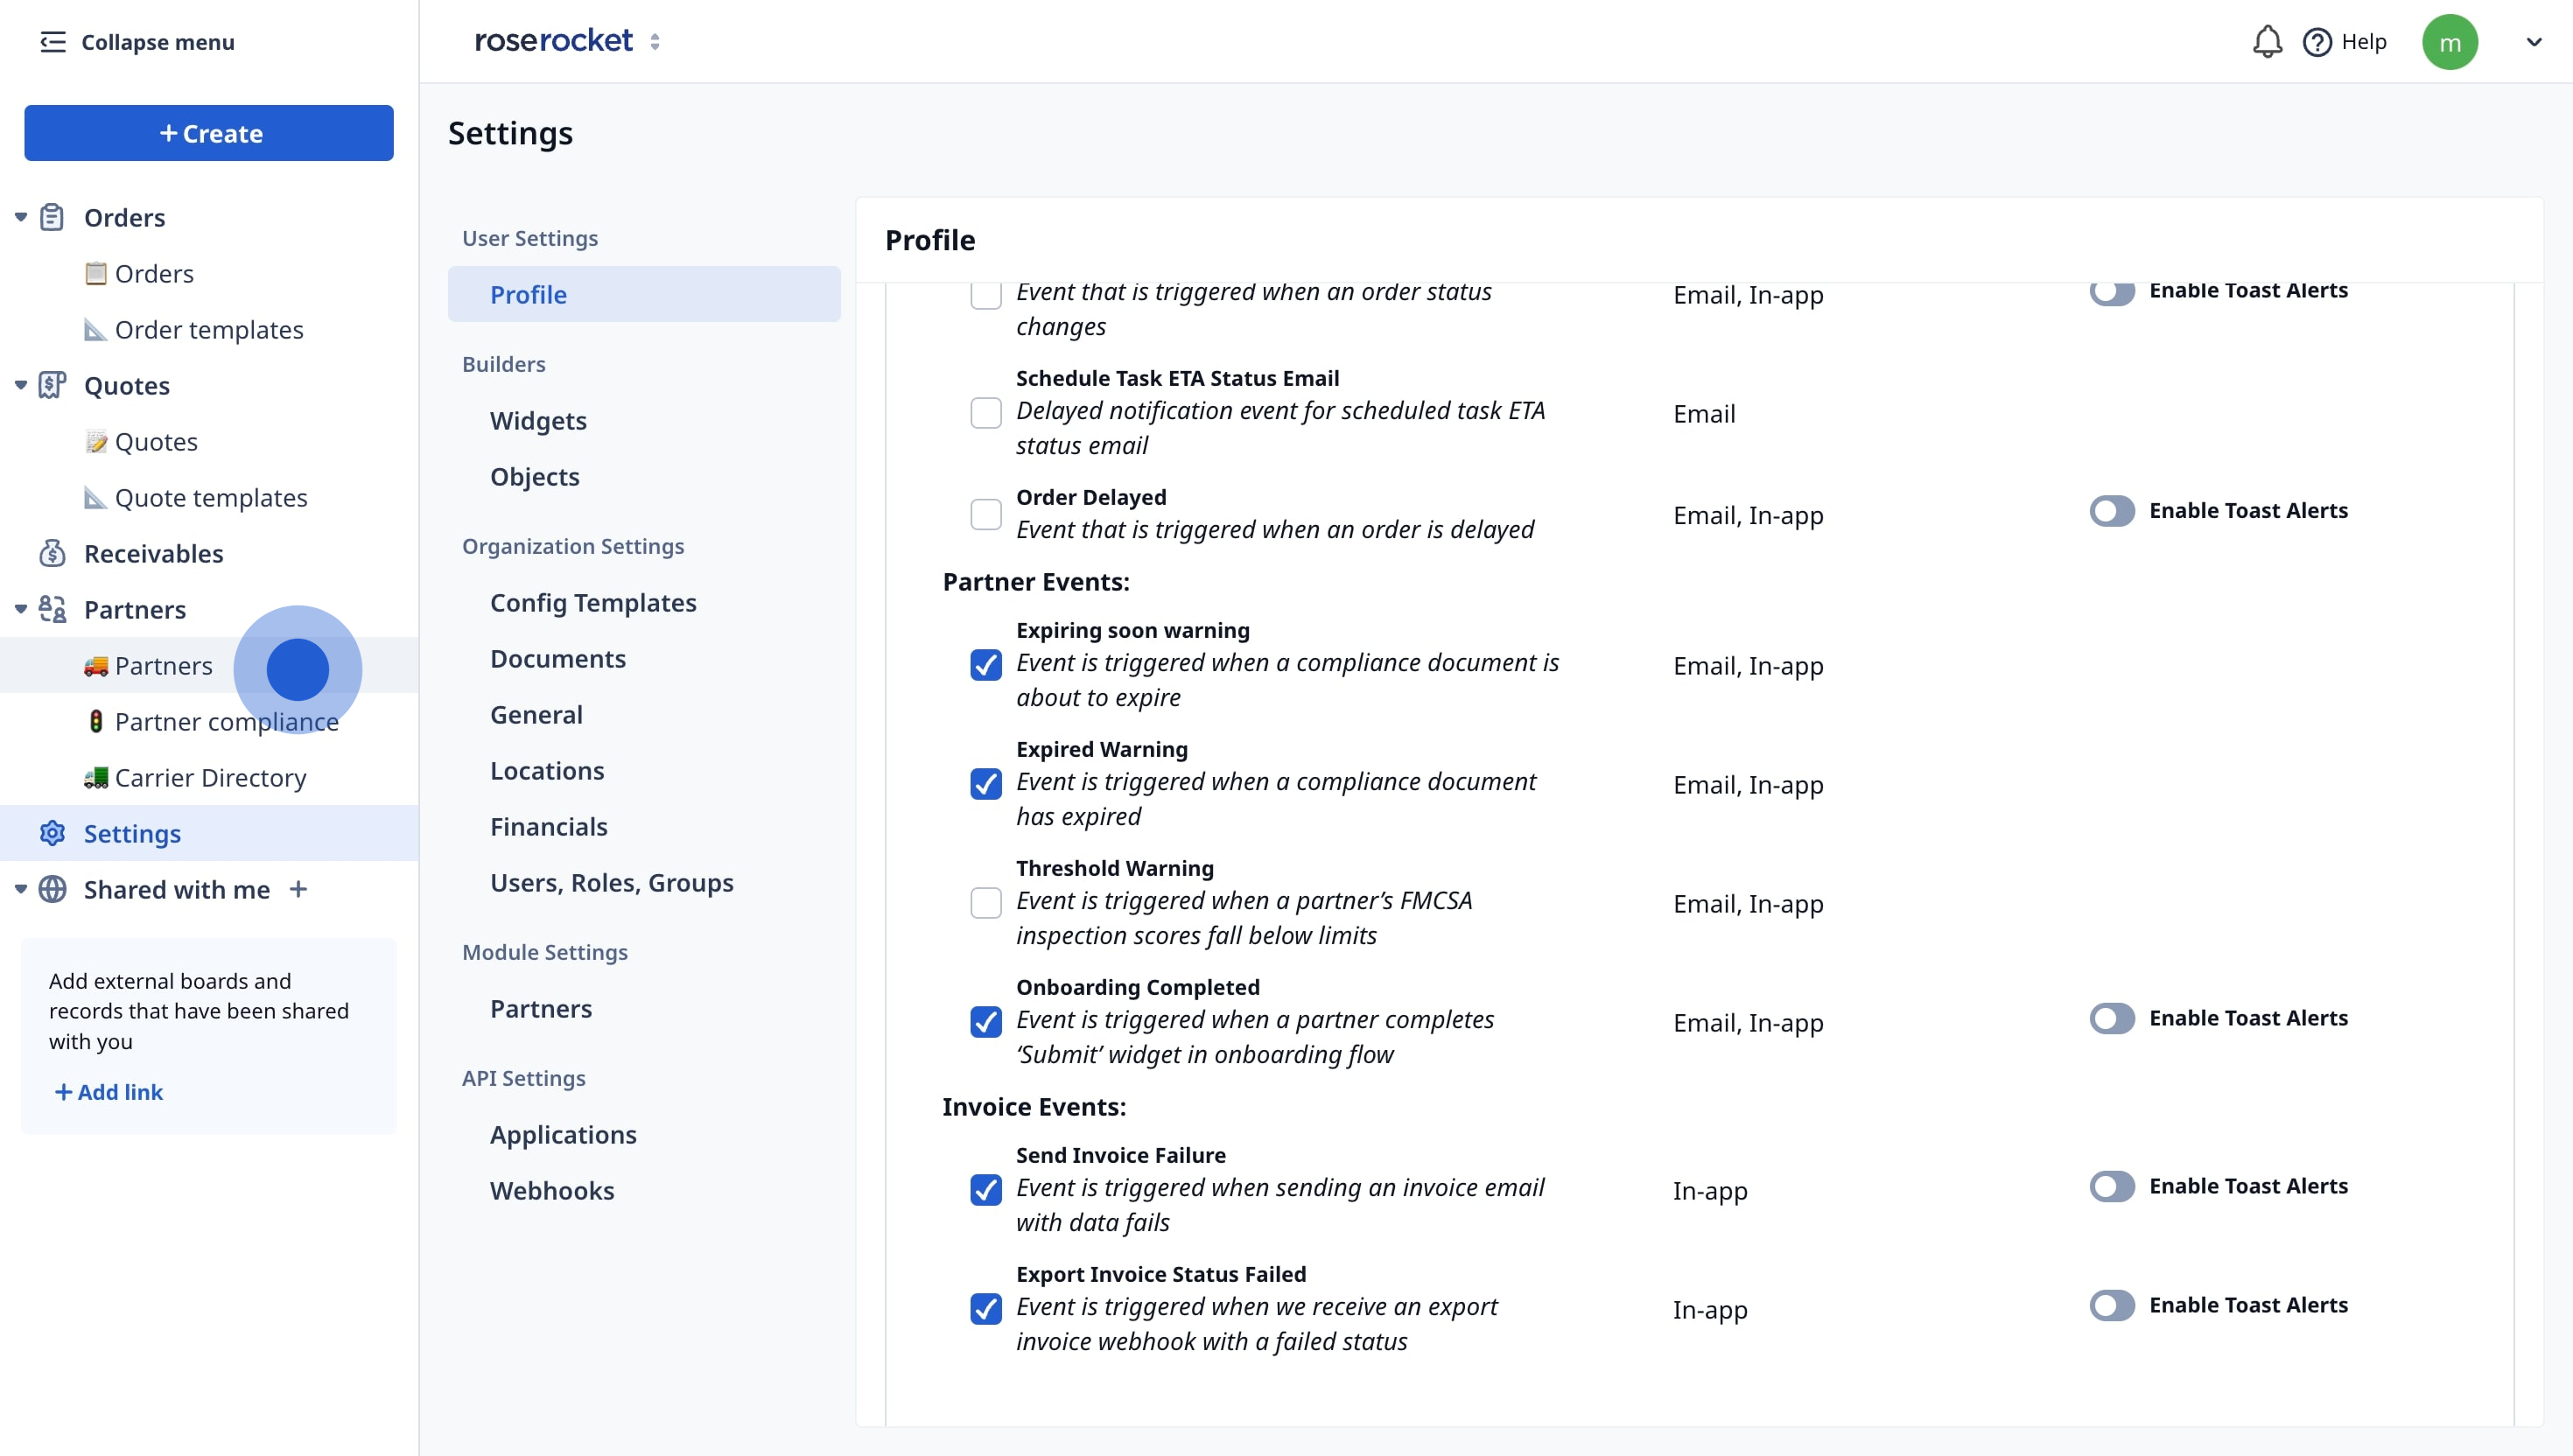
- Following that, create a new partner profile.
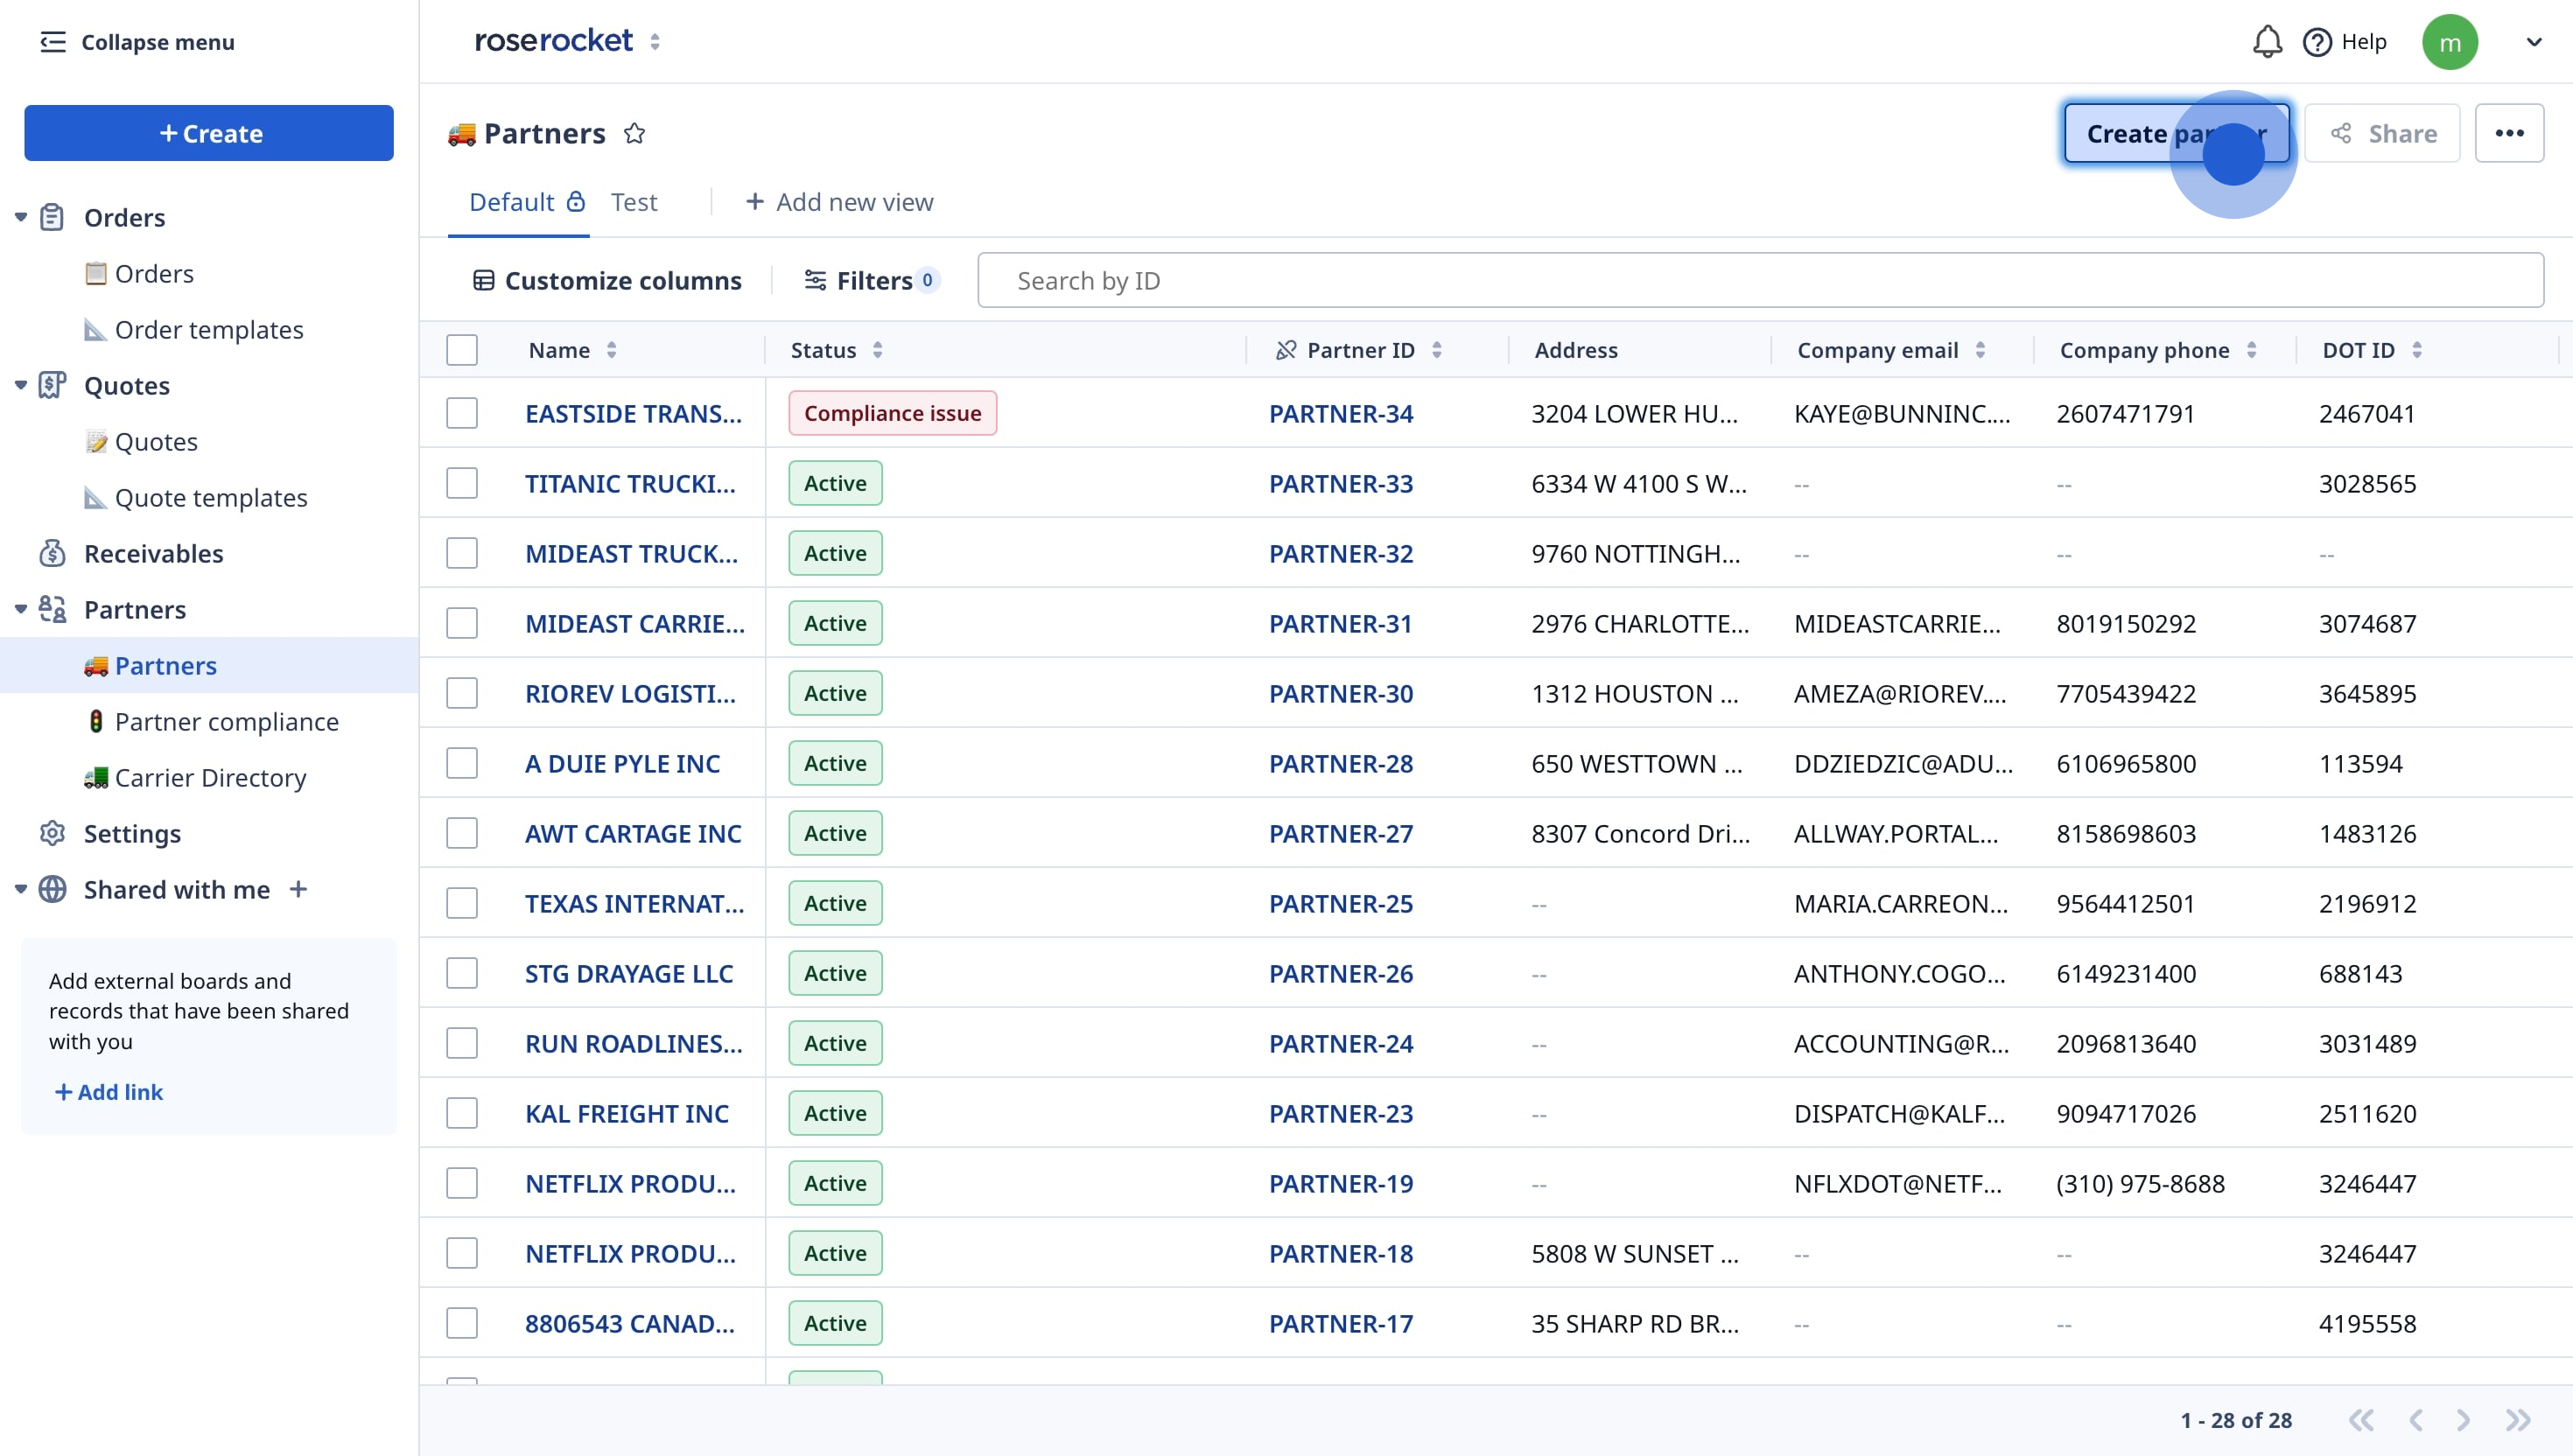
- Find them through our integrated FMCSA public carrier database.
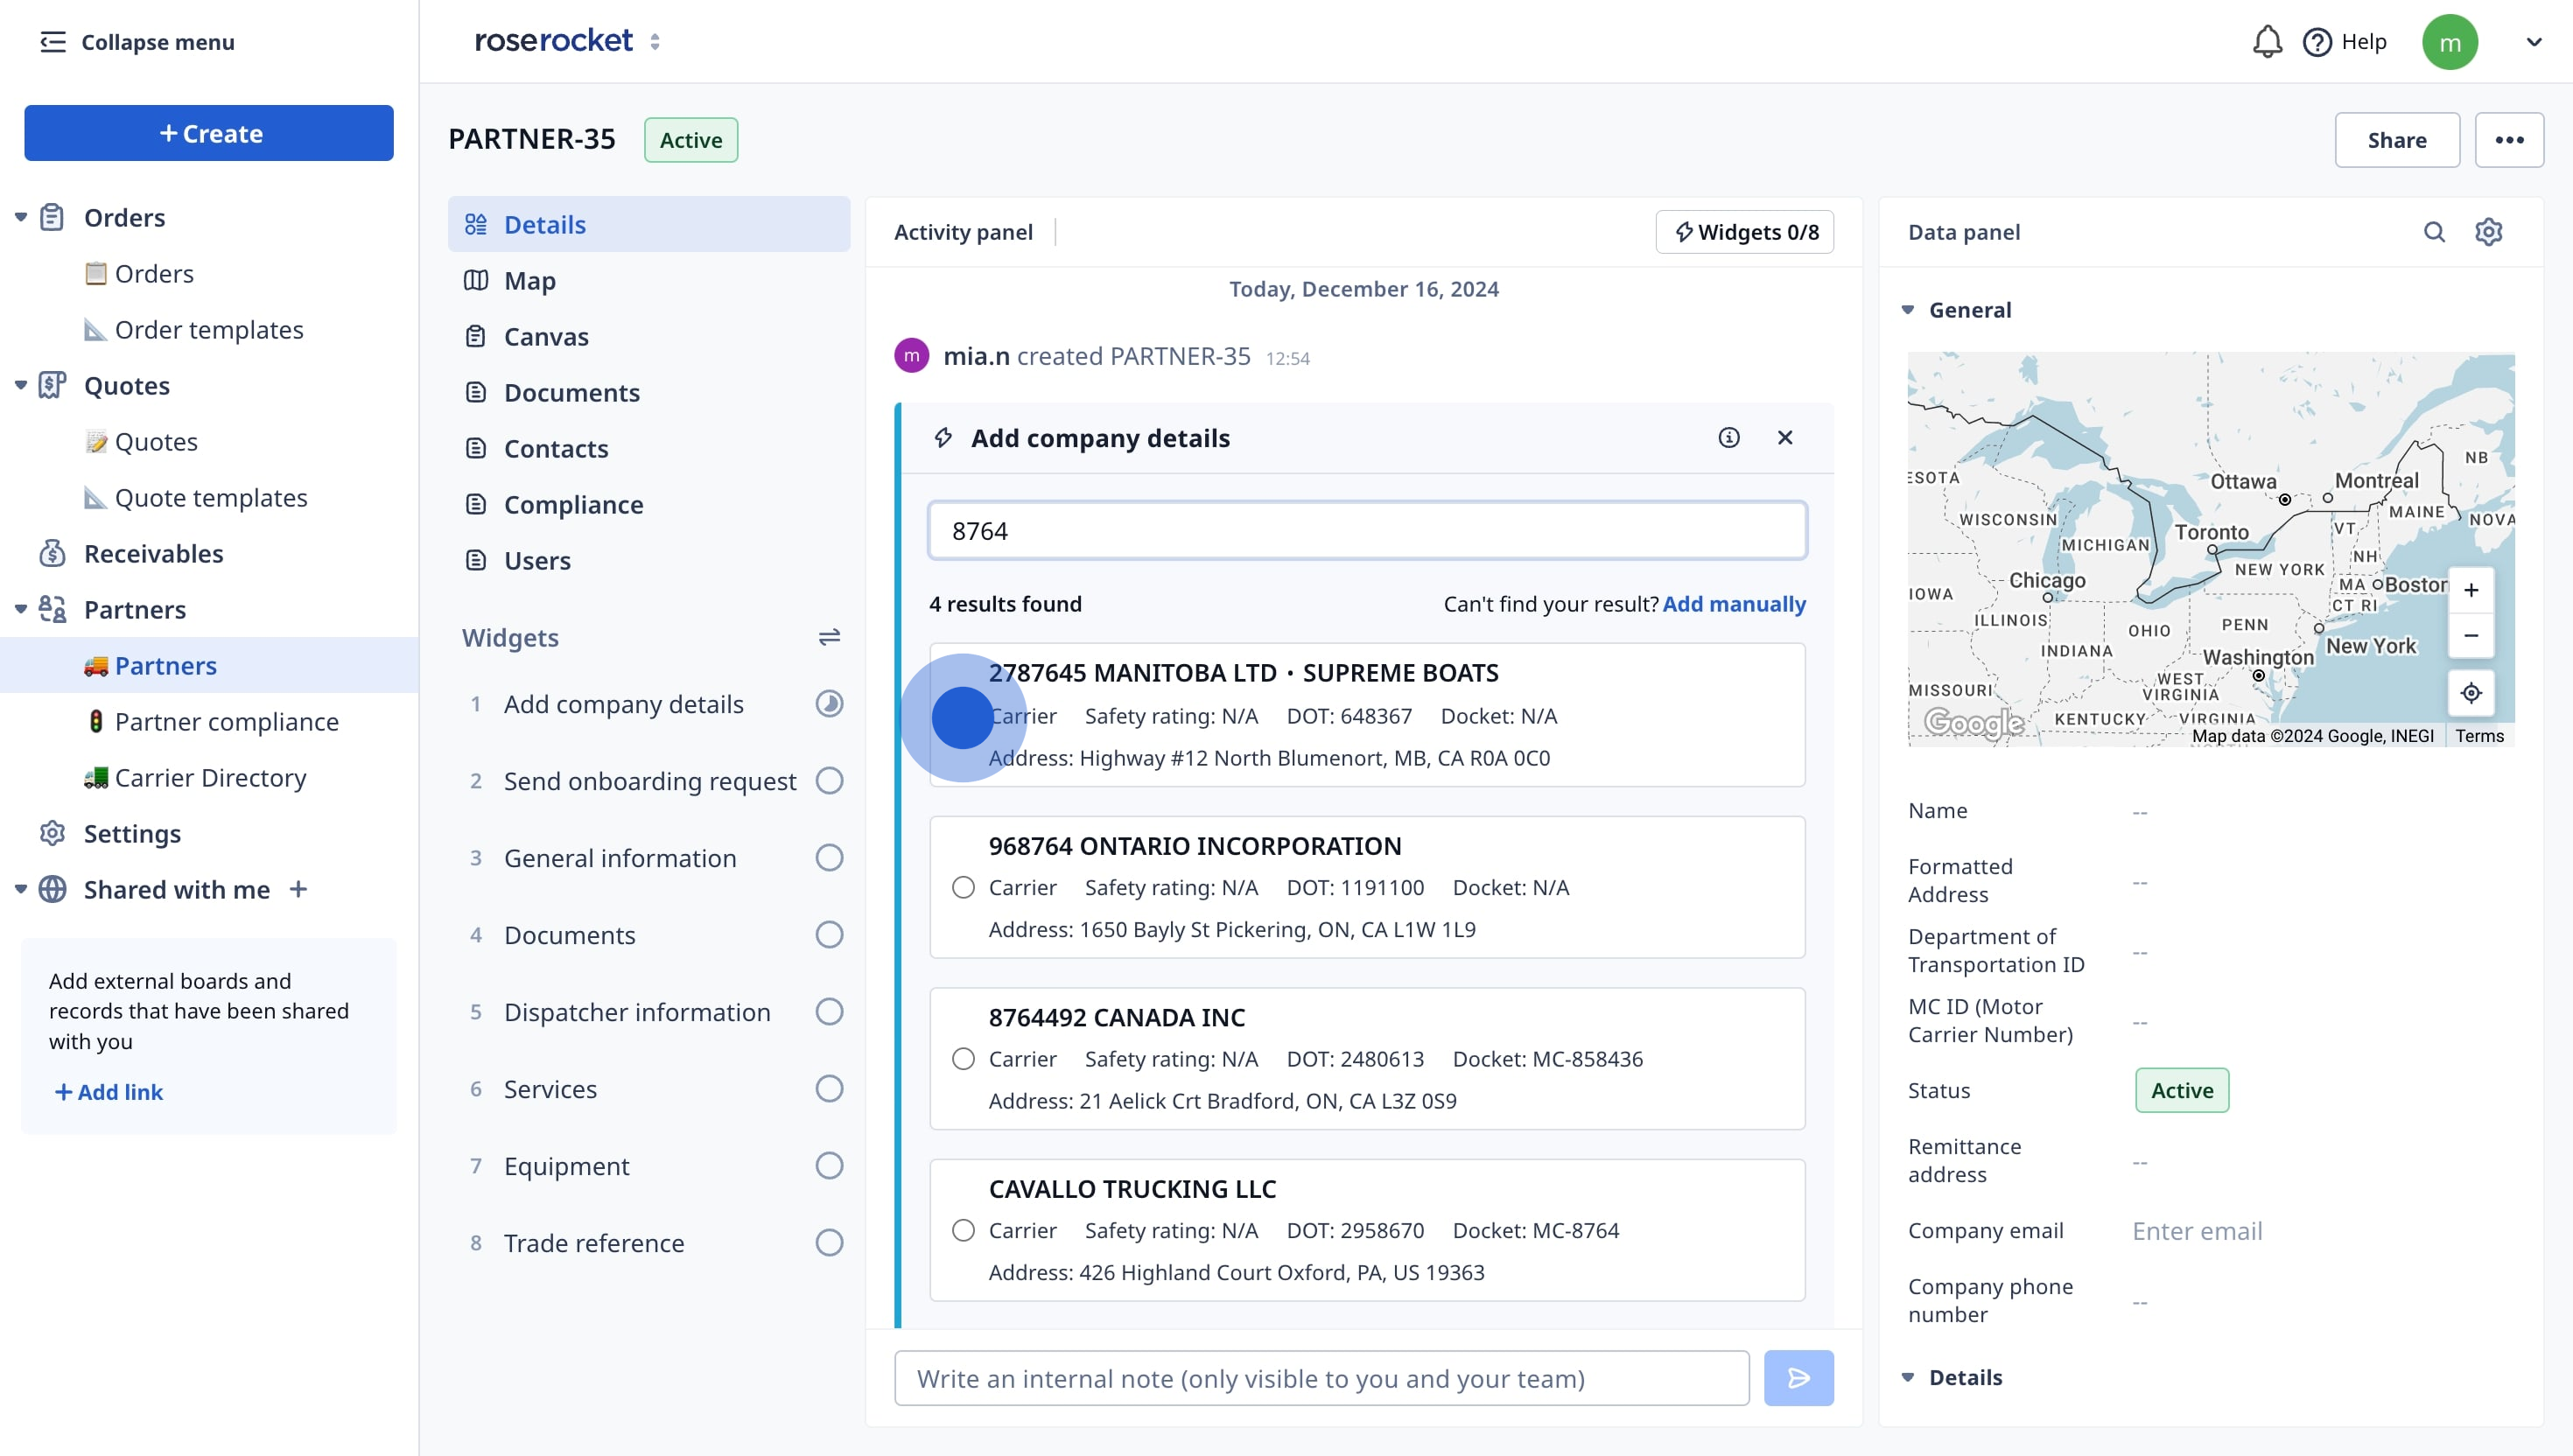
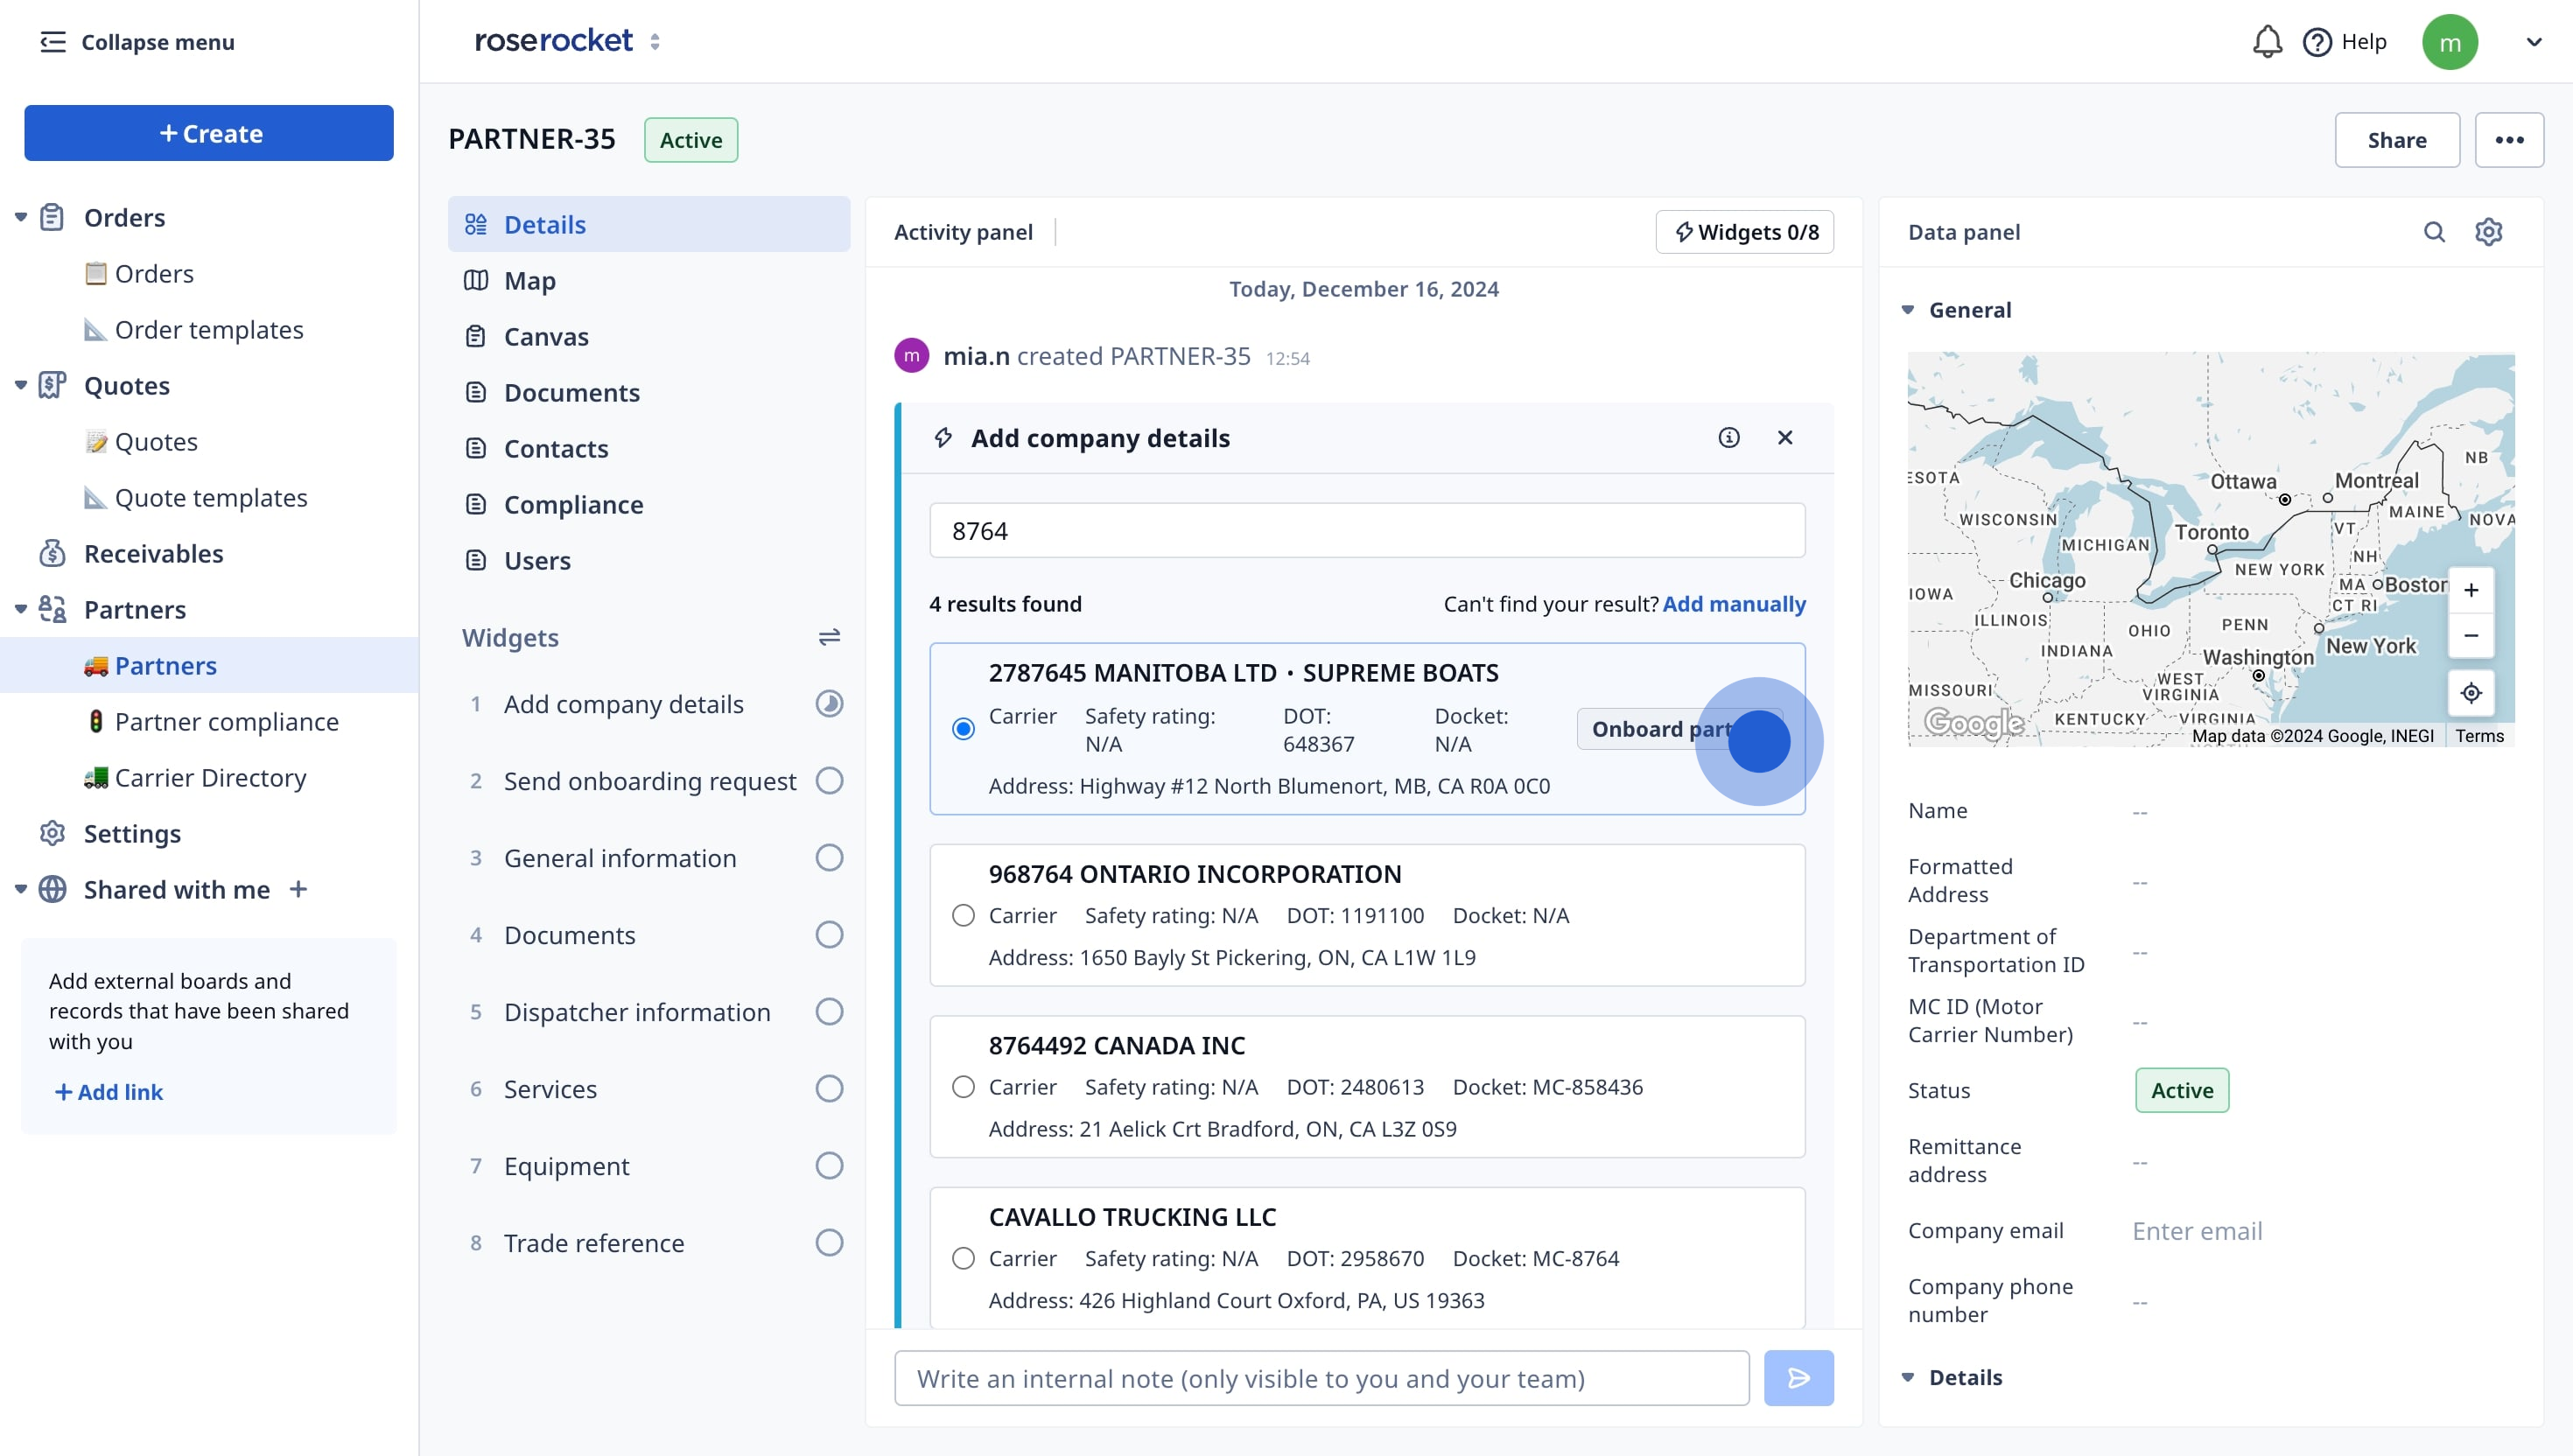
- Click Onboard Partner.
- Fill out the Reply To with your email address and Send To with the carrier's email so your carrier can receive the carrier onboarding packet and also reply to your email to provide additional information.
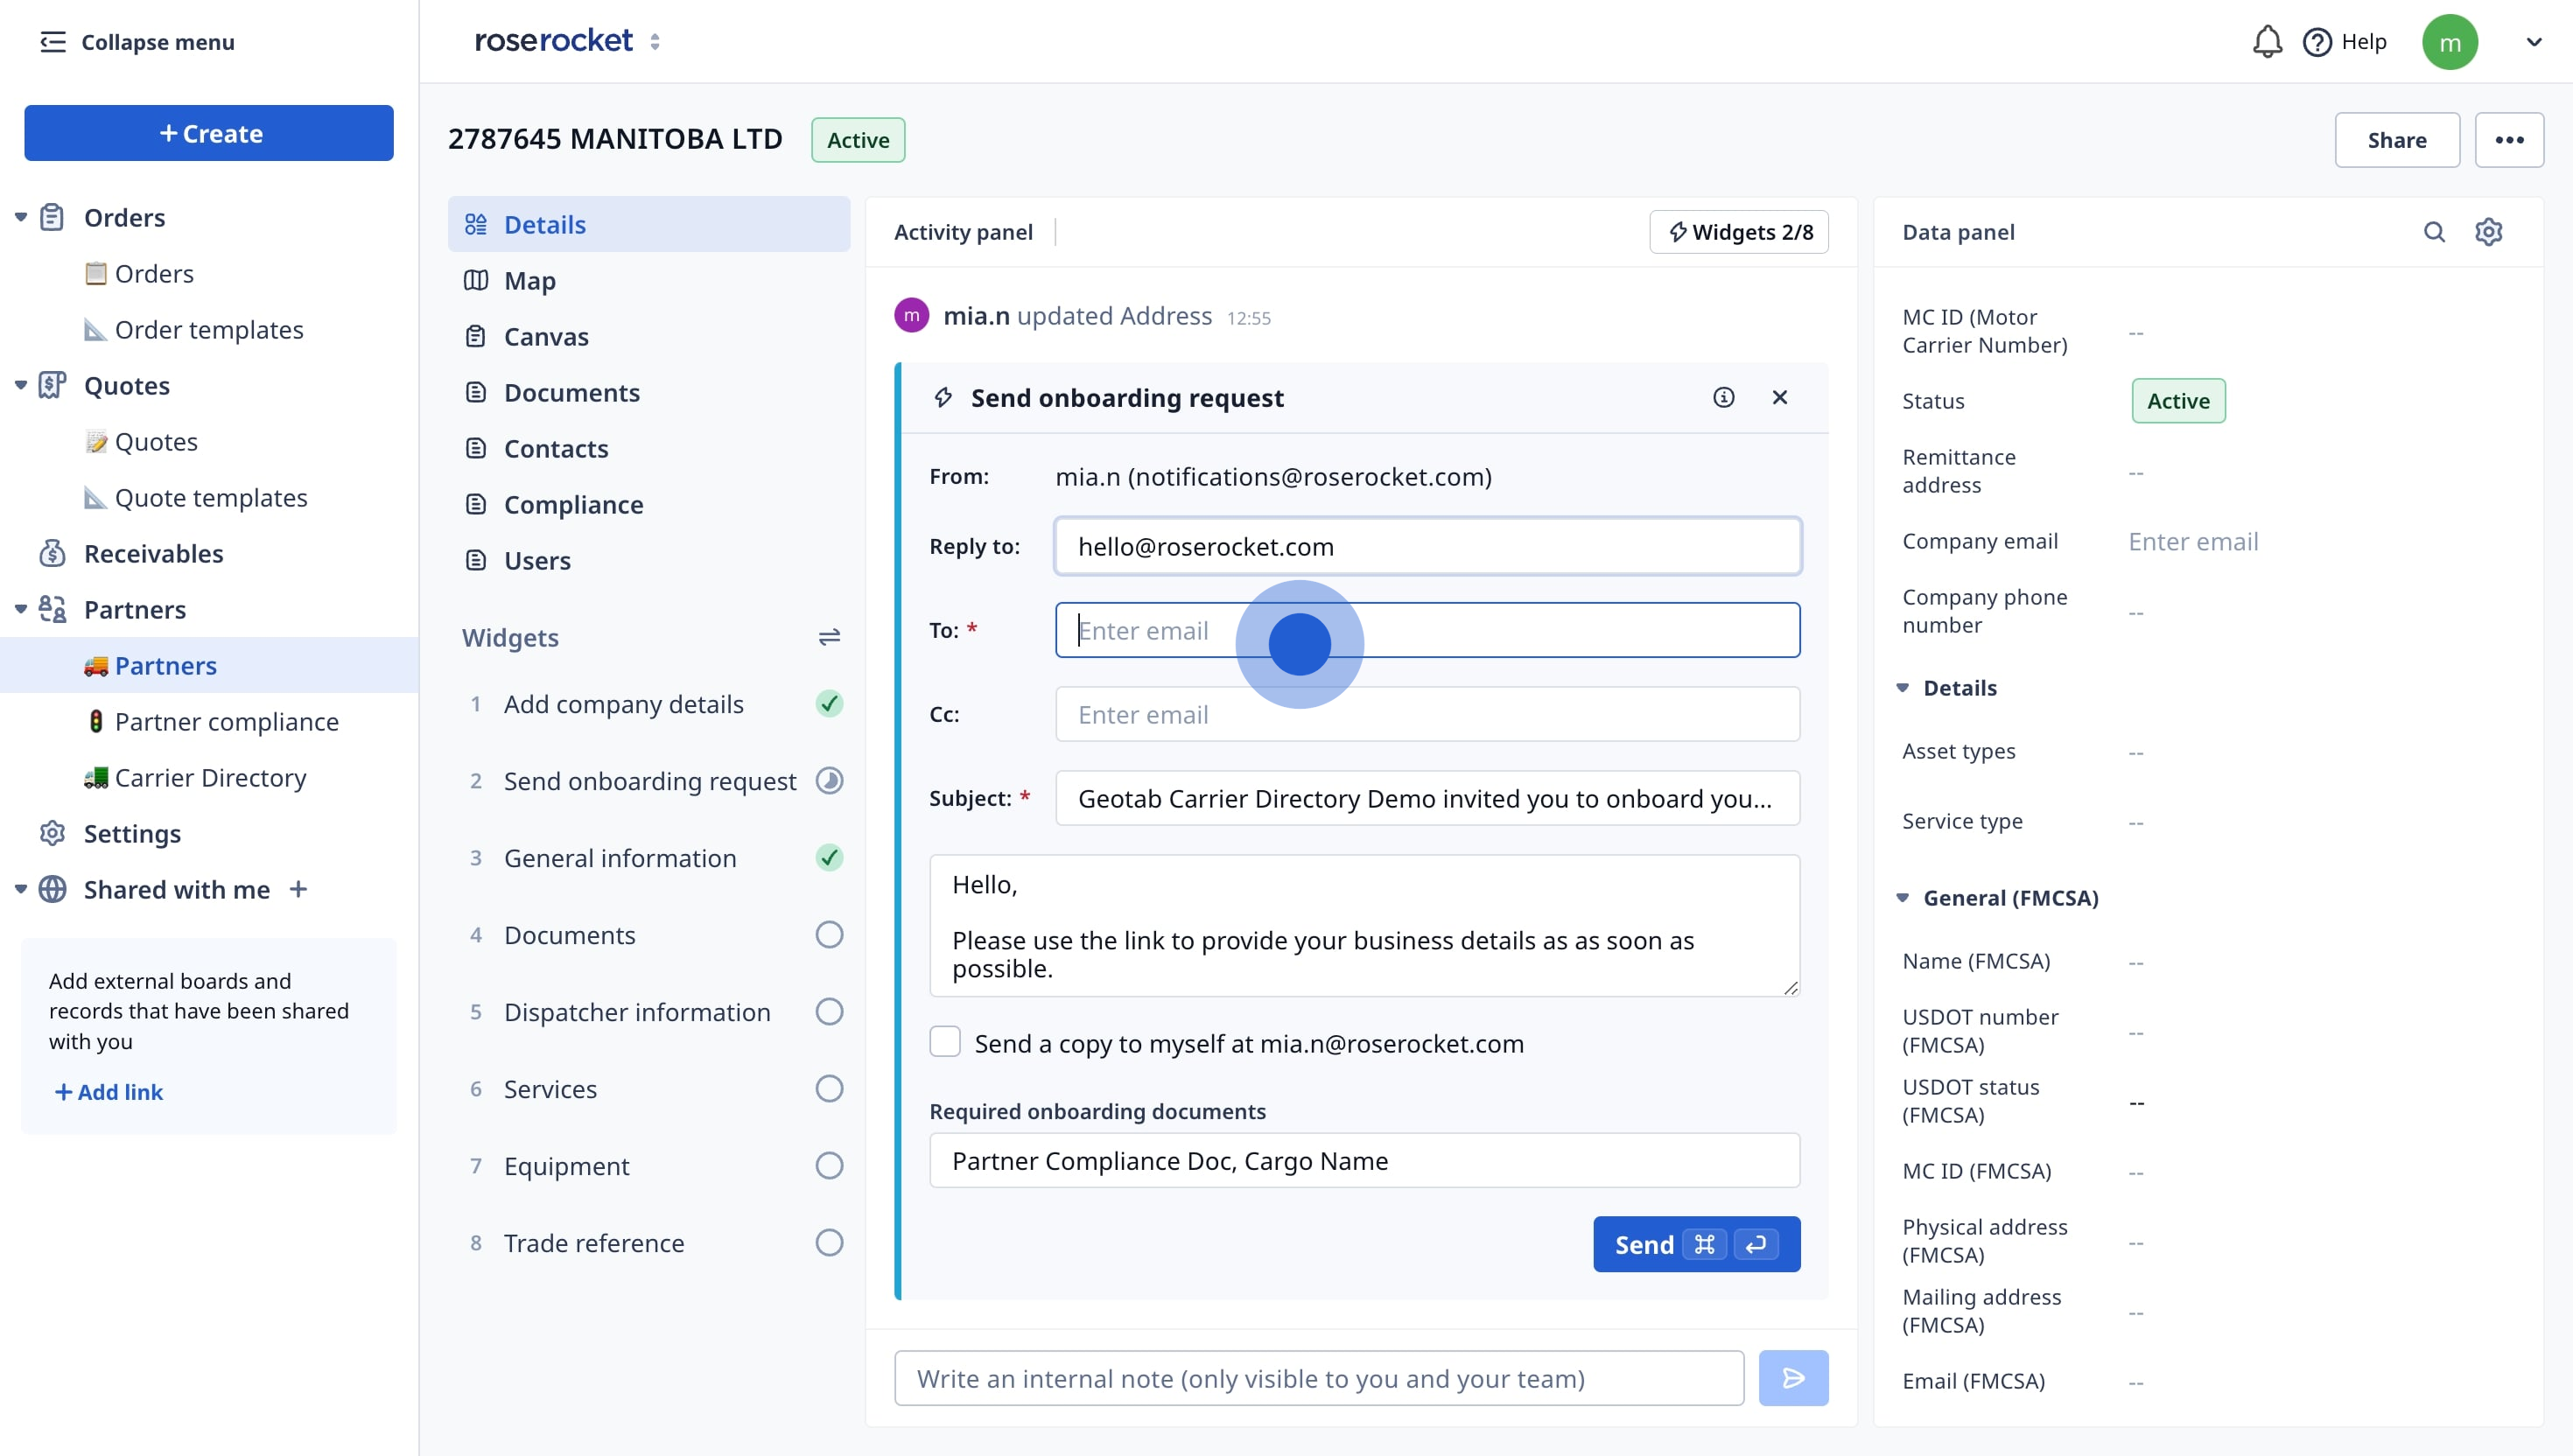
- Select all the document types you want the carrier to upload for the onboarding packet. If you have set the default to Yes for any documents, they will be pre-checked.
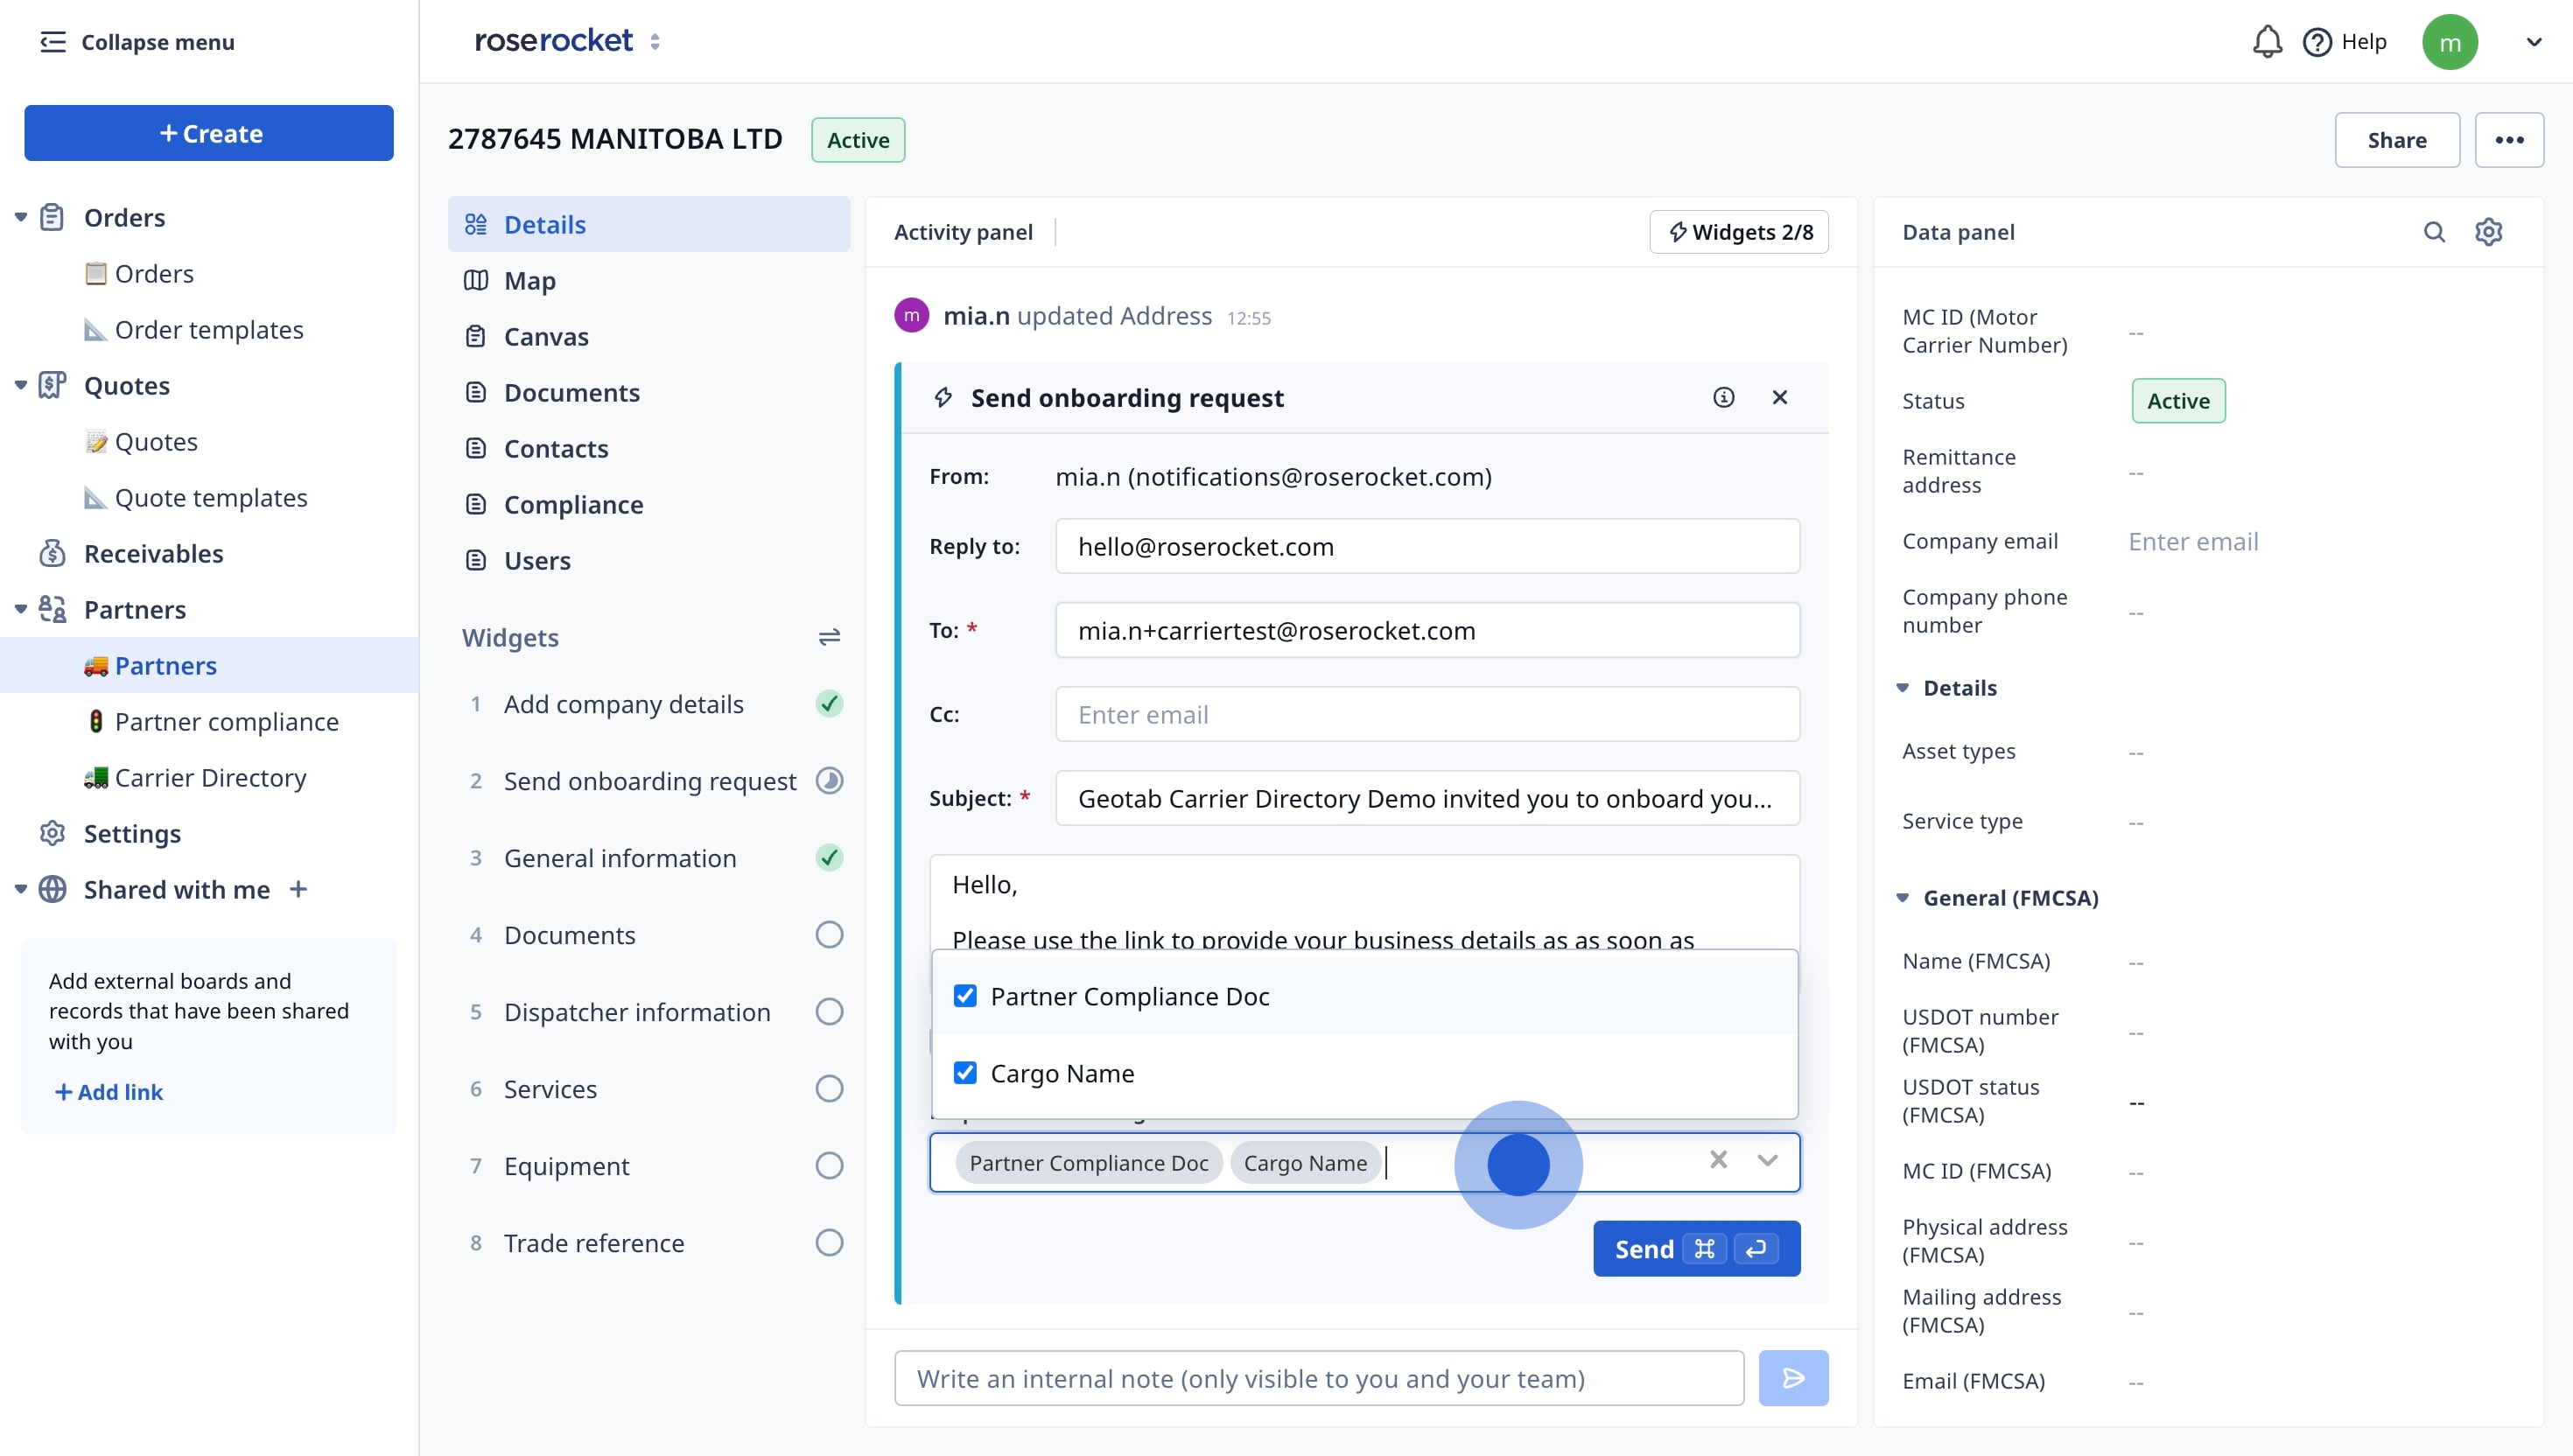
Step 5: What Your Carrier Sees
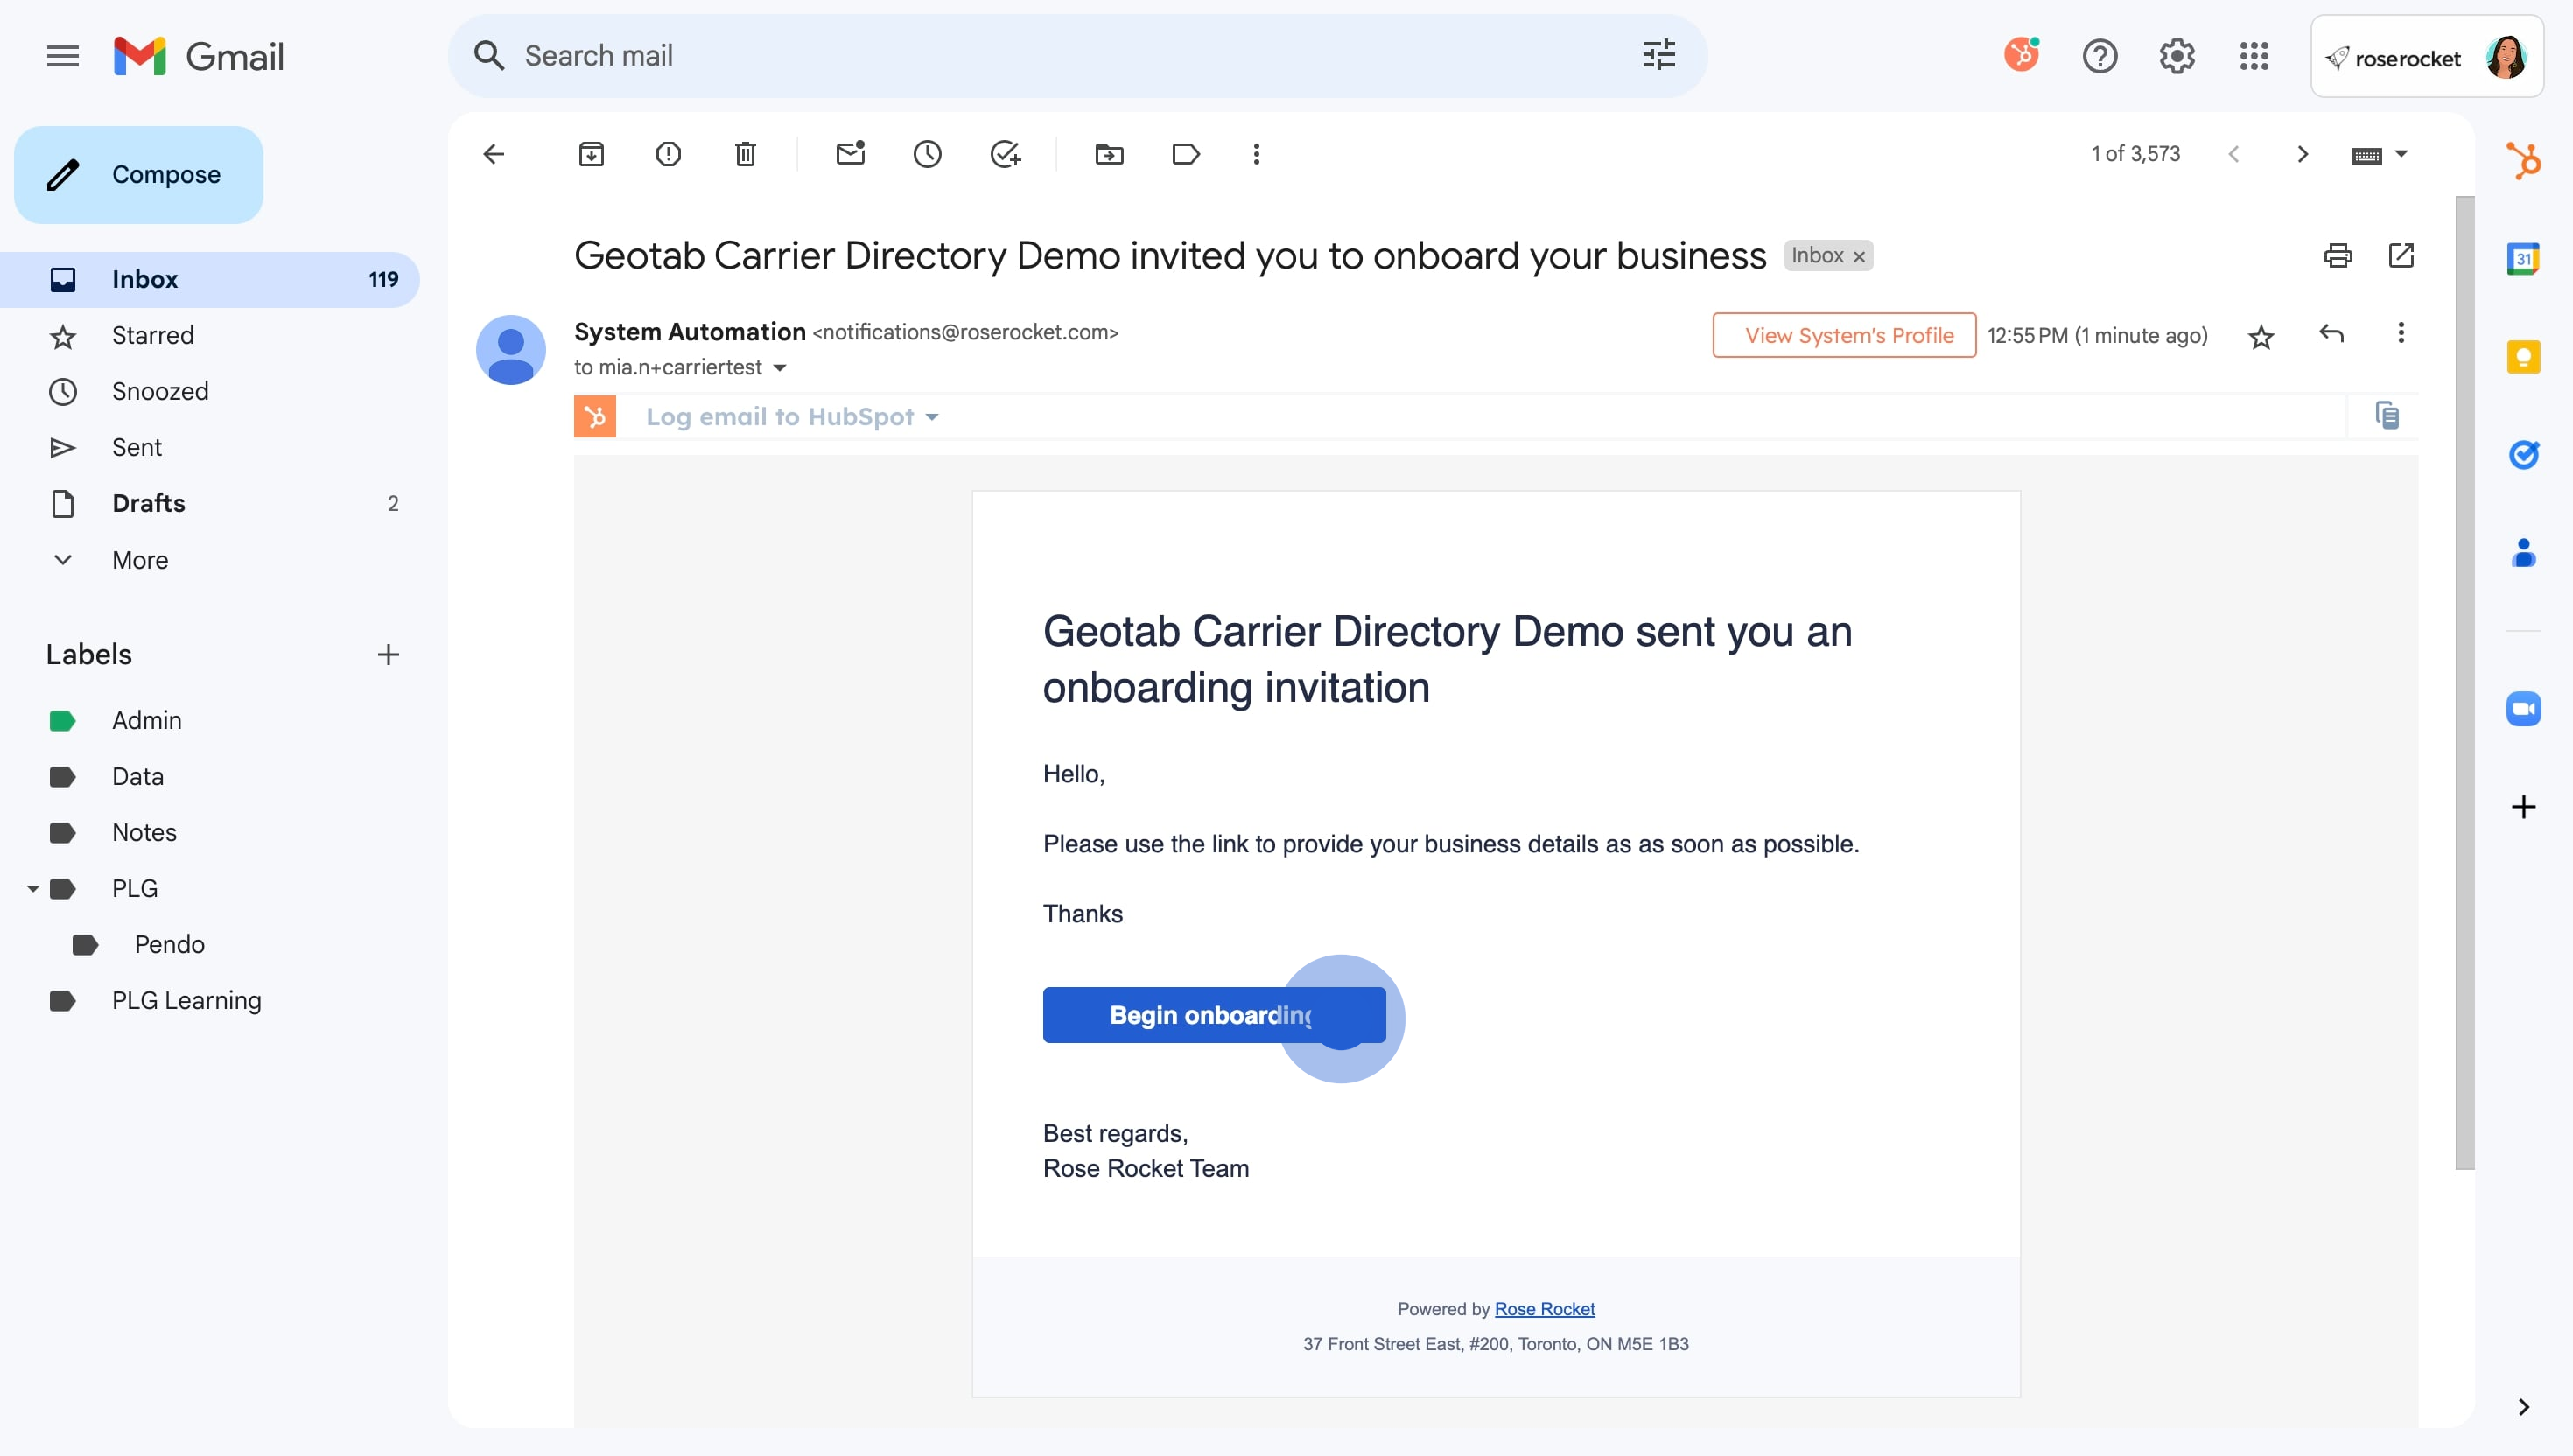
- Your carrier will receive an email that looks like the one below, click Begin Onboarding.
- They can follow the widgets that you have created to complete the carrier onboarding process.
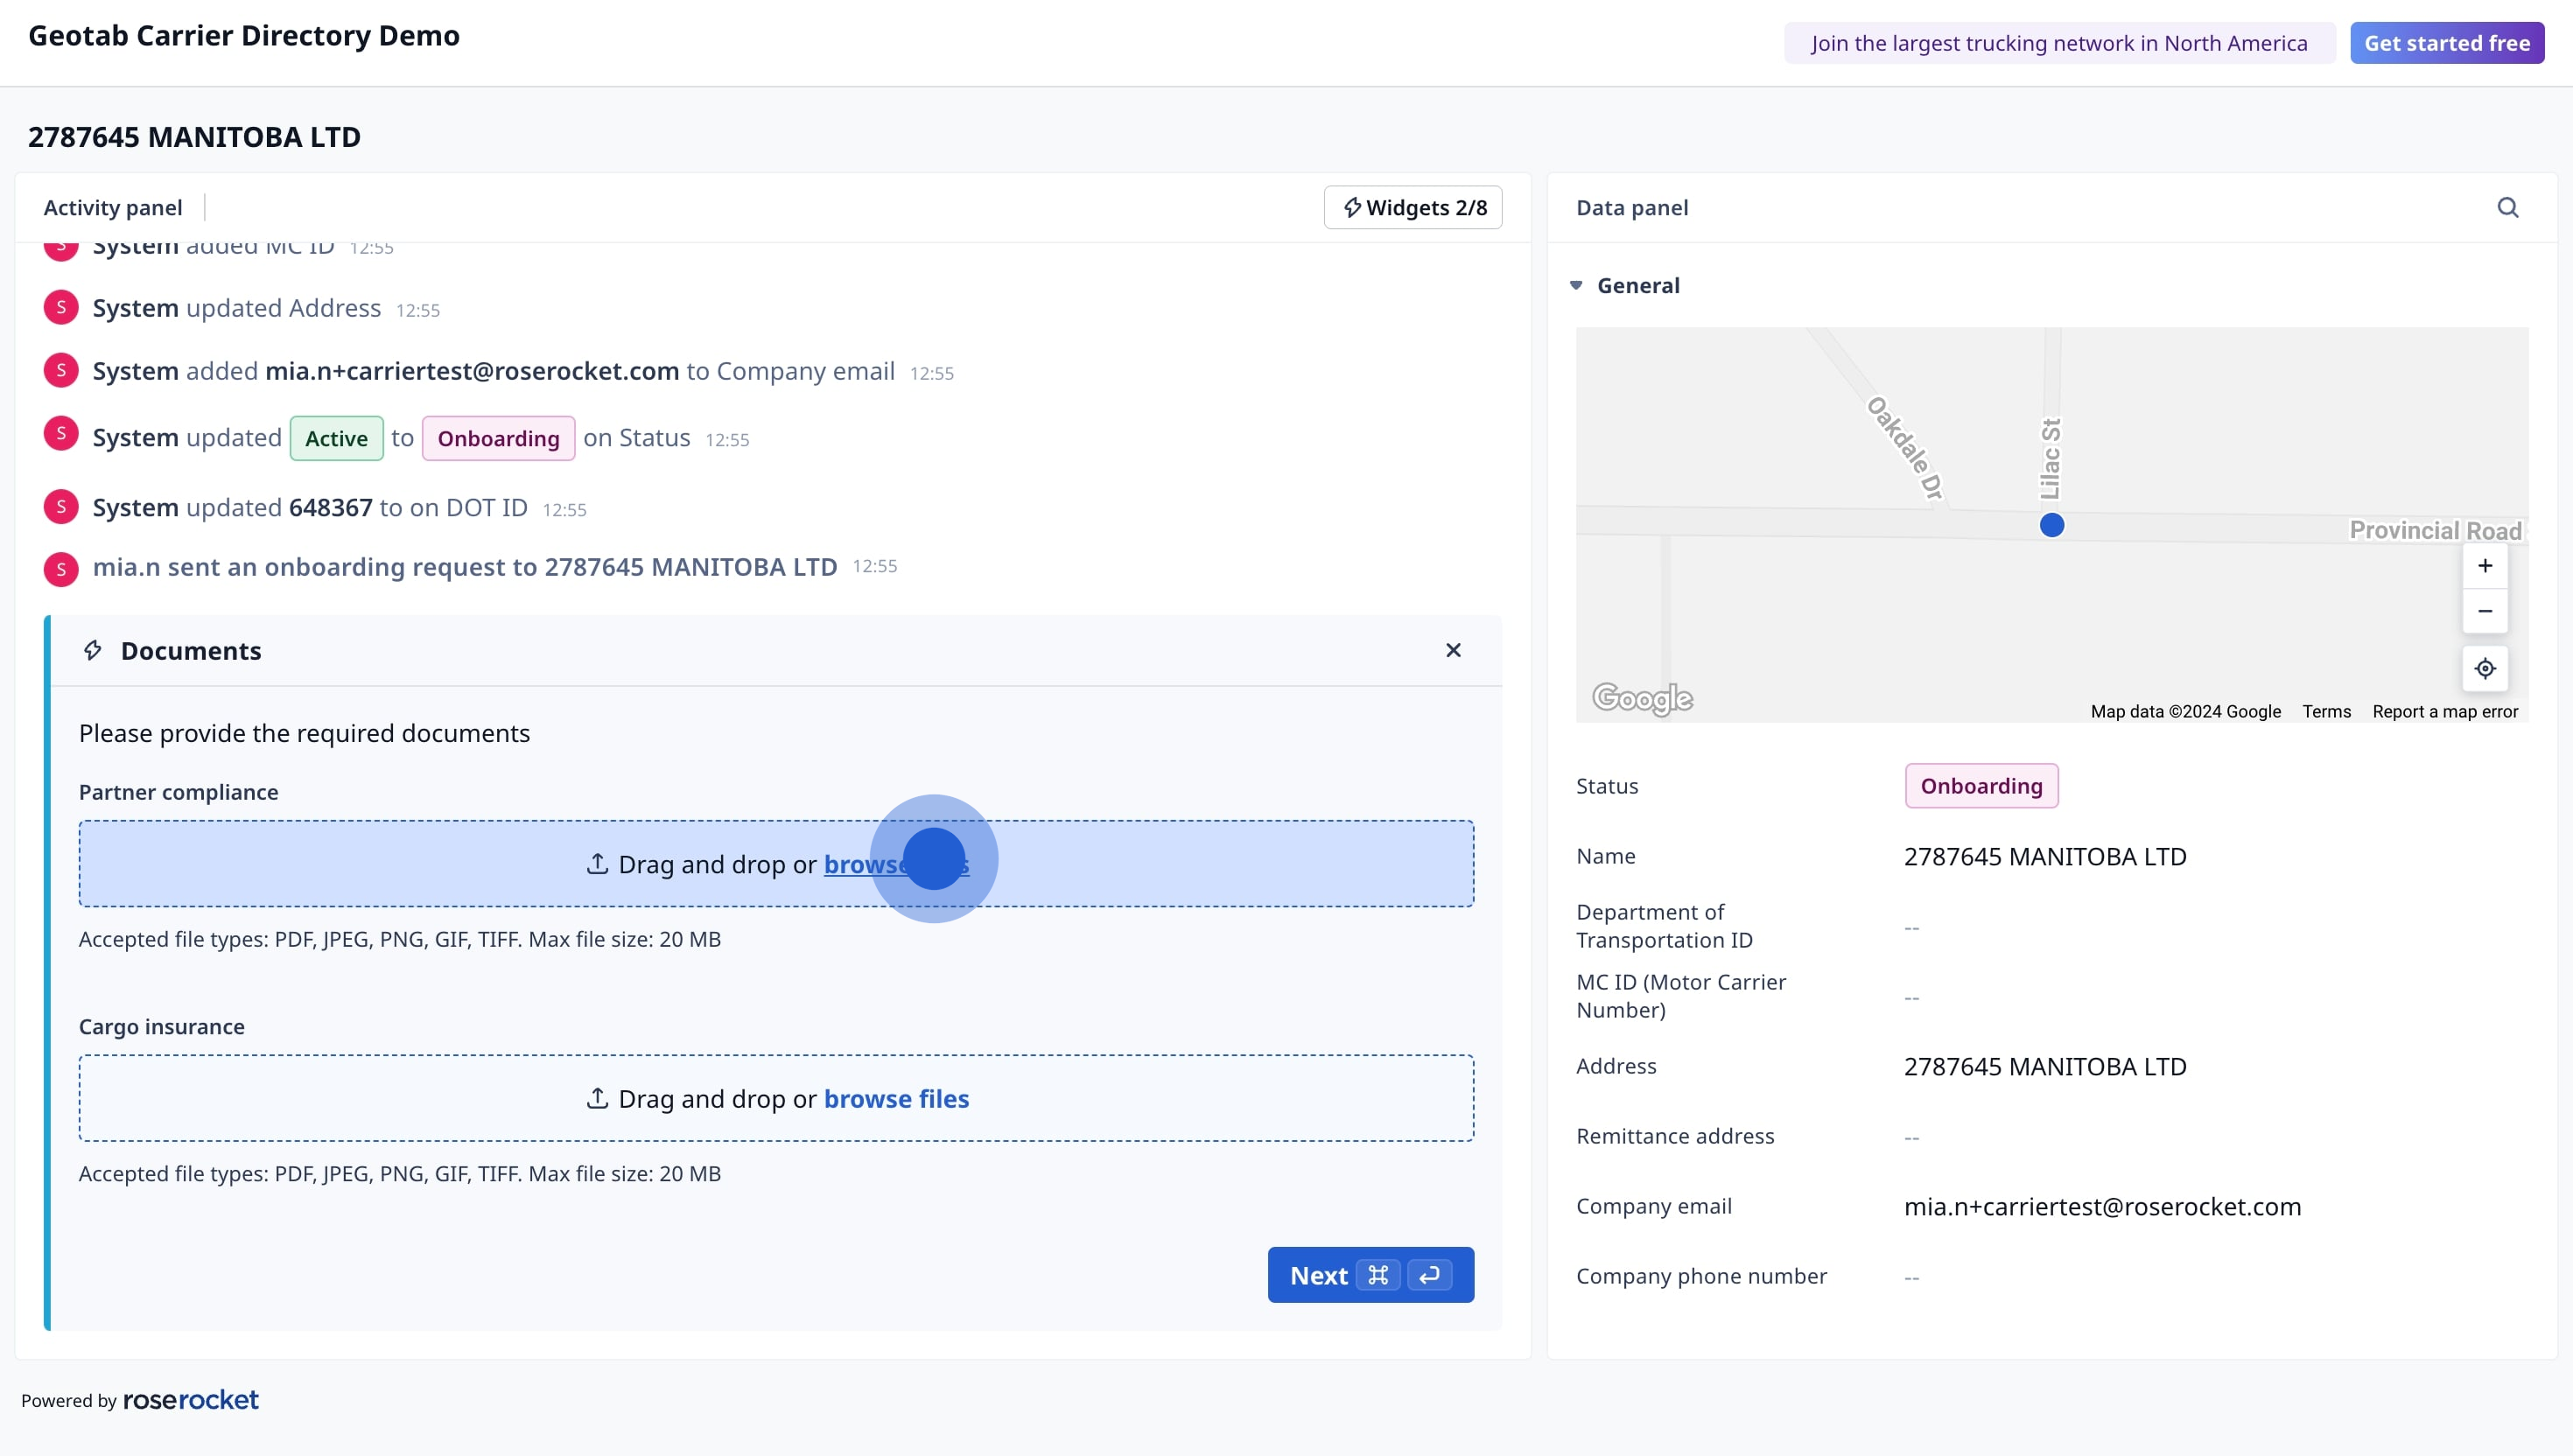
- Click on Next.
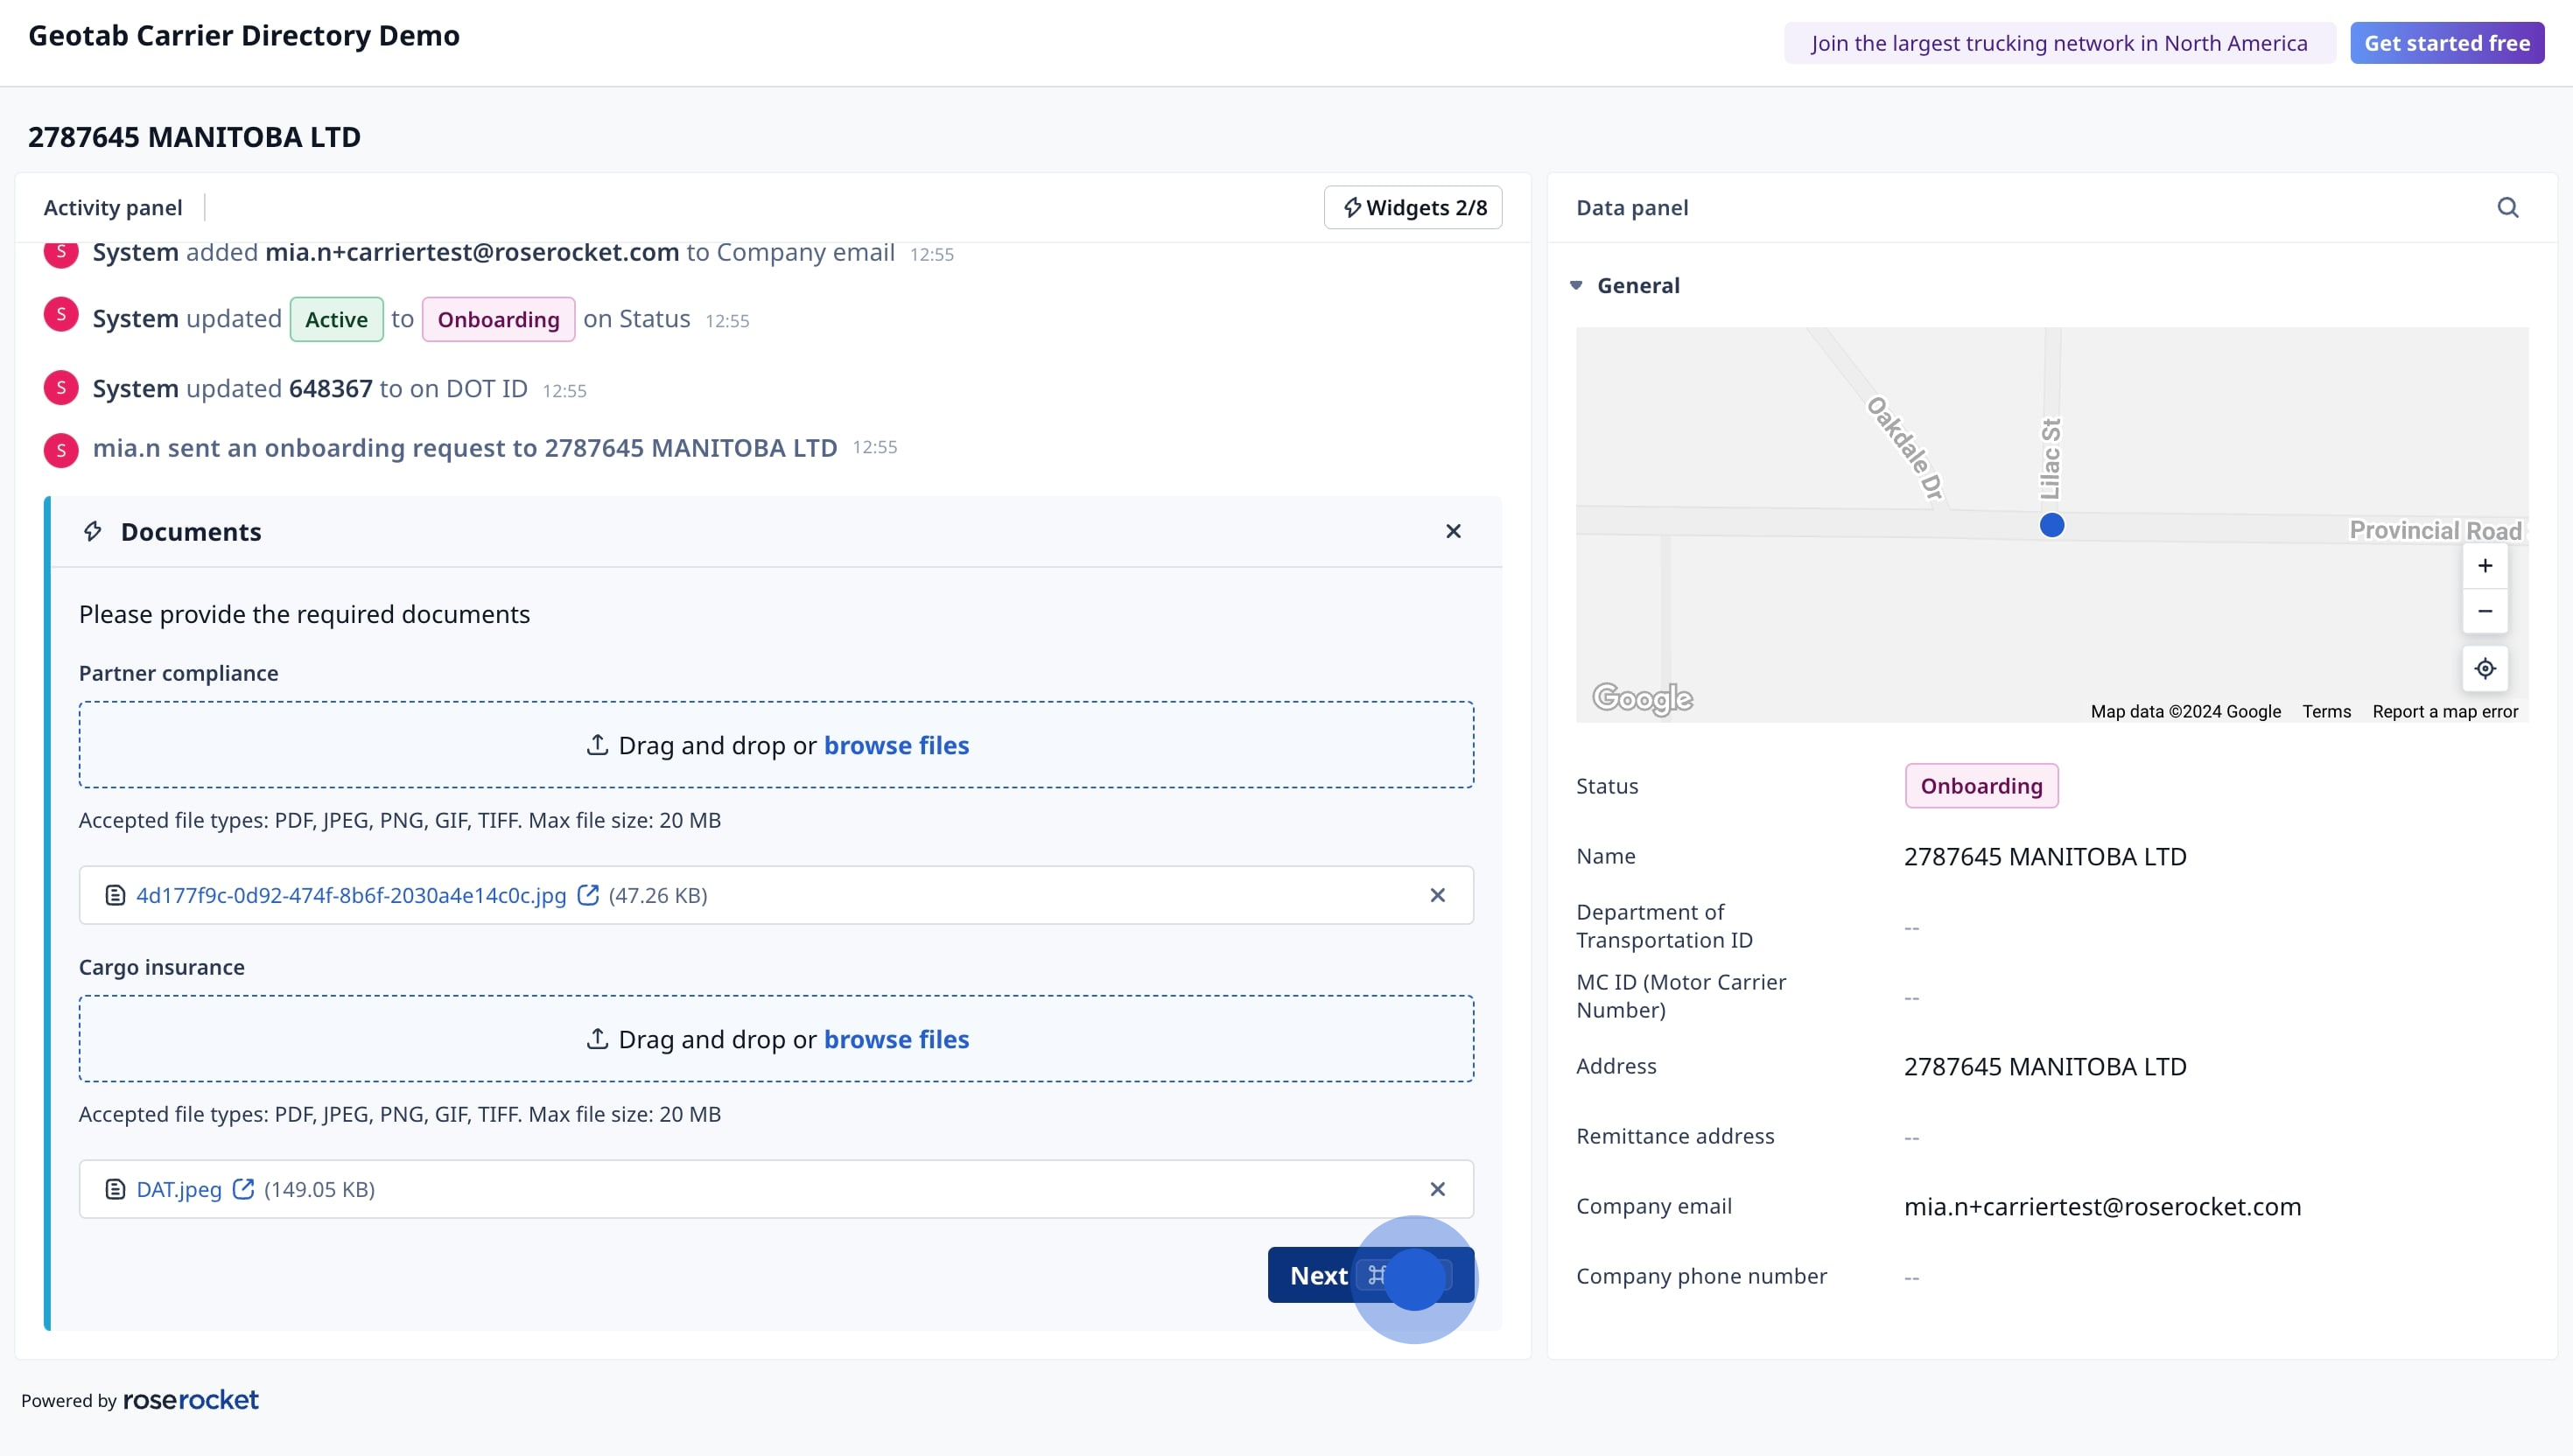
- Follow the widgets to complete the carrier onboarding flow.
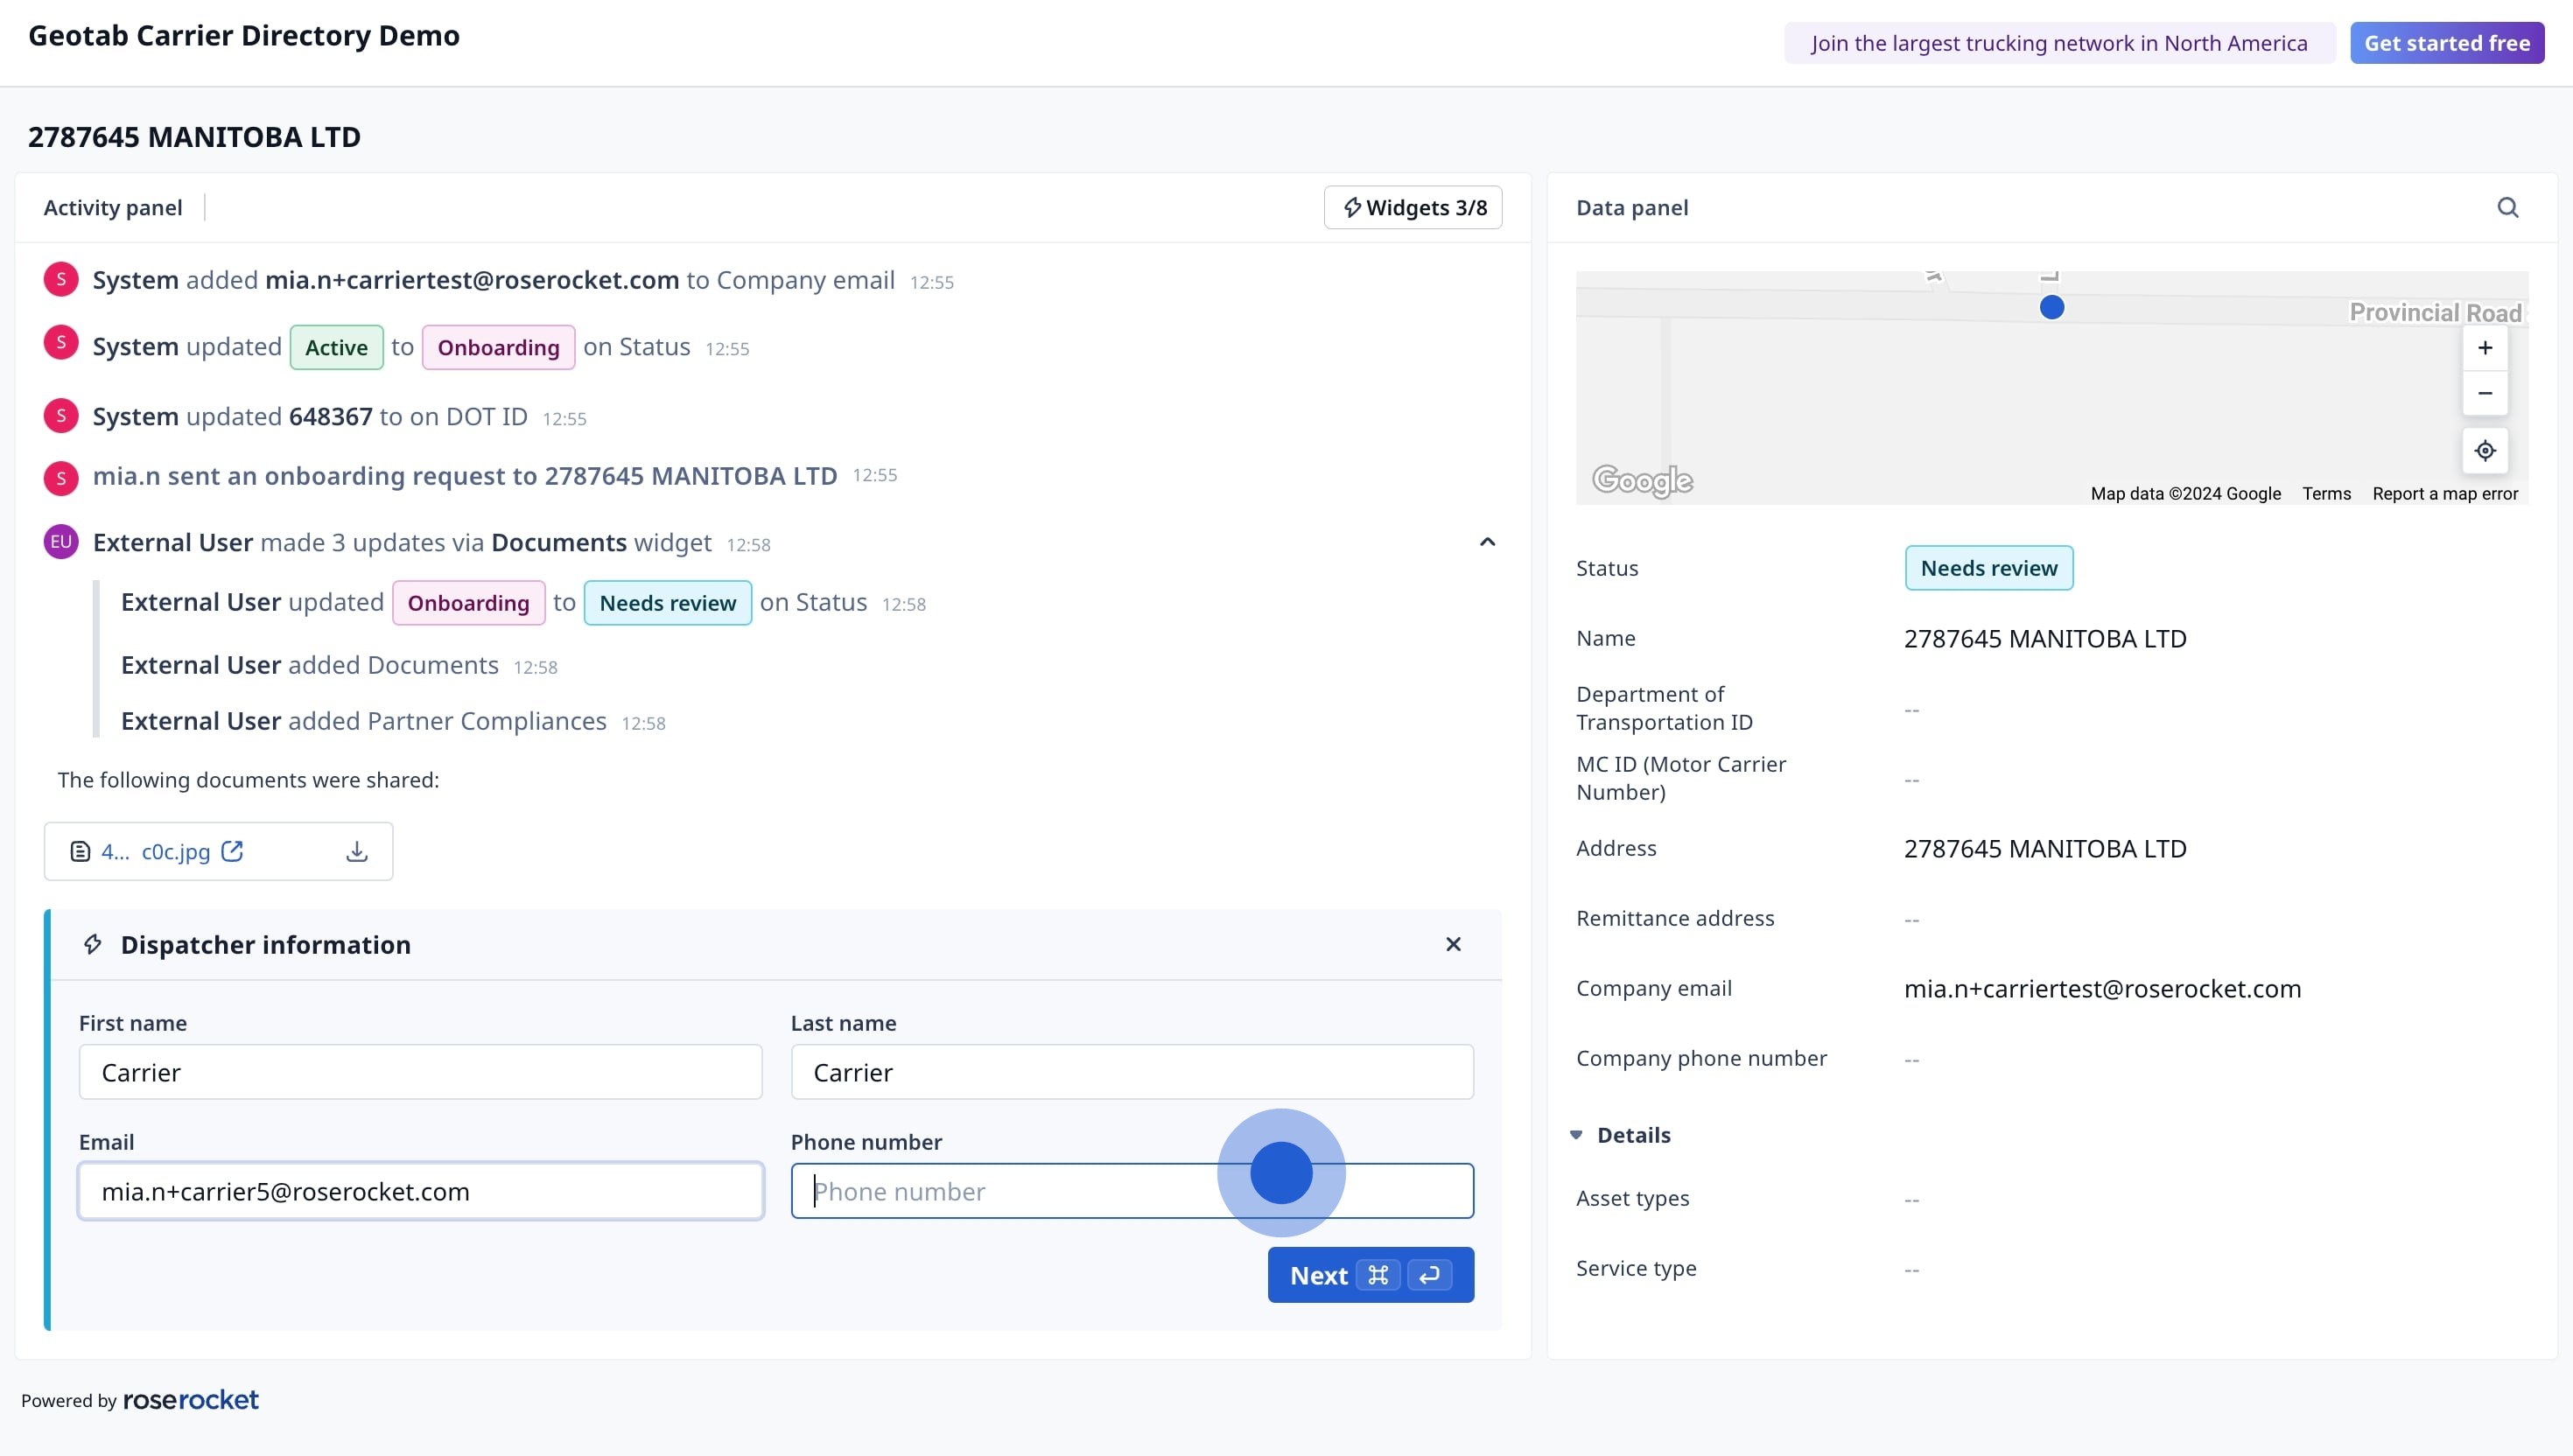
- Select Services.
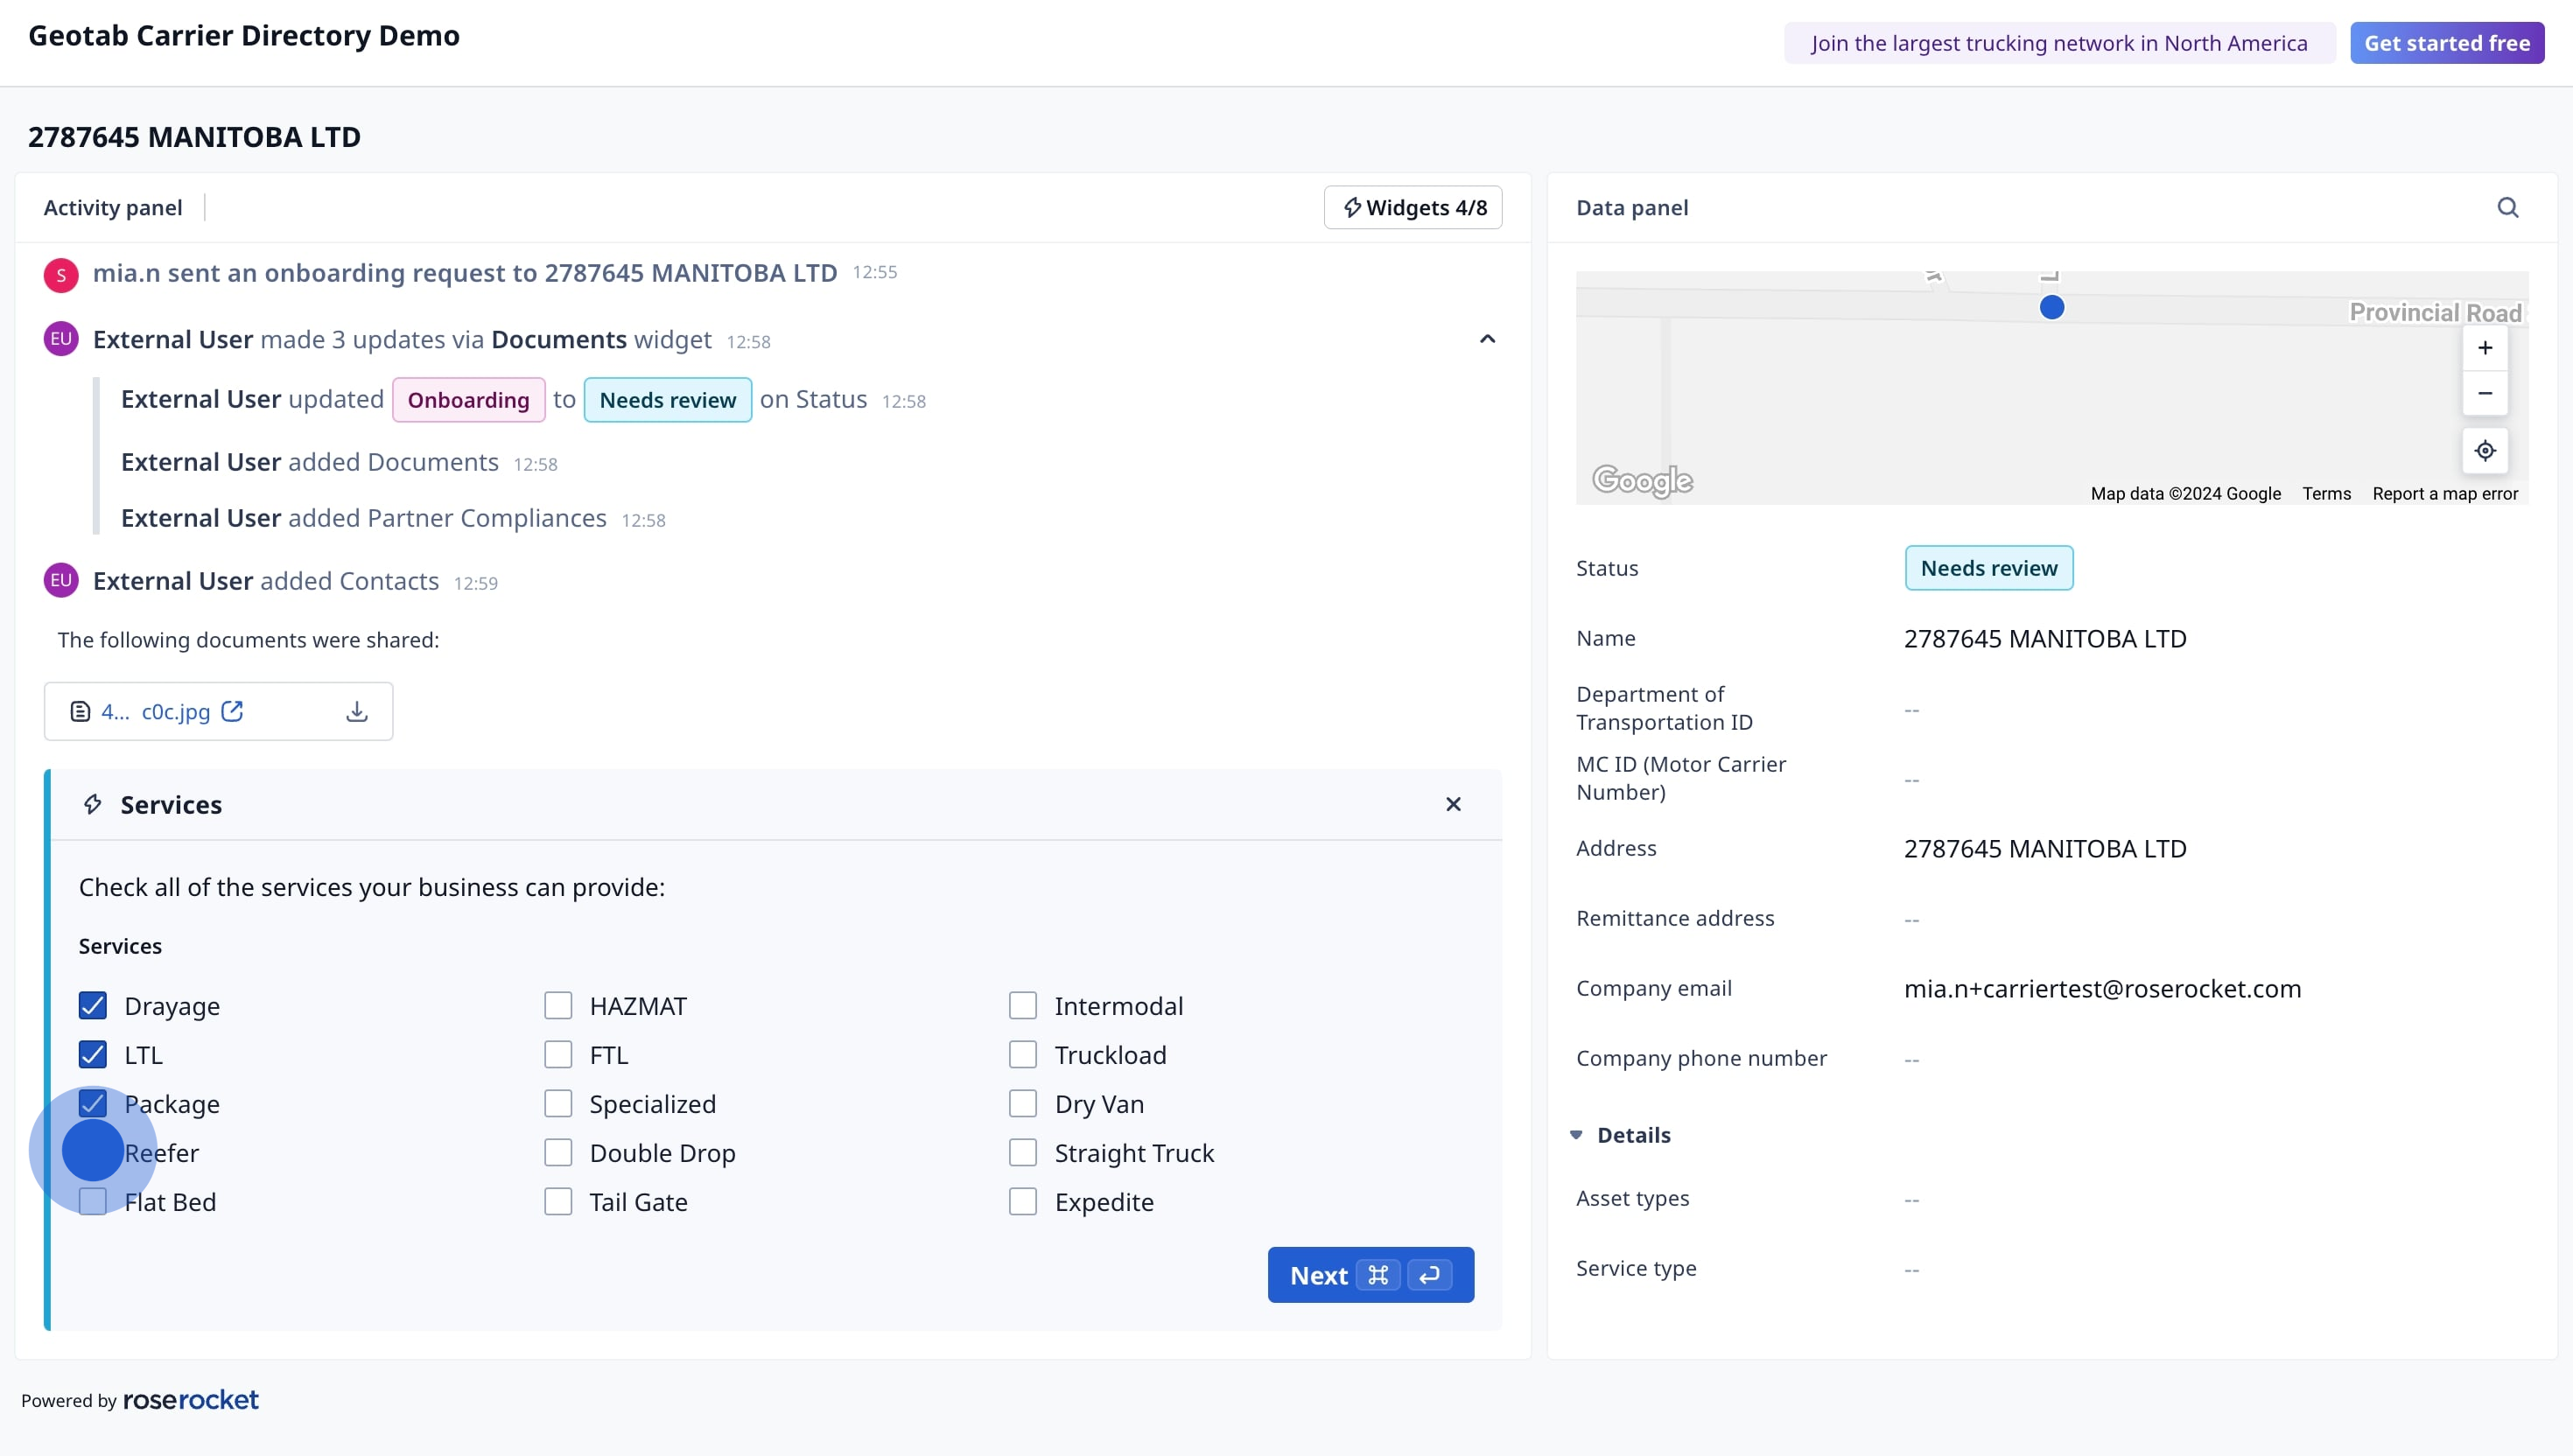
- Select Equipment.
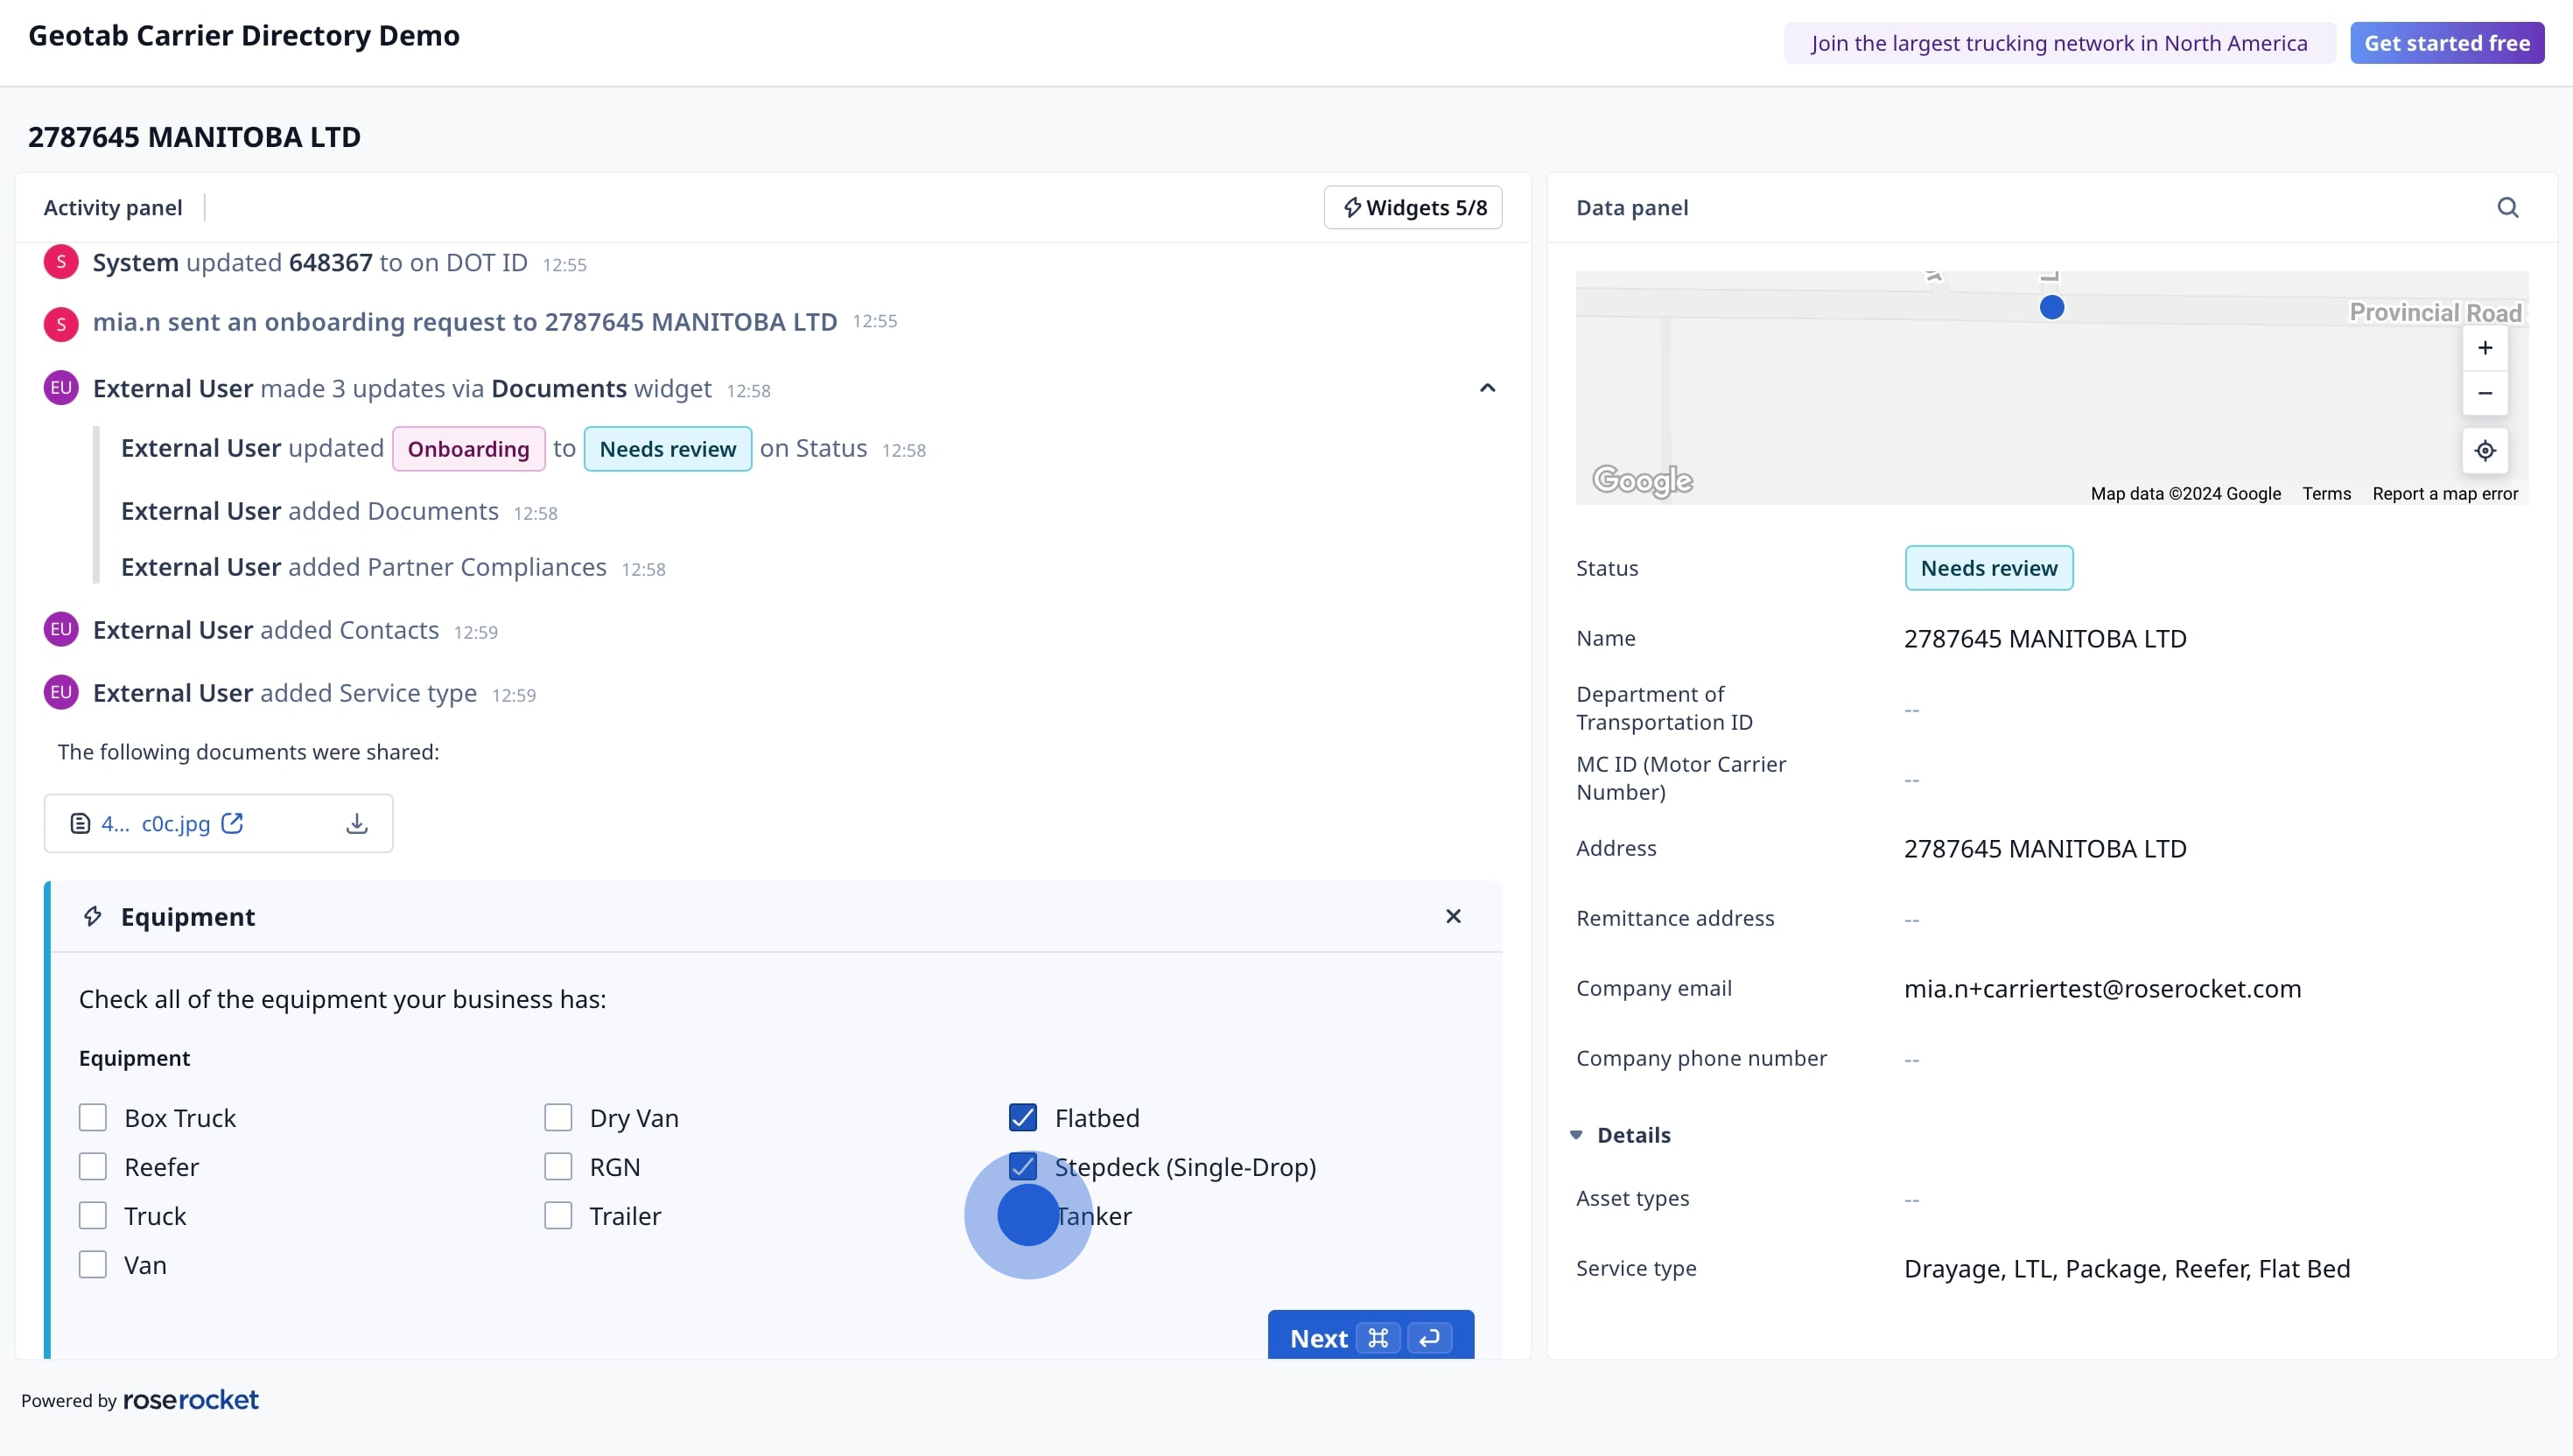
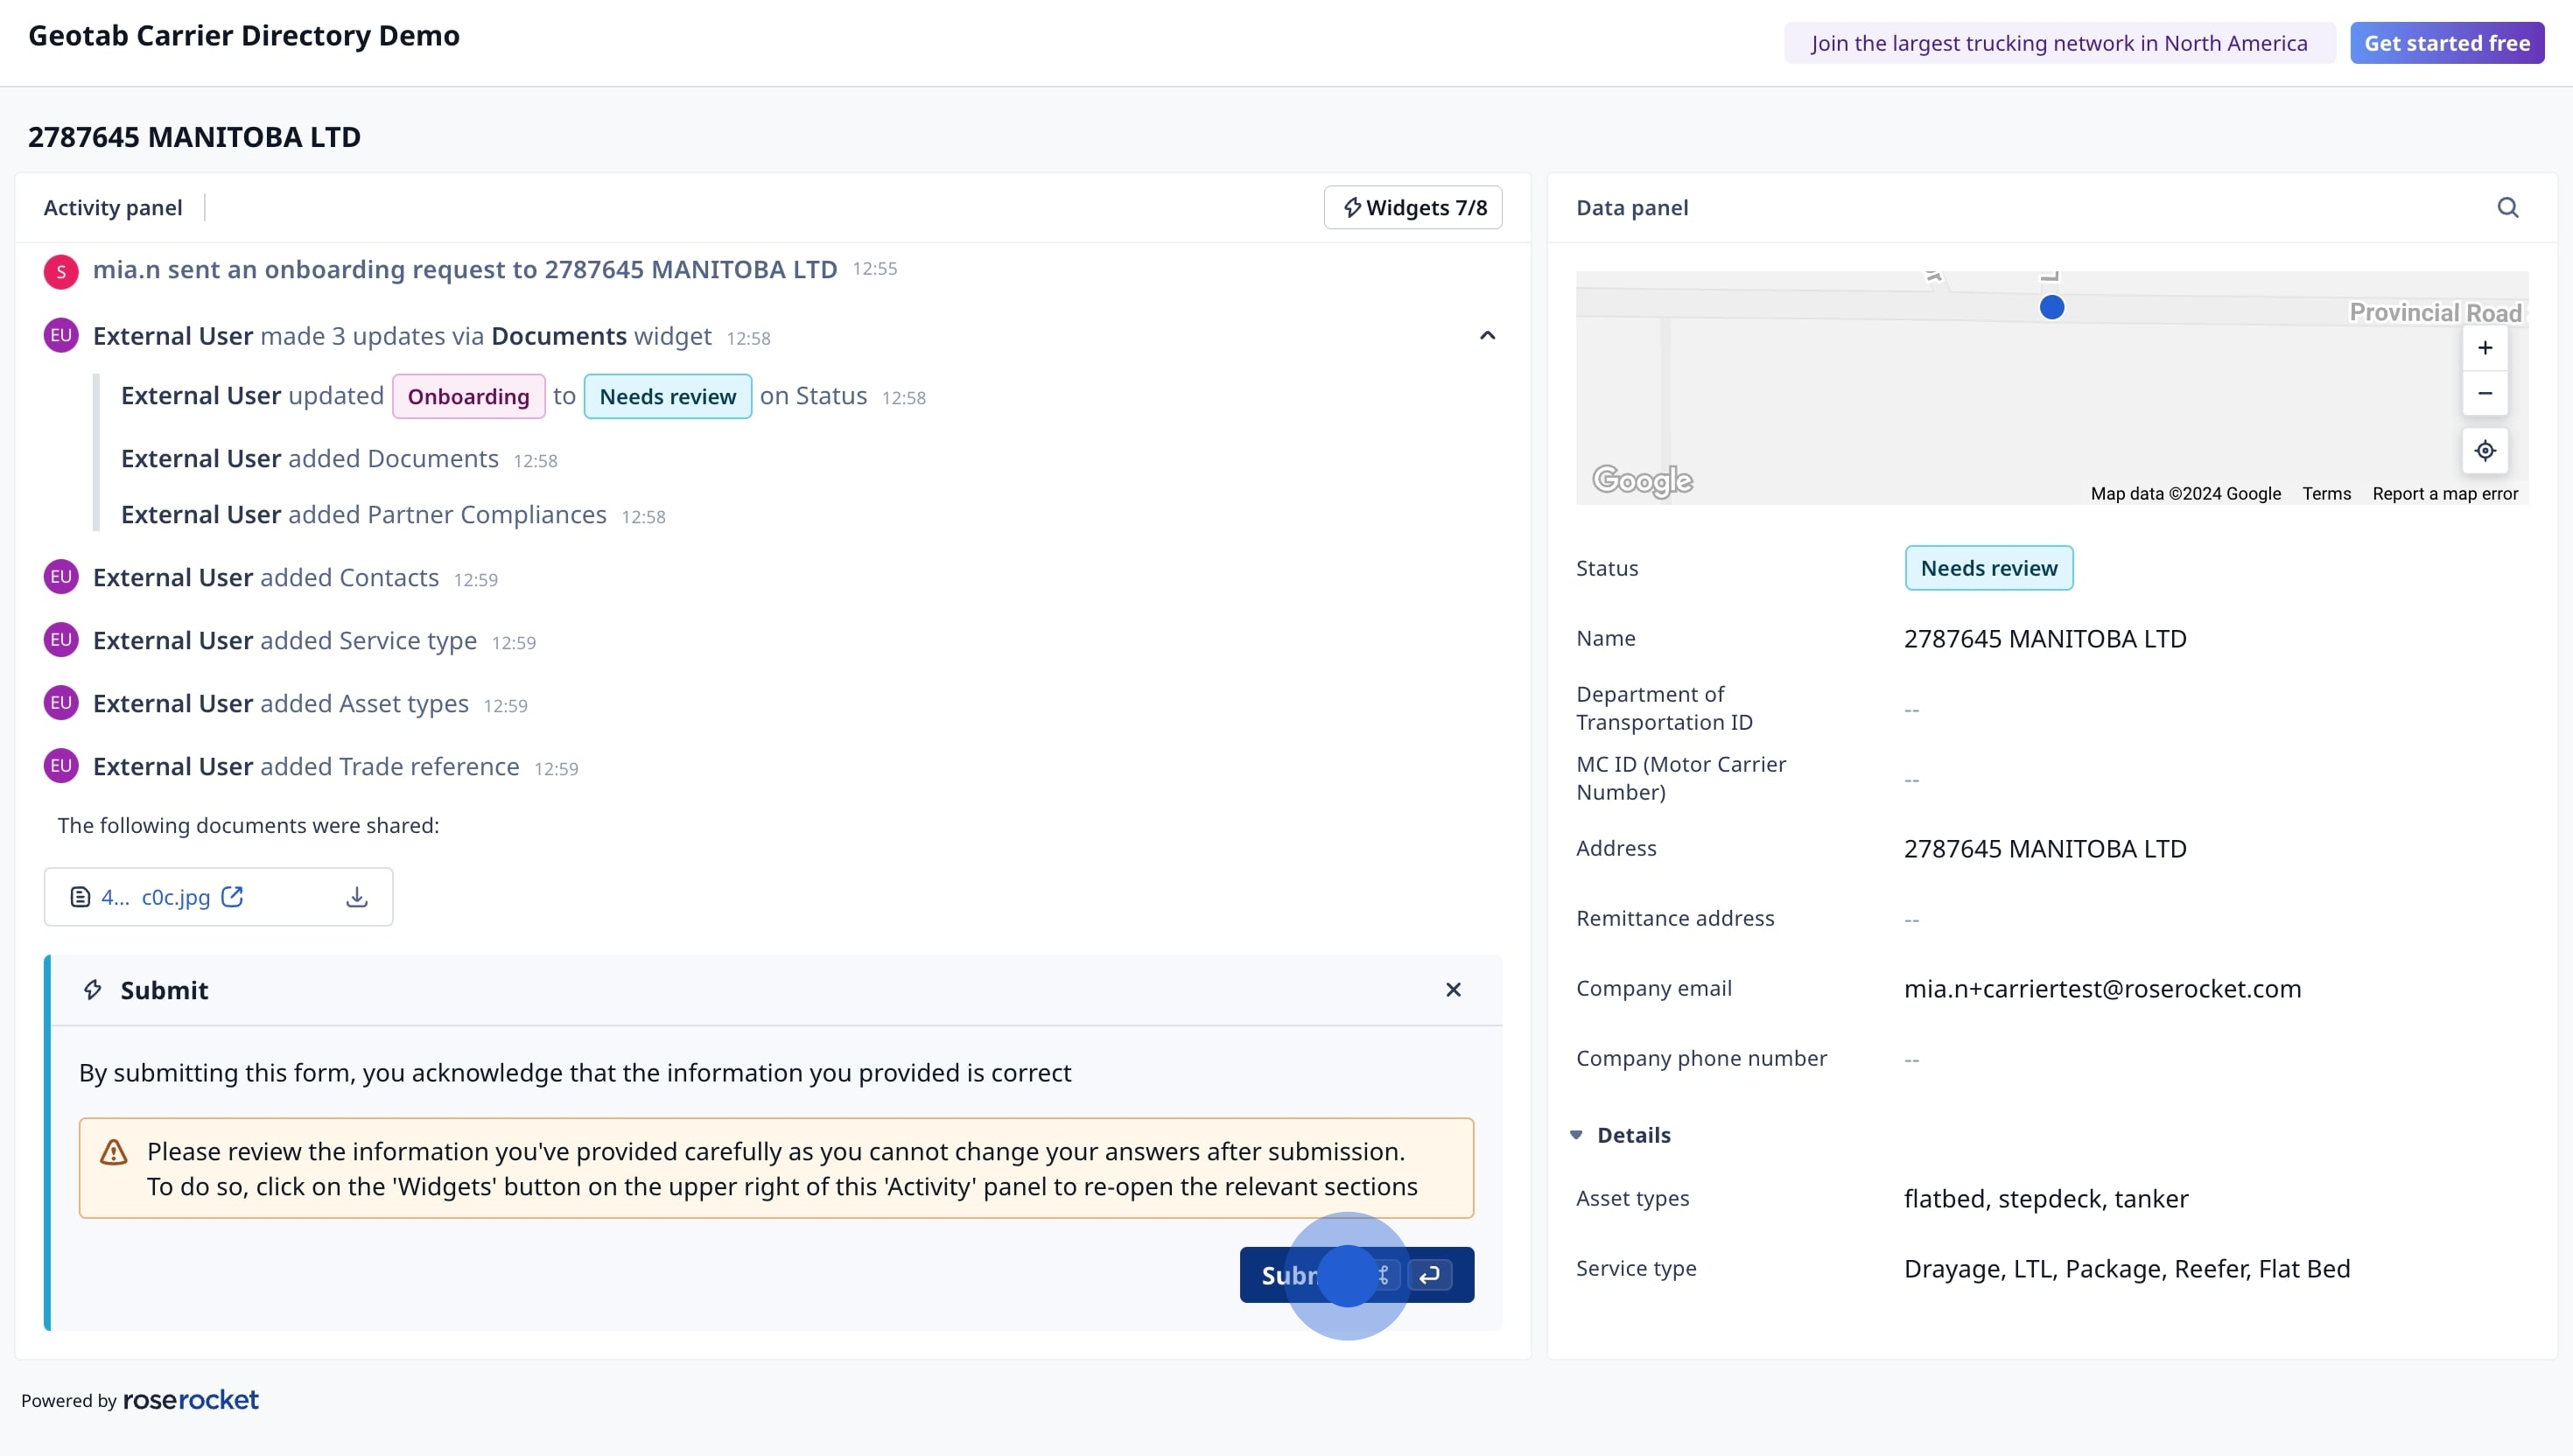
- Once the carrier fills out all the information, they can review once again in the Data Panel. Click Submit to confirm.
Step 6: Review carrier onboarding submissions
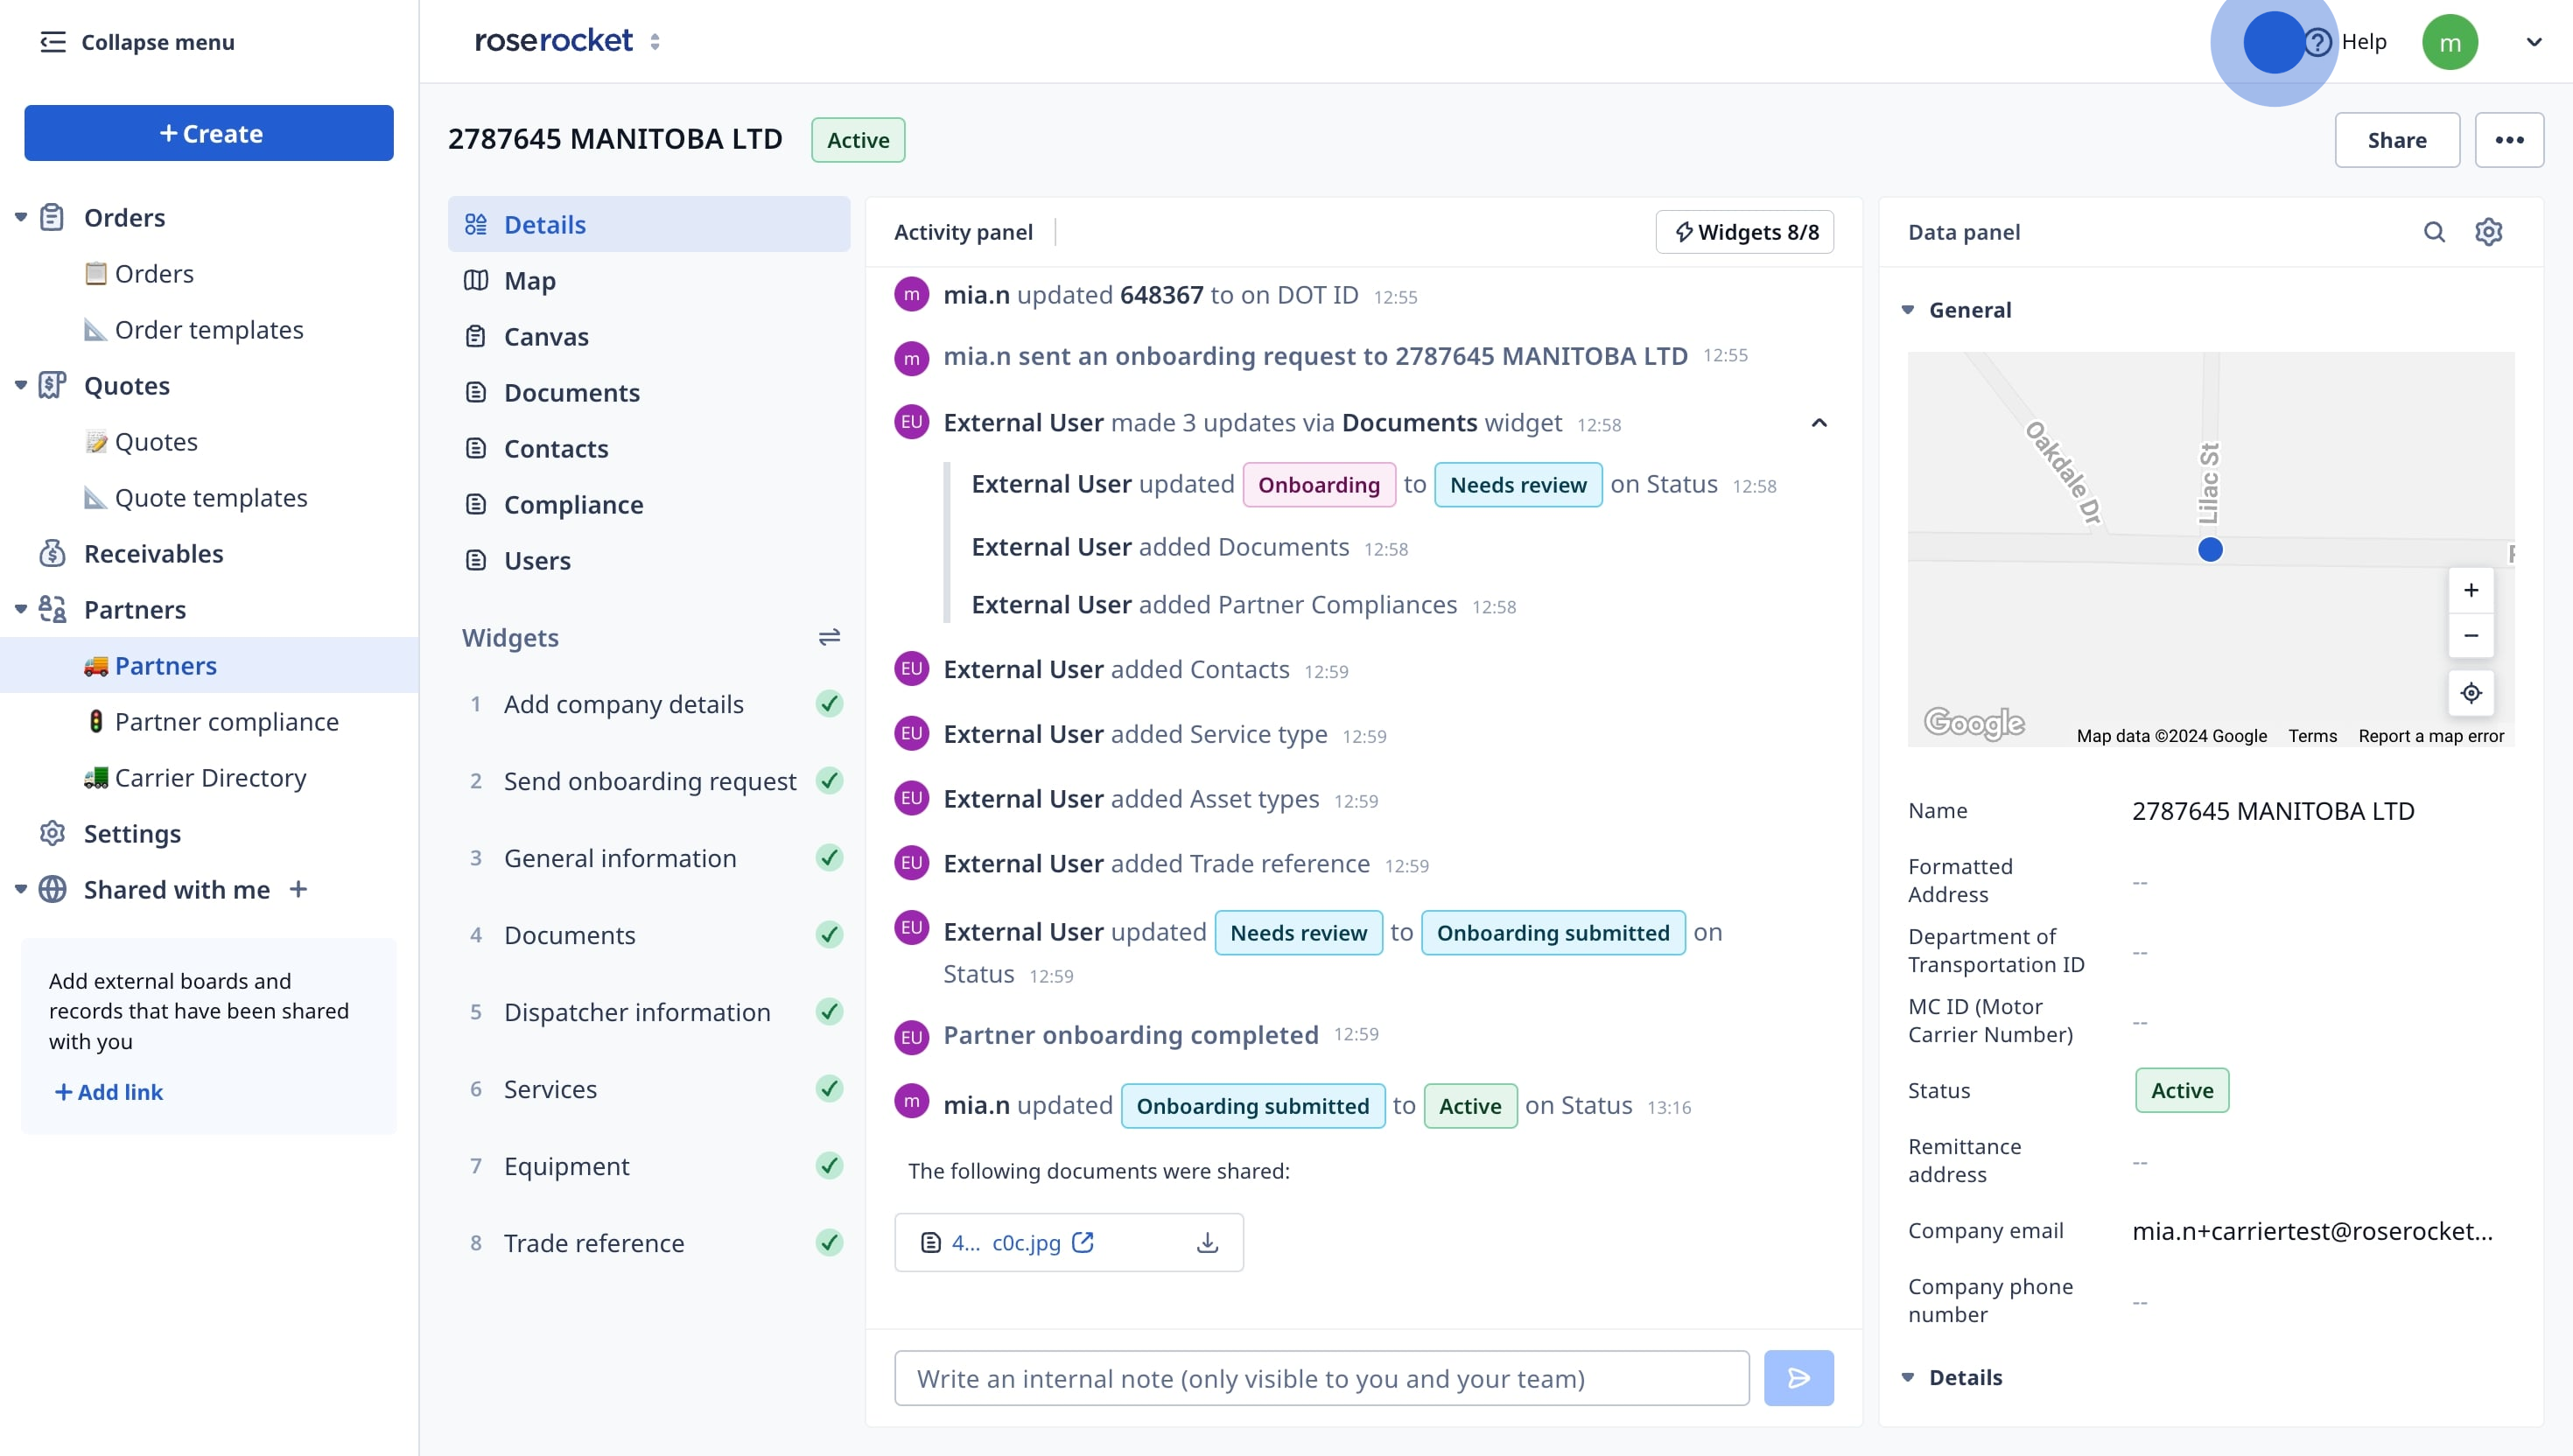
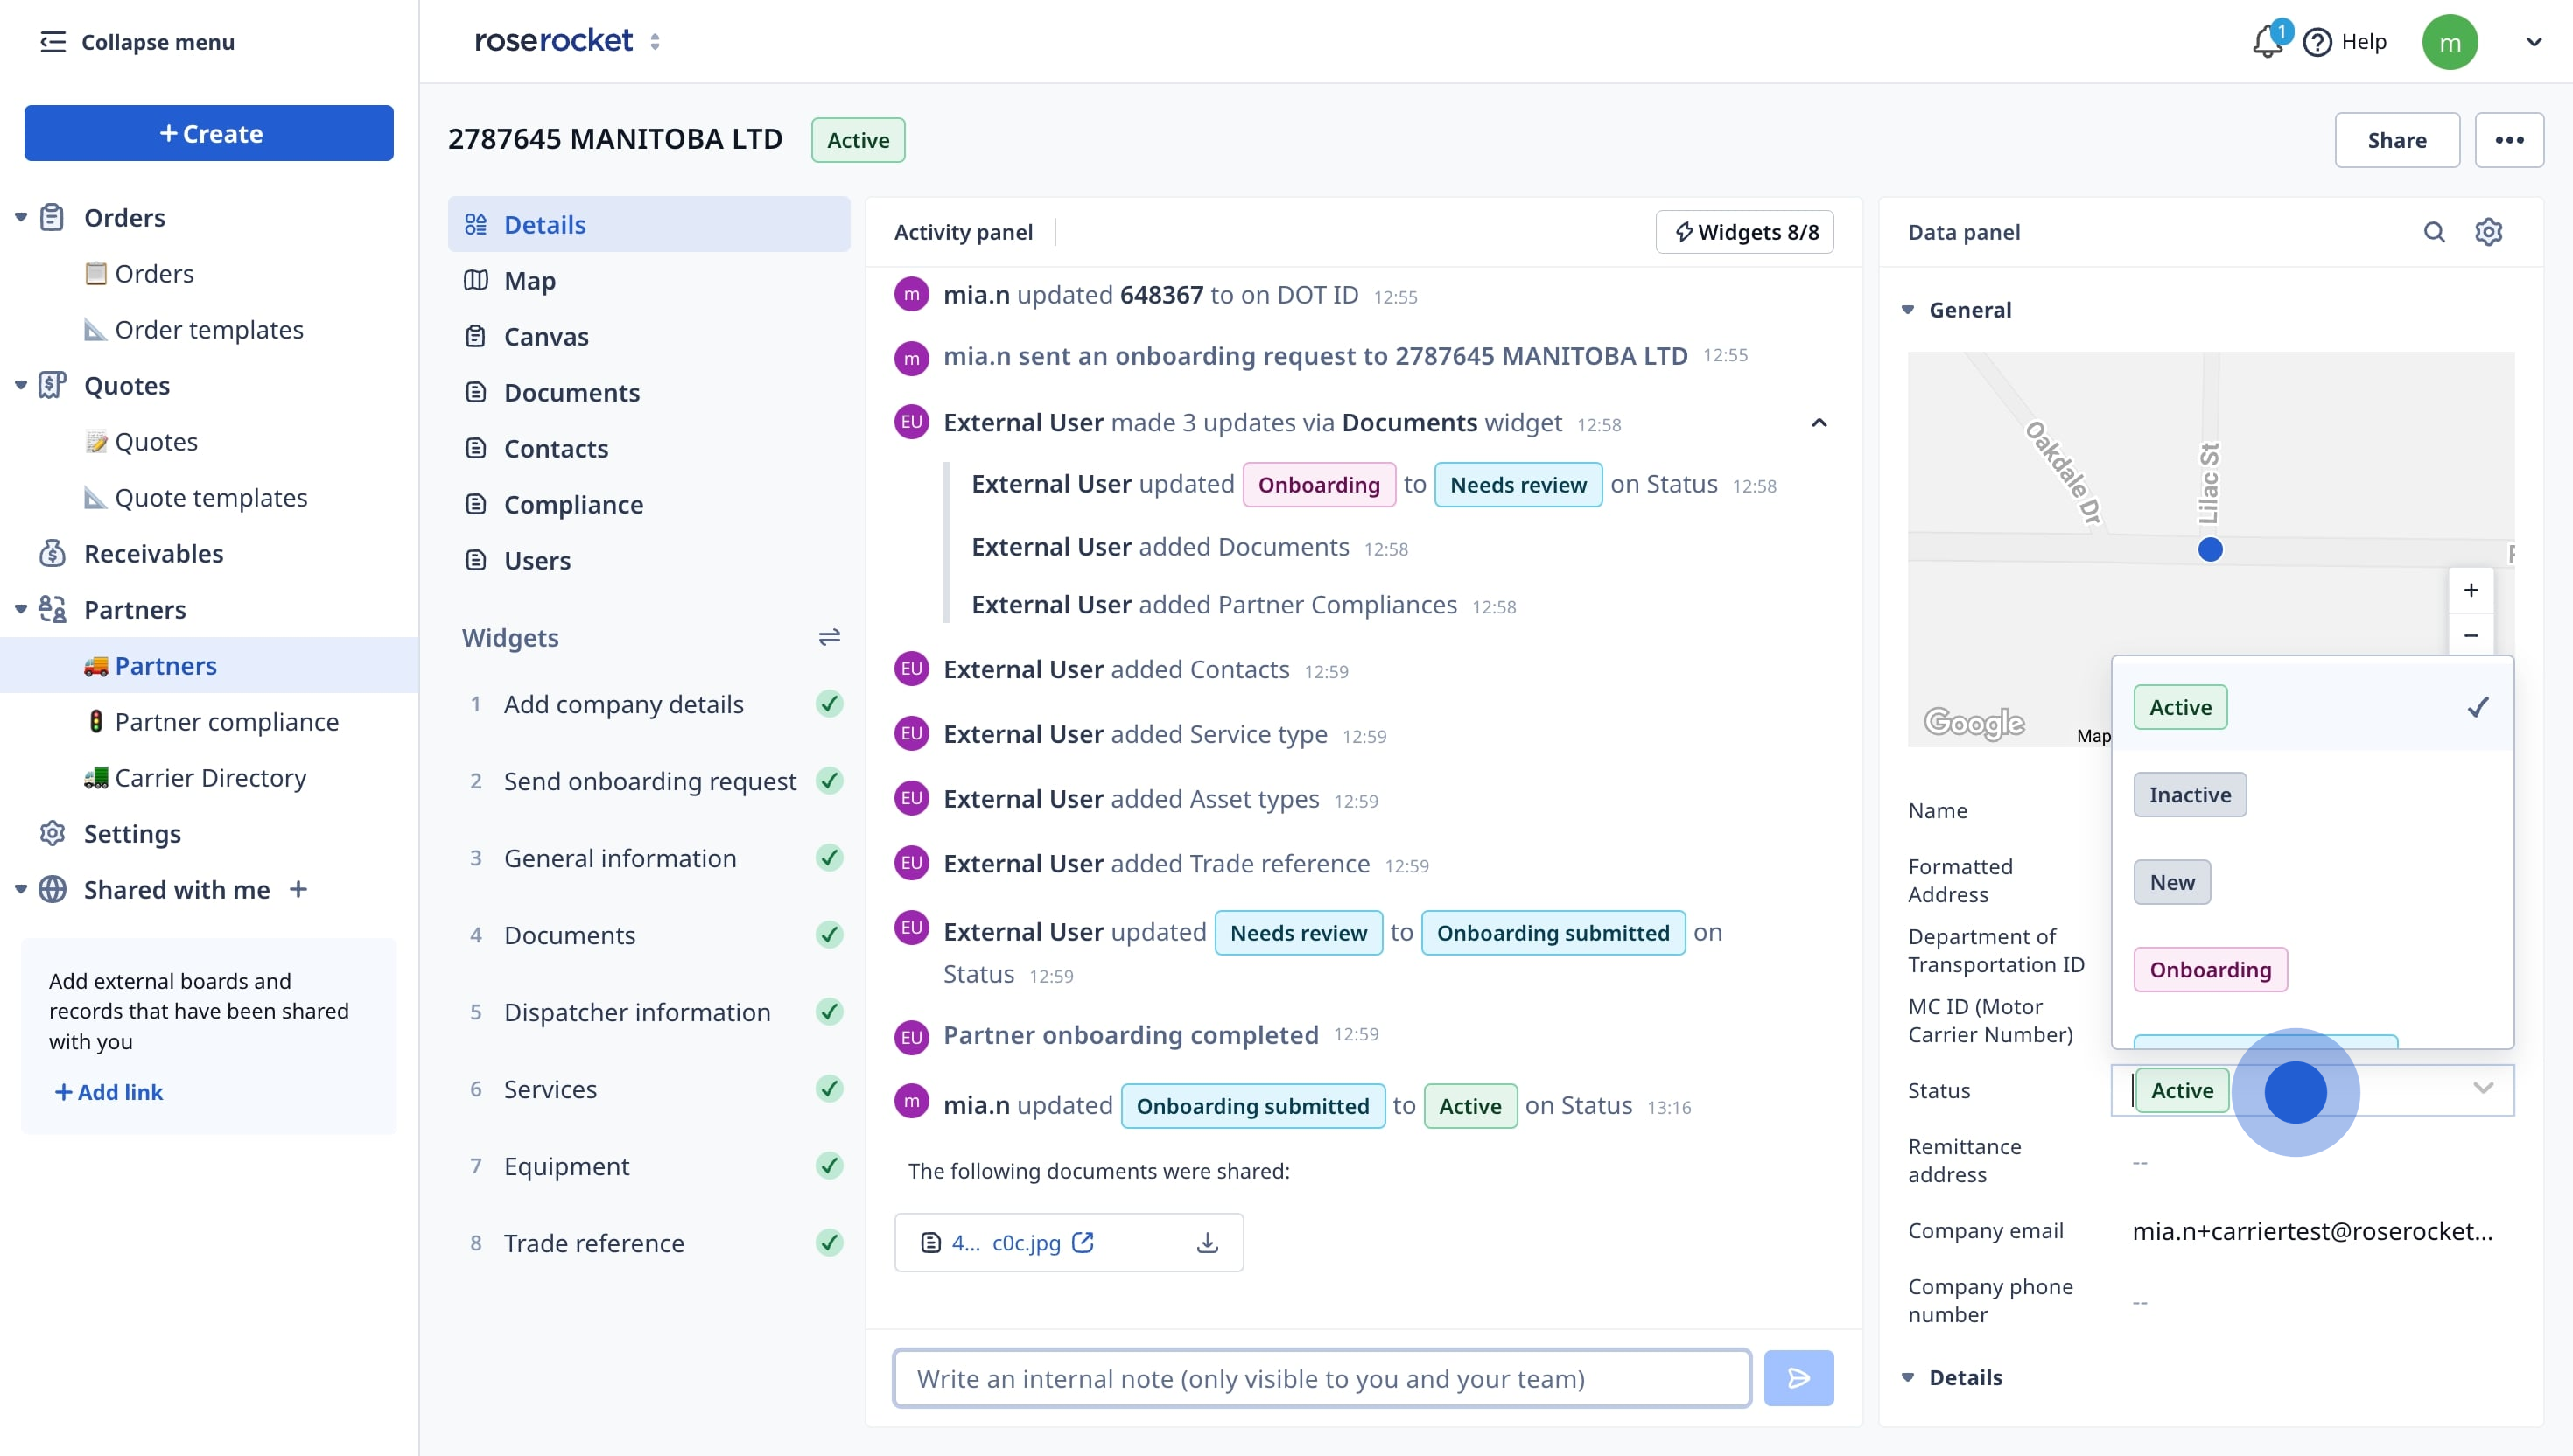
- Updates to the onboarding progress will appear in the Activity Panel.
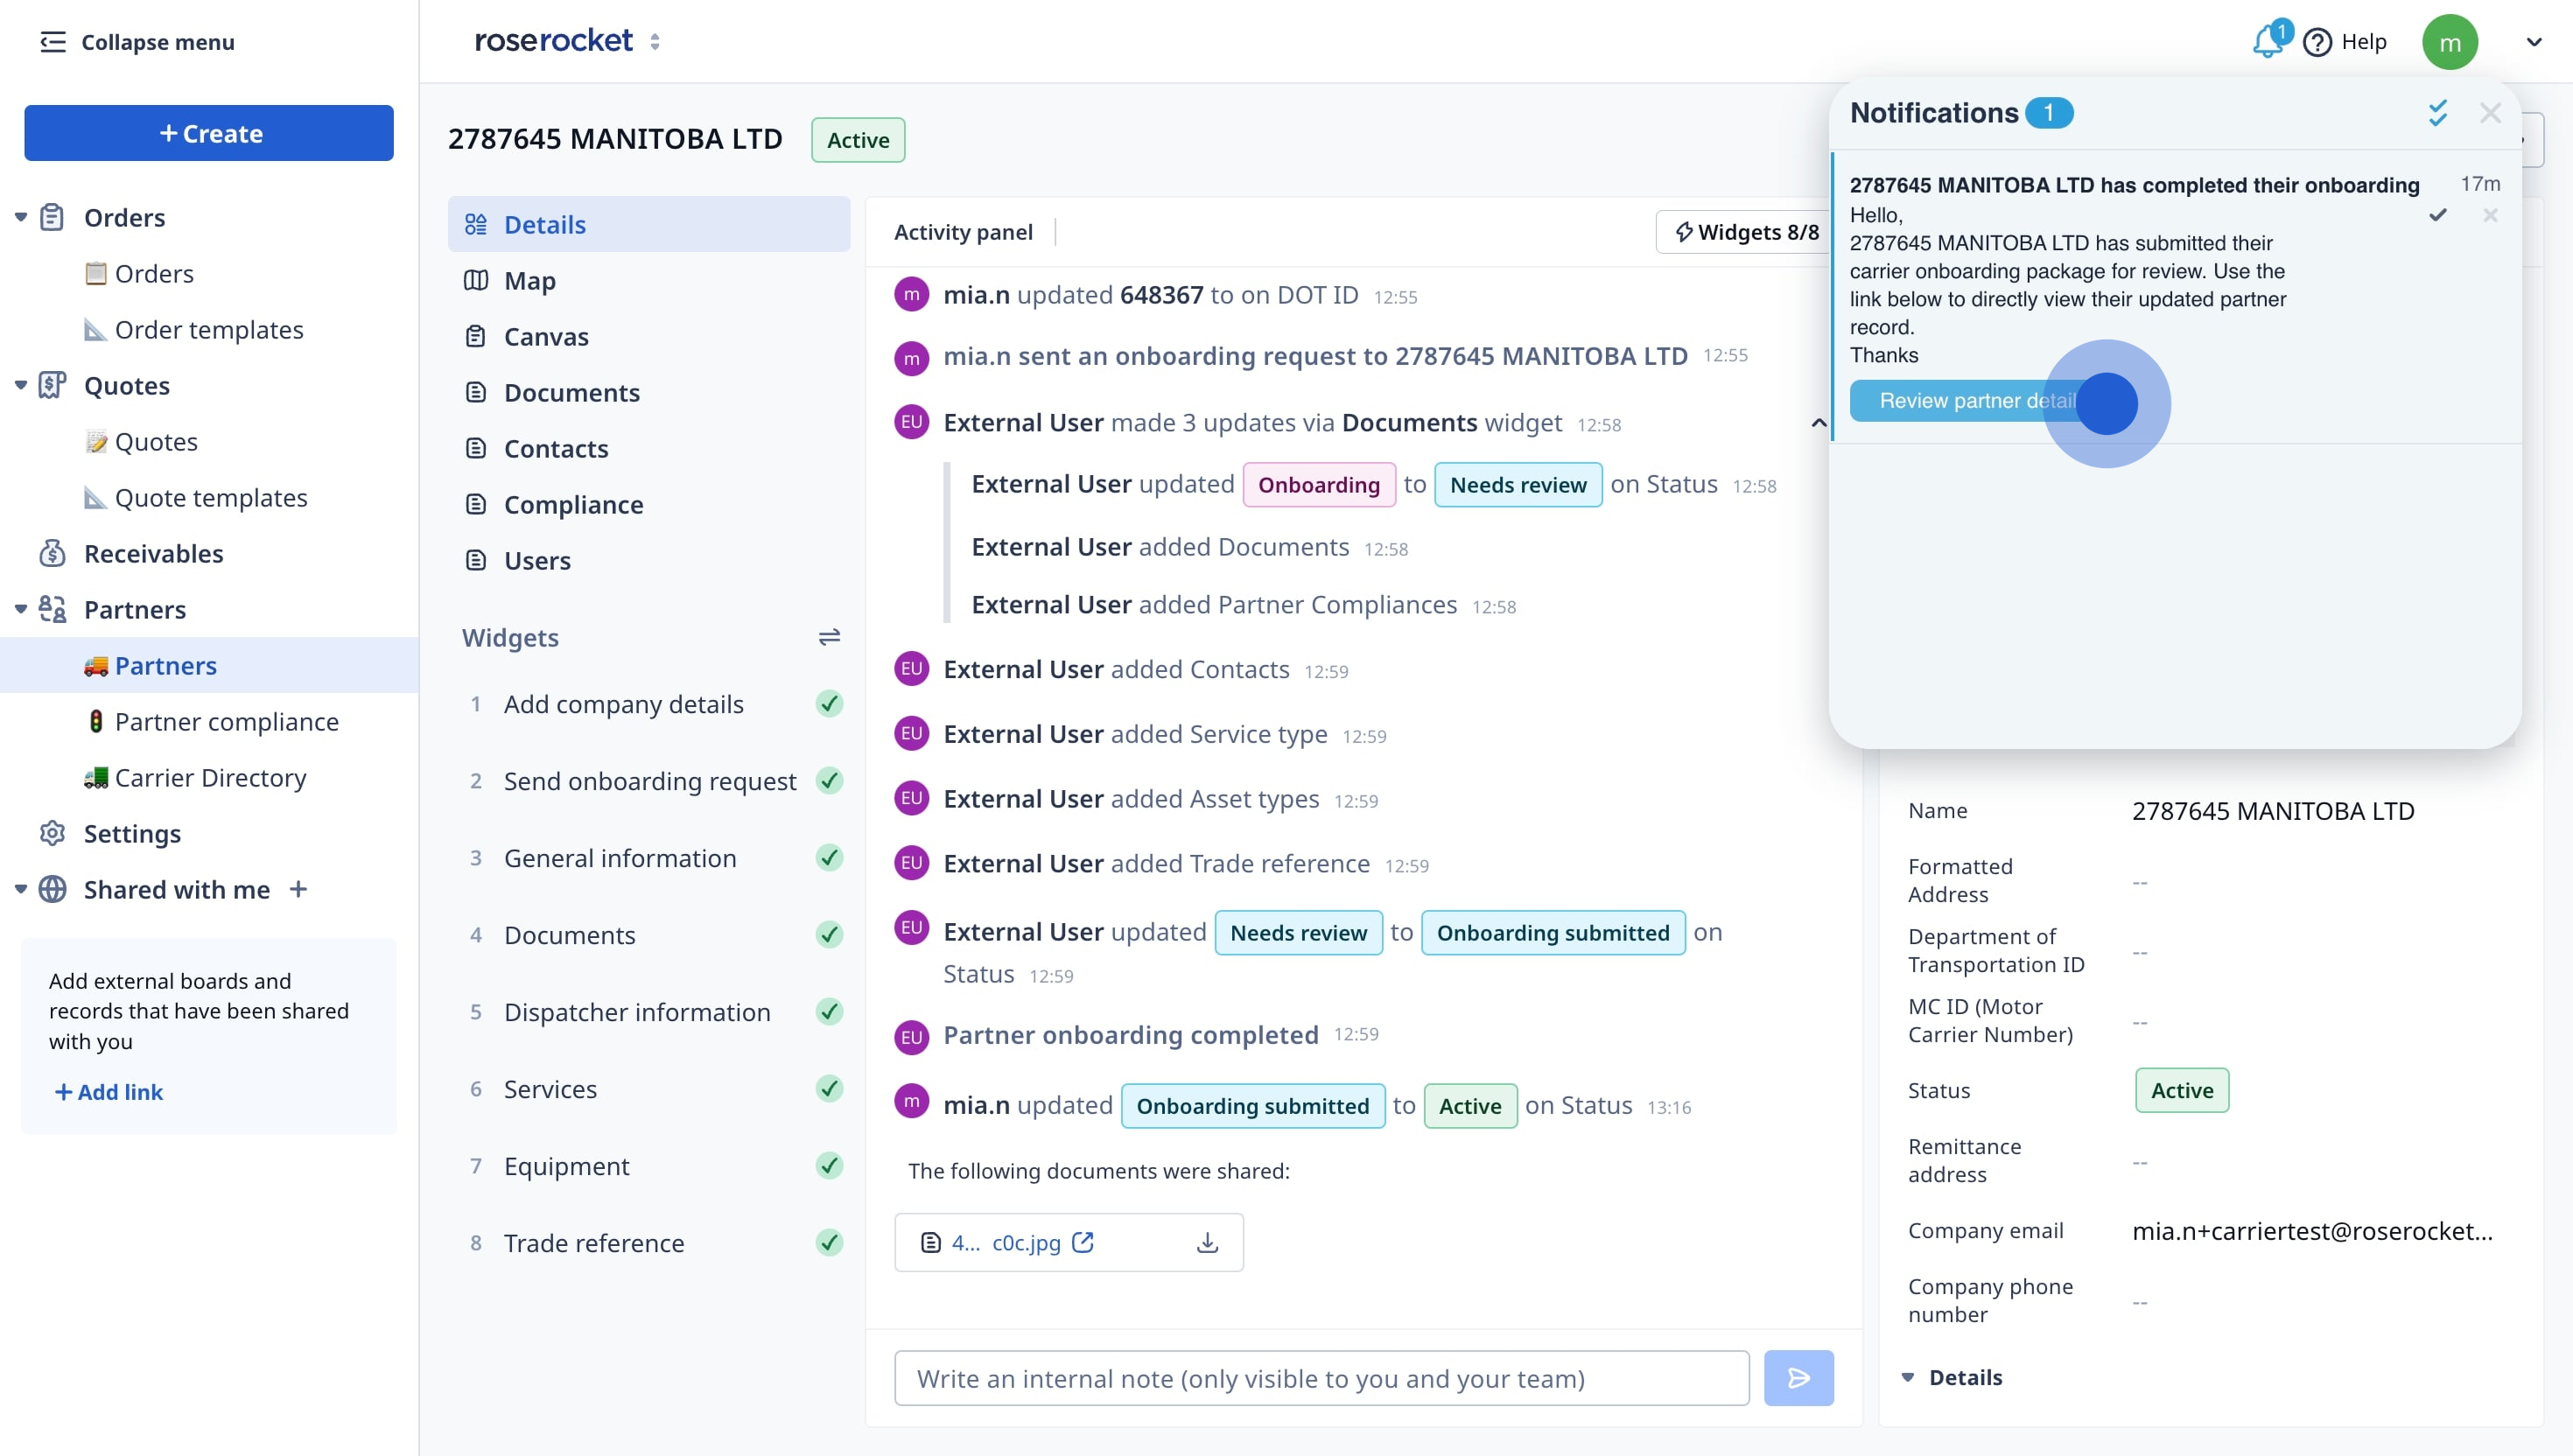
- If you've enabled notifications, you'll also receive an in-app notification bell or over email whenever the carrier has completed their onboarding, click "Review partner details".
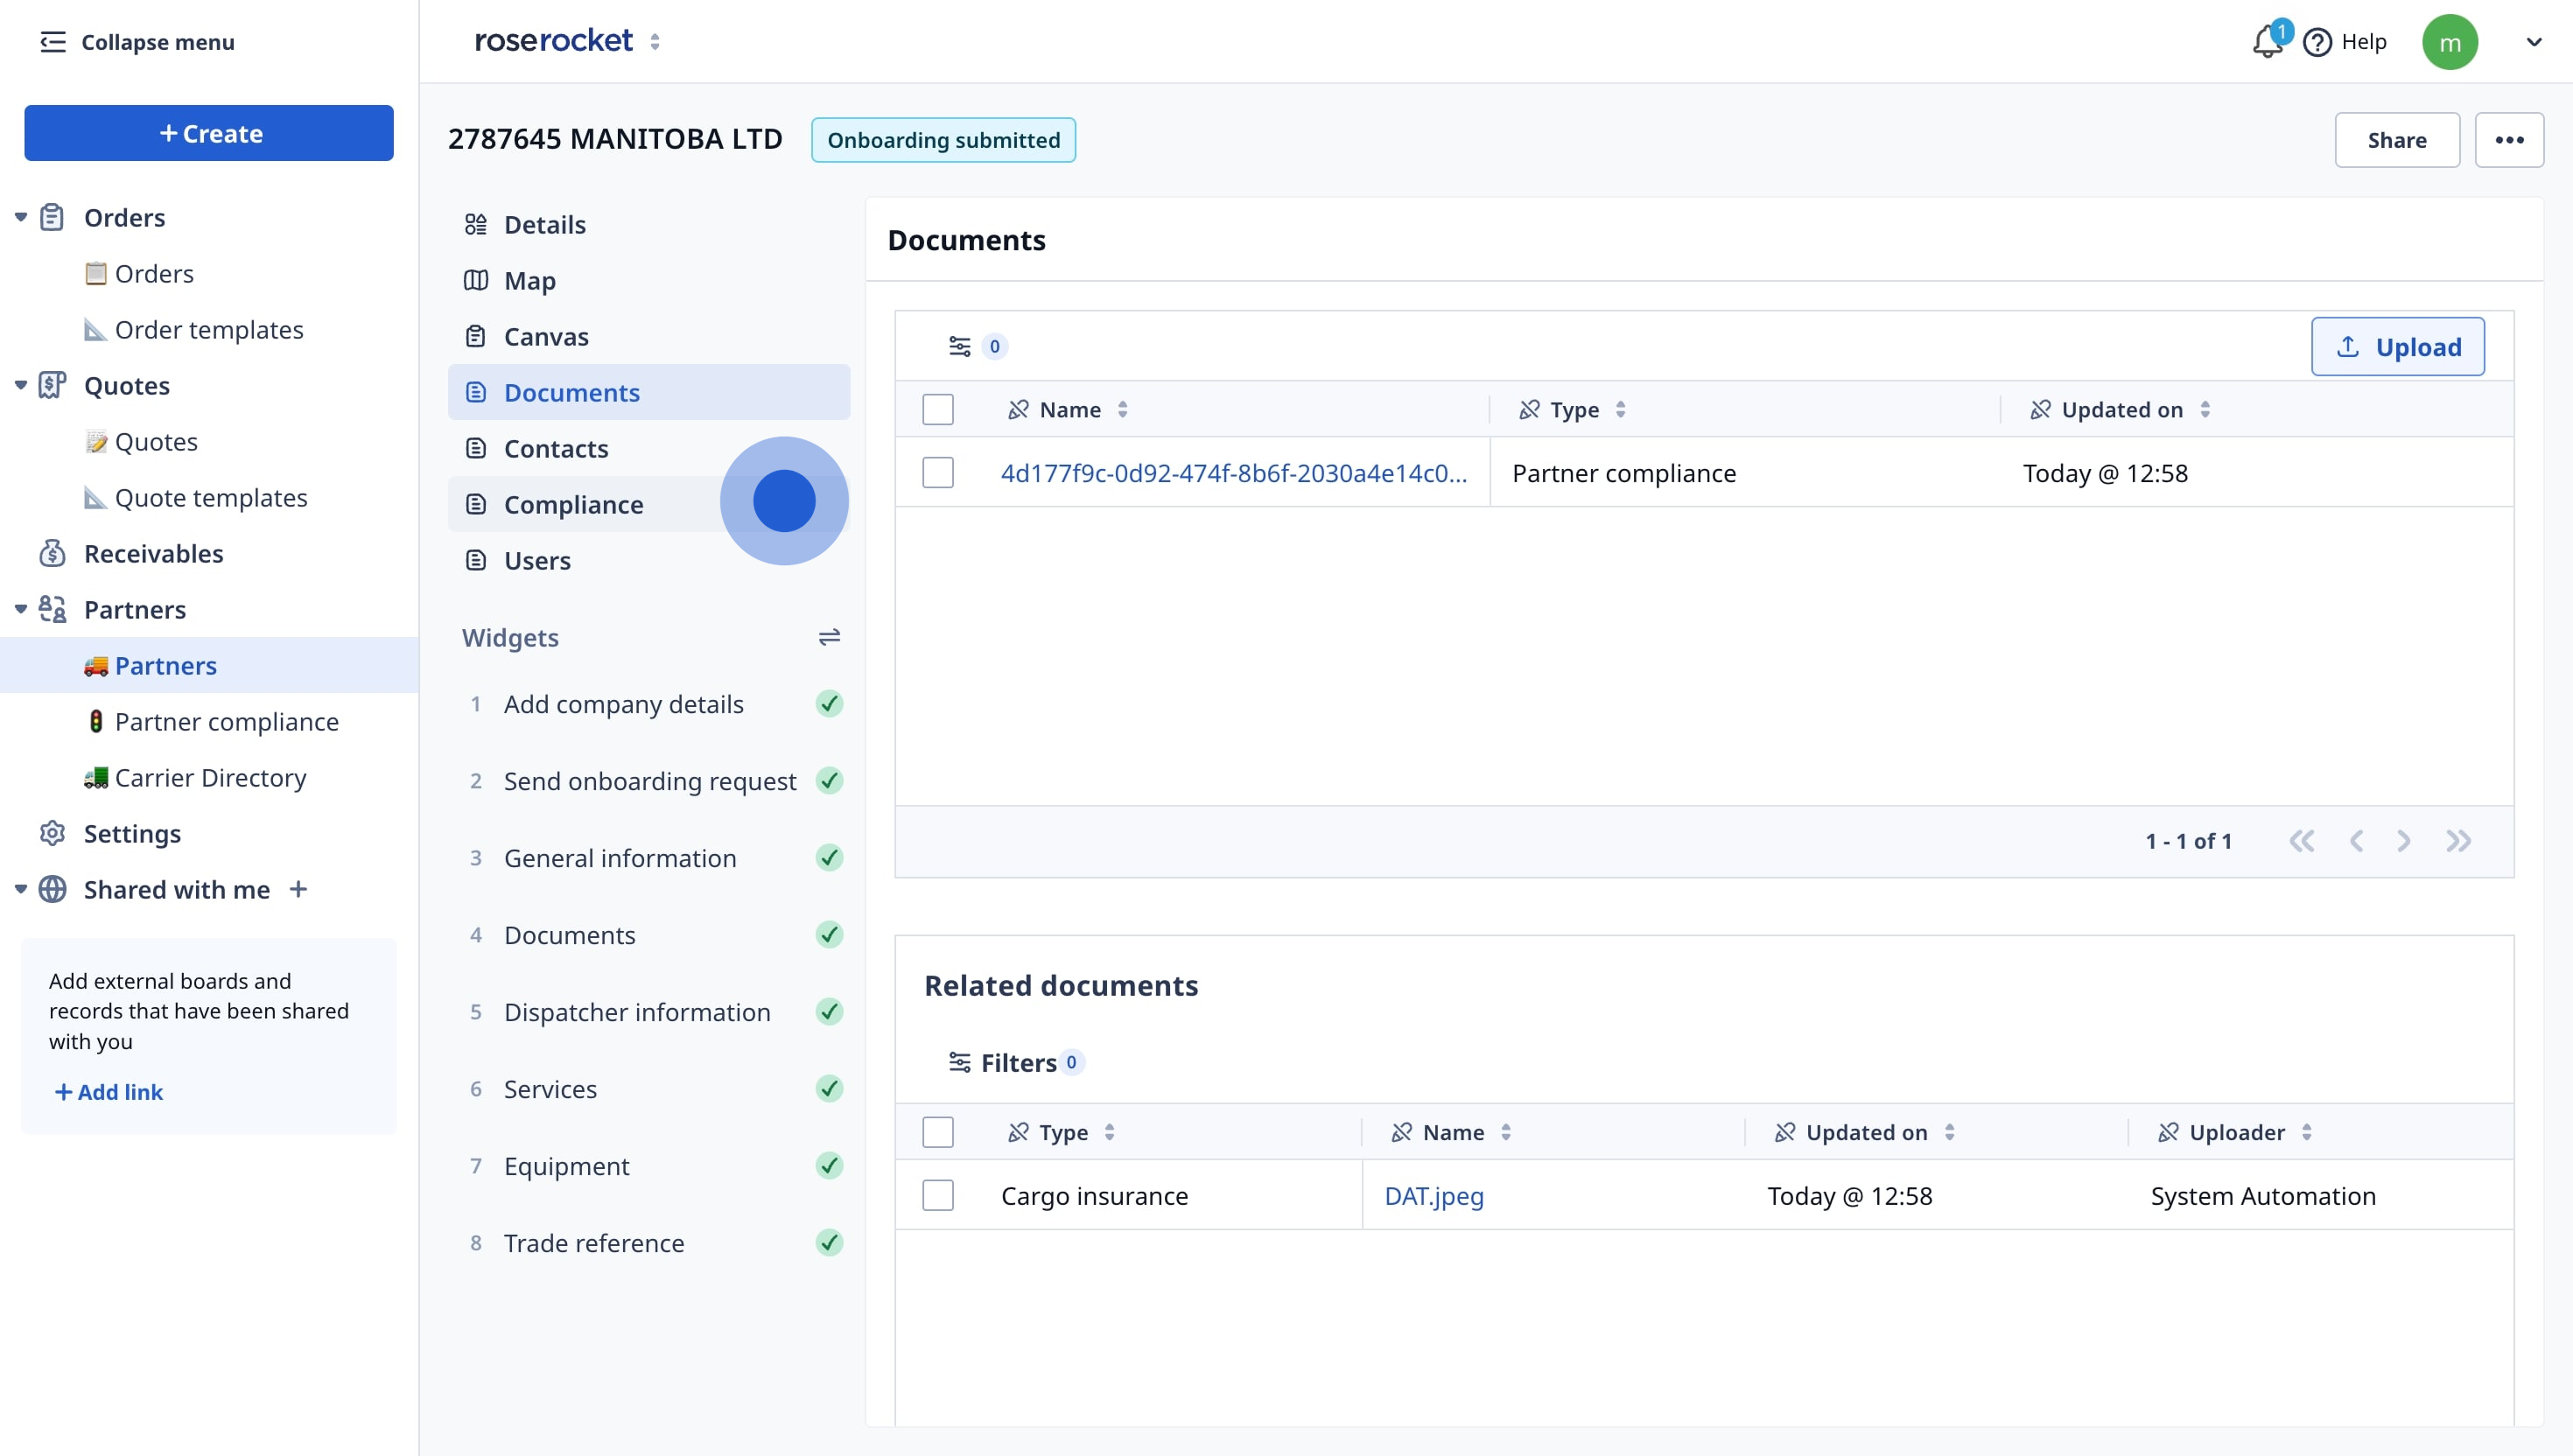
- Securely store & categorize carrier's documents in the Documents tab.
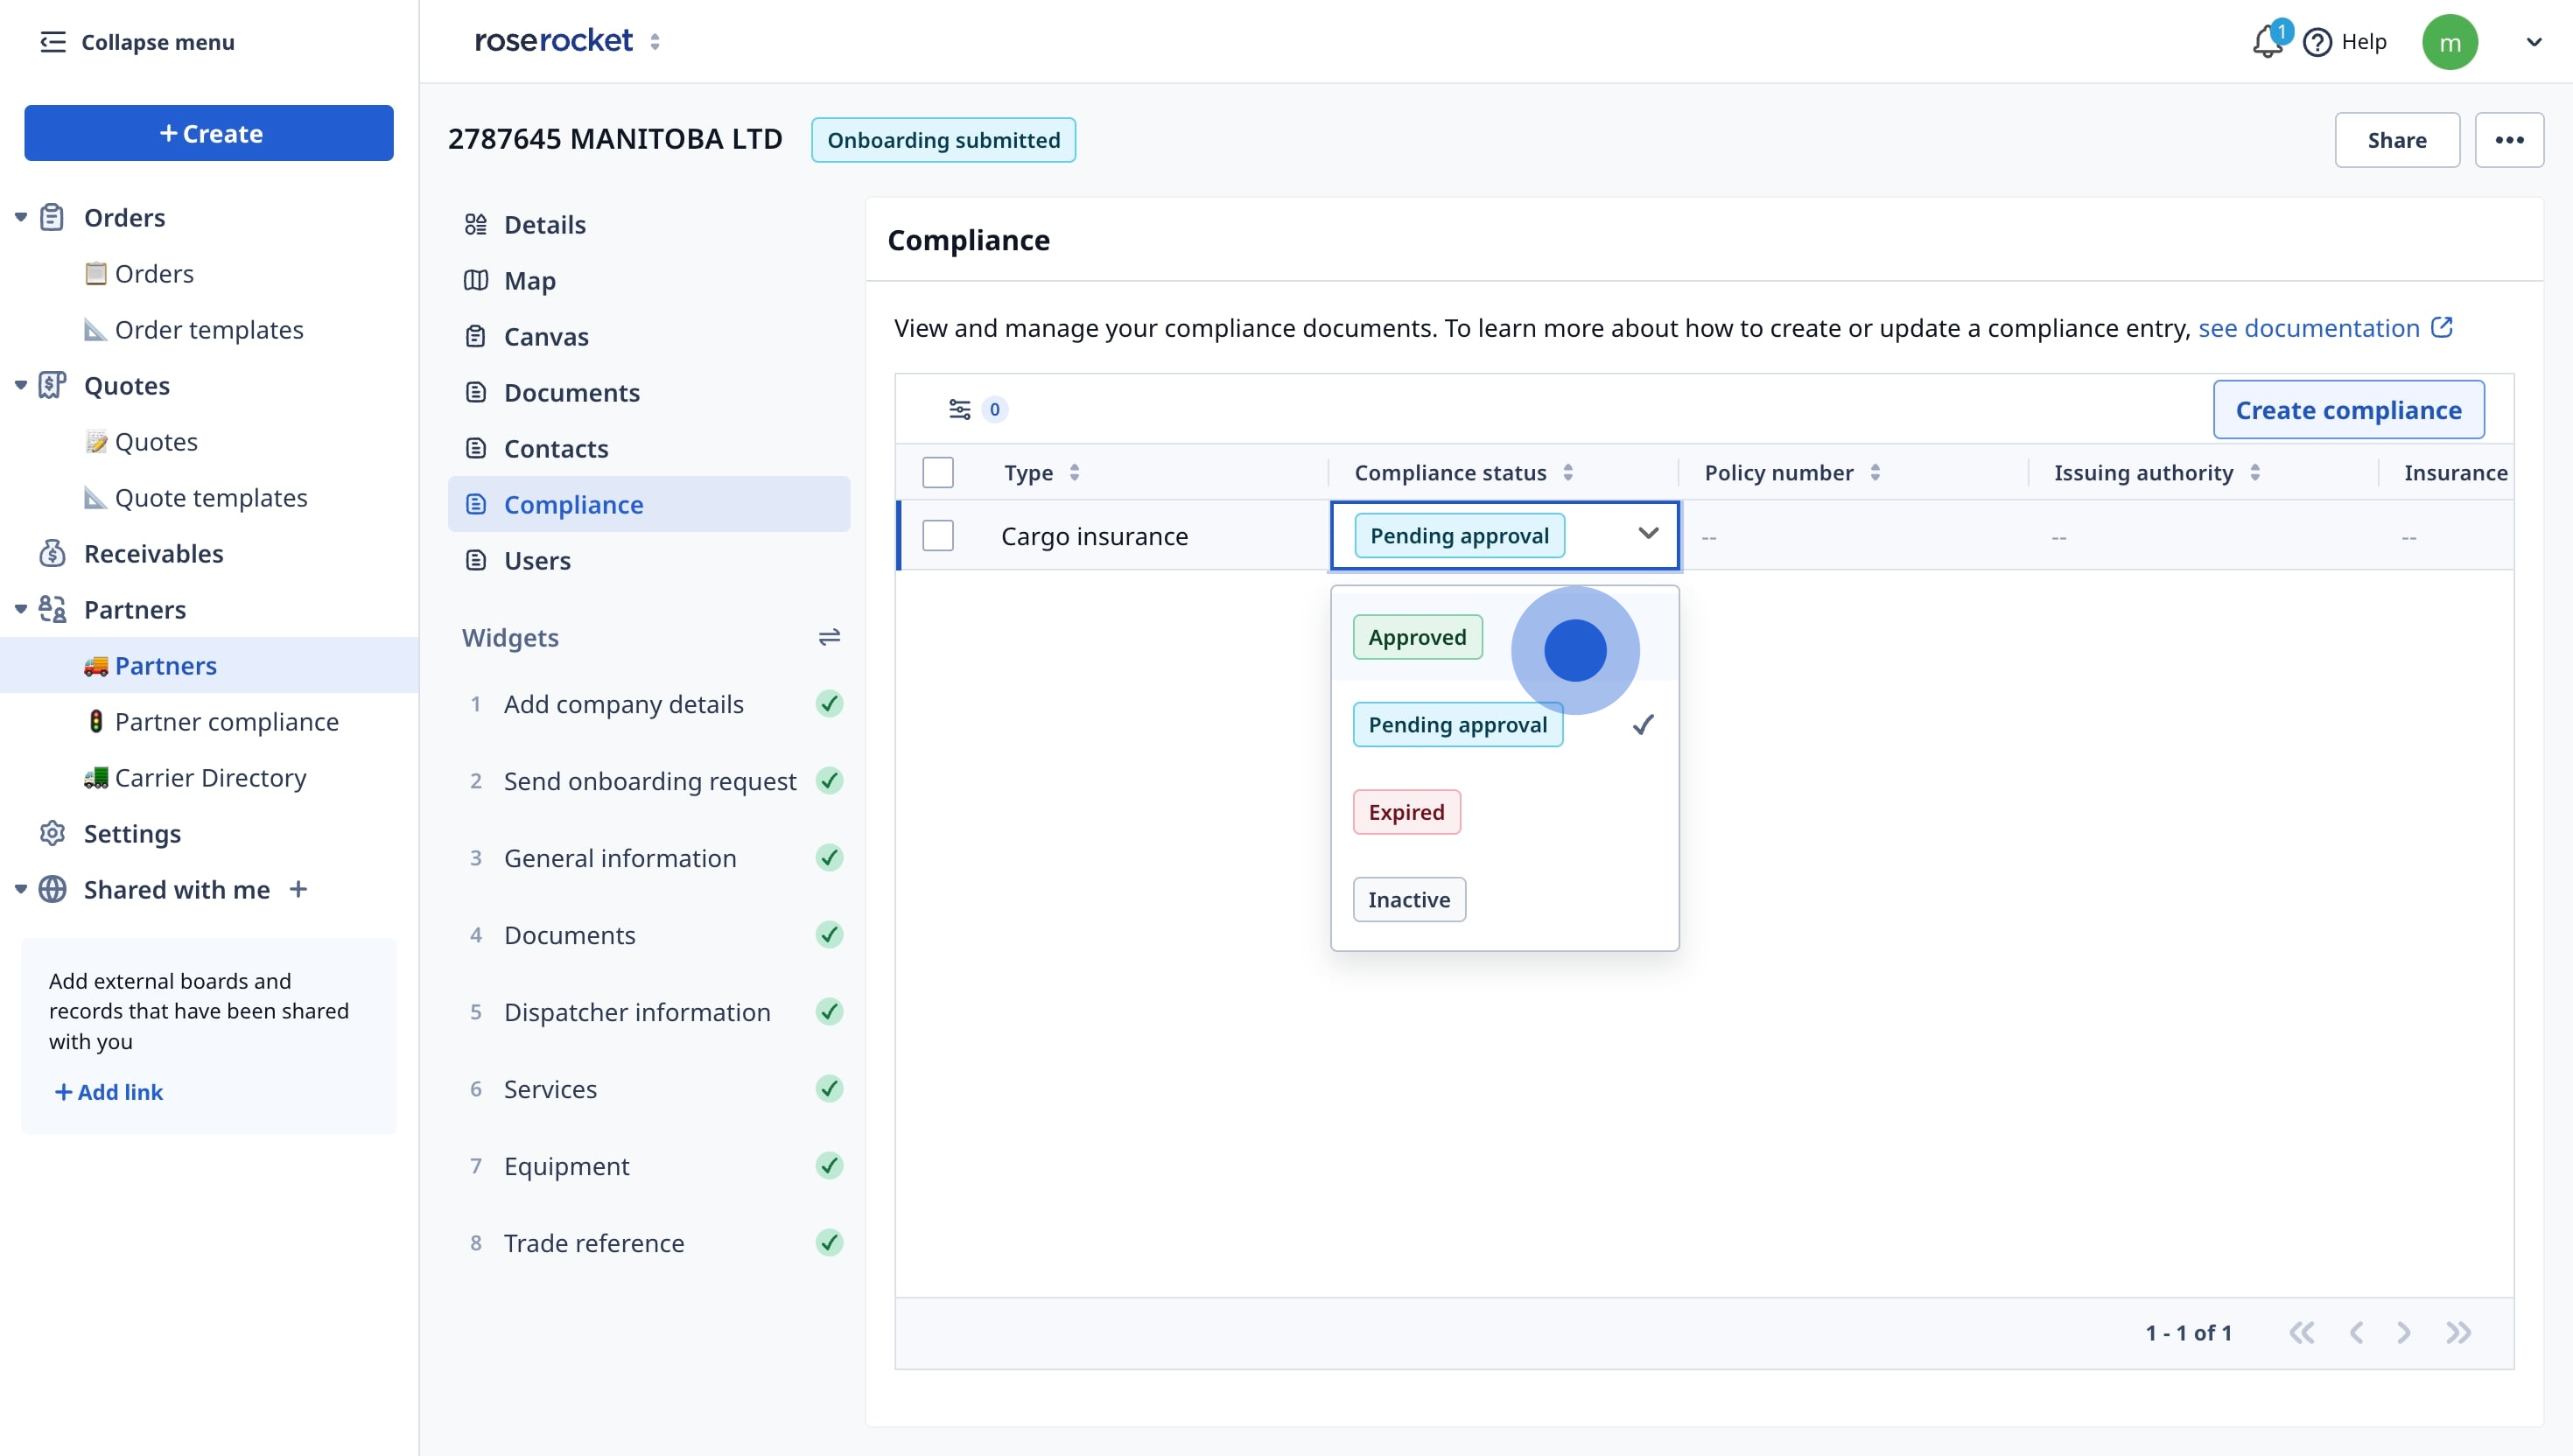
- Review compliance documents and update compliance status.
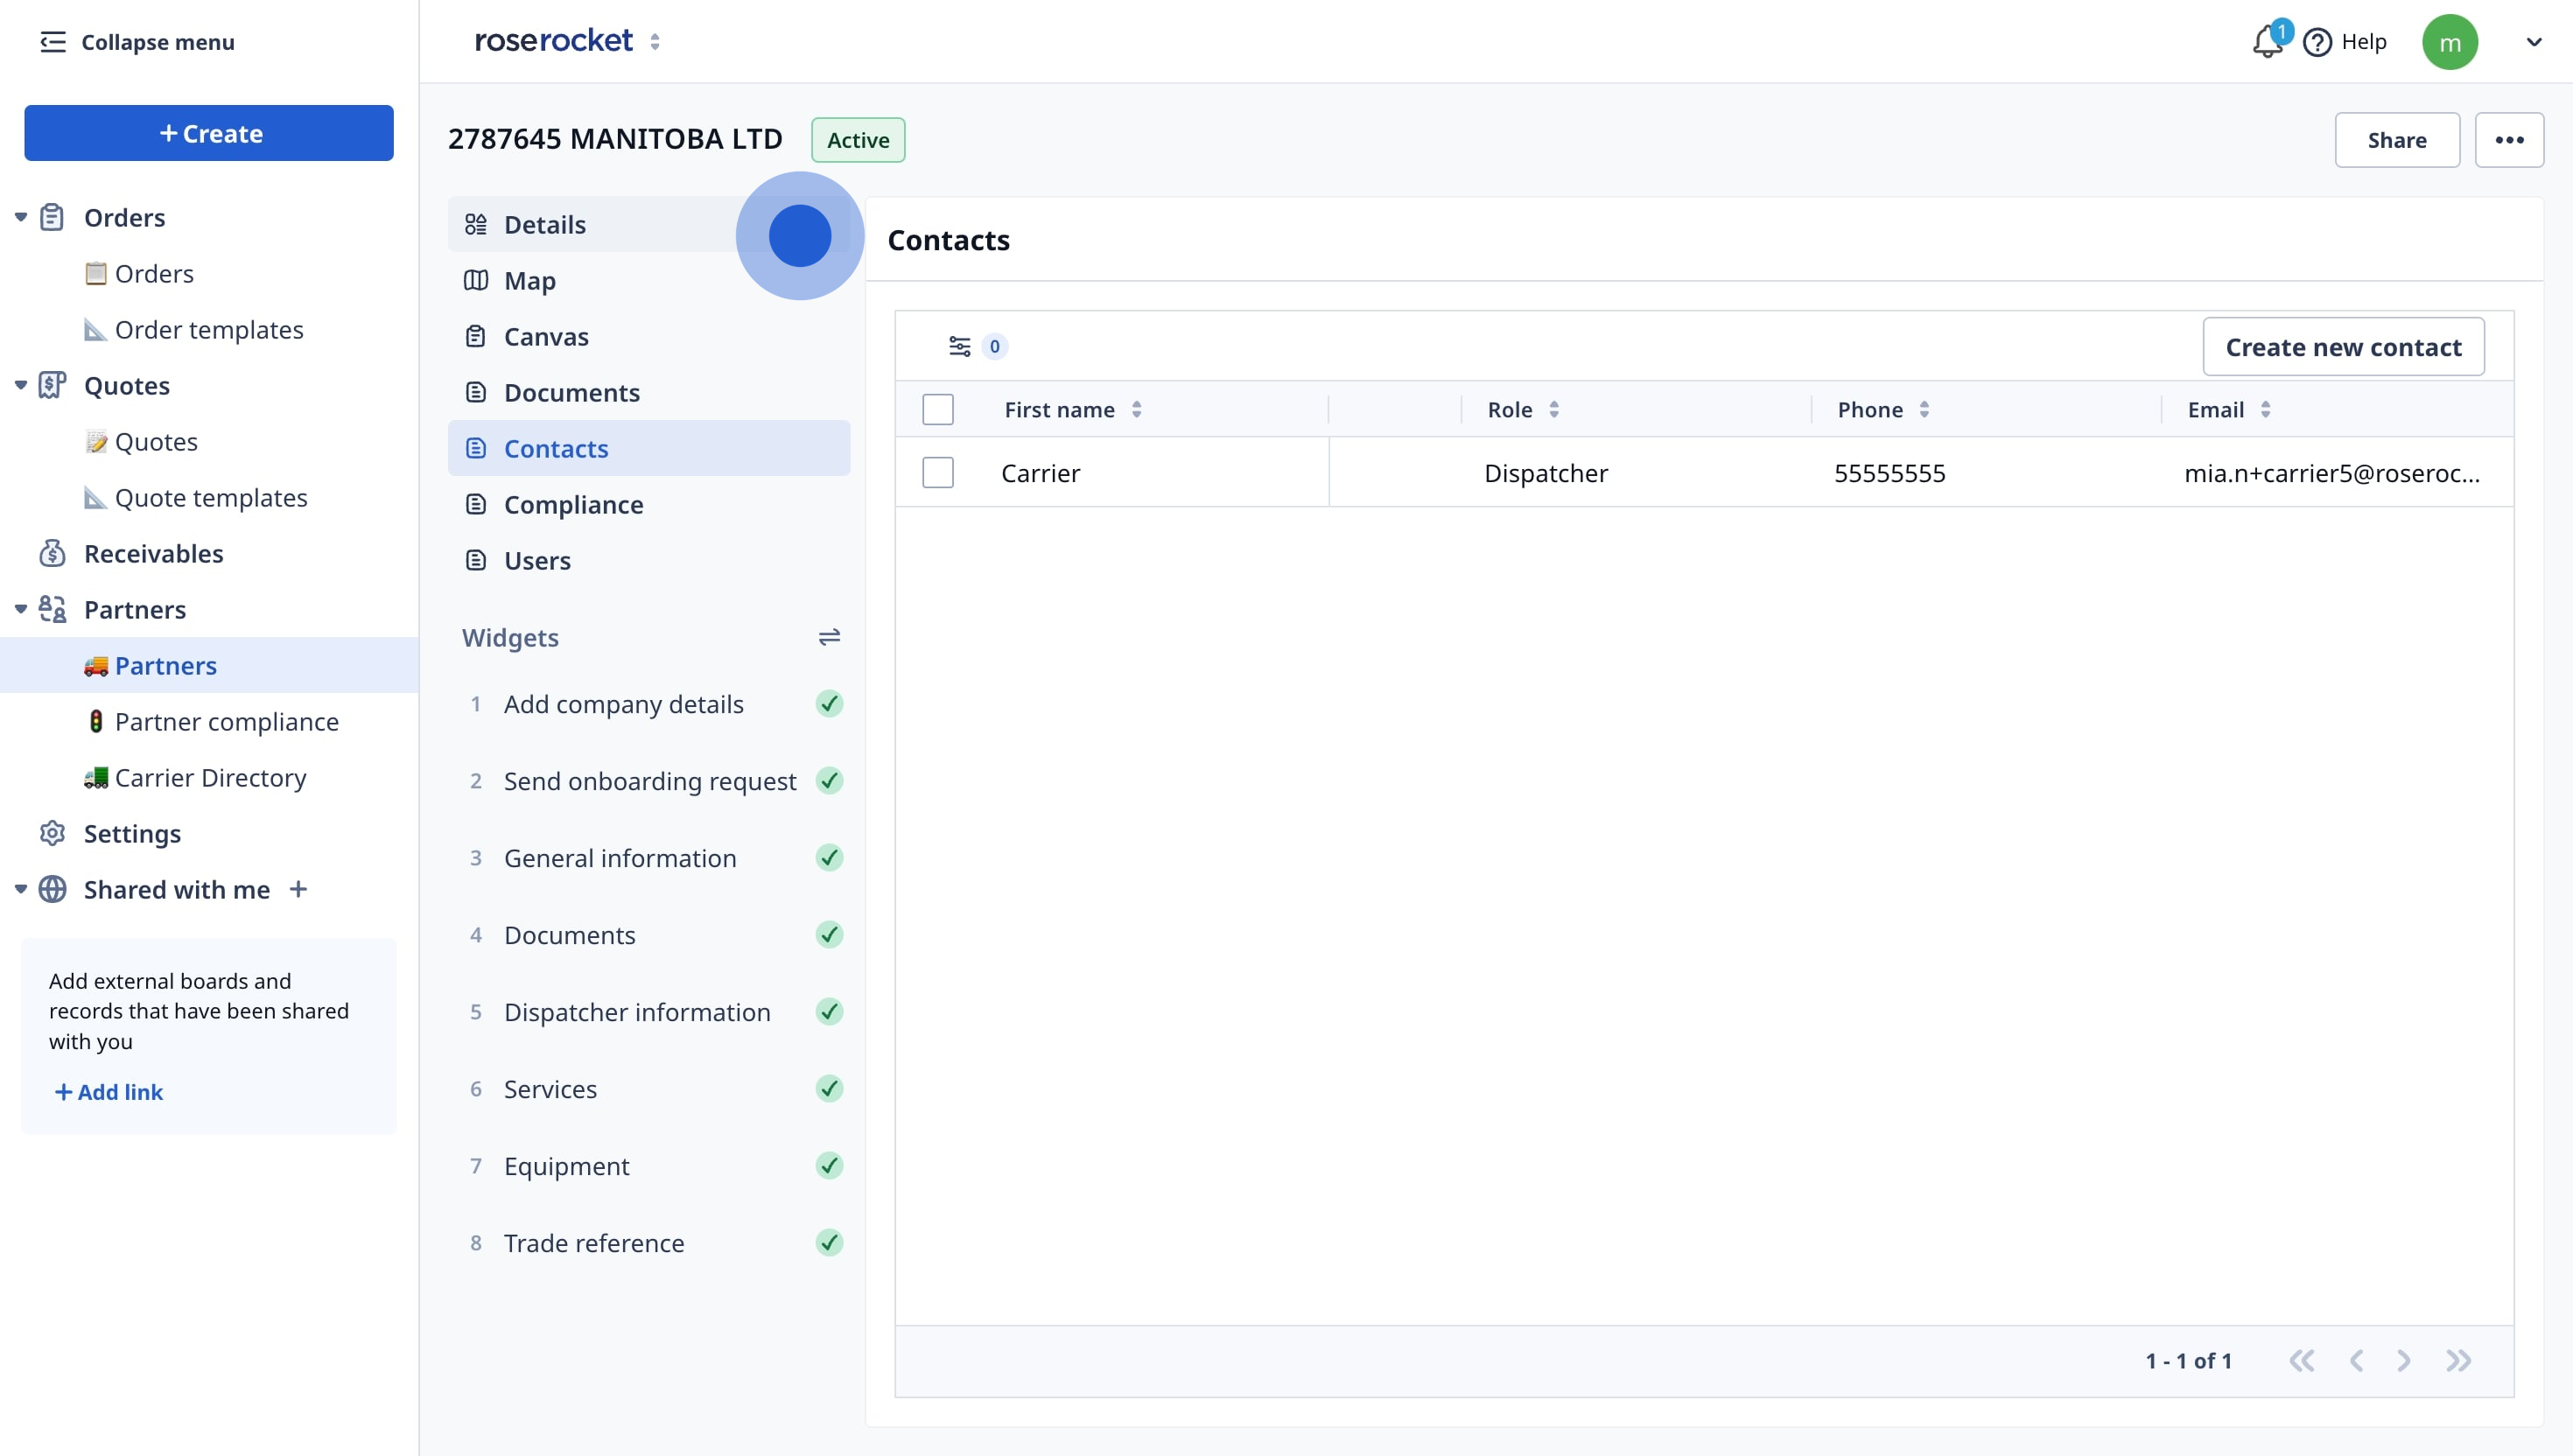
- Review the contact information provided by the carrier and add more if needed.
- Update the carrier's status to Active, Needs Review or Rejected.
-01%20(Custom).png?height=120&name=Rose%20Rocket%20Logo%20(Alternate)-01%20(Custom).png)

